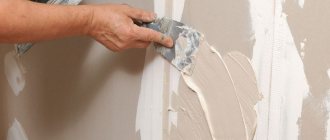
Professional finishers are confident in the need to prime the surface before performing any work on applying the finishing coating, but most owners who make repairs on their own doubt the necessity of this procedure. So why do you need a primer before painting walls, applying leveling solutions and before wallpapering the surface?
Indeed, purchasing soil and treating the surface with it increases the cost of finishing the apartment, but the positive results of such preparation significantly cover the amount of additional costs. The main task of using primers is to level the surface before performing work. Concrete, gypsum, wood - any materials have a porous structure and defects invisible to the naked eye that prevent strong adhesion.
The soil, penetrating deeply (up to 10 mm) inside the base, smoothes out all small cracks, irregularities and chips, removes dust, forming a thin and even film on the surface. It is thanks to this film that more uniform coloring occurs, wallpapering is much easier, and plaster solutions get better adhesion to the surface of the base.
In addition to the main task of leveling the base, primers perform additional useful functions: they increase the service life of the coating, provide antiseptic protection of the base, and act as a surface treatment against insects and rodents.
The primer ensures reliable adhesion of the wall to paint, plaster, ceramic tile adhesive or wallpaper adhesive, blocking the path of moisture through the concrete layer. It is because of the penetration of vapors and moisture through the concrete base that premature peeling of the glue and plaster mortar occurs, which leads to damage to the finishing coating (tiles fall off, wallpaper comes off the wall, paint peels off, plaster cracks).
Applying a primer mixture to the walls before applying wallpaper
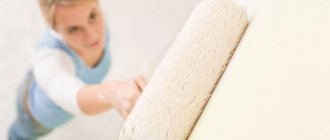
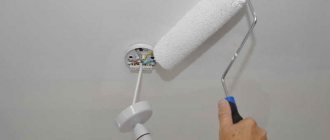
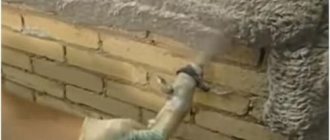
The final stage of work on preparing walls for covering with wallpaper is the application of the primer mixture itself. Important advice regarding the amount of primer applied to certain areas of the surface: despite all the heterogeneity and porosity of the walls, the primer solution should be applied in an even layer. Therefore, spray the wall surface with water. In places where the liquid has dried faster than elsewhere, it is worth adding more primer solution.
Now let's move on to mathematical calculations. Multiply the total wall area by a factor of 1.5. The result obtained is the approximate primer consumption in liters per surface layer. It is advisable that there be a total of at least 2 layers on the walls.
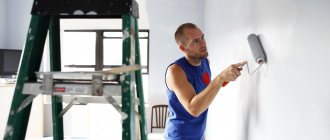
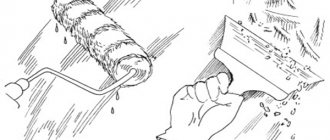
Add the primer liquid to the prepared bath, evenly wet the roller completely, after which you can begin applying the composition to the walls. Do not leave gaps or dry areas. Use a regular brush instead of a roller for fine lines or hard-to-reach areas.
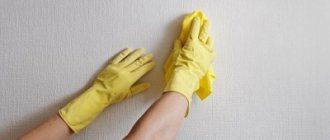
The wait for drying will be exactly as long as intended for a specific type of primer. After this, you can begin applying the second layer. Take your time: run your hand along the dry wall. If there is a white residue left on your hand, it is best to use a deep penetration primer as a second layer. The stage ends with the last layer completely drying. As a result, a smooth and moderately sticky whitish layer should remain on the walls.
Wear protective clothing and accessories. Please read the instructions for use carefully. Do not try to pour all the soil liquid into the bath for use, the composition will lose all its properties.
Whatever composition you choose, you are not allowed to proceed to wallpapering until it has completely dried. All types of primers have their own drying time, and it is worth taking this into account.
Don’t ignore our advice, make the right decision: use a primer before you plan to stick the wallpaper. Technically, the primer mixture has more advantageous qualities of use. For you, the work will be energy-intensive and will take some time, but you will be very satisfied after you are convinced of the durability, practicality, beauty, evenness of the walls and coatings on them.
You can pay 30-50% less for light, depending on what electrical appliances you use.
Korovin Sergey Dmitrievich
Master of Architecture, graduated from Samara State University of Architecture and Civil Engineering. 11 years of experience in design and construction.
Professional finishers are confident in the need to prime the surface before performing any work on applying the finishing coating, but most owners who make repairs on their own doubt the necessity of this procedure. So why do you need a primer before painting walls, applying leveling solutions and before wallpapering the surface?
Indeed, purchasing soil and treating the surface with it increases the cost of finishing the apartment, but the positive results of such preparation significantly cover the amount of additional costs. The main task of using primers is to level the surface before performing work. Concrete, gypsum, wood - any materials have a porous structure and defects invisible to the naked eye that prevent strong adhesion.
The soil, penetrating deeply (up to 10 mm) inside the base, smoothes out all small cracks, irregularities and chips, removes dust, forming a thin and even film on the surface. It is thanks to this film that more uniform coloring occurs, wallpapering is much easier, and plaster solutions get better adhesion to the surface of the base.
In addition to the main task of leveling the base, primers perform additional useful functions: they increase the service life of the coating, provide antiseptic protection of the base, and act as a surface treatment against insects and rodents.
The primer ensures reliable adhesion of the wall to paint, plaster, ceramic tile adhesive or wallpaper adhesive, blocking the path of moisture through the concrete layer. It is because of the penetration of vapors and moisture through the concrete base that premature peeling of the glue and plaster mortar occurs, which leads to damage to the finishing coating (tiles fall off, wallpaper comes off the wall, paint peels off, plaster cracks).
Selecting a primer based on the type of wall surface
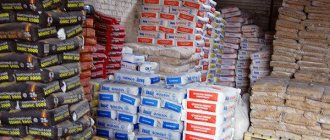
In terms of popularity, depending on the type of walls, the following primers are leading among buyers: “Ceresit” and “Knauf”. Their comparative characteristics are given in the table (prices taken for St. Petersburg as of mid-summer 2021).
| Primer name | Packing | Primer type | Surface type | Consumption per 1m2 | Price from, rub. |
| Ceresit CT 17 | 10 l | acrylic | concrete, brick, plasterboard, wood, plaster and putty, gas silicate blocks | 0.05-0.25 l | 510 |
| Ceresit CT 19 | 15 kg | acrylic adhesive | concrete walls, glass, tiles, plastic | 0.3-0.75 kg | 1165 |
| Knauf "Tiefengrund" | 10 kg | alkyd | GKL, GVL, gypsum putties and plasters | 100 gr | 690 |
| Knauf "Grundirmittel" | 15 kg | alkyd | gas and foam concrete, sand-lime brick | 0.2-0.3 l | 3000 |
| "Optimist" | 10 l | acrylic | tree | 0.1 l | 547 |
To summarize: primer for wallpaper, which one to choose? This is an acrylic primer: universal, easy to apply, odorless and non-toxic.
If you are not satisfied with the choice or want to save money, then you can prepare your own soil.
Required:
- boiling water - 7 l;
- drying oil - 0.1 kg;
- laundry soap - 0.15 kg;
- lime (slaked) - 2 kg;
- bucket - 2 pcs.;
- fine sieve - 1 pc.;
- grater - 1 pc.
Soap is grated on a fine grater and diluted in 3 liters of boiling water. When it completely disperses, drying oil is poured in and the composition is stirred. 4 liters of boiled water is poured into another bucket and lime is added.
The solution is also mixed. Water with soap and drying oil is poured into the milk of lime and mixed. The slightly cooled homemade primer is filtered through a fine sieve. The cooled mixture can be used for its intended purpose.
Why prime the wall after removing old wallpaper?
When performing finishing work on their own, many apartment owners cannot decide on the answer to the question: why prime the walls before wallpapering, when the surface, as a result of dismantling the old material, looks quite smooth and neat?
The answer depends on the method of dismantling the coating and the quality of the actions performed. If the coating was removed without using a spatula, using special solutions, and the surface of the wall was already puttied and treated with primer, applying a new layer of impregnation is not necessary. All you need to do is remove the screws or nails, mask the holes with putty and prime these areas, and then apply a new coating.
If tools were used during dismantling and the base was damaged, additional leveling with putty solutions and re-treatment with a primer solution will be required. Otherwise, reliable adhesion of the adhesive to the base surface will not be ensured and the service life of the wallpaper will be greatly reduced.
Wallpapering is a simple process of decorating the walls of a room, using printed products on a paper or non-woven basis, using specialized glue. Before wallpapering, a primer is applied to the walls.
Types of primers: which one to choose for wallpaper
Before choosing a primer, you must remember that the correct choice depends on the material of the wall surface (wood, concrete, putty, metal, etc.), the type of wallpaper (non-woven, vinyl, paper or washable) and other factors related to the operating conditions of the room (temperature, humidity, light).
Is it necessary to treat walls for non-woven wallpaper?
Decorating the walls with non-woven wallpaper gives the room a special elegance. Priming the walls will make the process of gluing easier, neutralize and prevent the appearance of mold and mildew, and also prevent yellowing from appearing on the wallpaper.
For priming walls before gluing non-woven wallpaper, the following types of materials are used:
- Acrylic primer. The most common and inexpensive material. Method of preparation: dilute the soil with water. Once applied, it dries quickly, approximately 2-3 hours at medium room temperature. If the color of the wall is uneven, there are types of primers with color that will even out the tone.
- Alkyd primer on non-woven base. A specific solvent is required for dilution. This type is intended for priming walls made of wood material: chipboard, fiberboard, SIP panels, plywood, wood boards, etc. This material covers the work surface with a moisture-proof coating. Latex primer is used for all types of coatings and materials from which walls are made. In addition, this primer is easy to apply and subsequent use.
Experts recommend using wallpaper glue for priming. Method of preparation: dilute the dry glue mixture twice as much with warm water. This material is applied exclusively with a thick-pile roller. It is enough to cover the surface with two layers of material.
When choosing a primer for non-woven wallpaper, it is recommended not to use a PVA-based primer, as this type of material will lead to premature yellowing of the wallpaper.
Which is better for non-woven vinyl wallpaper?
Suitable for vinyl wallpaper: acrylic, alkyd and latex primer. The choice of primer depends on the material of the wall surface on which the sticker will be applied.
Acrylic and latex primers are suitable for plastered and putty walls, since according to their characteristics they can penetrate into the top layer, sealing microcracks and pores.
If applying a water-based primer to walls can lead to deformation and corrosion of the material, then it is recommended to use an alkyd and glypthal primer. Alkyd primer is intended for treating walls made of wood-based materials. In this case, the solvent will prevent the wood from swelling from moisture.
Glypthal primer is a suspension of pigments based on acrylic varnish. This variety is ideal for wooden walls and will increase surface adhesion.
Under paper wallpaper
Paper wallpaper is the most economical option for wall decor. They are susceptible to the action of moisture from the adhesive; in addition, if a mistake is made during the preparation of the walls and the gluing process, they can bubble, delaminate and tear. To prevent errors, it is necessary to take into account all these nuances.
First of all, it is necessary to take into account the material of the walls, as is the case with non-woven and vinyl wallpaper. However, experts recommend using the option of priming with wallpaper glue, since this material during the gluing process will provide the opportunity for careful correction in case of air grooves or uneven joints.
Which wallpaper to apply under washable wallpaper: how to prime
Washable wallpaper is used in rooms where it is expected that dirt or moisture must be removed from it, such as a bathroom, kitchen or hallway. They are similar in structure to vinyl wallpaper. Due to the similarity of these types of finishing materials, the choice of primer is determined according to the same principle. It must be remembered that wallpaper with a synthetic polymer coating is glued after the primer has completely dried.
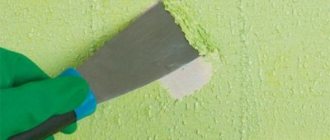
How to get rid of paint?
But what to do if you need to remove the paint itself? It is also quite difficult to cope with:
- Sometimes in this case they use a metal brush with short bristles. But it will not always help, since it can only smooth out the paint layer.
- Most often, it is more effective to use a set of nozzles, which includes scrapers of different shapes. To make them yourself, chisels, wide screwdrivers and spatulas are used.
- To facilitate and speed up the process, use a special nozzle. It looks like a rod with short chains attached to it. A few links will be enough. It needs to be inserted into the drill chuck and clamped. The drill should be parallel to the surface being cleaned. When the drill starts to rotate, the chains will simply knock off the paint.
- You can also use special chemical removers, but they must be used in compliance with all safety measures and instructions from the manufacturer. They give the effect of removing old coating quite quickly.
Important! If paint will be applied to the wall again in the future, it must first be puttied.
The easiest way to have a beautiful front lawn
You've certainly seen the perfect lawn in a movie, on an alley, or perhaps on your neighbor's lawn. Those who have ever tried to grow a green area on their site will no doubt say that it is a huge amount of work. The lawn requires careful planting, care, fertilization, and watering. However, only inexperienced gardeners think this way; professionals have long known about the innovative product - liquid lawn AquaGrazz .
Priming wall surfaces is a separate and independent type of finishing work in renovation. A primer is a special emulsion layer that is applied before covering the walls with plaster, putty, paint or wallpaper. The main property of priming is good adhesion of the wall and surface coating, as well as leveling the walls and masking imperfections. Previously, adhesives with a high water content were used before priming. Emulsion compositions have their own characteristics and varieties.
Each type is used separately for different types of surfaces:
- For mineral surfaces (brickwork, concrete surface, aerated concrete or plastered walls) a deep penetration primer mixture is intended.
- For the treatment of wood coatings, a shellac or polystyrene emulsion composition intended only for wood is most often used. After covering the wood with a primer, the paint lays on the surface evenly and without smudges.
- A primer for metallized surfaces is necessary, first of all, to prevent the appearance of corrosion or to get rid of rust. This primer is divided into insulating, protective and phosphate.
- For priming other types of material, for example, ceramics, glass, an emulsion solution with increased adhesion is required. For such surfaces, a primer is also suitable, which prevents the appearance of greasy and smoked dirt.
Having briefly talked about primer coatings and their role in finishing work, I think there is no need to give a detailed answer to the question of whether it is necessary to prime the walls before wallpapering. However, let's try to take a balanced approach to this issue.
Finishing work before and after applying the emulsion layer
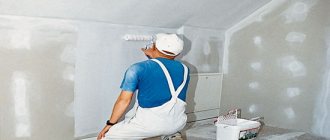
Contract workers or craftsmen are often hired to carry out repair work. However, there is nothing difficult in carrying out repairs and finishing of the premises yourself. It’s quite nice to live in an apartment or house that you built with your own hands and strength. If you still dare to carry out work, including priming walls and wallpapering yourself, then divide your activities into three stages:
- Prepare the wall surface before priming.
- Select the correct emulsion solution.
- Carry out finishing work with a primer.