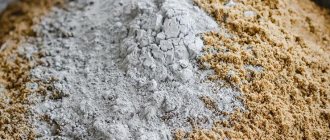
Clay mortar composition
Mortar for brickwork is made from clay with the addition of sand and water. It turns out oily, plastic, easy to apply and smooth over the surface. The prepared mixture is applied directly to the bricks, connecting the latter to each other. To make the clay mortar more durable, table salt or cement is often added to it, and heat-resistant glue is added to increase fire resistance.
Typically, the amount of clay in the solution is 20-40% of the total mass and is selected experimentally. For 100 pieces of bricks, approximately 3 buckets of ready-made clay paste are consumed with a joint thickness of 3-5 mm. The rate of table salt in the solution should not be higher than 80-250 g per bucket, cement - 750-1000 g.
All clay compositions can be divided by fat content as follows:
- oily - have high plasticity, but after drying they can crack;
- skinny - weakly plastic, after drying they cannot boast of high strength;
- normal - have optimal plasticity, as they harden they form the strongest layer.
Types of clay-based plasters
Clay is a natural, highly plastic material that is widely distributed throughout the world. On its basis, various building mixtures are prepared, in which clay can be the main component or coexist with other mineral substances and serve as a plasticizing additive.
Depending on the origin of the clay, the properties of the finished plaster vary. Construction mixtures are made using the following types of clay:
- monomineral - obtained as a result of the decomposition of one mineral (for example, kaolin appears during the decomposition of feldspar);
- polymineral - occurs during the decomposition of several minerals.
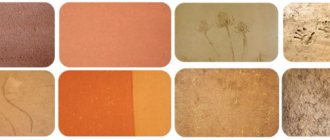
The color of the plaster will also depend on the clay, or more precisely, on its shade. To make mixtures, white, red, yellow, black, and less often blue clay is used. Depending on the type of plaster filler, there are:
- clay-lime;
- clay-cement;
- gypsum-clay;
- clay-acrylic.
Additives to clay in the plaster mixture can include sand or sawdust, less often - straw, fibers and polymer granules, fiber, expanded polystyrene chips, pine needles, which can increase the strength of the composition. By purpose, the material can be ordinary (leveling) and decorative, by fat content - heavy (ductility more than 0.27) and thin (ductility - 0.17-0.27).
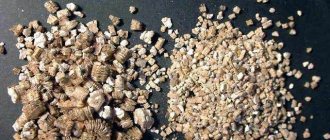
Mortar of clay and straw
Preparing the Components
To obtain a high-quality clay solution, you need to properly prepare the main components that make up its composition.
Clay selection
You can always buy clay in purified and crushed form at a hardware store. However, when purchasing, you must take into account that the solution is consumed quickly, so you will have to spend a lot of money on purchasing clay. To save money, most craftsmen extract the mineral themselves, because it is found everywhere. You can find it in any suburban area or close to it.
Typically, clay layers do not lie very deep, and digging up the material will not be difficult. You can also find him on the river bank, at the quarry site. It is important that the clay is well suited for masonry mortar. The main indicator characterizing the quality and plasticity of clay is fat content.
The higher the layer lies, the fattier the raw material, so experienced craftsmen immediately take the middle layers, where the fat content is usually optimal. At the very bottom, the mineral is most often skinny; it will have to be “fatten” by adding fattier compounds. You can reduce the rate of excessively fatty raw materials by introducing sand.
Why is the fat content of clay so important when carrying out masonry work? After drying, only a truly high-quality and plastic solution will not crack at all and will not shrink. The greasy composition will quickly crack, despite the ease of working with it. Skinny clay is also not strong and durable, and it is also very inconvenient to lay.
After extracting the clay, you need to determine its fat content experimentally. There are three main ways to do this:
- First way. Take a bucket of water (10 liters), add a little clay, constantly stirring with a wooden stick. Add a few more portions of the mineral to obtain a solution with a creamy consistency. Remove the stick from the mass and inspect it. If the tree is covered with a thick layer of clay paste, then it is too greasy and requires the addition of sand (at least 1 kg per 1 bucket of solution). The optimal layer thickness on a wooden stick is 2 mm. If the layer is thinner than 1 mm, then the clay is thin and requires mixing with fatter clay.
- Second way. Measure 5 parts of clean clay so that each of them is equal to the volume of a liter jar. Leave the first pile unchanged, add ¼ cans of sand to the second, ½ cans of sand to the third, a full can to the fourth, and 1.5 cans to the fifth. Mix each portion well, add water to get a ready-made solution that will not stick to your hands. Roll each type of solution into a ball about 7 cm in size and make a cake out of it. Leave all the cakes under a canopy until completely dry, making notes in advance about the amount of sand introduced. That cake that does not become cracked after drying can become a model for preparing a masonry composition.
- Third way. Carry out all the same manipulations as described in the second method. Do not compress the prepared balls into cakes, but let them dry a little. Then press each ball with two wooden planks. The clay sample that begins to crack only after compression by 1/3 of the diameter is considered the most suitable for masonry. A ball that cracks when compressed to ½ of its diameter is made from a mineral that is too fatty. A skinny sample will crumble immediately.
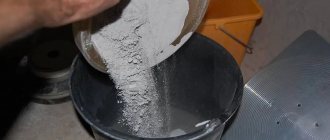
Preparing sand
Only fine sand (fraction less than 1.6-1.8 mm) is suitable for mixing masonry mortar, since the seams of the stove masonry are only a few mm. The ideal option is to mix material of different fractions, since such raw materials set better. Typically, pure quartz sand or a mixture of river sand, quartz sand, mica, and pieces of feldspar are used for masonry. The material is sold in finished packaged form or in bulk. In addition, you can get it yourself, for example, in a sand pit, ravine, or on a steep river bank. Mountain or lake sand is also a good choice, as it perfectly binds the components of the solution.
It is believed that the purest sand is located at a depth of less than 1-1.5 meters. Other types of materials most often have to be washed. Any sand must be prepared and cleaned before being included in the solution. It must be cleared of debris by sifting through a fine sieve. You can fill the material with water, shake it well, and then drain off the surfaced dirt and turbidity. Repeat similar manipulations until the water becomes clear. Dry the sand well before use.
Removing impurities from clay
The presence of roots, plants, pebbles, crushed stone, and soil greatly degrades the quality of the raw materials. It must be as clean as possible - this is the only way to get an excellent result. The preparation process includes several stages:
- Manual cleaning. All large debris and visible impurities are removed from the clay. If necessary, lay out the material in piles and inspect it carefully. This process usually takes the longest.
- Wiping. Contaminated raw materials are sifted through a metal sieve with mesh size of about 3 mm, pressing with the palm of the hand so that all particles pass through the mesh evenly.
- Soak. The mineral is placed in a clean container, filled with water so that the liquid covers it. Place the container under the lid in a cool place and leave for 2-4 days. Check periodically to ensure that the raw material does not dry out. If necessary, add a little more water. After swelling, the material is again wiped through a chain-link mesh with 3 mm cells. The finished mass should resemble thick sour cream.
If the clay is relatively clean, you can not wipe it dry, but remove large impurities and immediately soak it. It is best to use an old bathtub or a wooden box covered with metal sheets for this purpose. In order for the raw material to get well wet, it is covered in layers of 120-150 mm, each of them spilled with water. During standing, you can periodically stir the mineral with a shovel.
Methods for improving loamy soil
Plants on heavy clay soil develop poorly, often get sick, or die from lack of nutrition. To create the necessary conditions for growing garden and vegetable crops, you need to improve the soil - make it looser, more airy and moisture-permeable.
By changing the listed qualities, you will also change the composition of the soil, since it will begin to warm up faster and will quickly become populated with various microorganisms. Let's look at methods that will help improve the composition of loamy soil.
Adding coarse river sand
Sand of fraction 2-4 mm is considered coarse-grained. It must be added regularly and in fairly large quantities (1 bucket of sand per 1 sq. m.).
Since it is necessary to “dilute” clay soil not only on the surface. The area to be improved must be periodically dug up so that the sand gradually penetrates into the deeper layers of the soil, which will also increase its aeration and warming. In virgin lands, clay soil is dug up 3-4 times per season.
In the future, this must be done every year, otherwise the sand will begin to exfoliate on the surface, and moisture will leave through it, but not penetrate deeper. With each year of mulching loamy soil with sand and surface loosening, the fertile layer of soil will increase.
Application of organic fertilizers
Living microorganisms will increase soil fertility. Therefore, organic matter is added to the mulched and dug clay soil. It is best to do this in late autumn, but it can also be done in early spring, when the snow has just melted and the soil becomes available for digging.
Suitable for beautification:
- large peat;
- manure;
- compost.
Peat is applied once every 4 years. It can be of different acidity, which will affect soil performance. And this must be taken into account when choosing peat - by studying the current soil pH and their compatibility with the plants that will be planted on it.
If the crops you grow love acidic soil, it is better not to add manure at all, as it has an alkalizing effect. Then use plant-based compost.
If you apply manure, choose horse or sheep manure. It is dug up, mixed with the top layer of soil. This should be done in the fall so as not to burn the roots of the plants in the spring.
You need to dig up fertilized soil regularly. This will ensure the looseness of the soil and the uniform distribution of microorganisms in it. You can simultaneously add sand and organic matter to improve clay soil.
Planting green manure
Growing green manure on loamy acidic soil will allow it to be structured, fertilized and will have a beneficial effect on the development of beneficial microflora. The following crops are suitable for sowing on loam:
- rye;
- phacelia;
- sweet clover;
- lupine;
- alfalfa;
- white mustard.
These green manures will improve the health of the soil and help deoxidize it a little. Also, corn stalks and leaves are used to refine loams. The coarse fibers of this plant take a long time to decompose in the soil and have a positive effect on its breathability and looseness.
Loosening with other components
If the soil is very heavy with a high clay content, then even fine gravel can be used for loosening. From changes in temperature and humidity, it causes the soil to move and thereby ensures saturation with air.
Perlite will help lighten clay soil. This is a very light material that needs to be applied so that a layer of soil of at least 10 cm remains above it. This material helps to retain air and moisture in the soil above it, and prevents useful substances from fertilizers and microorganisms from being washed out of it.
Old sawdust is also suitable for loosening. Fresh ones cannot be used, as they release resins and further acidify the soil. To prevent them from absorbing nitrogen from the soil, soak them in a urea solution before use.
It is prepared as follows: 200 ml of the drug is diluted in 10 liters of water based on three buckets of sawdust, which are soaked in the solution for a day. Consumption of prepared material for loosening: 1 bucket of sawdust per 1 sq. meter of soil.
Related Posts
- Mortar for laying a stove: varieties, composition, mixing methods
- How to make fire clay
- Instructions for using fireclay clay
- How to plaster a stove to prevent it from cracking: types of putty for stoves and execution technology
- How to build a children's sandbox with your own hands
- Tiles for the stove: types and their features
- Sand: formula, characteristics. construction sand
- How to update old tiles in the bathroom
- How to glue fiberglass correctly?
- 9 types of heat-resistant tiles for fireplaces and stoves: choosing the best
- How to make a mortar for floor screed, the main proportions of cement and sand per 1 m3
- Calculation of well volume
- Density of wet sand: properties and melting point of river sand
- How to cut metal using a grinder
- Options for making shelves for the garage with your own hands
- How to make water filters with your own hands?
- Dry Stream: photos and videos
- The door handle creaks: causes of the problem and solutions
- Homemade Russian stove on the street under a canopy
- Why does the air conditioner gurgle when not working when there is wind?
- DIY blind area
- Caring for matte and glossy stretch ceilings
- How to plant and care for a willow hedge
- Technology of painting wallpaper with water-based paint
- How to seal the joint between the bathtub and the wall? 8 popular options
Read with this
- Mortar for laying a stove: varieties, composition, mixing methods
- How to make fire clay
- Instructions for using fireclay clay
- How to plaster a stove to prevent it from cracking: types of putty for stoves and execution technology
- How to build a children's sandbox with your own hands
- Tiles for the stove: types and their features
- Sand: formula, characteristics. construction sand
- How to update old tiles in the bathroom
- How to glue fiberglass correctly?
- 9 types of heat-resistant tiles for fireplaces and stoves: choosing the best
Recipe for preparing the solution
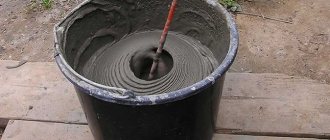
The clay composition for masonry includes three main components - clay, sand and water. The latter must be clean, without impurities and mineral additives. It is better to mix the composition in a bathtub, trough, tub, or metal tank. To lubricate the oven, you can prepare a small amount of the composition in a regular bucket.
Usually, for the construction of the firebox and foundation, they use not simple, but fireclay clay, which has high heat resistance. A standard clay-sand mixture is used for plastering the stove, but after adding salt it is also suitable for the main masonry. Most often, a solution is made from 1 part clay (simple or fireclay) and 2-3 parts sand. The procedure for preparing the composition will be as follows:
- mix the already prepared clay mass well with a shovel, and then with a construction mixer;
- add sand little by little, stirring occasionally with a mixer and ensuring the homogeneity of the mass;
- add water in portions, bringing the mixture to a creamy texture;
- salt is added to strengthen the future masonry.
Relation to water
Typically, 75% dry weight requires about 25% water. In any case, the amount of liquid is determined empirically in a specific situation. It is important that there are no calcium carbonate impurities in the water, otherwise the substance will protrude on the walls of the stove and ruin its appearance. Similar problems will arise if the water has increased hardness due to the content of other impurities. Rainwater is best suited for preparing masonry mass.
Checking the quality of the composition
Before work, the finished mixture must be checked for the degree of plasticity and adhesion. To begin, put a little mass on a metal spatula and tilt the tool down. The high-quality composition slides off the spatula easily. Afterwards, the clay mixture is applied to the brick in a layer of 7-8 mm, and pressed on top with a second brick.
The excess squeezed out solution is removed so that the seam is no more than 4-5 mm. Leave the “masonry” to dry for 40 minutes, then evaluate the adhesion strength. Take the structure by the top brick and lift it so that the bottom brick hangs in the air. If it does not come off, then the composition has a high degree of adhesion and is suitable for work.
To assess the correct consistency of the finished mass, the following experiments are performed:
- A spatula or trowel, previously soaked in water, is lowered into the mixed solution. If the composition sticks, then it is too greasy and requires adding sand. After introducing a new portion of sand, the mass is mixed again and the test is carried out again. In this way they act until a composition with the desired consistency is obtained.
- It happens that water appears on the surface of the solution. In such a mass, the clay has too little fat content. You will have to introduce a little mineral with a high fat content and mix the composition well. Do the same if the mixture does not stick to the spatula at all due to reduced plasticity.
The solution has dried out - what to do?
To prevent drying out, the clay paste is stored under a lid or covered with a wet cloth. But even with partial hardening, the solution can regain its plasticity (only if there is no cement in it).
It is broken into pieces with a hammer, filled with water, and left to soak for 24 hours. You can also crush the material with a wooden tamper. After a day, the paste is mixed using a construction mixer. If there is too much water in the composition, it is scooped out after settling or drained by tilting the container.
Required tools and materials
To make your own mortar and plastering, you will need the following tools:
- container for stirring the solution;
- shovel for loading mixture components;
- measuring container for measuring the amount of sand, clay and other components;
- sieve for sifting sand;
- spatulas of different widths for applying the composition;
- rule or grater for leveling;
- grout grater;
- electric drill with a nozzle for mixing the mixture;
- hammer drill and screwdriver for attaching the reinforcing mesh.
In addition, consumables are needed:
- steel mesh or shingles for reinforcing walls;
- dowels or nails for fastening reinforcement;
- clay, sand, sawdust or fiber for making a mixture;
- a small amount of cement or gypsum to strengthen the finishing layer.
If you follow the technology for performing the work and our recommendations, it is not difficult to do clay plaster with your own hands, resulting in a stylish, cozy, healthy home with a special natural atmosphere.
Drying masonry
Typically, clay masonry takes quite a long time to dry, because brick is a porous material that absorbs moisture and releases it weakly. Typically, oven drying is carried out in two stages:
- The first stage is natural drying. It lasts up to 5-7 days. The damper, all doors and the vent in the stove must be open. To speed up the process somewhat, you can turn on the fan and direct it to the mouth of the firebox. At this stage, the upper layers of the solution harden.
- The second stage is forced drying. Duration - up to 10 days in summer and up to 4 weeks in winter. Several small logs are burned in the stove twice a day. When, 3-4 hours after the completion of the firebox, condensation does not form inside the door, the stage will be considered completed.
Clay is an ideal material for making stove masonry. It is 100% environmentally friendly, inexpensive and can be applied without special knowledge and skills. Due to its many positive properties, clay is used everywhere and will not lose its relevance in the future.
What characteristics should a mixture for making stoves have?
Scheme for determining the readiness of a clay solution.
The solution should be plastic, its fat content should be medium. The fatty mixture will decrease in volume and collapse as it dries. A low-fat mixture will not be strong. The clays used to prepare the mixture may have different characteristics. You can find clays from which you can prepare a masonry mixture of suitable fat content, without the need to add sand.
Sometimes you have to mix 2-3 different clays, which must be taken from different places. First of all, they are mixed dry, after which they are mixed with water. If the clays are oily, then sand should be added to them. Its amount can vary from 0.5 to 5 parts by volume. Most often, the ratio of clay and sand in the mixture is 1:1 or 1:2. The amount of liquid should be approximately ¼ of the total volume of clay. If you purchased oily clay, then you should add a lot of sand to it. It should have small grains, and its composition should not contain unnecessary elements. First of all, the sand must be filtered through calico with cells of 1.5x1.5 mm. Skinny loams need to be soaked to remove excess sand.
Before preparing a clay solution, you need to check the quality of the clay.
This can be done using one of the many existing methods. The simplest of them is as follows: you need to form a ball from the prepared mixture and throw it on the floor. If the product crumbles, it means that the mixture contains too much sand. If the ball cracks, there is too much sand. If not a single crack appears on the ball, then the solution is of medium or high fat content.
Return to contents