One-step craquelure (one-component) is one of the decorating techniques, once you become familiar with it, you can make original crafts for the interior of your home. There are other directions, such as patination, gilding, decoupage and several more. All of them can be combined, complemented and added individual notes. We'll get to know all the techniques later, but let's start with a very bright and impressive one-component craquelure.
What is one-component craquelure?
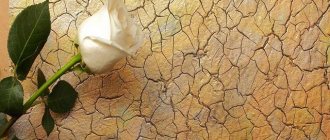
Craquelure (“fr” craquelure) translated from French is a crack in the paint layer or varnish in a work of painting. One-step craquelure is used to age simple plain surfaces. To do this, the surface of the object to be decorated is covered with the main background. This is the color the cracks will be. After the paint has completely dried, a one-step craquelure varnish is applied with simple movements in one direction and dried again. Next, paint of the main color is applied, under the influence of which the craquelure varnish begins to crack, and the background paint appears in the cracks. The finished product can be coated with a clear varnish for acrylic paints for durability.
The concept of one-component implies the use of one product (component) in the decorating process. It is worth highlighting that two-component and one-component compositions can give the effect of simple cracking. At the same time, single-component ones can cause cracks in both varnish and paint.
The general scheme of a one-component pie is as follows:
- The first stage consists of high-quality preparation and priming of the workpiece.
- Then we paint it the color we want to see in the cracks and dry it completely,
- Next we apply craquelure varnish. Let it dry a little (here are the following nuances - the longer you dry it, the smaller and longer the cracks will be).
- Apply top coat paint.
- After it you can patina or varnish.
As a result of these manipulations, the craquelure varnish, due to the difference in surface tension, cracks the paint of the main color and the previous layer of paint is visible in the cracks. For clarity, it is recommended to watch the following video:
Crack coating technique
Many girls are interested in the question of how to apply cracking varnish in order to end up with a beautiful manicure. Now we will explain step by step how to create a manicure with cracking varnish with your own hands at home.
Necessary tools
To create a craquelure effect on your nails you will need a simple set of materials.
- Nippers for trimmed manicure. To remove excess cuticle so that the craquelure on your nails ends up looking perfect.
- Nail file. With its help you will give your nails the same and correct shape.
- Cotton pads and nail polish remover. With their help you will remove the old coating.
- Varnish base. This will help you prepare your nails for the cracking finish.
- Coverage of any shade. It will set the tone for your future nail art.
- Varnish with a cracking effect in the shade you need.
- Transparent varnish-fixer. It will anchor your design and make it last longer.
- To speed up the drying process of nail cosmetics, you can use sprays with a drying effect. It will dry coatings in seconds.
Stages of creating a cracked manicure
- Use a cotton pad soaked in nail polish remover to remove the old polish from your nails.
- Using tongs and a nail file, adjust the shape of the nails and remove excess cuticle.
- Apply a thin layer of base coat. It will level the surface of the nail plate. Wait for it to dry completely.
- Take a polish of the shade you like and cover the nail bed with one layer. Here you can use matte or glossy varnish, and lovers of club manicures may prefer neon or fluorescent.
- After the previous layer has dried, you can apply craquelure varnish of a harmonious shade.
- Craquelure varnish dries quickly enough, forming beautiful cracks. To ensure that your design lasts as long as possible, secure the result with a layer of transparent fixative.
What to pay attention to
When applying the top coat of paint, you must adhere to the following rules:
- You cannot paint twice in the same place, as cracks begin to form immediately, and it is possible to paint over them.
- At one time, the paint should be applied as evenly as possible, covering the layer so that the underlying paint does not show through.
- The consistency of the main color paint is very important - not liquid, but not thick, so that the craquelure varnish allows it to crack.
- It is important to apply this paint evenly, with equal pressure on the brush. If the pressure is stronger, the paint layer will be thin, the cracks will be long and elongated, thin (when applied with a brush) or small and “scaly” (when applied with a sponge).
To recreate beautiful natural cracks, you need to correctly combine a sponge, a brush, layers of paint and drying the craquelure varnish. And, naturally, the selection of the optimal craquelure composition is no less important. Therefore, the nature of the cracks depends entirely on:
- Craquelure composition.
- The thickness of the varnish layer.
- Drying conditions.
- Consistency of top coat paint.
- Thickness of the top layer of paint.
Which varnish to choose for one-step craquelure
One-step craquelure varnish is a water-based product that looks like a liquid paste. It dries extremely slowly. And acrylic paint applied on top of such a composition dries simply quickly in comparison. That is why its cracking occurs, provoked by movement in the underlying layer.
Varnish for one-step craquelure
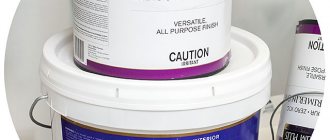
On sale on the shelves of craft stores you can find many jars of one-component compositions from various manufacturers. The most common one-step varnishes that are used are:
- Craquelure varnish - DECOLA (Russia).
- Craquelle Medium - Hobby Line (Germany).
- Krakelierlack - Nerchau company (Germany).
- Krakelee Medium - Marabu (Germany).
- Antique Effekt - Sadolin (Denmark).
- Idea Decoupage - Maimeri company (Italy).
- Krakelierlack DecoArt medium - Rayher (Germany).
- Crackle Medium - Decorfin (Holland).
- Craquelure paint Krakelierfarbe - Glorex (Switzerland).
- One-step craquelure varnish - Ars Hobby company (Russia).
- One-step craquelure varnish - Tair company (Russia).
- One-step craquelure varnish - Aqua-color company (Russia).
- Country Style Crackle - Stamperia (Italy).
- One-step varnish Vintage design “I am a decorator” - Rusart company (Russia).
Unfortunately, each composition gives its own peculiar cracks, and it is unlikely that you will be able to choose the composition that you will definitely like the first time. Therefore, you should experiment with different compositions. Feel them and choose the best one for yourself.
One-step (one-component) craquelure in decoupage
This is the most popular varnish among beginners working with the craquelure technique. Designed to crack a layer of paint applied over varnish. The result is beautiful colored cracks in a rustic (country) style.
Rustic-style crackle differs from other types of craquelure in that it is possible to control the direction of the cracks. If the varnish is applied with a brush in parallel strokes, then the cracks will also be parallel to each other. If craquelure varnish is applied with a sponge, the cracks will be distributed randomly.
Before applying craquelure, it is better to try on a “draft” which type of strokes suits you best.
Mistakes that are best avoided in one-step craquelure
Follow the instructions to avoid mistakes
Errors in preparing the base
- The porous base will absorb the craquelure medium, which will not be able to produce full cracks in the subsequent paint layer.
- Only one, thin or uneven, layer of primer or acrylic paint is applied to the base.
- The compositions are applied with a coarse (bristle) brush.
- A well-prepared base (wood, plaster, plastic, ceramics, etc.) is a surface with two layers of acrylic paint or primer.
- If you want to keep the color and texture of the base, you can coat it with a clear finishing varnish with a glossy or matte effect.
- Each layer of product applied to the base must be thoroughly dried.
Application of craquelure medium (composition)
As a rule, all craquelure compositions, regardless of price and manufacturer, allow you to achieve a cracking effect. They each do it in their own way, and working with each of them takes a little getting used to. However, there are general operating rules.
Typical mistakes:
- The craquelure varnish medium was not mixed before use or was mixed too much and contains many air bubbles.
- An uneven layer of craquelure varnish is applied to the base (if unintentional, this is considered a mistake).
- The composition is applied with a rough, for example, bristle brush, leaving “grooves”.
Rules:
- Before use, you need to mix the composition well (for a uniform consistency) and wait a little (until any possible air bubbles disappear).
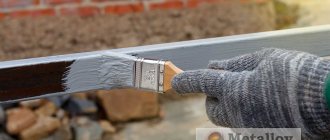
- Apply the composition with a flat synthetic brush (for a smooth, “grooved” coating). A thin layer of the product will cause small cracks, a thick layer will cause large cracks. An uneven layer will produce cracks of different sizes.
- If the composition is applied only to certain parts of the work, then craquelure will appear only in these places.
- The movements of the brush are directed in one direction, the composition is applied to the surface at a time.
Applying acrylic paint
This is perhaps the most subtle moment in the whole work. The final appearance of the work on creating cracks depends on the timing of this stage, the accuracy and uniformity of paint application.
Typical mistakes:
- The paint is applied too early, that is, when the craquelure varnish has not yet dried enough (it sticks and gets dirty).
- The paint is applied too late. This is a different period for different compositions (you need to look at the description).
- The paint is applied in random directions (if not intended).
- The paint is not applied “in one pass”, but is applied to the still wet layer again or “fiddled” back and forth with a brush.
- A rough or, conversely, too soft (not elastic) brush is used.
Rules:
- The paint is applied at the moment when the craquelure varnish stops staining your finger when you touch it, but still sticks.
- To obtain large and rough cracks, the paint can be applied a little ahead of time, making confident impasto strokes.
- To speed up the drying of the product, you can use a warm stream from a hair dryer.
- All areas with craquelure varnish must be covered with paint.
- The paint must be applied strictly in one layer (do not move the brush over the same place).
- The movements of the brush are directed in the same direction as when applying the medium (unless otherwise provided by the design).
- The composition is applied with a flat synthetic brush (for an even, “grooved” coating).
- A thin layer of paint will give thinner and more graceful cracks, a thick layer will produce larger and deeper ones. An uneven layer will produce cracks of different sizes and types.
Drying one-step craquelure
It's quite difficult to make a mistake at this stage. To speed up the final result, two options are possible: wait until everything happens on its own, or speed up the process of crack formation using a warm jet of a hair dryer (a hair dryer will also work).
Rules:
- Cracks begin to appear almost immediately, especially if the compounds are applied in a thin layer.
- Large cracks appear first, then they continue to grow and, as a rule, are covered with a network of smaller cracks.
- The heating process speeds up this process.
Working with two-step craquelure varnish
- Priming the surface, applying a layer of acrylic paint, performing decoupage, finishing the drawing, fixing the design with varnish. All layers must dry well. If you want to leave the natural color and texture of the base, then it needs to be coated with finishing varnish.
- Applying the first varnish from the two-step craquelure kit. A synthetic brush is used and the varnish is applied in a thin layer. You need to pay attention to the fact that the varnish covers the entire surface of the product. If there are gaps, then there will be no cracks in this place.
- The varnish must dry. Drying time depends on the type of varnish (from 15 minutes to 6 hours). The best result is if, when touched, there are no traces left on the finger, but it still sticks a little. The drier the surface, the smaller the cracks will be. Rinse the brush after use in water, solvent or alcohol. It depends on the type of varnish.
- Applying the second varnish with a synthetic brush. The depth of the cracks depends on the thickness of the layer. The layer must be applied completely to the entire surface. The surface must dry well.
- When the varnish dries, cracks appear on the surface. They need to be manifested. To do this, use oil paint of any color (or two colors). The paint is gently rubbed with your fingers (sponge, sponge) into the surface of the work. Excess paint is removed with a napkin, and the work is left to dry for 2-3 days.
- Coating the work with a solvent-based finishing varnish. To do this, it is better to use a soft elastic brush. If the item is decorative, then one layer is sufficient. If it is to be used at home, the varnish should be applied in 2-3 layers. In this case, each layer is thoroughly dried before applying the next one.
You may also be interested in the article reverse decoupage.