Painting the stove with water-based paint: advantages and application features
Wood-burning stoves are still widespread today, despite widespread urbanization.
They have found their successful use in bath structures and are the only source of heat in many country estates. Caring for the stove, among other things, also involves painting it in a timely manner. This is done to give the structure aesthetics and increase its heat transfer qualities. Water-based paint will do the job perfectly. And we will look at how to paint the stove in the house with its help in this article.
Photo of a painted brick oven
Cladding methods
If you don’t know what to paint the structure with, you can finish the existing fireplace using one of the methods presented below:
- Plaster and then apply water-based paint.
- Simply paint without pre-coating with anything.
- Coat the stove surface with a varnish that is resistant to high temperatures.
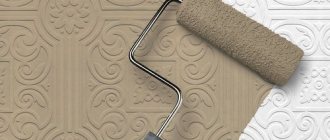
- Apply a pattern with a relief to the brickwork, and then secure it with a special varnish coating.
If you paint the fireplace as presented in the last version, it will significantly change its appearance, become more aesthetically pleasing and attractive, while the coating itself will not lose its original appearance for many years.
Various types of paints and compositions for stoves and fireplaces
In different situations, those compositions are used that are suitable for certain reasons. So we must not forget that stoves and fireplaces have metal parts. They also need to be processed.
Painting the stove with chalk
Painting stoves and fireplaces can be done when the surface has dried after other work (plastering, priming). The simplest and cheapest method is to apply chalk paint. It is not necessary to make it white; you can add color and give it the desired shade.
For greater convenience, this solution can be applied using a sprayer.
A little history! Chalk paint has been used for a long time. Previously, every housewife could prepare such a composition on her own. And in order to get rid of the grayish tint that forms after such staining, blue was used.
This method is also used in the modern world.
Painting a brick fireplace using chalk composition
It is more correct to call the chalk composition not paint, but whitewash. It is prepared quite simply:
- They take a bucket, after which they grind chalk in it.
- Everything is filled with water so that it completely covers the previously crushed composition.
- They wait two hours. By this time, the wood glue solution is diluted. The ratio is as follows: for ten liters of whitewash take one hundred grams of glue.
- The two mixtures are combined into one, with constant stirring. A drill with a mixer attachment is perfect for this.
- If necessary, add blue (for 9-10 kg of chalk, take 50-60 g), but it is better to use a heat-resistant color.
- When the solution reaches the required consistency, it is applied to the oven.
There may be several layers, but each is applied to a dry surface.
Mortar
This composition is very popular. It is successfully used in private households and cottages. It is very easy to prepare:
- One and a half liters of water is poured into a bucket, this is one kilogram of lime.
- To improve the quality of the solution, add table salt (2 tablespoons) and drying oil (1 teaspoon).
- To give the desired shade, use blue (20 g) or color.
Stove painted with lime mortar
Lime mortar is applied in several layers. Unlike the chalk composition, it is not necessary to wait until the first layer has completely dried.
What special paints and varnishes are there for the stove?
Painting brickwork is usually done in two main cases - either you decide to decorate an already finished brick wall, or to hide the imperfections of old and damaged masonry over time.
Walls made of new bricks, which do not have serious damage received during production or during the laying process, already have a very beautiful, unique texture.
If you are simply not satisfied with its color, you can cover the top with several layers of paint, while the relief will remain, but the wall will acquire the shade you need.
If the masonry is very many years old, chips, cracks, small collapses have appeared on it, seams have fallen out and other defects have appeared, then the wall is usually covered with a layer of plaster, which hides all the imperfections of the wall, and paint is applied on top. The two above methods require preparation, certain tools, an understanding of technology and the types of building materials that will need to be worked with.
Below we will analyze the painting technology and tell you what tools you will need to use. Tools:
- metal brush;
- sharp knife;
- soft brush;
- vacuum cleaner;
- fine sandpaper;
- medium density cement mortar;
- soft silicone spatula;
- dye;
- paint brush, roller or sprayer.
The first stage of work - you need to thoroughly and carefully clean the wall from foreign contaminants - dust, dirt, cobwebs, remove old paint with a brush (if the brick has already been painted). Carefully inspect the seams for damage, deep or even through holes. It is recommended to carefully blow out deep depressions with polyurethane foam, allowing for its expansion, so that there is room left for filling with cement mortar. The foam will fill all the holes inside, form a durable insulating layer, and protect against cold and drafts.
After it has dried and hardened, cut off unnecessary protrusions with a sharp knife, knead a little solution in such a ratio of components so that it turns out soft, plastic, easy to work with, but it does not peel off from the places of application, and sets there. Carefully process all the seams, cover them with a soft spatula, trying to fill the entire space as much as possible. This will avoid the appearance of “cold bridges”, which will provide additional insulation from the cold.
For reference!
It is worth paying attention that getting the solution on the brick and hardening it is extremely undesirable, because this will disrupt the texture of the brick and, after drying, will form small lumps that will interfere with the overall aesthetic appearance.
After the seams have dried, the brick wall must be carefully rubbed with fine sandpaper, smoothing out all the irregularities and removing excess defective protrusions. It is recommended to remove the resulting dust in the workplace with a broom and a powerful construction vacuum cleaner, which will clean the entire surface of the masonry and the area around it as much as possible.
It is also advisable to carry out wet cleaning to wipe away what the vacuum cleaner could not remove. After drying from moisture, you should begin priming the wall surface. This is a very important stage; a layer of primer will allow the finishing layer of paint to adhere more firmly to the wall.
To obtain the highest quality result of the work, you should carefully prime the masonry twice.
If it has a color, it should initially be chosen to match the tone with which the wall will be painted in the end. This will allow you to get the most similar shade that you chose to decorate your balcony. If the work is done slowly and not urgently, then it is recommended to paint with a soft paint brush.
It will allow you to carefully paint all hard-to-reach places, wall corners and seams. If the wall area is very large, then you can use a roller of a suitable size or a pneumatic sprayer.
Painting with them should be done very carefully so that there are no unpainted areas as a result - they can lead to uneven shade on the finishing layer and defects in the structure of the coating.
After the primer has dried - this will take several days - you can begin painting the wall. The modern market offers a huge selection of paints of various structures, purposes and colors. Paints can be made based on acrylic, acrylate, latex, silicone or polymer materials. The most preferred is the first type - acrylic paints.
They have a rich color, have a long service life, and are easy to clean. They are more expensive than others, but their durable structure allows you to avoid having to resort to maintenance work for many years in a row.
It is worth noting that the requirements for paints that will be applied to the walls from the inside of a closed and heated balcony are significantly lower than for those that will be used outside.
One coat may not be enough to achieve the shade you require; for this, the wall is usually painted two or three times. Paint and primer calculations are made based on measurements of the area you will be working on, taking into account the number of layers.
The area for which this volume of material is designed is written on the paint cans.
As a result, we get a perfectly flat, smooth surface with a beautiful brick texture and the color we need.
We invite you to familiarize yourself with Building a brick oven for your home with your own hands - Review and Step-by-Step Instructions Video
The scheme of this option is very similar to the previous one. It is also necessary to prepare the wall, process the seams, and clean the work area. The brick relief will be hidden under the layer of plaster, along with all the wall defects.
If you have an open balcony, then the mixture is prepared using cement-sand, with a high cement content. This will add extra strength to your coating. If the balcony is closed and heated, you can use gypsum mixtures without cement. The putty is applied to the wall with trowels of different sizes.
A more expensive option is to pre-fix the reinforcing mesh to the surface using the same solution. The layer must be carefully leveled to form a single smooth area, after drying it must be cleaned and defects must be eliminated using a liquid solution (if any).
Then the wall is primed, and after the previous layer has dried, paint is applied.
The technology is similar to that described above. The only difference is the use of special building materials that are not afraid of the influence of the external environment. These include putty with a high cement content and facade paints based on silicone or acrylic, which repel water. The use of oil-based paints is not recommended in places where direct sunlight will fall - after a few seasons it will completely fade. You can avoid this by using white oil paint.
A properly prepared and carefully painted wall will serve you for many years. However, the day will still come when you notice some defects that have arisen during operation.
Most often, this can be cracking and peeling of small areas of paint, which can be easily eliminated by lightly rubbing with sandpaper until the fallen pieces are completely removed and touching up with a small brush.
If over a long period of time the paint has lost its former bright shades, then after light rubbing it can be painted again with the same color as it was originally.
Careful surface preparation is required; it is the foundation for the durability of the future wall covering. You should not take cheap materials, they have a high degree of wear and tear, and soon you may need preventive, if not major, repairs of your wall. It is necessary to prime and paint very carefully to avoid the formation of defects into which moisture will enter, which will lead to peeling of paint, plaster and the formation of fungus.
From the video you will learn how to paint brickwork and how to do it correctly.
Save
A brick wall cannot be left in its original condition. This greatly spoils the material and reduces its performance characteristics. Therefore, it is important to be able to choose the right paint, tools for work and prepare the surface for painting.
Many people wonder about the need to paint brickwork. Do-it-yourself reinforced brickwork After all, brick itself is quite a presentable material and by its nature is not intended for painting. But this only applies to new material with an ideal structure, without cracks or chips. In other cases, the brick must be properly protected and given its original appearance.
So, brick should be painted in the following cases:
- If the material has faded over time. This could happen due to precipitation and direct sunlight.
- If the material has defects (for example, chips or cracks).
- If efflorescence (in other words, salt crystals) appears on the surface.
- To create unusual design solutions.
Any of these cases requires maximum responsibility for the painting process. After all, deviation from technology can lead to loss of airtightness of the house.
Before painting a brick wall, you need to remember the difficulty of removing the coating from the surface. If you decide to insulate the wall in the future or cover it with a layer of plaster, the paint will need to be removed to increase adhesion to the insulation.
If you decide to paint new brickwork, you need to remember that the original color cannot be returned. You may not like the new shade of the surface or may not fit the interior. In this case, only repainting it in a different color will help.
When painting a brick wall that was built more than a year ago and has not been painted, efflorescence may appear when paint is applied to it. After all, this material has a porous structure through which moisture penetrates to the surface. Therefore, the texture of the painted surface may deteriorate due to this factor.
To obtain high-quality painting, you will need to purchase everything necessary for this. Materials you will need:
- Dye.
- Cement.
- Putty.
- Primer.
- Vinegar and water.
To make it easier to apply materials, you need to acquire the following tools:
- With a roller.
- 2 flat brushes (approx. 100 mm and 50 mm wide).
- With a brush.
- Sandpaper.
- Spray bottle.
- Safety glasses.
- Rubber gloves.
Pros and cons of heat-resistant paint
- Wear resistance, good heat transfer , protective functions of masonry. The painting process is easy, without primer, warranty period is 10 years .
- Strong odor, long drying time, toxic substances in the composition . When doing work with your own hands, precautions should be taken.
Having chosen what to paint the stove with , you should carefully consider this process, and especially the choice of paint . When purchasing, it is better to immediately select a solvent, since the paint may dry out or accidentally get on other surfaces.
is better not to use used brushes due to the difference in components, especially for homemade .
What should be the finish of a brick oven?
At first glance, it may seem that the main obstacle preventing you from painting the stove is the low heat resistance of water-based paint. But in fact, the requirements for painting materials are much broader:
- The paint and varnish coating must be firmly held on the surface of the plaster;
- The water-based mixture that is supposed to be used to paint the stove should not emit odors or fumes;
- The paint layer should not interfere with the “breathing” of the brick walls of the furnace or prevent the penetration of water vapor;
- Coatings based on water-based mixtures should not age, darken or turn yellow.
Of course, in addition to durability and vapor permeability, painting the stove solves the main problem - to make brick walls more attractive and attractive. Moreover, modern paints, regardless of the base used - water-based, latex, polyurethane or alkyd, have very rich and bright colors.
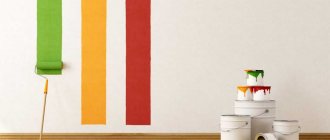
It is not necessary to try to paint the stove in the traditional white color; paintings using graphics or special techniques that visually mask the solid mass of the stove in the interior of the room are more interesting.
The main advantage of water-based and water-dispersed materials is the ability to use surfaces that do not require a primer for painting. In order to paint the stove, you do not need to dry the brick walls for a long time or use expensive primers.
Often the stove occupies a significant part of the room, most often in the center or closer to the interior walls of the house. No matter how much you would like to put the stove, like a fireplace, in the corner of the room, you still have to touch the surface of the brick walls with your hands and clothes every day. Therefore, it is better to paint with paint that is resistant to abrasion than to suffer with cheap, but not always convenient, whitewash. In addition, the walls of the stove need to be painted, at least so that dust does not collect and the brick does not absorb odors and fumes from burning wood or briquettes.
Preparation for painting: important requirements
When carrying out work on painting the surface, it is worth considering that brick is a porous material. To completely dry and weather the wall, the house must stand for a long time in its original form.
If you paint the brickwork prematurely, you can ruin the texture of the freshly painted wall.
For external work
When choosing to paint an external brick wall, you should consider the following points:
- It is not advisable to paint fresh masonry. The surface must fully go through the stages of drying, weathering and leaching. This may take a year.
- Before painting, prepare the wall surface; it must be clean. To do this, remove salt stains, wash with soapy water and allow to dry thoroughly. Excess moisture will evaporate from the surface within a week.
- Painting brickwork creates a modern and trendy style for your home. Attention is diverted from small defects in the walls. You can choose a paint color that matches other buildings on the site.
Large and clearly visible imperfections are better to be filled or plastered. Although the brickwork should be rough with a surface without large cracks or chips, it is easier to paint this way, and the wall looks neater.
The surface should be carefully primed. Choose a deep penetration primer that creates a dense water-repellent film.
Brick, as a building material, is not entirely suitable for painting. This is due to its porous structure. In the future, removing paint from it and plastering the surface will be quite problematic. The only option is to repaint the wall a different color.
The surface must be clean before painting. All salt stains must be removed with a wire brush (never use acid!). Wash the wall with soapy water and leave to dry: the brickwork needs about a week for all the excess moisture to come out of the pores.
Painting the stove at the dacha with enamel
To paint a stove with enamel, you will need to choose heat-resistant silicon-organic enamels. Before you start painting, make sure that the enamel is not very thick; viscous paint is difficult to work with, because... This paint does not absorb well into clay and brick. You can dilute it with turpentine or use special solvents. Once you have managed to obtain the desired thickness, allowing you to apply the paint with a brush (the paint does not roll), apply the first layer. After the first layer has dried, you can begin applying the second layer. If the paint adheres well and the clay or brick is not visible anywhere, you can stop at 2 layers, but in most cases, you need to paint the surface several more times. A similar technology is also applicable for painting the surface of the fireplace.
Unfortunately, organosilicon enamels of the required color spectrum are not always available, and if you are unable to find enamel of the desired color to paint the surface, you can make it yourself. For this you need varnish PF-283 and turpentine, mix them in a 1:1 ratio. The resulting mass is transparent with a slight haze; to give it the required color, you need to take gouache of the desired shade, dry it, and then grind it to a powder. Add this powder to the finished mixture until you achieve the desired color. Now you can start painting the stove. If desired, you can apply drawings or patterns; if you do not have artistic talent, you can use stencils made of thick cardboard; paint for making patterns can be obtained using the same method.
Methods for painting a balcony wall
When deciding on the choice of paint and varnish material, you should understand the purpose of such treatment:
- protection of the base of the structure - a paint or varnish layer prevents cracks in the masonry and their growth;
- giving smoothness to the rough walls of the structure, while improving heat transfer;
- modern look, harmony with the surrounding environment.
You can paint a wall in one of two ways - leaving the brick texture unchanged or leveling the wall with a layer of plaster and then painting it. The first method can only be used if the brickwork does not have serious defects. The second method can be used if the wall needs serious repairs or the “brick” design does not correspond to the overall style of the interior.
Balcony with painted brick wall
This method is simpler, but to prevent the paint from crumbling and swelling over time, it requires careful preparation of the surface, which includes several steps:
- Surface cleaning;
- Seam alignment;
- Wall primer.
Painting a brick wall without plaster
The brickwork is cleaned of dust, dirt and mortar, and if the brick has already been painted, the previous layer of paint must also be cleaned off. If this is not done, repainting may pull the old paint and cause it to peel off the surface. The seams are cleaned with a stiff brush, and the voids identified during the cleaning process are filled with mortar.
This must be done with care so that the seams are filled evenly and they do not differ from the general background, and also trying not to stain the brick.
Now the wall needs to be primed - this will promote better adhesion of the paint to the brick. The choice of primer depends on what type of paint you will be using. How to beautifully paint the outside of a house using plaster photos?
Immediately before priming the wall, clean it again with a vacuum cleaner to remove dust. This way you can avoid the formation of small lumps that appear during the application of the primer and then clearly stand out under the paint layer.
Painting a brick wall on a loggia or balcony should begin only after the primer has dried. We recommend doing this with a brush, which allows you to better paint corners, small protrusions and grooves in seams. A paneled brush 6-8 cm wide is suitable - it fits freely into the grooves of the seams and evenly distributes the paint over the surface of the brick.
A roller or sprayer can be used if the balcony walls have a large area.
We invite you to familiarize yourself with the DIY brick sauna stove
If you decide to paint a brick wall on a balcony using this method, the whole process will take longer because it includes the following steps:
- Surface cleaning;
- Plastering;
- Putty;
- Primer.
Paint the brick white
The surface is cleaned of dust, dirt and loose formations, and a layer of plaster is applied to it. If the loggia is not heated in winter or the outer wall needs to be painted, prepare a cement-sand mortar. For closed heated balconies, it is permissible to plaster with gypsum mixtures without adding cement.
Using a layer of putty applied to the plaster, you can achieve a perfectly smooth surface, and this is especially true for the interior decoration of a loggia used as a living space. For external walls or unglazed balconies, you can skip the stage of puttying the walls, since under the influence of temperature changes and moisture, the putty will peel off and the walls will need to be repaired more often.
After drying, the wall can be primed and painted. It is better to paint with a roller or spray, after covering the windows and floor with plastic film.