The fashion for wooden ceilings has not passed even today, and those who believe that wooden ceilings are the lot of country houses, as well as rural and rural buildings, are wrong. The wood on the ceiling is from a series of exclusive interiors, where everything is expensive and rich. But even in ordinary houses and apartments, a wooden ceiling is far from uncommon. After all, there is no other coating that is both beautiful, environmentally friendly, and prestigious. But wood is a living material and cannot remain for a long time without special treatment, otherwise its beauty will soon fade. Therefore, painting a wooden ceiling is a mandatory procedure to prolong its service life. What and how to paint a wooden ceiling so that it turns out not only beautiful, but also durable?
How to paint the ceiling in a wooden house
The answer to this question depends on the aesthetic preferences of the home owners, but no less on the overall interior of the room. If the house is decorated in a chalet, country or Provence style, or there are many other wooden elements, then a wooden ceiling in the interior will look harmonious and natural. In this case, to cover the ceiling, it is best to use products that preserve the natural texture of the wood:
- antiseptic impregnations;
- decorative lazuli
- varnishes
- stains
If the style of the house does not involve preserving the natural structure of the wood, then there is only one option left - to paint the ceiling with covering paint.
Glazing and coating antiseptics
The products create a protective barrier against unfavorable biological factors (rot, fungus, microorganisms). They are well absorbed and penetrate deeply into the wood structure. Glazing compounds cover the surface with a transparent layer without covering the wood grain. Coating antiseptics give the wood the desired shade while maintaining its texture.
Colorless and tinted decorative glazes
They perform a protective function, block the development of pathogenic processes, increase wear resistance and extend the service life of the coating. Azure allows you to create a matte or glossy surface, change the tone of the wood, and give the wood a silver metallic effect. Lazuries are produced on the basis of water, natural oils and solvents.
It is worth highlighting oil glazes, which have excellent performance and aesthetic characteristics. The best quality indicators are demonstrated by the glazes of the German manufacturer OSMO, which can give even a cheap material a respectable look.
Transparent and colored varnishes
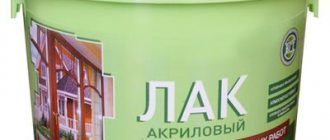
They create a transparent or slightly tinted film on the surface, through which the natural texture of the wood is clearly visible. Water-based acrylic varnishes are excellent for clapboard ceilings. They are safe, have water-repellent properties, and protect the surface from dirt and dust. You can use polyurethane and epoxy varnishes, which form a strong, durable and beautiful coating. A good solution is alkyd varnishes, which are very stable and wear-resistant, creating a lacquered coating with a shimmering effect.
Stains
Stain is a coloring liquid that emphasizes the structure of wood and gives it the shade of a certain type of wood. After treatment with this product, even ordinary wood takes on the appearance of an expensive wood species. Due to this property, stain is often used when painting plywood ceilings. Light-colored stains look very impressive on the ceiling. Staining performs a purely decorative function; to protect the wood and give it water-repellent properties, it is necessary to apply a transparent varnish or drying oil over the stain.
Paints
Covering paints create a durable and durable color coating on the surface that completely covers the natural texture of the wood. For the ceiling, you can use only safe dyes that do not emit odor and do not contain toxic substances. The packaging of the paint should indicate that the product is intended for interior decoration.
The range of paints is very wide. Acrylic dyes are excellent for painting the ceiling, forming an elastic, waterproof coating. A good option is acrylate paints, which retain their rich and bright color for a long time. You can also use silicate, silicone and polyurethane dyes.
You can learn more about the properties of paints intended for interior work in the article “What materials are used to paint the interior walls of a wooden house.” All these dyes can also be used to paint the ceiling.
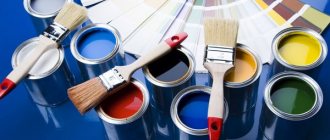
Main types of coloring materials
There is quite a large selection of paints that are suitable for painting a wooden ceiling. Each of them has its own properties and features of application.
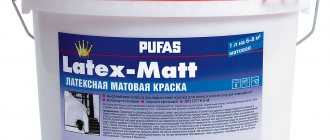
Water-based acrylic paint
Water-based paint
Water-based acrylic paint consists of the following elements: water, acrylic resin and a certain pigment for coloring. This paint is universal, since with its help not only ceilings, but also walls, floors and even the facades of a home are painted and acquire aesthetics. In order to minimize paint consumption, it is better to use a spray bottle to apply it. Although the most common method, used even by beginners, is to apply paint using a roller or brush. Please note that the amount of material consumed also depends on the condition of the surface and the quality of the acrylic that is included in the paint. When painting a wooden surface, more substances are consumed than concrete. This is due to the fact that wood has a high degree of porosity and absorbs material very easily. It is enough to apply better quality paint to the ceilings in one or two layers, while cheaper ones will have to be painted at least three layers. Water-based paint has the following advantages:
- water-based ceiling paint is non-toxic;
- has no odor, which gives a certain comfort in work;
- fire resistance, so mainly consists of water;
- after drying, it is resistant to moisture;
- high degree of resistance to low temperatures;
- the ability to retain bright colors for a long time and do not fade;
- painting ceilings is easy and dries very quickly;
- if necessary, you can easily remove a layer of paint during work;
- long period of use;
- After treatment it is easy to care for the surface;
- large selection of colors.
Water-based paint has almost no disadvantages. This is the best option for painting a wooden ceiling.
Based on alkyd elements
Alkyd paints have a durable color.
Alkyd-based paint consists of almost the same components as acrylic paint, excluding resins. This type of substance is used to give ceilings a glossy shine. Let's consider all the positive characteristics of alkyd-based paint:
- fairly quick drying of the layer applied to the ceiling;
- high degree of reliability, since this type of paint has the ability to penetrate deeply into the surface and be fixed in it;
- the presence of antifungal impurities in the composition, which helps protect ceilings from mold;
- intensity of color tones;
- high degree of weather resistance;
- paint can protect ceilings from rotting.
But it should be noted that alkyd paint also has disadvantages, which, in principle, almost completely cover all its advantages. These include:
- the presence of an odor that is difficult to tolerate, especially for allergic people;
- is not resistant to chemicals;
- instability to fire.
Based on this, experts recommend using this paint to paint ceilings in rooms that have a high degree of humidity in order to ensure reliable protection of the wooden ceiling from the process of rotting.
On polyurethane bases
Polyurethane paint has great wear resistance.
It is a rather capricious substance to work with. This paint should only be applied to carefully prepared ceiling surfaces, which should be absolutely dry. Otherwise, after applying polyurethane paint to moistened wooden ceilings and drying it, the applied layer will swell and crack. The main disadvantage is a very high degree of toxicity. But still, it should be noted that this paint is very wear-resistant.
Oil based
Paint of this type, not so long ago, was the most popular substance for finishing a wooden ceiling, but over time, modern types of painting materials gradually began to supplant it. In the current repair and construction market, this type of paint is significantly inferior in quality to other types. Despite this, many consumers continue to paint ceilings and more with it. It should be noted that oil paint has a high degree of resistance to temperature changes.
What color is best to paint the ceiling?
What paint to paint the ceiling with, light or dark, largely depends on the interior.
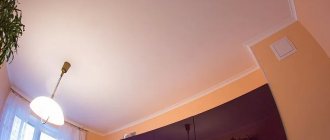
But it should be taken into account that wood is a material that in itself looks weighty, so a dark ceiling requires a certain height of the room. It can only be installed in spacious rooms and large halls with high ceilings, otherwise it will hang over your head and burden your eyes with its weight. It is advisable to give preference to light and golden shades. If the goal is to visually raise the height of the ceiling, it is better to paint it white. Cream, sand or light gray paint can also make a space appear larger. Today, a ceiling with the effect of whitewashed wood is very popular, which can be achieved using special wax-based products, for example, Teknovax.
Wood is often used as an additional element of ceiling design. In this case, the main light and smooth ceiling is decorated with dark wood ceilings.
How and how to paint a lining ceiling
- 29-10-2013
The choice of wooden lining for interior decoration of residential premises in a private house is a fairly successful and often used option. The aesthetics of wood finishes have been and continue to be valued for their naturalness, solidity and traditionality. At the same time, the use of lining raises the question for any home owner about what and how best to paint it, so that it looks more presentable and lasts longer. How should a lining ceiling be painted so that it looks appropriate and dignified in a particular interior? Let's consider the possible options.
A ceiling decorated with lining looks just as beautiful as a suspended or plasterboard ceiling.
The wooden lining on the ceiling will not be subject to serious mechanical stress or friction, it will not be exposed to direct sunlight, it will not get dirty with dirt, be subject to heavy dust or be filled with various liquids.
Therefore, the choice of the means with which the owner will paint the lining ceiling depends mainly on the aesthetic preferences and features of the interior of the room.
You can treat the lining with an antiseptic or varnish before installing it on the ceiling.
If the interior is designed with an emphasis on natural aesthetics, with many wooden elements, then you should pay attention to glazing and coating antiseptics, which not only preserve the wood for many years, but also give the surface shine and tone, while maintaining the texture of the wood. Such antiseptics can be sold with additives that allow you to diversify the color and tonal range of wood. In general, today there is a very wide selection of impregnations, decorative glazes, and high-quality transparent coatings for lining, which not only do not hide all the beauty of the wood, but are also able to emphasize the full depth of the aesthetics of its natural texture.
A ceiling made of wooden lining also looks good if it is varnished. For interior ceilings, it is best to use acrylic water-based wood varnishes, which dry quickly enough and give the wood paneling a solid tint. At the same time, there is also a choice between glossy, matte and tinted varnish, which again depends on the aesthetics of the interior decoration of the room. Acrylic water-based varnishes are also good because the wooden surface they coat repels dust, water, and dirt well. If you paint the ceiling with this varnish, you can periodically wipe it with a damp cloth.
The lining ceiling can be painted with antiseptics, varnish and paint.
And finally, if the interior does not involve preserving the exclusively natural appearance of the wood structure of the lining, then the ceiling can be painted. Here the choice usually occurs between options such as oil, acrylic and acrylate paints. But if the first two varieties are more suitable for external work, then it is better to paint the ceiling indoors with acrylate paints, which retain the saturation and brightness of the color for a long time. In addition, acrylate paints are not subject to cracking and are vapor-tight, which allows for better protection of the wood.
Return to contents
The ceiling is that part of the room that is constantly and completely visible, because of this it needs to be painted evenly, without streaks and in the same tone. This means that you need to be especially careful in the process of preparing the coloring material, as well as in preparing the necessary materials and tools.
Return to contents
- selected paint material and appropriate solvents;
- brushes, rollers, possibly a spray gun;
- buckets and trays for diluting paint;
- stepladders and trestles for working in the upper part of the room;
- work clothes, safety glasses, gloves, etc.
Return to contents
It is necessary to paint the lining ceiling in two layers, changing the direction.
What stages of work should be followed in order to carry it out quickly, without a hitch?
- First of all, you need to prepare the ceiling surface for painting. Initially, you need to clean the lining from any surface contamination. Usually, after it is already installed, there is no significant contamination left. But in addition to surface cleaning, the wooden surface should be thoroughly sanded, for which it is recommended to use pumice or not very fine sandpaper. Sanding movements are carried out exclusively along the grain of the wood.
- Having prepared the surface of the ceiling, you should protect the floor from accidental contact with paint or varnish, and also prepare a stepladder, ladder or trestle for working at heights and place containers on them into which the finished painting solution will be poured.
- If possible, apply a primer to the wood. This stage for painting the ceiling is not mandatory, but if there is material, then it is better to do it, thanks to which such a ceiling will last many years longer.
- Using the instructions included with commercial mixtures, varnishes or paints, prepare appropriate coloring solutions.
- Using a roller, brush or spray gun, apply the first coat of paint to the wood paneling. Experts recommend painting the lining with a brush. This is primarily due to the fact that the ceiling, upholstered with clapboard, does not have a flat structure, but longitudinal grooves. To ensure that all parts are evenly painted, a brush is best.
- Painting is best done in three thin layers. You need to apply the first layer of paint or varnish especially carefully and subtly, because the overall appearance of the ceiling will depend on it. You can limit yourself to two layers of coloring, but if the availability of material allows, it is better to do a third pass.
https://youtu.be/-gZyDHNI6aw
Thus, today there are many excellent options for painting ceilings covered with wood paneling. All work is carried out very simply and quickly, without the use of any complex tools, and does not require special skills. The most important thing is to choose the right material for covering the ceiling so that its appearance fits into the interior of the room and meets its overall aesthetics.
1popotolku.ru
Preparing the ceiling for painting
In order for the paint to apply beautifully and evenly, the surface of the ceiling must be perfectly smooth and even. Therefore, before covering the surface with varnish or paint, it must be well prepared.
- If the ceiling has been previously painted, the old coating must be removed. In order for the paint to be easily and quickly removed, it must first be softened with a construction hairdryer, and then the swollen coating is cleaned off with a spatula.
- Next, the surface is polished. This work can be done with a grinder with special attachments or sandpaper, first with coarse and then fine grain.
- If there are cracks or irregularities, they must be sealed with wood putty, and then, after the composition has dried, the surface must be sanded again, paying special attention to the putty areas.
- If paint will be applied to the ceiling, it is necessary to first prime the surface to be painted. Apply two coats of primer with a 24 hour interval. If varnishing is intended, a primer is not needed; the wood is covered with stain, drying oil or antiseptic impregnations.
Paint for wooden ceilings: 6 types of coating and the best option
Painting a wooden ceiling can present some difficulties not only in the process itself, but also in the choice of finishing material. If we consider the issue from a design point of view, then the best paint is the one that most complements the interior. But we must not forget that wood is a rather “capricious” material, therefore the range of different coatings is quite wide.
Content:
In the case when the ceiling treatment is carried out in a room where there are many wooden elements and the same ceiling, that is, as close as possible to the natural design, it is recommended to opt for a glaze or antiseptic coating.
They have a number of advantages, including:
- Increasing the service life of a wooden ceiling;
- Giving the surface a characteristic shine and light tint;
- Full preservation of wood texture.
If necessary, you can choose a paint with additives, which will make it possible to give the desired shade to the existing material
Specialized construction stores offer a wide selection of wood coatings:
- Acrylic;
- Latex;
- Water-based;
- Silicone;
- Silicate;
- Textured.
Each of them pursues its own purpose, which is described in detail in the instructions for the substance.
Note! Sometimes it may be necessary to apply two or more layers of coating in order for the resulting paint to have a decent appearance.
In most cases, they prefer to choose varnish for wooden ceilings. Considering that interior finishing work is being carried out, it is better to choose water-based acrylic varnishes. This coating dries quite quickly, while preserving and emphasizing the natural grain of the wood.
Varnish protects wood from dust, dirt and water, thereby increasing its service life
Also, depending on the design of the room, the ceiling can be painted with matte or glossy varnish. When choosing conventional paints, preference should be given to acrylate coating, because oil and acrylic are used exclusively for exterior work. The advantages include long-term preservation of the original color, the wood does not fade, and is protected from cracks and the penetration of moisture and steam.
The best paint for a wooden ceiling: evaluation criteria
Unfortunately, it is impossible to give a definitive answer to this question, which is due to many factors: the goals pursued, design, type of wood, etc. Naturally, if the house has a wooden ceiling, then painting is the most correct solution for its reconstructive and primary finishing. Most eco-friendly coatings are white, making them versatile. If necessary, you can add color and give the wood any color.
When choosing varnish or paint, you need to pay attention to the following points:
- The level of coverage of the coating (the ability of the selected material to hide or change the primary finish with minimal consumption);
- Ability to mask defects;
- Adding volume;
- Difficulty in aftercare;
- Price.
All this can be read on the can itself, where the manufacturer indicates the estimated consumption and other characteristics of the coating.
When painting wooden ceilings, it is best to pay attention to water-soluble paints and varnishes
As you can see, there is no definite answer, and there cannot be, because the choice of finishing materials is wide and constantly updated. You can only rely on the presented parameters and, based on the correspondence of the coverage to each of them, make your own choice.
Impregnations and tinting for processing wooden ceilings
If you are the proud owner of a wooden ceiling, then you are incredibly lucky. This finishing material is rich in texture and aesthetics, which is usually only emphasized, but not masked in any way. That is why most craftsmen opt for translucent or transparent coatings that can transmit the required amount of light and slightly tint the wood.
To get this result, you can choose one of the options:
- Glaze with a decorative effect or impregnating varnish. First of all, such a coating performs a protective function, preventing and delaying the process of wood rotting as much as possible. The aesthetic properties of the material appear to the owners in a more pronounced light: the texture is not hidden, the surface is tinted, the varnished element sparkles and shimmers fascinatingly in the rays of the sun and artificial light, and silkiness is felt upon tactile contact.
- Colored varnishes for decorative works. The coating is alkyd, but for all its transparency, it covers the wood with a powerful protective film, and the degree of gloss varies depending on the number of layers.
- Synthetic glaze coating. This varnish is able to penetrate into the deep layers of wood and color it from the inside, which is why they are popularly used when making ceilings made of cheap wood.
Before painting, the wood needs pre-treatment. The protective composition increases its service life, protects it from pests and prevents rotting.
Any of the presented coatings is suitable for treating wooden surfaces made of valuable and ordinary species, as well as their artificial substitutes.
The choice of decorative coating should be approached responsibly, and if there are doubts about its correctness, it is recommended to consult a professional. By the way, construction stores often provide this service free of charge.
Painting a wooden ceiling: main stages of work
It is noteworthy that when painting a ceiling, the whole difficulty lies not in the painting process itself, but in the preparatory stage. If the material is not carefully processed, the final result cannot be called satisfactory.
The preparation is as follows:
- If you are not performing a primary treatment, but a re-treatment of the ceiling, be sure to remove as much of the old coating as possible, and then thoroughly sand the surface, not missing a centimeter;
- After completing the first stage, you should begin grinding the surface; for this, use special sandpaper or a diamond blade, available for purchase in specialized stores;
- The third stage is the use of stain, which will prevent damage to the wood by various insects, and also saturate the material with color;
- At the last stage, we paint the ceiling with a pre-selected material, but only after the previous coating has completely dried.
Visual process of preparing a wooden ceiling for painting
Attention! You should not choose cheap paint, otherwise there is a risk of losing the texture of the wood and ruining the design.
As for the painting process itself, everything is quite simple: you need to work with a brush in one direction, and if several layers are applied, then you need to alternate horizontal stripes and vertical ones.
Choosing paint for wooden ceilings (video)
The paint for wooden ceilings can be absolutely any at the request of the owner. You can coat the material with varnish or a tinted coating, the main thing is to clearly understand what you want to see in the end and go towards your goal.
Attention, TODAY only!
kitchenremont.ru
Recommendations for painting a wooden ceiling
Painting can be done with a roller, wide brush or spray gun; if you do not have the skills to work with a paint sprayer, it is better to choose traditional tools.
It is more convenient to paint a lining ceiling with a brush, making movements in the longitudinal direction. The paint is applied at a temperature not lower than +5 and not higher than +35 degrees. At a lower temperature, the composition will become viscous, so smudges cannot be avoided; too high values will lead to uneven distribution of the dye. It is best to work with varnish in the temperature range of 18-22 degrees.
It is recommended to apply at least three thin coats of paint or varnish. Before applying the next layer, you must wait until the painted surface is completely dry.
How and what is the best way to paint the ceiling and walls in a wooden house?
Wooden houses are beautiful, environmentally friendly, and durable. The interior decoration of the ceiling and walls must correspond to high quality materials. But a lot of wood is also too much; sometimes you want to finish it not with slats or clapboards, but with the help of modern paints and special technologies that allow you to adequately decorate the interior of a wooden house. Such compositions and methods exist!
A beautiful and stylish “wooden” interior is not always appropriate. When all the ceilings and walls in the house are exactly the same, the interior seems boring, dull, monotonous and even gloomy. You can brighten the room with a ceiling painted white.
Wooden ceilings can be painted with any paint that is in harmony with the overall style of the interior. To maintain self-regulation of the microclimate in a wooden house, the surfaces to be painted must be wooden (slat, board, plywood), and in no case finished with adhesive composites, chipboard or fiberboard.
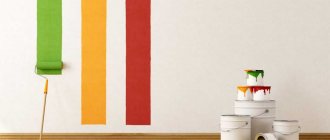
To paint the ceiling, it is better to use water-soluble (water-based) paint. Regular whitewash will do, but using paint is more convenient, easier and faster. A textured finish (alfraine painting) is appropriate, which at a minimum cost significantly transforms the space, visually disrupting the integrity of the volume. Just one frieze is made using the alfrei technique, and the perception of the entire room will completely change.
Artistic painting with paints of a special composition is a very profitable solution when making stucco is time-consuming and expensive. Antique painting is always in fashion; such decoration will adequately decorate any wooden house.
Rules for painting wooden surfaces
The first layer applied to the wood is primer. The primer must be selected correctly. Its composition is supposed to penetrate into the pores of the wood as deeply as possible. The consistency of priming liquids should be thinner than regular paint.
The primer is applied to the wood hot, like natural drying oil. Viscous primers with filler are chosen if it is necessary to fill the pores of loose material.
How do you paint wood?
For painting wood, there are paints and varnishes of a special composition that increase fire resistance properties and extend the life of the building.
Wood is often painted with enamel. This paint is quite resistant to external factors. The enamel creates gloss and lays flat on the surface. It is applied to surfaces using a brush, roller or spray gun.
Acrylic paints guarantee durability and a spectacular look of wood. Paintwork products in this category are fireproof, do not emit a toxic, pungent odor, and dry quickly.
Painting wooden walls with a sponge
The technique of applying paint to a wooden wall using a sponge allows you to achieve interesting solutions. This technique gives glossy plain surfaces a shimmering effect.
To paint or not to paint?
A thick layer of paint “suffocates” the wood, and underneath it it stops “breathing”. A minimum of humidity gives life to microorganisms that destroy wood. Sometimes external beauty hides destructive processes that significantly reduce the service life of the material and the structure itself.
The conclusion is clear: if you paint, then only with paints that allow air to pass through. The choice of oil paint should be justified (the priority is the protective functions of the paintwork).
For example, this paint can be used to paint a veranda that gets very hot in the summer but is not heated in the winter. This is a kind of temperature threshold for the house, so its surface must be more carefully protected from external moisture and all household pollution than from internal atmospheric instability. A protective finish or oil coating will provide protection to your home's plumbing fixtures.
How to choose fencing for your personal plot?
How to build a wooden house combined with a bathhouse?
www.kaz-stroyka.ru
Difficulties in dyeing yourself
The ceiling is always visible; if the walls can be hidden behind furniture, and the floor under the carpet, then the ceiling cannot be hidden. Therefore, it needs to be painted very carefully and evenly, avoiding streaks and smudges, but when painting it yourself, this does not always work out.
Many home craftsmen do not bother with thoroughly preparing the surface, and some skip this important step altogether, which certainly affects the quality of the paint.
The difficulty of painting wooden ceilings lies in the fact that their processing requires special devices (horses, ladders, and sometimes scaffolding), since they are usually installed in very high rooms.
Particular difficulties are caused by varnishing the surface, since many varnishes require dilution immediately before painting. If the ratio of components is incorrect, the result may not be the same as required. In addition, in order to get a beautiful coating, each layer of the varnish surface must be sanded well, which is not always possible to do when doing the work yourself.
Basic requirements for wooden ceilings
Before you start processing wooden ceilings, you need to consider some factors that will affect the quality of processing:
- Quality depends on the type of wood. Coniferous trees are more often used for arranging floors. For a wooden ceiling it is better to use hardwood.
- The room in which the ceilings are installed. Humidity indicators and expected load on them. For example, kitchen or bath ceilings will be more susceptible to moisture than bedroom ceilings.
- The degree of paint compatibility if the ceilings were previously painted. It is not recommended to change the composition of the substance, as you can get a completely unexpected result.
Professional ceiling painting
Our specialists are ready to save you from all the complications and difficulties that painting the ceiling yourself causes. All of our company’s technicians are high-level professionals. We will not only prepare and paint the ceiling efficiently and quickly, but will also fulfill any of your wishes for decorating the coating, applying drawings and other decorative elements. We guarantee excellent quality of painting and durability of the applied coating. You can leave your request through any communication channel from the “Contacts” page.
Calculate the cost of painting and insulating your home right now
Select types of work:
Select materials:
DIY ceiling painting
Ceilings do not look aesthetically pleasing at all if the work on painting them is done carelessly and of poor quality. Modern ceiling designs are more varied than before. Original painting of ceilings in several colors with different geometric shapes is acceptable. But not all consumers dare to make such creative solutions; conservatives try to decorate plain water-based ceilings in a conventional style or cover them with paints and paints. But in any case, to obtain high-quality ceilings, it is necessary to use the correct technology for painting them. It consists of two main stages: high-quality preparation and direct painting of the ceiling surface. To achieve the desired result, you need to prepare tools and materials.
Required Tools
Before you begin the main stages of finishing wooden ceilings, you need to prepare the necessary tools, both for preparing the ceilings and for painting them. So, the irreplaceable items that will be needed for the process of painting a large coverage area:
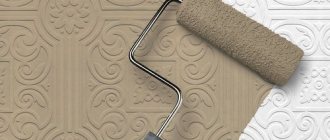
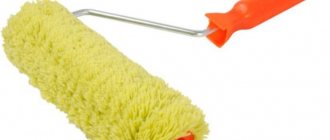
- Rollers. One of the most convenient tools that is used for painting ceilings that have fairly large areas. It should be noted that it is much easier to obtain high-quality painted ceilings using a roller than using a brush. But when purchasing a roller, pay attention to the length of the pile. It should be of medium length. It is more convenient to work with a roller if it has a long handle.
Painting tools - Paint tray. This is a very convenient utensil when using a roller. It has a small recess into which paint is poured. In front of the recess there is an inclined ribbed plane, which is designed to remove excess paint from the roller and distribute the solution evenly on the roller. You can also be confident in the stability of the tray and not worry that it may tip over.
- Brushes of different sizes. No matter how convenient it is to perform the painting process with a roller, you cannot do without brushes. They will help to tint the wooden ceiling in places where a roller cannot be reached. For example, corners or baseboards.
- Masking tape. This material is very appropriate and is an indispensable assistant if the ceilings are painted in several colors. It will help to clearly mark the boundaries between colors and ensure an even color line. It can also be used to protect ceiling skirting boards if they do not require a paint application process. After removing the tape, we get a completely clean surface.
We will also prepare tools that will be used to prepare ceilings for painting with water-based paint:
- Rubber and metal spatulas. Using a metal spatula, you can thoroughly clean the ceiling surface from peeling layers of old paint or dirt. And with the help of a rubber spatula you can fill cracks or chips.
- Chisel. With its help, you can easily get rid of the remnants of old putty or protruding knots or other irregularities that have appeared on the surface of the ceiling.
- Construction hairdryer. This tool will be needed if there is a need to clean the ceiling from several layers of old paint. If the goal is to completely change the design of the ceiling, then you must first remove the old section using a hair dryer, clean the surface and only then apply new paint.
Surface cleaning
Surface preparation material
When starting to prepare the surface, we pay attention to the materials that will be needed for high-quality leveling of ceilings:
- putty;
- wood primer;
- wooden slats for sealing wide cracks;
- paint for painting;
- solvent for thinning paint.
There are several types of putties that are best used to level the ceilings before painting.
- On an oil or oil-adhesive basis. The composition of such materials includes glue, crushed chalk, drying oil and sicativa - a substance that ensures rapid drying of the material. But, it should be noted that the drying time of this type of putty is still longer than other types. As for strength and reliability, oil putty has high levels of these qualities.
- Acrylic based. They are made from barite or gypsum, talc with the addition of ocher and zinc white. This type of putty is recommended to be used for leveling the surface of water-based ceilings. It fills cracks easily and dries fairly quickly. In addition, acrylic water-based putty is used to level out minor depressions on the surface of ceilings. One of the priority properties of this material is maintaining elasticity, which allows surface deformations not to violate its integrity. One of the conditions for ensuring the reliability of the filling process with water-based putty is careful preparation of the cracks. They must be cleaned of dust and dried.
- Very often, ceilings are leveled using homemade putty. To do this, take small sawdust, add wood glue and mix. This is a fairly high-quality material that is easy to apply and dries quickly.
In addition to filling water-based ceilings, it is necessary to protect the wood from rotting and fungus formation. To do this, you can use drying oil or a specialized primer for wooden ceilings. In addition, the use of a primer will ensure uniform application of paint and minimize its consumption.
Wood surface primer
Surface preparation
After the tools have been prepared and the materials for the work have been determined, we begin preparing the ceilings for painting with water-based paint:
- Initially, we thoroughly wash the ceilings using detergents.
- Pay attention to the cracks in the ceiling. We clear them of dirt using a chisel or knife.
- If there are greasy stains on the surface of the ceiling, they should be cleaned with a solvent.
- They also remove any uneven surfaces and attach any loose boards with nails.
- A water-based acrylic leveling putty will help to fill all cracks and irregularities.
Ceiling painting
Many people take the process of painting wooden ceilings quite frivolously, believing that nothing can be simpler than painting the ceiling. But, like any other process, applying paint to a wooden ceiling surface has its own specifics. The technology depends on the level of condition of the ceilings.
- Painting the ceiling without visible damage is as follows. To begin with, apply a layer of drying oil to the surface of the ceiling and allow it to dry. This usually takes about 3 days. Then apply the first layer of paint using a roller and again wait for it to dry completely. Subsequent layers of paint are applied in a similar manner. Usually 2 - 3 layers are performed.
- The process of painting a ceiling that has significant defects should be done in the following way. After cleaning the surface, all defects should be thoroughly repaired by filling them. After this, the putty areas should be cleaned with sandpaper. After the material has dried well, begin painting the surface using the technology described in the previous paragraph. To improve the quality of the surface and give it an original appearance, it is recommended to seal the last layer of paint with colorless varnish or special protective oils. They create a glossy appearance to the surface.
- Another method of coloring is improved, according to experts. Its essence lies in the following actions. In one liter of drying oil, dissolve 200 grams of dry paint powder. Cover the ceilings with this mixture and allow it to dry completely. Then a very thin layer of putty is applied, allowed to dry and then stripped. Using this procedure, the ceilings are puttied at least two more times. After this, two layers of paint are applied to the ceiling.
Painted ceiling
Paint consumption
The optimal paint consumption is considered to be about 200 - 300 grams of solution per square meter. This effect can be achieved by using a roller or sprayer to apply paint. If you use a brush for the painting process, paint consumption increases significantly.