Any finishing work involves surface preparation. This is especially important when it comes to repairs. It is then that a situation arises in which you have to remove the old coating from the walls. Most often this is wallpaper or various paints and varnishes. If everything is clear with the first option, then the second one causes a lot of difficulties. It is not always possible to completely remove a layer of paint, then a reasonable question arises: is it possible to putty over paint?
This question is not idle. The fact is that it is not always possible to remove the entire painted layer. There are always mistakes left. They can be removed, but then you will have to remove part of the coating. And this, in turn, leads to additional costs. And in general, will the putty layer stick then?
Preliminary surface study
Surfaces found in houses and apartments are usually coated with oil-based, water-based paints and enamels. Complete removal of such coating is not always necessary. The old layer can stick very well and not delaminate. Thus, before taking drastic measures, you need to check whether anything should be done. This can be understood if you resort to a simple test: run a well-wetted rag over the painted wall. What you can see:
- The coating will begin to “wash off”. The marks will remain on the rag and the layers will begin to peel off. All these signs indicate one thing - water-based paint was used. It can be easily removed when exposed to water. If you put putty on it, the same thing will happen. Namely, the solution will simply fall off. The work will go down the drain. To put it simply, everything will have to be removed and redone. The worst thing is when this happens while wallpapering.
- There may be another option. The surface will not react to exposure to water. This means that this is a paint based on drying oil or solvents. Such materials are not afraid of increased moisture. It's not scary to apply putty on them. Although here, not everything is so simple. The painted layer should adhere very well.
Removing paint
As already noted, water-based paint can be easily removed using water. After it is completely washed off, the surface needs to be thoroughly dried. The situation is different with oil solutions and enamels. There are several options that are used to remove such compounds. This:
- Mechanical method To remove the coating, use special tools and electrical devices. This method requires a lot of physical strength. It leaves behind a lot of dust and dirt. For work, it is advisable to wear a respirator and safety glasses.
- Chemical method Special chemical reagents are used. They are applied to the painted surface. Under their influence, the layer is destroyed. Work is performed in protective clothing, gloves and goggles.
- Thermal method: A hair dryer is used. Under the jets of hot air, the paint begins to rise. It is easy to clean.
What do you need to get in the end? It's okay if some painted areas remain. The most important thing is to ensure that there is no peeling. The places where the old layer remains must be well cleaned and free of swelling and swelling. Then you can not be afraid and putty on the paint.
Surface preparation
Before you putty the walls and ceiling, they need to be prepared. Any surface requires thorough cleaning of paint, paint and dirt. If there are oil stains, they are removed using a soap solution. It is possible that when removing painted areas, the integrity of the coating was compromised. That is, potholes, cracks, and chips appeared. They need to be sealed.
It is important not to forget that there is always such an important stage as priming. Due to the fact that all surfaces that are coated with paint are very smooth, this process must not be forgotten. Only then can it be achieved that the adhesion of the putty mixture to the painted section of the wall will be as strong as possible. This will also give greater strength to the old coating. Any neglect will result in the solution peeling off. That is, the putty will not adhere to the paint.
Putty application and final finishing
Further work is no different from simply applying the solution to the walls and ceilings. The putty is easily applied to the paint. The resulting surface will hide traces of previous painting. If everything was done correctly, then there will be no problems.
The following nuances are taken into account:
- Any major defects will be corrected after the base paint has been removed. Then the areas that were generated in this case are simultaneously closed.
- The putty must be applied in thin layers. You cannot make them larger than those specified by the manufacturer. Especially when working on a painted surface.
- If you notice that the mixture begins to lag behind areas of the wall on which paint remains, then most likely you need to reduce the thickness of the applied layer.
- After the putty is applied to the paint, everything should dry thoroughly. Then it is coated with primer again.
In the photo - work with putty on a painted wall
Is it possible to putty on paint: water-based, oil-based?
Any finishing work involves surface preparation. This is especially important when it comes to repairs. It is then that a situation arises in which you have to remove the old coating from the walls.
Most often this is wallpaper or various paints and varnishes. If everything is clear with the first option, then the second one causes a lot of difficulties.
It is not always possible to completely remove a layer of paint, then a reasonable question arises: is it possible to putty over paint?
This question is not idle. The fact is that it is not always possible to remove the entire painted layer. There are always mistakes left. They can be removed, but then you will have to remove part of the coating. And this, in turn, leads to additional costs. And in general, will the putty layer stick then?
Preliminary surface study
Surfaces found in houses and apartments are usually coated with oil-based, water-based paints and enamels. Complete removal of such coating is not always necessary. The old layer can stick very well and not delaminate.
Thus, before taking drastic measures, you need to check whether anything should be done. This can be understood if you resort to a simple test: run a well-wetted rag over the painted wall.
What you can see:
- The coating will begin to “wash off”. The marks will remain on the rag and the layers will begin to peel off. All these signs indicate one thing - water-based paint was used. It can be easily removed when exposed to water. If you put putty on it, the same thing will happen. Namely, the solution will simply fall off. The work will go down the drain. To put it simply, everything will have to be removed and redone. The worst thing is when this happens while wallpapering.
- There may be another option. The surface will not react to exposure to water. This means that this is a paint based on drying oil or solvents. Such materials are not afraid of increased moisture. It's not scary to apply putty on them. Although here, not everything is so simple. The painted layer should adhere very well.
To find out the type of paint that is applied to the surface, you need to run a well-wetted sponge over it
This was the simplest test option. But before starting work, you should also study the surfaces in other ways. To do this, you need to tap the ceiling and walls to achieve peeling of the poor-quality coating.
As an auxiliary tool, a special spatula is used, which was designed specifically for removing coloring materials. One of its sides is sharpened, which allows you to pry off bubbles and peeling edges.
Removing paint
As already noted, water-based paint can be easily removed using water. After it is completely washed off, the surface needs to be thoroughly dried. The situation is different with oil solutions and enamels. There are several options that are used to remove such compounds. This:
- Mechanical method To remove the coating, use special tools and electrical devices. This method requires a lot of physical strength. It leaves behind a lot of dust and dirt. For work, it is advisable to wear a respirator and safety glasses.
- Chemical method Special chemical reagents are used. They are applied to the painted surface. Under their influence, the layer is destroyed. Work is performed in protective clothing, gloves and goggles.
- Thermal method: A hair dryer is used. Under the jets of hot air, the paint begins to rise. It is easy to clean.
What do you need to get in the end? It's okay if some painted areas remain. The most important thing is to ensure that there is no peeling. The places where the old layer remains must be well cleaned and free of swelling and swelling. Then you can not be afraid and putty on the paint.
Putty application and final finishing
Further work is no different from simply applying the solution to the walls and ceilings. The putty is easily applied to the paint. The resulting surface will hide traces of previous painting. If everything was done correctly, then there will be no problems.
The following nuances are taken into account:
- Any major defects will be corrected after the base paint has been removed. Then the areas that were generated in this case are simultaneously closed.
- The putty must be applied in thin layers. You cannot make them larger than those specified by the manufacturer. Especially when working on a painted surface.
- If you notice that the mixture begins to lag behind areas of the wall on which paint remains, then most likely you need to reduce the thickness of the applied layer.
- After the putty is applied to the paint, everything should dry thoroughly. Then it is coated with primer again.
The putty should be applied in a thin layer and only after careful preparation of the painted wall.
There are a lot of people who are concerned about the question: is it possible to putty paint on walls? After all, sometimes it is quite difficult to clean a painted surface. The paint eats away so much that it can only be removed by destroying the structure itself. And many argue that this is the only way out. But in reality, it's not all that scary.
You can apply putty to paint, and you don’t have to be afraid of it. True, you should remove the old layer as much as possible. It is necessary to ensure that there are no peelings or swellings. For greater adhesion, non-removed areas are covered with scratches.
The only paint from which the surface needs to be completely cleaned is a water-based paint.
: the most practical way to prepare a painted wall for applying putty for tiling
Source: https://otdelkagid.ru/raboty/shpaklevka/mozhno-li-shpaklevat-po-kraske.html
How to putty
When working with a clean room, questions about old painting do not arise, but what to do when it comes to repairs, and we are faced with old painted walls? 10 out of 10 experts will answer that first you need to understand what kind of material is on the wall.
Putty on old paint is allowed in rare cases and if the surface is not painted with water-based emulsion. In addition, it is necessary to check how tightly the coating adheres to the base. To do this, it is enough to cause several mechanical damage to the painted wall and make sure how tightly the paint layer adheres to the base of the surface.
An old painted surface that falls apart due to mechanical damage
Regarding water emulsion
Naturally, the question immediately arises: is it possible to putty over water-based paint? We’ll answer right away – no! The fact is that the water emulsion will draw water out of the putty, and as soon as this process begins, everything will peel off from the wall, along with the layers of putty.
Important! It is necessary to immediately exclude the moment of filling with water emulsion. Regardless of the dry mixture, it will still flake off!
Paint with putty peels off very easily
One question always leads to another, because you need to understand what kind of paint is applied to the wall.
This is very easy to calculate:
- Warm water is filled into the container.
- A simple sponge is used to treat part of the painted wall.
- You can rub a small space with a sponge, and if it foams, then it is a water emulsion.
- After 15 minutes, using a spatula, the swollen part of the painted surface is calmly removed.
And in this case, the paint putty will simply be completely useless, since it will not be able to fulfill its functional duties and very soon it will simply fall off the walls.
Are all paints equally contraindicated for applying putty?
The next question, whether it is possible to put putty on paint, essentially stems from the fact that in addition to water-based emulsion, there are other types of paint and varnish materials.
And here there are some interesting points:
- If the paint really shows excellent adhesion to the walls, then you can put putty on it.
- The painted surface must be washed with soap or other detergent to prevent oil stains on the wall.
- Notches are applied to the surface, they can be scratched directly with a spatula, or beaten with a hammer and chisel, this will be a kind of mesh.
Notches on the wall help with grip
- After all, the wall is primed, this will give adhesion to the entire surface.
Important! This procedure is perfect for oil paint. But at the same time, the painted layer must be in good adhesion to the wall.
Work ban
Naturally, there are surfaces where paint putty is canceled in any case. There are several such conditions:
- A loose base that falls off when pressed lightly.
- Wet walls on which the paint has already swollen and started to “bubble”.
- An easily removable layer of painted surface.
Under what conditions can putty be applied to paint and how to do it
Many construction works are inextricably linked with this type of finishing, such as putty coating. And if it comes to a new building or room, then often there is already a layer of paint on its walls. Then a logical question arises: is it possible to apply putty to paint? The answer depends on what type of paint you are dealing with.
How to determine the type of paint on the walls
To determine the type of paint applied to the surface, carry out a simple test - soak it with a sponge soaked in warm water. If it becomes covered with foam and begins to wash off, then it is water-based paint; when applying putty under the influence of moisture, it will definitely come off in layers.
There is no point in applying putty to such a coating, which means it will have to be removed completely. This is done simply: moisten the surface with a sponge or a spray bottle with plain water and leave it for 10-15 minutes. After this, the paint can be easily removed with a spatula, and the surface can be wiped with a damp cloth and dried.
If the color coating does not come off after moistening, it means that it is enamel based on drying oil or other non-aqueous solvents. Putty on oil paint is possible after appropriate preparation, if, of course, the painted layer adheres well. To check this, scratch the surface with a metal spatula in several places. If the paint comes off in layers and falls off, it should be cleaned off.
Ways to remove paint from a wall
Removal of the painted layer is distinguished by chemical, thermal and mechanical methods. The first method involves the use of special compounds that soften the enamel to such an extent that it can be easily removed with a spatula.
This method is inconvenient only because the product consists of toxic solvents, that is, they can only be used in a room with good ventilation. By the way, a household replacement for such a product can, in extreme cases, be a solvent.
The effectiveness of the thermal method is due to the property of the old paint layer to soften when heated. The paintwork is heated with a hair dryer or a soldering iron, after which the paint begins to bubble and melt, and is then removed with a spatula.
Advice: if you don’t have a hair dryer, you can use a blowtorch, but this is much more dangerous and requires strict adherence to safety measures.
Mechanical methods can be varied and quite unusual. You need to start by simply scraping off the paint layer with a spatula. Of course, this work is labor-intensive and highly dusty; therefore, if the coating does not come off over the entire area, but only in certain places, it is better to clean those areas. The rest of the surface is treated with a primer.
If the layer adheres too firmly to the surface, use a metal brush and scratch the coating with it - this will help increase adhesion before filling. Another option is if there are no voids under the paint coating, make notches with a sharp object (say, an ax) (the main thing is that their depth reaches the surface under the paint).
This promotes better adhesion of the solution to the surface when puttingty is applied to paint. For the same purpose, paint is stripped with coarse-grained emery manually or using a grinding machine.
Advice: after such treatment, be sure to wipe off the resulting dust layer from the surface.
What to do if the paint cannot be removed
If it is not possible to remove the paint, use a special primer, which contains microscopic particles, which improve the adhesion of the base to the putty.
Quartz sand is often used as such particles; the liquid component of the product has the property of penetrating deeply into the paint layer, simultaneously connecting with it. A similar primer designed to cover smooth surfaces is called “Concrete Contact”.
Its main purpose is to provide a smooth surface with roughness that will facilitate the application of putty.
USEFUL INFORMATION: Which paint is better to choose for wallpaper for painting? If there are cracks in the coating, they are “sealed” with a spatula, that is, the peeling paint, as well as the plaster underneath, are removed until the coating is durable. During the process, large recesses may form; they need to be leveled with putty over the paint layer, and then, after preliminary priming, leveling of the entire surface begins.
After applying the primer with a roller or brush, it is advisable to install a plaster mesh, which will greatly facilitate the work. It is especially necessary if the future plaster layer on the walls exceeds 10 mm.
How to apply putty to paint
Further actions are identical to those performed when leveling and finishing a conventional plastered surface. However, there are also specific features of this work.
- If the wall deviates significantly from the level or there are serious defects, the surface is first leveled with starting putty, which has a coarse-grained structure;
- Putty on treated paint will adhere more firmly if it is applied in several layers, the thickness of which is up to 2 mm. Each subsequent layer can be applied after the previous one has completely dried;
- After all layers have completely dried, the surface is cleaned with sandpaper or a special mesh so that sagging and traces of a spatula can be removed.
After this, finishing putty is applied using the same principle. After the last layer has dried, it is also sanded to a perfectly smooth surface. This operation is especially relevant if painting is to be done.
As for the technology of applying plaster, first a small part of the solution is sprayed so that a reliable base is formed. When this base has dried, proceed to the main leveling procedure using a plaster rule or trowels.
At the final stage, a primer is applied to the walls. After this, you can paint them or glue wallpaper.
By following all these recommendations, you will very quickly forget that a perfectly even layer of putty hides the peeling coating underneath.
USEFUL INFORMATION: Creative wall decoration ideas
Source: https://mr-build.ru/podgotovka-osnovaniy/mozhno-li-nanosit-shpaklevku-na-krasku.html
Conclusion
In conclusion, you can derive a simple formula for successful puttying and painting - everything needs to be done according to the rules, and the video in this article will clearly show how to accurately follow the basic principles of finishing and painting work (see also the article “Types of putties and features of their use”).
Almost any renovation begins with leveling the walls before their subsequent finishing. However, what to do if the surface has been painted? Is it possible to apply putty over paint or should I still clean the wall?
Study of surface properties
In order to find out whether putty can be applied to old paint, you should determine its type. There are several main varieties:
- If, when the painted surface comes into contact with water, the paint begins to bubble and wash off, this means that the walls were covered with water-based paint. Can putty be applied to water-based paint? When exposed to moisture, the paint layer is destroyed and washed off, so the applied putty, which also contains water, simply will not stick.
- If the surface is smooth and shiny, and does not react to contact with water, then this means that the walls are painted with drying oil or solvent-based paint. Can putty be applied to oil paint? There is no clear answer to this question. The fact is that putty can be applied to old paint that still holds, but if chips, cracks and blisters are visible on the coating, then the surface of the wall will have to be cleaned.
Putty for water-based paint
Questions related to plastering, priming and painting work. Issues related to the preparation of surfaces for finishing are also discussed.
Return to “Surface preparation. We plaster, prime, paint.”
Go
- Apartment interior design and decoration
- General questions about the interior
- Bedroom
- Children's room
- Interior furniture
- Cabinets and shelves
- Lighting. Light in the interior
- Curtains, curtains, curtains, blinds, etc.
- Finishing
- Surface preparation. We plaster, prime, paint.
- Ceramic tile
- Wallpaper and films
- Thermal insulation and sound insulation
- Other questions about repairs and finishing
- Repair equipment
- Tools and materials
- All about doors
- Locks, handles, fittings
- Floors and floor coverings
- Ceilings
- Windows and glazing
- Electrics
- Plumbing, pipes, heating, sewerage
- Plumbing and pipes
- Bathtubs, sinks, toilets, bidets and showers
- Country house and landscape design
- Country house renovation
- Foundation
- Roof and roofing materials
- Stairs
- Engineering systems
- Gardening and landscape
- Country paths
- Fences and enclosures
- Questions about the site and forum
- Guestbook
Who's at the conference now?
Currently browsing this forum: no registered users and 0 guests
Vadim Messages: 730 Registered: 15 Feb 2012, 12:58
Post by Vadim » May 24, 2012, 06:11
We are making repairs in classrooms, the walls of which were built by the construction battalion; naturally, they are not level. The walls are covered with water-based paint, the question is whether it is possible to somehow treat them so that the paint is not removed, but putty is applied directly to the paint. super_stroitel Messages: 890 Registered: February 25, 2012, 21:41
Re: Putty for water-based paint
Post by super_stroitel » May 26, 2012, 8:22 pm
If the previous putty and paint hold up well, then you can treat it with any deeply penetrating primer. Places where paint or putty does not adhere must be knocked down, primed and puttied again. Alina Messages: 252 Registered: 20 Feb 2012, 18:24
Post by Alina » May 28, 2012, 10:58
I think this will be a lot of problems! You will at least need to peel off the paint - for this you will need a hair dryer and a spatula. In most cases, this paint comes off without problems. If the walls are not treated and primed before puttying, the starting or finishing putty will begin to crumble and mold.Candamar
Post byCandamar » Jun 05, 2012 12:34 pm
You don't have to remove the paint. The main thing is to remove it from those places where it peels off with a spatula or a metal brush. Then go through Betokontakt and dry well (at least 24 hours). This preparation will be sufficient for puttying. Nothing will definitely fall off.melnik7771Messages: 9 Registered: 03 Nov 2012, 11:21
Posted bymelnik7771 » Nov 22, 2012, 12:32 pm
It is necessary to reduce the gloss with a large tungsten mesh. The weak points identified at the same time should be torn off. Prime everything. We putty, and immediately, before the putty has dried, we embed the nylon mesh into it. The mesh is sold in construction stores and has a width of 1 meter. After this, you can apply any layer of putty. Semen_2012 Messages: 9 Registered: 03 Dec 2012, 22:18
Post by Semen_2012 » Dec 03, 2012, 10:29 pm
What is the gloss on water-based paint?! They tell you correctly: prime and you won’t have any troubles. If the paint holds up well, then after priming it will lay down normally and anything will go on top.natalishoklovaMessages: 15 Registered: November 14, 2012, 07:52 pm
Post bynatalishoklova » Jan 10, 2013, 4:11 pm
It’s possible, but you just need to prime it and go over it a little at least superficially with a spatula. but not necessarily, the main thing is the primer, and putty, but after puttingty, be sure to prime the wall. Tomasss Posts: 93 Registered: Nov 14, 2012, 11:36 am
Post by Tomasss » 09 Mar 2013, 07:09
I would advise you to first find out whether the paint is moisture resistant or not, if it is moisture resistant then you can putty and don’t be afraid, well, of course, in compliance with all technologies, you can check this by wetting the walls, if the paint does not bubble then everything is fine. serenada Messages: 109 Registered: 18 Feb 2012, 09 :54
Posted byserenada » April 25, 2013, 05:37
To ensure high-quality performance of new finishing work, it is recommended to remove the old layer of water-based paint. To do this, you need to wet the walls with a sponge or rag, wait for it to swell and remove it with a spatula. After removing the old paint, the wall should be primed.
Putty for acrylic paint
Acrylic is not as popular as the types of paints described above. However, it is also used for wall decoration. Can putty be applied to acrylic paint? Acrylic-based pigment is as durable as its oil-based counterparts.
To ensure good adhesion to the smooth surface of the painted wall, apply a layer of primer with fine abrasive particles. They will penetrate into the pores and irregularities in the paint, thereby creating an optimal rough surface for good adhesion to subsequent putty.
Acrylic paint
The most common option is a wall painted with acrylic paint. As a rule, such a cake consists of putty, cobwebs, another layer of putty mixture and two layers of acrylic. Please note that most putties have an acrylic base, hence many conclude that a fresh layer of the mixture can be applied to the wall immediately, without preparing the surface. This is mistake #1.
The problem is that the painted wall absorbs moisture well, so a fresh layer of the mixture will dry quickly and will not adhere to the surface. Our task is to reduce the absorption of the wall. For this, primer Condor, Ceresit and analogues are used. The operating algorithm is as follows:
- Testing acrylic for strength
- Apply 1-2 layers of primer,
- Apply putty.
If the old paint does not adhere well, then the wall will have to be cleaned with a spatula or abrasive. It’s easy to check the quality of the paint - make a cut on the wall with the angle of a metal spatula, if the paint does not start to crumble, then feel free to prime the wall and putty. If the acrylic crumbles, then there is an extra step in the work:
- Old acrylic is cleaned off,
- The wall is primed
- Apply a new layer of putty.
The optimal way to clean the wall is to use a metal spatula from 20 cm long - it removes the paint on all problem areas. In those places where the composition holds well, there is no point in removing it!
The primer is applied with a roller in 1-2 layers. The number of layers depends on the absorption of the wall. Apply the first layer, wait 4-6 hours and check the absorption of the wall; if it still absorbs moisture well, then prime twice.
The putty is applied 6-12 hours after applying the last coat of primer.
How to remove old paint
In most cases, the old coating must be removed. You can do this in several ways:
- Water-based paint is thoroughly washed off with water, after which the wall surface must be thoroughly dried before applying putty or other finishing materials.
- Oil paint is removed mechanically. It involves scraping the surface using special tools. This method takes a lot of time and leaves a lot of dust and dirt. It is recommended to use personal protective equipment - goggles and a respirator.
- The chemical method is the use of special reagents that destroy the paint layer. Substances that can harm humans are often used, so it is recommended that all manipulations be carried out with gloves, goggles and a respirator.
- The thermal method involves heating the paint surface with a hair dryer. As a result, the coating will begin to separate from the walls, and it will be quite easy to clean it off with a spatula and other tools.
Materials and tools
Can putty be applied to paint? It’s possible, but it’s important to choose the right building materials and tools:
- Finishing paint work is carried out with finishing putty, which has a fine fraction and is applied in a thin layer. This is necessary in order to obtain a perfectly flat and smooth wall surface.
- It is recommended to use gypsum or acrylic putty. It meets all the necessary requirements.
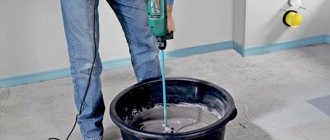
- To mix the composition, you may need a plastic bucket and a drill with a mixer attachment.
- Coarse sandpaper is used to sand the wall surface.
- A small spatula is needed to scrape off paint that is unstable on the wall surface.
- A large spatula will be needed to apply layers of putty.
Surface preparation
The surface, cleared of old paint, must be prepared for applying putty. To do this, you should inspect the wall for dirty stains that need to be washed off. Then the surface must be primed to ensure good adhesion of the putty to the wall.
If you cannot get rid of the paint, you should use the following methods:
- A smooth painted surface does not adhere well to putty, so you should make notches on the wall using a knife or other sharp tool.
- In some cases, builders recommend cleaning the surface with a wire brush or sandpaper to create roughness.
Any of the chosen methods guarantees a good result.
Preparing the painted surface
They operate in the following sequence:
- Furniture and household appliances are removed from the premises. Objects that cannot be moved, as well as windows and doors, are covered with plastic film.
- Use a knife or spatula to scrape off the peeling and cracked paint. Doubtful areas are tapped and scraped with a chisel. If they are not held firmly, they are also cut off.
- Tap the wall to check for voids under the plaster. If any are found, the solution is beaten down to the concrete, then a fresh cement-sand mixture is placed in the recess. Do the same with cracks.
- By knocking down the paint with a chisel and hammer, several lines are formed in the form of an oblique grid. This is easier and faster to do with a hammer drill with a special blade in the chuck.
- The paint in the “cells” of the mesh is treated with a coarse-grained abrasive in order to give the surface roughness. Use an angle grinder, a hammer drill with grinding equipment, or sandpaper on a special grater.
- Use an old broom and then a damp cloth to remove dust from the wall. After this, the paintwork is degreased with a soap solution. After a few minutes, the composition is washed off.
To speed up the drying process, the structure is heated with a heat gun.
Remove paint from the wall.
Application of primer
Using a primer to obtain a high-quality result is simply necessary. It must be applied to the wall surface before starting puttying. It can also secure a layer of putty.
Experienced builders recommend using a quartz primer, which has large fractions of mineral inclusions in order to create an ideal surface for attaching putty to the wall. The finishing primer, which is applied to the putty before subsequent finishing, is used with smaller fractions so as not to stand out too much against the background of a smooth wall.
Puttying on paint
Can finishing putty be applied to paint? This type of finishing work is acceptable, but you should adhere to these recommendations:
- When preparing the surface for puttying, it is necessary to clean the wall from dirt and dust, as well as sand the surface that could not be cleared of paint.
- The thickness of the layers of putty applied should be minimal. This is also indicated by the manufacturer on the label.
- It is recommended to apply a layer of primer before applying putty.
- If in some place it begins to lag behind the paint, this means either a poorly prepared surface or a too thick layer of the applied material.
- It is important to pay sufficient attention to drying the mixture before continuing finishing work.
- After finishing the puttying, you need to coat the surface again with a primer.
Is it possible to mix paint with putty? Can putty be mixed with paint?
Dry putty, can it be mixed with paint or can the putty be mixed directly into the paint instead of water.
It is technically possible to do this, that is, pour water into a container, add putty and mix it thoroughly.
Then add paint and mix again until smooth.
The proportions are arbitrary, it all depends on the color saturation; the more paint, the richer the color.
But from personal experience, I categorically do not advise carrying out such experiments, and certainly do not advise immediately using paint instead of water.
The composition of the putty should be balanced, only water is added to dry mixtures (according to the technology), it is not known how the putty will behave with paint.
I tried it, the putty cracked, and the color on the surface was uneven.
Putties in the mass are painted with colors, not paints.
But again, the putty (gypsum) should not be leveling, but textured, for example,
If these are leveling putties, then these are not finishing layers, but intermediate ones.
After the initial putty, the surfaces are primed and then a layer of finishing putty.
The finishing putties are polished, bringing the surface to “zero”.
By mixing putty on paint, or simply adding paint to putty, you worsen the technical characteristics of both putty and paint.
Unless, of course, we are talking about special putties for wood, metal, plastic, etc.
Read the information on the container, follow the recommendations from the manufacturer.
Source
Auto putty
Putty is also used in car repairs. Of course, this is far from the same material that is used to putty on walls, but the same question still arises: is it possible to apply putty to the paint of a car? This is absolutely not worth doing; such a structure will not hold up and will fall off immediately after drying. It is important to remove the paint layer from the car and strip the area down to bare metal. Only after this is the car ready to apply putty.
Putty on paint: nuances of working with a painted surface
After the layer has dried (no earlier than 12 hours), you can begin stripping it. To do this, use sandpaper with grit P100 and P150.
5. Then primer is applied and the next layer is applied.
6. The last layer is sanded again with finer sandpaper and primed again. Now the ceiling is ready for painting.
Advice. Start putting putty from the wall adjacent to the one where the window is located. This way you can see the work better. Do not apply a layer thicker than 5 mm. The putty does not dry well and may crack.
Selecting material, tools and painting the ceiling
Water-based paints have long replaced lime and chalk in our homes. Among them are acrylic and latex, silicone and silicate. But they are all diluted and diluted with water. It is difficult to recommend which paint to choose. To do this, you need to see the interior, the design of the room, know the tastes of the owner and his creative plan. But as for the technical side, tips for choosing water-based paint are as follows:
- The paint must have high hiding power.
- For wet rooms, washable paints are chosen. In other cases - with the usual parameters.
- Buy paint with a little extra. The fact is that in one batch, but in different jars, there may be paints with a tonal difference. And if you don’t have enough of one can of paint, you may not have time to buy a second one. And the ceiling needs to be finished painting.
And the last thing you need to know about paint: it becomes 2-3 shades lighter when it dries.
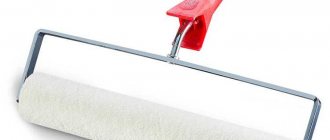
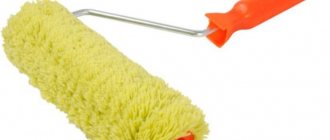
Tool
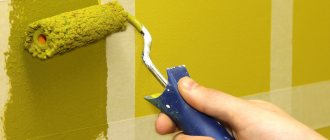
The paint is applied with a roller or brush. As for the brush, everything is clear here: they are needed only for lining the sides and corners. It is not worth purchasing them in large sizes. One flute brush no more than 10 cm wide will be enough.
But the roller should be given more attention. Its width is chosen within 20-25 cm. The pile should be medium. Long pile becomes heavier during operation, while short pile leaves streaks.
Don't buy foam rollers. They crumble already on the fifth or tenth square meter.
Advice. The best tool for painting is the ANZA roller. The painting process can be made easier if you use a telescopic handle.
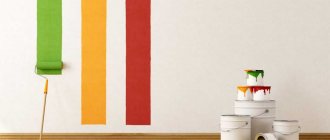
Painting
Painting the ceiling is the finishing line of its renovation. The process is simple, but requires compliance with the rules. First, layer the corners with a brush. The width of the layering should be approximately 5-6 cm. Paint from the window into the room. Layers of paint are applied in a mutually perpendicular direction. This is how an even surface coating is achieved. Now a little about the order of operations.
- Shake the jar, open it and mix the paint again.
- Pour some paint into the tray.
- We roll up the paint, lightly touching its surface. In this case, the roller is pulled along the bath.
- After removing excess paint, roll it across the ceiling using a W-shaped motion.
- When there is little paint left on the roller, they pass it over the painted surface with light movements, removing smudges and painting over the remaining stripes.
- After the first layer, you can apply the second one 12 hours later. If necessary, add a third layer.
Finally, the ceiling is allowed to dry thoroughly, and you can enjoy a job well done!
Video review: How to paint the ceiling correctly?