Ceiling painting technology
The ceiling should be painted in three layers, with the first layer being primer.
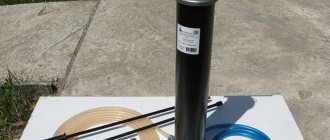
Tool: roller with fur coat; paint tray with squeezing mesh; brush - flute 50–80 mm; low-adhesive paper tape; stepladder.
The choice of roller affects the quality of ceiling painting, sometimes more than the paint itself. The best results are achieved when working with a long-nap roller. Fur coats with long pile create a rough “orange peel” finish, while those with short pile create a smooth surface. Foam rollers are not suitable for painting; they press air bubbles into the paint layer, which reduce the quality of painting. Velor is also not quite suitable - it doesn’t take much paint.
1. Preparation for painting.
Cover and cover floors, furniture, window sills and radiators with old newspapers or plastic wrap. It is better to secure newspapers to furniture and other places with low-adhesive paper tape. This tape can even be applied to wallpaper; once removed, it does not remove either the top layer of paper or paint.
Cover the wall below the installed polystyrene foam cornice with paper tape, wrap the heating pipe risers with tape - we don’t need to paint the walls and pipes yet. The paint does not bleed under the paper tape, and the tape itself is easily removed and leaves no marks. Remove the tape after the paint has thickened, but without waiting for it to dry completely.
2. Installation of lighting.
To achieve high quality painting, you need to be able to clearly see what you are doing. An energy-saving white lamp with a power of 15 W is used. Unlike incandescent lamps, it is safer and does not heat up the socket. The lamp, preferably with a lampshade, is attached to a temporary wooden tripod near the ceiling and moved as needed. Oblique lighting, almost parallel to the ceiling, will show all the unevenness of the base; it will not be too late to putty them, and during priming and painting, unpainted areas will be visible under this lighting.
3. Preparing the ceiling surface for painting.
After the lighting has been set, defects have been identified and uneven surfaces on the ceiling have been puttied, allow time for the newly applied putty to dry from 12 to 24 hours. Then the entire surface of the ceiling (or only the puttyed areas, if sanding was carried out earlier) is sanded with fine-grained sandpaper (“zero”). The sandpaper is attached to a small piece of flat board with rolled edges or to a special tool and the ceiling is sanded meter by meter. The work is not hard, but tedious due to its monotony - set up a stepladder, sanded a meter, moved the stepladder, sanded another meter... Then the ceiling needs to be dusted - vacuumed through the hair brush of a vacuum cleaner, or at least swept with a clean broom. This step is often skipped, but in vain, the paint (or primer) does not adhere well to the dusty surface.
As a primer, you need to use the composition recommended by the paint manufacturer; its name is written on the paint can. If the manufacturer allows priming with the same paint as painting, then the paint should be diluted exactly in the proportion that is recommended - add exactly as much water to the paint as indicated on the can, no more and no less.
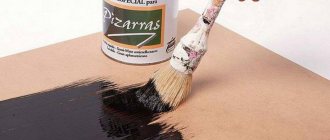
Pour the paint (primer) into a clean bucket. Add water (if recommended) and mix with a mixer. Using a round brush or a medium flange brush, paint the room around the perimeter, covering the entire cornice and carefully brushing the wall-ceiling corners. Paint around the heating pipes with a brush. In general, you need to prime all the places with a brush that cannot be reached with a roller. After which the ceiling is primed with a roller.
When triple painting (primer and two coats of paint), start from any of the window-side corners and work your way from the window to the opposite wall. The ceiling is primed in strips approximately 700–1000 mm wide. Prime the first strip from the corner with the window to the opposite wall, start another. The priming of the ceiling, as well as subsequent painting, should be carried out quickly, without interruptions - 15–20 minutes and the ceiling is ready. When painting, the “wet edge rule” must be observed, that is, the next strip must overlap the previous one along the wet layer. The overlap width is approximately 100 cm. Therefore, if you lack skill, it is better to prime (and paint) two people together. One works with a brush on the ceiling corners and cornice, the other immediately rolls up the ceiling.
Slowness in work leads to the beginning of polymerization of the paint on the ceiling, then when the second strip overlaps, the roller either “lifts” (tears off from the base) the previous layer, or lays on top and the paint film on the ceiling thickens - after drying, dark spots will appear. Avoid interruptions in work.
When painting with two layers (primer and one layer of paint), they also begin priming from the corner of the wall with the window, but change the direction of priming, in this case they work in stripes “across the light,” that is, parallel to the wall with windows. All this is done so that the last finishing layer of paint lies on the ceiling “in the light”, perpendicular to the wall with windows, in this case “unpainted” marks and marks from the roller will be less noticeable.
For a good opaque paint, usually expensive, two layers of paint are enough; for cheaper paint, three layers are done.
If you primed with diluted paint, wring out the brushes and roller after work, wrap them in a damp rag and tie them in two plastic bags. If you used a commercial primer, wash your brushes and roller coat first. In general, the times when entire books were written on how to extend the life of a paint brush and roller are long gone. Treat these tools as disposable tools and the quality of your finish will improve. If you can wash the instrument, wash it; if you can’t or don’t want to get dirty, throw it away.
5. Painting the ceiling.
Follow the instructions on the can and give the primer the drying time recommended by the manufacturer. Each new layer of paint should be applied only after the previous layer has completely dried. During long breaks in work, the ceiling must be free of dust. It is usually best to prime the ceiling in the evening so that you can apply a second coat of paint in the morning. It is applied across the primer strips. If this is the finishing layer for a two-layer painting, then it will lie “in the light.” If this is an intermediate layer in a three-layer paint job, then it will be “across the light.”
If the manufacturer recommends thinning the paint to the desired thickness, usually adding 5-10% water, pour the paint into a bucket and add water. If you don’t need to dilute the paint, just mix it with a mixer.
First, as with priming, the ceiling corners along with the cornices and hard-to-reach places around the pipes are painted with a brush. The ceiling itself is rolled with a roller.
Use a new roller or change the coat on the old one that was used for priming. Take the roller and dip it in the paint trough. In order to wet the roller on all sides, roll it out over the mesh of the trough or over a clean sheet of linoleum, hardboard, etc. But not on the ceiling! You may need to dip the roller in the paint again and roll it out again. You need to roll until the coat of the roller is completely saturated with paint. As painting work progresses, this operation is repeated with each set of paint. If you start painting the ceiling without ensuring that the roller is evenly filled with paint, you will end up with unpainted areas that will form stains after drying. Therefore, before each lifting of the roller to the ceiling, it is imperative to ensure that it is evenly filled with paint.
Next, lift the paint onto the ceiling with a roller and roll it out evenly so that the paint layer is the same thickness. Movements with a roller on the ceiling are reminiscent of drawing a huge letter N. We drew one letter, draw another next to it, without lifting the roller and partially overlapping what was painted.
The painter looks at the ceiling from bottom to top, along the lines of painting, he does not notice weakly painted and, most importantly, missed places on the surface of the ceiling, he does not see the place where he “walked” with a roller once, and where several. For him, the surface above him has acquired a uniform wet shade and it seems that everything is painted the same way. While the ceiling is wet, everything looks fine, but after drying, spots will appear on the ceiling. An energy-saving lamp mounted on a tripod high near the ceiling will help. The lamp must be installed on the side of the paint strip and then unpainted areas become visible. Experienced painters step aside from time to time and look at the painted strip of the ceiling from the side, identifying unpainted areas. You can work with an assistant - one paints, the other controls, examining the ceiling from a different angle. As a result of joint work, the ceiling will be painted evenly.
The third layer (if there is one) is applied only after the second layer has dried, usually within a day.
After painting each layer, strain the paint remaining in the tray through women's tights and pour back into the jar. Close the jar tightly. To store paint for a long time, turn the can upside down for a few seconds.
If spots appear on the ceiling after the paint layer has dried, then under no circumstances try to paint over them with thick paint - it will not help. This indicates that the ceiling was poorly leveled with putty, there are holes in it, or you applied a thicker layer of paint in some places when painting. Let us remind you once again that the paint must be applied evenly, observing the “wet edge rule” and each subsequent layer of paint should be done after the previous layer has completely dried. If you follow these rules, the thickness of the paint layers will be approximately the same over the entire area of the ceiling. Dark spots can then appear only from “pits”. The ceiling is illuminated from the window and the “bumps” will be illuminated better than the “pits”. Resign yourself and leave the ceiling as is, or try adding another layer of thinner paint over its entire surface.
If stains remain after this, all further painting work is useless and only leads to waste of material. The work needs to be redone.
You can try to correct the defect by sanding the entire ceiling with fine sandpaper on a block or grater. Be sure to do everything, otherwise after re-painting the stains will appear again. If you remove stains after the first or second coat of paint, the result will be better. And if you overlooked it and left many layers, then simply sanding the ceiling will not help - you will have to putty the ceiling again, sand it and paint it.
Tools and materials for work
To decorate the walls you will need the following materials:
- Water-based composition.
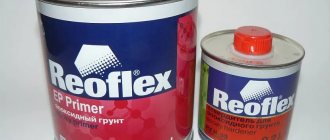
- Primer. When using penetrating agents, the paint adheres well to the surface. Priming allows you to avoid the appearance of streaks and smudges. If possible, choose a product of the same brand as the paint and varnish product.
- Sandpaper. For grinding, abrasive material of varying degrees of grain size is used.
- Putty. If a large number of irregularities are detected, the main and finishing mixtures are purchased. In the absence of major defects, it is sufficient to create a final coating.
- Polyethylene film. Used to protect floors and furniture from contamination by particles of building materials.
- Masking tape. Used to mark the boundaries of areas to be painted.
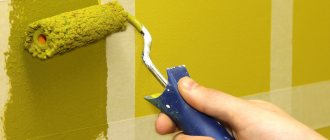
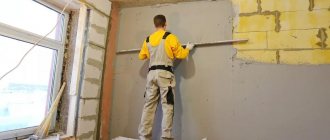
Water-based paint compositions are applied to the walls with a roller. You need to choose the right attachment for this tool.
The following cylinders help to paint the surface without streaks:
Velor roller for applying water-based paint.
- Foam rubber. The simple and cheap material absorbs a large amount of the color mixture, which causes smudges to remain. You can use thick foam pads.
- Velor. This type of roller can only be purchased at a hardware store. Velor captures a small amount of the composition, distributing it evenly over the surface. The tool often has to be immersed in a container with finishing material.
- Fur. Artificial material is practically no different from natural material. The fur does not leave lint or streaks, the attachment can be used for several years.
The length of the roller is also determined in advance. Retractable handles allow you to paint walls without any extra effort. You cannot choose heavy products. The following tools will also be required:
- tray with grooved side;
- construction mixer;
- brushes for painting hard-to-reach places;
- ladder.
On the left is universal water-based paint for walls and ceilings from the Expert company, on the right is water-based paint for walls from Diola.