For these purposes, it is convenient and practical to use silicone sealants.
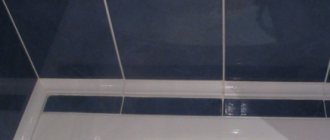
To remove old or freshly applied silicone sealant from an acrylic surface, it is important to know exactly how to clean the bath effectively, efficiently and without unpleasant consequences.
How to clean silicone sealant with chemicals
The mechanical method cannot completely, so it is often combined with chemical treatment.
The solvent is selected taking into account the composition of the sealant.
- Acid-based substances emit a vinegary odor; they can be removed with an acid-based solvent.
- Neutral silicone adhesives do not have a strong odor and are easily dissolved with gasoline, acetone or other organic solvents.
Household chemicals
A quick way to clean virtually any substrate. Do not use household chemicals to clean rubber and plastics.
Vinegar
Acidic sealants have a characteristic vinegar smell.
A pungent aroma is the main feature of budget sealants.
Their traces are easily removed with vinegar essence (70%). If necessary, the area is treated with vinegar several times.
Work with the essence is carried out with gloves on, with the windows open or forced ventilation turned on.
Alcohol
Alcohol-based sealant can be dissolved with industrial alcohol or ethanol. The compositions act in the same way, first softening the glue and then dissolving it.
To clean surfaces, a clean rag is dipped in alcohol, which is then used to wipe the dried mixture.
Petrol
Gasoline dissolves sanitary sealant and mixtures with a neutral base well. A small rag is soaked in the purified fuel and the dirt is thoroughly wiped off. If necessary, the processing is repeated. The dissolved layer is removed with a spatula, and small traces with a stationery eraser.
White spirit, acetone
White spirit or other solvents like acetone can easily remove traces of fast-hardening sealants. Neutral sealants, the main components of which are amines and alcohols, are washed off. They can easily clean any surface without damaging it.
Dip a cotton swab into the solvent and wipe the area. After the product has dried, cleaning is repeated if necessary. When the sealant softens to a mushy mass, it can be easily removed with a kitchen sponge.
White spirit cleans cast iron or enamel bathtubs well, but is ineffective on acrylic surfaces.
Professional solvents
- Tytan (Selena, Poland). Phosphoric acid based sealant solvent, odorless. Can easily dissolve dried silicone. The cleaner operates for 12 hours. It effectively cleans textured substrates, so it is often used to clean tiles with a three-dimensional pattern. The product leaves greasy traces.
- XADO Mottec Antisilicone (Ukraine). All-purpose alcohol-based car cleaner. Used to degrease and clean substrates from traces of tape and sealant. Can be used on ceramic and acrylic materials. Does not require rinsing, no traces remain after treatment.
- Soudal (Belgium). Hydrocarbon based silicone remover. Available in gel form. Easy to apply, has a moderately pungent odor. Begins to act after 10 minutes. Can only be applied to dry substrates. Before using on ceramic, acrylic, plastic and stone substrates, it is better to test the product on an inconspicuous area. After processing it leaves traces of fat.
- Body Antisil 770 (Greece). Car wash, which is available in aerosol form. Cleans any base. Based on organic solvents. Can dissolve various sealants. Stubborn stains may require re-treatment.
- Dow Corning (Dow Sil, USA). Silicone based solvent. Starts the depolymerization process of the sealant. Safe for any surfaces, including painted ones. Does not change the color of the dye, does not leave stains. Available in aerosol or liquid form. The latter is suitable for removing old traces of silicone.
- Penta-840. Cleans waterproofing from tiles, metal and acrylic substrates. A washcloth is used for application. After washing, the surface is covered with oilcloth for several minutes. The softened silicone is removed with a sponge.
Due to prolonged exposure of the remover to the metal, corrosion may begin. Do not allow the product to come into contact with the skin, eyes or respiratory tract.
Other surfaces
We seem to have sorted out the acrylic bathtub. But what about other surfaces on which silicone sealant remains?
To clean a glass surface, you have three options:
- The first and easiest is to use a sharp blade. The disadvantage of this method is that it will take you a lot of time, and there is a possibility of scratching the surface of the glass.
- The second is to use Penta-840, which is designed specifically for removing sealant.
- The third is to use white spirit or gasoline. They are inexpensive, and they are easy to buy at any specialized hardware store.
White spirit also works well with sealant.
Here's what you can use to clean ceramic tiles:
- Remove as much of the silicone sealant from the tile as possible, but be careful not to damage or scratch the tile. Then, using a soft cloth soaked in gasoline or white spirit, rub the product into the remaining glue. When it has softened, use a wooden scraper to remove any remaining sealant. When using the scraper, do not use too much force to avoid damaging the ceramic tiles.
- You can rub kerosene into the sealant until the glue softens and it does not take much time to remove it. Instead of kerosene, you can use a liquid solution, although it will take longer to act. You decide.
- You can use Penta-840 or Silicon-Entferner solvents. But before you start full-scale work, check whether your ceramic tiles are resistant to them, otherwise you may damage the surface of the ceramic and it will crack and harden.
You can remove sealant from the countertop using the following means:
- If the sealant has not completely dried, you can remove the sealant from the countertop using gasoline. Apply a little product to it, and when it softens, remove it with a cloth.
- If the sealant has frozen, cut off as much of the layer as possible with a sharp knife or blade. Then apply detergent to it until it is completely softened and remove using a wooden scraper.
- If you decide to use modern solvents on the surface of the countertop, then carefully read the instructions so as not to damage the material from which it is made.
The sealant can also be cut off with a utility knife.
Additional recommendations
The process of cleaning various surfaces from sealing agent residues will be simplified by using the following tips:
- A solution consisting of vinegar and ethanol shows excellent results in removing silicone. You can also add a little calcined salt. This solution is applied to the problem area for 25 minutes, after which the softened composition is removed mechanically.
This video shows a technique for removing sealant using phosphoric acid:
- Use tweezers or small pliers to remove material from the cracks.
- A regular eraser will help to clean the tiles from any remaining sealing mixture.
- After using industrial cleaners, yellow stains may remain on the surface. Regular laundry soap will help get rid of them.
In the following video you can find out even more information about the method of cleaning surfaces:
Problem and solution
Finishing work is the final stage of any renovation. According to any recommendations, when sealing cracks in the bathroom, you need to use silicone sealant. But at the same time, few people tell you how to use it wisely, so that you have as little of it as possible left on the surface of the bathtub or walls, since then you will have to clean it up. And since the sealant has high adhesive properties, you will have to work hard.
Nowadays, you just need to enter the query “removing sealant” into the search bar on the Internet and many pages will open where you will be assured that this is the method that will quickly and efficiently remove sealant from an acrylic bathtub. But, as practice shows, not everything is gold that glitters. Therefore, we asked advice from experienced specialists who have carried out similar procedures more than once or twice, and this is what they recommended:
- Removing sealant mechanically. To do this you will need a regular razor blade. Apply it to the surface of the acrylic bathtub and lightly cut off the remaining sealant. Moreover, your chance of scratching any bathroom, including an acrylic one, is minimal. The only thing you should pay special attention to is that you don't cut your hands yourself. Use a brush to sweep away any remaining silicone. A stationery or sharp construction knife. That is if you don't have a blade in your house. In this case, you do not immediately cut off all the sealant, but act gradually, cutting off layer by layer. Do not try to peel off the sealant, otherwise you will remove it along with a piece of acrylic tub to which the silicone adhesive is firmly stuck. In this matter, haste can cost you dearly. So please be patient and have some free time. Please note that silicone sealant is more difficult to cut than acrylic. The first one is better removed using other means.
- Removing sealant using chemicals. Firstly, we are talking about solvents. Such as Lugato, Quilosa, Penta-840, CRC Gasket Remover and others. Many people recommend using Dow Corning OS-2. They are available in the form of liquids, aerosols or pastes. The method of using liquids is very simple: you apply it to the sealant, it softens and is easily removed. If you decide to use aerosols, then stock up on gloves and a protective mask. Shake the can and apply it to the surface of the bath. And after 20 minutes you can remove the sealant by wiping the surface with a napkin. Or if there is still something left, then use a spatula.
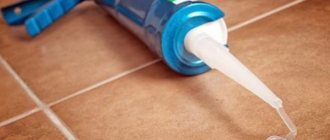
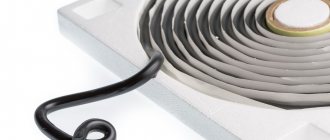
Sealant can be removed using various solvents
To avoid damaging the acrylic bath, apply a small amount of solvent to the surface in a place where it will be least noticeable in the event of an unexpected reaction of the enamel or paint to the preparation. In general, when a solvent gets on the sealant, it either turns into a kind of mush or softens, which in any case makes it easy to remove it from the surface of the bathtub.
Secondly, you can use white spirit, especially since it is inexpensive. To begin, you will need to cut off as much of the sealant as possible with a knife or blade, and then rub white spirit into the area using a soft cloth. After some time, the glue will soften and you can carefully remove it with a wooden scraper without damaging the surface of the bathtub.
If you have to dismantle an acrylic bathtub, and not just remove a couple of drops of sealant, then we are talking about completely removing the old glue and installing a new sealant in its place. Then you have to do the following:
- First, tear off the bathtub tray. Since the sealant has strong bonding properties, you will have to sweat. In addition, for these works it is advisable for you to have an assistant. First, try picking up a thin layer of silicone with a construction knife and using a screwdriver, pry the bathtub in several places. When the bath gives way, move it away from the wall.
- Proceed to clean the tiles and surface of the bathtub from the old sealant. Using a cloth soaked in solvent, make circular movements to remove the silicone, and upon completion of work, wipe the tray with a dry cloth.
- Having done all of the above, apply a layer of new silicone sealant to the surfaces of the tiles and tray and install the acrylic bathtub in its original place. If there are cracks or gaps left somewhere, also treat them with sealant. Clean up any excess glue immediately so it doesn't dry out and you don't have to start over.
Cleaning plastic from sealant
The smooth surface of plastic has low adhesion, so the adhesion of sealants to it will be minimal.
- Large sagging is cut off from the plastic base.
- The remaining stains are softened and removed with a suitable solvent.
If you need to remove a layer from plastic in the bathroom, use a substance that will not damage the bathtub bowl or tray. Before cleaning, the effectiveness and safety of the solvent is tested on an inconspicuous area. Softened residues are removed with a soft abrasive or just a hard sponge. If the removal does not work the first time, all steps are repeated.
Folk remedies for removing sealant
Folk remedies for removing sealant from a bathtub can also be effective. The still wet layer of the substance is simply removed with a wool cloth or a rubber scraper. But hardened material requires more drastic measures.
Traditional methods involve not only the use of sharp objects, but also the creation of solutions using improvised products. And often this is the best option; there is not always a desire to use harmful chemical compounds.
The still wet layer of the substance is simply removed with a wool cloth or a rubber scraper.
Regular table salt or soda
Regular salt, which is found in every home, will help you cope with the task. Salt is poured onto a sponge, and the coating is vigorously scrubbed with it. The wet state of the salt is important in this method. This technique is effective for thin layers or for small areas; large areas cannot be eliminated. But salt can deal with small stains quickly.
Soda is used in the same way; the cleaning process is the same as working with salt. The cost of such methods is minimal, and the presence of products in the house allows you to cope with the task at any time.
The wet state of the salt is important in this method.
From glass and mirror surfaces
You need to use a hair dryer. After the sealant has sufficiently warmed up, it is pryed off from the edge and it can easily move away from the glass or mirror. But sometimes traces remain; they are removed with White Spirit solvent. If you don’t have this at hand, you can try to wipe off the traces with table vinegar.
Gasoline is not the best way to get rid of various contaminants on glass. It will cope with the problem, but will leave behind multi-colored stains that are not so easy to wash off.
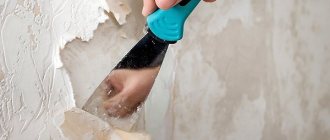
Mechanical removal methods
There are many ways to solve this problem, which have been tested by experts in real life. First, you should familiarize yourself with mechanical methods. In the process you will need: a knife, a blade, rags, an eraser.
The most popular method is removal with a razor or a regular blade. It must be sized to completely grip the sealant line and sharpened.
The blade is simply applied to the acrylic surface and guided in the direction of the sealant, thus cutting off excess material.
There is no need to worry about damage to the bathroom, since acrylic, like other materials, is quite resistant to mechanical damage. If scratches appear, they will be almost unnoticeable, but to reduce risks it is better to act cleanly and carefully, and most importantly, slowly .
The knife also acts like a blade, carefully cutting off the remaining material with its sharp part. The main thing is not to take an ordinary table knife, but to use a sharpened stationery or construction knife, since they are most suitable for this task. Residues can be easily removed with a simple eraser.
You should not try to simply peel off the sealant, as this method will lead to serious damage to the acrylic coating. It will simply come off along with the silicone.
How to replace sealant
First of all, it is important to choose an original product from a trusted manufacturer. Bathroom compositions must contain a biocide (antimicrobial component). It is advisable to purchase sanitary silicone sealant in specialized stores: as a rule, storage conditions are observed there and there is less chance of buying a fake.
Technology for applying a new layer of sealant:
- The working surface is degreased with any available means and dried thoroughly.
- To prevent unwanted contact of sealant with surrounding areas, the area around the work area can be covered with masking tape.
- The tube with sealant is prepared for use according to the instructions.
- Carefully apply the composition.
- Form a seam around the entire perimeter of the application, removing any remaining sealant. To obtain an even, uniform seam without defects, it is better to use not your finger, but a spatula, a ruler or an old payment card.
- Before use, wait until the sealant has completely dried (12 to 24 hours).
Note: Sealant should not be applied to wet surfaces. Even if the silicone adheres to the base, mold is guaranteed to begin to grow underneath it.
In practice, even high-quality formulations with antifungal additives can be affected by mold. This is possible in a number of cases:
- violation of sealant application technology;
- purchasing a counterfeit;
- favorable conditions for the development of fungus (high humidity, poor ventilation).
If every time a fresh sealant quickly becomes covered with mold, you should eliminate the listed reasons one by one (purchase the product from another store or from another manufacturer, check the humidity in the bathroom).
Advice! If you need bathroom renovation specialists, there is a very convenient service for selecting specialists from PROFI.RU. Just fill out the order details, the experts will respond and you can choose who to collaborate with. Each specialist in the system has a rating, reviews and examples of work, which will help with the choice. Looks like a mini tender. Placing an application is FREE and does not oblige you to anything. Works in almost all cities of Russia.
If you are a master, follow this link, register in the system and be able to accept orders.
Remove sealant from tiles
After renovation, it is often necessary to clean the silicone in a tiled bathroom. Part of the grout remains on the surface after sealing the joints and hardens fairly quickly. It is impossible to wipe it off after hardening without the use of special means.
Contaminants are removed in several stages:
- Use a knife to pry up large pieces of silicone and tear them off. If the surface of the tile is covered with glaze, it is better to use a wooden scraper to avoid scratching it.
- The remaining silicone is treated with a solvent (kerosene, gasoline) to soften it. To soften, apply a cloth to the silicone for 1-2 minutes. This period is sufficient for the material to dissolve.
- After softening, the sealant is wiped off with a rag.
- Grease stains remain on the treated surface, which can be washed off with dishwashing detergent.
Need to remember
The task of the sealant is to protect the integrity and isolate the required structure or connections from moisture. It initially has a paste-like substance that hardens in air. Moreover, the longer the contact with air, the stronger the adhesion. Therefore, it is important to immediately remove any traces of sealant.
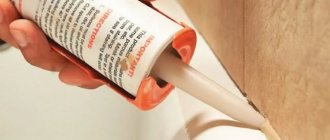
When choosing a sealant for your home, you should pay attention to the packaging. Aluminum tubes and “cartridges” are easier to use at home. A special applicator (“gun”) is convenient for precise application of the composition. And the chance of getting your clothes dirty is minimized.
Advice from professionals
In stores you can find many solvents for removing sealant, but it is unknown whether they will remove silicone. Therefore, it is more economical to start with traditional solvents - vinegar, gasoline, white spirit and others.
Before removing the sealant with an expensive solvent, you need to test its effectiveness on a small area. After a positive result, you can begin to clean the entire surface.
Silicone rubber in the sealant can reliably adhere to different surfaces and penetrate deep into their structure. Therefore, it can be difficult to remove such sealants from the surface, but it is possible. The examples and tips given above will help you do the job confidently and efficiently.
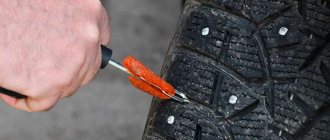
In this video, car enthusiasts will learn how to remove silicone from headlights using a handy tool that can be found in every kitchen.
From hands and clothes
Clothes can be cleaned
When using sealant, a small amount may come into contact with skin or clothing. If this was immediately noticed, then the product can be removed quickly and without a trace. But what to do if the layer is dry? To remove sealant from clothing, you can proceed as follows:
- Remove soiled clothing, stretch the stained area, pick up the resulting film and remove it with your fingernail.
- Place things in the freezer for several hours. After this, removing pieces of silicone will be just as easy. In addition, no stains will remain.
- Soak clothes with dried sealant in vinegar for 30 minutes, and then remove the composition with a rag.
- If you have alcohol or vodka on hand, you can use them. After wetting, the stain should be cleaned with a brush.
Wash off skin with laundry soap
If the sealant gets on the skin, you must also take care to remove it. You can remove silicone residue from your hands using a solution of warm water and salt. You should hold your hands in the basin for a few minutes (the water should completely cover the dirt), and then remove the sealant with a hard sponge or pumice stone. It is important to note that the silicone may not be removed the first time, so the process must be repeated. Instead of table salt, you can use laundry soap - the process is completely identical.
If neither salt nor soap helps, take vegetable oil, heat it a little and apply it to the skin. After this, use washing powder to wipe the skin until the sealant is completely removed.
In addition to traditional methods, you can also consider special products that are sold in the store. But it is irrational to purchase them if they are slightly dirty.
Safety precautions
- Work with piercing and cutting tools is carried out using gloves made of thick rubber.
- All cuts are made slowly and carefully, removing the old coating one millimeter at a time.
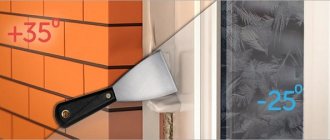
- When working with aggressive chemicals, acid-resistant construction gloves are worn on your hands.
- Free air circulation is ensured in the room, windows and doors are opened, and artificial ventilation is turned on.
- Protect your eyes from acids and dangerous vapors with plastic goggles.
- A respirator or disposable protective mask will protect against harmful substances entering the respiratory system.
Chemicals
If mechanical methods are completely unsuitable, then chemical agents with special compositions come to the rescue.
It is believed that they can quickly get rid of unsightly residues of sealant or at least prepare them for cutting. Chemical means for removing silicone sealant should not be understood as powders, household cleaners, or any chemicals with abrasives.
Their use on an acrylic bathtub is fraught with serious consequences in the form of a damaged coating with various scratches and erased places.
The choice of solvent also greatly depends on the composition of the sealant that was used in the repair. There are acidic and neutral mixtures. In the first case, the base is acetic acid, which evaporates when it hardens. The second option is made on the basis of components such as amides, alcohol, ketoxime and amines.
If the former are removed using acetic acid, gasoline, white spirit, kerosene and ethanol (the most effective remedy), then for others you will need products based on concentrated alkalis.
The solvent may leave greasy stains, but don't be alarmed. They can be easily removed with ordinary household chemicals, such as dishwashing liquid or laundry gels.
During the work, you may need napkins or rags, wooden spatulas.
The following products can deal with sealant:
- Lugato Silicon-Entferner is a specially developed cleaner for silicone residues. Its consistency is a paste, which is evenly applied to problem areas and left for several hours. It must be removed not just with a rag, but with a wooden spatula. The product will be removed with the tool along with the remnants of the hated sealant. It is well suited for both acrylic and many other surfaces, so it can be used by the master in further work;
- Soudal Silicone Remover is a product for softening and removing silicones that are in a solid state. It is intended to prepare the surface for applying a new layer if sealant has already been used there, but it is also quite applicable in the case of excess. The product is distinguished by the fact that it has a pleasant lemon scent and a brush with a spatula included so that the application of the gel is as precise and accurate as possible;
- Penta 480 is already a liquid, which, according to manufacturers, copes with both fresh and old sealant. Also, using this product you can easily refresh or replace seams. It is used as follows: soak an ordinary rag and apply it to the required areas, after which the whole thing is covered with polyethylene to create a greenhouse effect;
- Dow Corning OS-2 is a product available in three variations: liquid, spray and paste. It is quite popular among craftsmen because it is easy to apply and quickly removes the sealant. Apply to the sealant, leave for 20 minutes until it softens and simply remove. The main thing is to equip yourself with protective gloves and even a mask when using an aerosol. The product is considered very aggressive, so first you should test it on a small and almost invisible area to avoid unpleasant consequences;
- White spirit is another high-quality product that has a low cost compared to analogues. The work will consist of two stages: first, part of the sealant is cut off, and then the spirit is rubbed in with a soft cloth. This should help soften the sealant, which can then be easily removed with a regular spatula. Thus, the original appearance of the bathtub is restored and the acrylic coating does not deteriorate;
- You can also add products such as HG Silicon seal remover, Mellerud, Soudal, Sili-kill. When choosing, proceed from your personal needs and the quality of the sealant used, if such information is available.
Important ! One should not forget about precautions, even if the manufacturer assures that the acrylic coating product is completely safe.
Before applying it to all problem areas, it is better to check the effect of the liquid or paste in advance. To do this, it is applied to an inconspicuous place, and after some time the reaction of the enamel is checked.