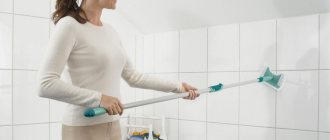
Quite often, after taking a bath, the owners of an apartment or country house are faced with the problem of water accumulating on the floor surface. Simply put, a puddle forms on the floor, the cause of which is a loose joint between the plumbing bowl itself and the walls of the room.
You can call a finisher, or you can try to deal with the problem yourself. After all, sealing the seams between the bathtub and the wall is not the most difficult operation. The main thing is to strictly adhere to the chosen technology and carry out all the steps it provides sequentially.
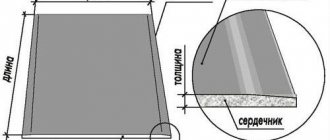
Sealing a seam in a bathroom
When it comes to sealing seams in rooms with difficult operating conditions, several options for solving the problem are possible. In particular, sealing a seam in a bathroom involves using the following methods:
- Mortar.
- Filling with polyurethane foam.
- Putty with silicone (or acrylic) sealant.
- Installation of ceramic or plastic skirting boards.
- Adhesive border tape.
Important: you can use several (two or more) methods in combination.
The agony of choice: what type of sealant is best for the bathroom?
The breadth of the assortment makes your head spin when you look at the shelves of a hardware store. In fact, the task is not that difficult, especially with the right approach. First of all, you need to choose the appropriate type of sealant from those that are most often used in bathroom renovations.
Types of sealants for bathrooms
- Silicone. It has a high degree of adhesion to most materials, which makes it the most popular sealant, but has a negative impact on cost. Resistant to ultraviolet radiation, moisture, high and low temperatures, due to which it has a long service life. Insignificant shrinkage, which does not exceed 2%, makes it the optimal choice for sealing moving joints. Due to its high elasticity, the finished seam is easily deformed and is not able to hold paint.
- Acrylic. Almost as good as silicone in terms of adhesion, immunity to ultraviolet radiation, temperature fluctuations and high humidity. At the same time, it has a more affordable price if you compare the prices of one company. Its use is limited by the low elasticity of the seam, which is not suitable for surfaces that may be subject to deformation. Acrylic sealants can be painted, varnished or plastered.
photo from the site https://www.mota.ru
- Polyurethane. It is most often used to replace an old layer of sealant, since it is not so critical to surface preparation and works well on difficult-to-clean residues of silicone compounds. As with the use of acrylic compounds, the finished seam can be opened with varnish or paint.
- Silicone-acrylic. It occupies an intermediate position between the two types, differing in good elasticity and strength. Another area of application for sealants in this group is gluing surfaces.
Choosing the best
If you are going to seal the seams in the bathroom with sealant, the best choice is silicone sealant, which, in turn, is divided into two types:
- Acid. They cope with their tasks perfectly, but the acetic acid contained in the composition has a detrimental effect on metal, stone, marble, mirror and lime-plastered surfaces. Due to their affordable cost, it is acidic silicones that are usually used by hired workers. If the seams of acid-resistant materials in your bathroom require sealing, check this point. You can tell that an acid sealant is being used by the characteristic smell of vinegar or the “A” marking on the package.
- Neutral. Due to the fact that the components of these compositions do not enter into chemical reactions with alkalis and metals, they are used for any surfaces. Such versatility has a negative impact on the cost of sealants, but for the sake of preserving finishing materials or plumbing fixtures, it makes sense to pay more. An indication that a neutral sealant was used is the absence of a strong odor and the “N” marking on the tube.
photo from the site https://parazit.pro
The warmth and humidity in the bathroom are favorable conditions for the development of fungi. To prevent black mold that is resistant to removal from spreading throughout the bathroom, choose a sealant labeled “sanitary.” It contains antifungal substances that will prevent the development of mold spores.
For plumbing fixtures made of acrylic, it is better to choose a sealant of the same name. Due to the similarity of the compositions, the connection will be stronger and more durable. Please note that not all acrylic sealants are moisture resistant, so read the manufacturer's recommendations before purchasing.
Additional properties
All sealing mixtures on the market contain various additives that give them certain qualities:
- Extenders - provide significant expansion of the material, indispensable for filling wide joints, for example, around sewer pipes.
- Fillers (quartz dust or chalk) - improve adhesion and reduce the cost of production.
- Fungicides and antibacterial components – prevent the development of pathogenic microflora.
- Organic solvents, mineral oils - serve as a tribute to environmental cleanliness and harmlessness of fumes to humans.
- Pigments provide a wide range of colors, making it easy to match the sealant to colored plumbing fixtures or tiles.
photo from the site https://sreda-obitaniya.ru
The content of additives in quality material should not exceed 10%. Otherwise, the main functions - waterproofing, elasticity and durability - suffer.
A small amount of this product can be wiped off with alcohol, gasoline, or white spirit. There are plenty of different solvents on sale that can be used to remove sealant from the surface. But most of them do not completely clean the silicone, but only soften it. But after that it will be much easier to remove it. But it is worth keeping in mind that all of these products may have some restrictions on use on certain types of surfaces. Therefore, you first need to try them in an inconspicuous place.
Silicone-based sealant is a convenient and practical product, and it is quite easy to use. Using it in the bathroom can effectively protect this room from the appearance of traces of mold and mildew.
Sealing the joints between the bathtub and the tiles with mortar
One of the oldest methods of sealing seams between plumbing fixtures and walls in bathrooms is rightfully considered to be laying the joints with mortar. And this method involves several mandatory technological steps:
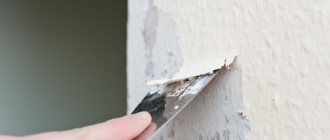
- First of all, the seam is cleaned of old materials, and very carefully.
- If the gap is large, then it will first need to be plugged with a rag soaked in a fairly liquid cement-concrete mortar.
- The surface edges are wetted so that the solution adheres better.
- Afterwards, the joint is filled and leveled with a medium-thick solution.
- The dried seam should be refined: puttied and painted;
- decorate a ceramic plinth from a frieze or borders (if the bathroom walls are tiled);
- stick a plastic plinth or a special border tape.
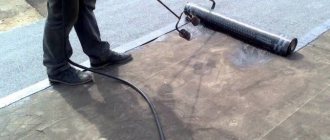
The process of sealing a seam using a solution can be seen in the video review:
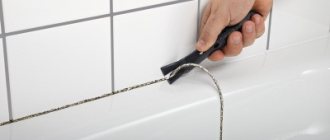
We use masking tape
Apply masking tape on both sides of the joint (professionals recommend using Eurosel, Tesa) and apply silicone. This method is also called dry grouting because the tiles are not wetted. If you accidentally missed any area, you can add more grout.
Using masking tape to create an even seam
The advantage of this method is that the surface around the seam remains clean. This is the best option for beginners as there is an opportunity to correct mistakes.
Sealing the joint between the bathtub and the wall using polyurethane foam
Filling the seam between the bathtub and the wall with foam is one of the easiest ways to solve the problem. Especially compared to the outdated solution method. And one-component polyurethane foam, which has excellent water-resistant qualities, is best suited for these purposes. You just need to work very carefully, since polyurethane foam that gets on tiles, painted surfaces, or even hands is extremely difficult to clean off later.
The “foam” process of sealing seams is simple:
- first the seam is cleaned, degreased and thoroughly dried;
- the foam in the container is shaken properly and poured into the cavity of the leaking joint;
- 40 minutes are allotted for complete foam drying in a room with high humidity;
- excess foam along the edge of the bathtub is carefully removed with a painting knife;
- Then the sealed joint is designed at the discretion of the master.
Important: during the drying process, the polyurethane foam increases in volume several (up to 30) times. Therefore, it is necessary to clearly measure the amount of composition to be laid.
You will see a detailed description of the process of sealing a joint using foam by viewing this review:
How to avoid a gap near a wall
The bathroom is a room with high humidity, so it is necessary by all means to prevent water from getting on the surface. Installing an exhaust device helps with this. The correct connection of the bathtub to the wall is also of great importance. The outside of this plumbing fixture is covered with a screen, limiting access to the surfaces behind and under the bathtub. If there are cracks left, water will get in. It is difficult to remove, because mold often grows behind the screen.
It is impossible to avoid the formation of gaps between the bathtub and the wall. But you can choose a method of installing it in which the gaps are minimal. They can be easily eliminated using silicone moisture-resistant sealant, since the distance between the bathtub and the wall is small.
Craftsmen disagree on when to install plumbing fixtures: before or after laying the tiles. Experienced people advise doing this last, but they recommend preparing the walls in advance for installing a bathtub: making grooves in them for the sides. Thus, they (the sides) can be “embedded” directly under the first row of tiles. This method of installing plumbing equipment has its advantages:
- The sides of cast iron and steel bathtubs are rarely even. With acrylics in this regard, things are much better. By sliding the bathtub into the grooves, you get minimal gaps between it and the walls.
- To design such joints, no finishing materials are required. The method is beneficial in terms of saving money and labor costs.
High-quality seam sealing in the bathroom with sealant
To reliably seal a leaky joint between the bathtub bowl and the wall/walls of the bathroom, special sealants are often used. And sanitary silicone sealant in a special cartridge tube is best suited for these purposes.
The choice of a sanitary hermetic composition is fundamental, since additional antiseptic protection in such a difficult room from the point of view of operation as a bathroom is simply necessary.
But the shade of silicone sealant can be either transparent or colored - this only matters for the intended finishing of the joint. So that it fits as harmoniously as possible into the existing or planned interior.
Before starting the caulking activities, you should acquire the necessary tools:
- construction plunger gun;
- and large scissors.
And, of course, there should be a cartridge with silicone sealant, as well as border tape or plastic baseboards for the final decorative finish.
The sealing process is simple, but must be carried out technologically sequentially, without skipping the necessary operations:
- First, the joint surface is prepared for sealing. Cleans (both the side of the bathroom and adjacent parts). There should be no trace of old materials left - no peeling layers or protruding residues.
- Next, the surface is degreased (for these purposes you can use a regular solvent), and then thoroughly dried.
- Using scissors, cut off the plastic spout from the sealant cartridge. And it should be borne in mind that the thickness of the future seam directly depends on the size of the cut. The sharper the tip, the thinner the seam, and vice versa.
- The sealant is applied to the joint area very carefully, without rushing. Either by pressing on the tube or using a plunger gun. In both cases, you need to install the cartridge at the starting point of the seam.
- The applied sealant is leveled directly with a finger dipped in a soap solution.
The sealant dries quite quickly in the joints. And after it has completely dried, the seams are decorated either with special skirting boards or with border tape.
Detailed instructions are presented in the video review:
How to make an even seam with silicone sealant? Expert advice
When making repairs on their own, many are afraid to treat the seams with sealant: they are scared away by the viscous, quick-drying material that can stain the surface. But working with it is not at all difficult, and the results are excellent.
Often, plastic corners or jointing (grout) are used for the inner edges of tiles. But the corners do not fit tightly, and dirt accumulates under them due to humidity. And the edge worn with jointing becomes cracked over time. In this case, silicone grout is the most reliable method.
Required Tools
What you need to create a beautiful silicone seam:
— A gun for silicone or a tube (before starting work, you need to cut its nose at an angle of 45 degrees. Make a hole slightly larger in diameter than the width of the future seam).
— A tool for forming a seam and removing excess grout.
- Sponge or cloth.
— A container for soap solution or detergent, and if you chose the dry method, masking tape.
— A small unnecessary container for removing silicone residues.
As a tool you can use:
— Special spatula.
— A plastic card with corners cut off (the cuts should be slightly wider than the future seam).
— A stick with an oval edge (wooden, plastic, plexiglass).
Don't forget to prepare the work area - it should be free of dirt and dust and degreased. Then choose one of three ways to create a smooth joint with caulk.
We use masking tape
Apply masking tape to both sides of the joint and apply silicone. This method is also called dry grouting because the tiles are not wetted. If you accidentally missed any area, you can add more grout.
The advantage of this method is that the surface around the seam remains clean. This is the best option for beginners as there is an opportunity to correct mistakes.
Using detergent
Fairy is usually used. Take a rag or sponge and apply detergent to the sides of the corner without wetting the seam. Then apply silicone. In this case, it will only stick to the seam, and not to the tiles and drywall.
Apply soap solution
Apply some excess silicone, then wet the corner and tool with a regular solution of water and liquid soap (diluted as for soap bubbles). Quickly remove excess. This is a quick method, but requires some experience. If everything doesn’t work out the first time, you’ll have to redo it, since the sealant will no longer adhere to the wetted surface.
Forming an internal corner
Squeeze the sealant evenly along the corner, then moisten the surface with a soap solution. Remove excess silicone. As the tool becomes dirty, clean it by removing the residue from the spatula into a suitable small container. Forming an external corner If the edge is too long, it is better to make it from special corners. For short edges, silicone is also suitable. Here we need painting tape. We glue it 2-3 mm from the corner boundaries. Apply sealant and remove excess. In this case, the working area does not need to be wetted. We begin to remove the painting tape while the grout has not yet hardened.
How to seal a wall-to-floor joint
The sequence of actions is important here. First, all vertical wall joints are treated with silicone. After they have completely hardened, we take up the silicone seam on the floor. Apply silicone along the corner, then moisten it with a soap solution and remove all excess.
The wall-ceiling junction is formed in the same way, but the sealant for it is replaced with acrylic (it can be painted later). As you can see, there is nothing difficult in making an even silicone seam. Start with the simplest method - and everything will work out!
Sealing a seam in a bathroom with tape
One of the most effective methods of sealing the joints between the bathtub bowl and the walls is to finish the seams with a special border tape. But only where we are talking about very small gaps.
Self-adhesive border tape is one of the easiest modern finishing materials to use. It is a strip of super-thin and super-durable plastic with a highly adhesive layer of sealant on one side. This tape is very elastic and fits perfectly into the corners of the joints, sealing them securely and making an insurmountable barrier to moisture penetration.
This type of border strip is especially relevant for bathrooms whose walls are tiled. And sealing the seams between the bathtub and the tiles with tape is a very simple process that does not require any special skills. However, this operation must be performed in stages:
- cleaning, degreasing and drying the joint;
- peeling off the paper fuse from the curb tape;
- warming up the released sticky layer (this can be done using a regular hair dryer or a construction hair dryer);
- applying with simultaneous alignment of the tape on the seam;
- gluing the applied border tape along the joint;
- pressing and smoothing the tape over the surface.
The advantages of this method of sealing seams between plumbing equipment (bathtub) and walls are obvious:
- Speed.
- Simplicity.
- No need for any additional and/or finishing.
An example of using border tape from one of the German manufacturers is presented in the video review:
How to remove sealant from ceramic tiles on a wall
Ceramic plates are wear-resistant and practically unaffected by chemicals, but they must be wiped carefully, following the following sequence:
- Remove the excess with a stationery or household knife, without cutting right to the slab, so as not to scratch it.
- Soften with Silicone Entferner, Penta 840 or White Spirit.
- Mechanically work on the excess with a homemade wooden scraper.
For more information on cleaning walls from silicone, read the article How to remove silicone sealant from tiles.
Sealing the joint between an acrylic bathtub and the wall
Acrylic bathtubs are installed in many living spaces today. People are increasingly choosing just such bath bowls (or liners), because they look beautiful in appearance and are incredibly easy to clean.
However, when installing an acrylic bathtub, the same problem of leaking joints between the bowl itself and the walls can and often does arise.
There are several ways to close the gap and seal the joint efficiently:
- acrylic or silicone sealant (and here it is better to take an antiseptic composition);
- installation of a special plinth;
- use of polyurethane foam.
But the best option, of course, is to use a sealant. Acrylic or silicone – it doesn’t matter, but its composition must have the following properties:
- adhesiveness;
- plasticity;
- absolute resistance to water;
- tint stability (should not turn yellow, become covered with stains, etc.).
In addition, such a sealant must be completely safe for human health. To do this, you must carefully read the component composition of the product printed on the label. A truly high-quality sealant should not contain any organic solvents. For example, acrylic and silicone sealants made in German, Czech, Belgian and Turkish have gained the trust of buyers on the market.
As for the actual process of sealing the joint between an acrylic bathtub and the walls using sealants, it is absolutely identical to the above-described method of sealing joints using sanitary silicone sealant (for other surfaces).
Of course, the gap to be sealed must be clean, grease-free and dry. And on top of the sealant layer, you can apply a thin and elastic curb tape as an aesthetic finishing coating.
Acrylic surfaces
To remove sealant from a plastic bathtub, you cannot use more than ten types of chemicals, which makes cleaning such plumbing equipment difficult.
It won’t be difficult to purchase exactly the substances intended for caring for acrylic surfaces (from manufacturers of bathtubs and shower stalls). Do not use the following substances to clean acrylic:
- knives, scrapers, scissors, etc.;
- organic solvents;
- abrasive substances.
To remove old silicone-based sealant, leave the surface treated for 24 hours. If there are no chemicals nearby, use a gentle soap-based solution. Constantly lubricate the sealant for 2 days, and then scrape it off the acrylic, wipe dry and finish with alcohol/vodka to degrease.
Combination of different methods
Experts in the field of finishing work believe that no matter how effective each of the methods of sealing the joint between the bathtub and the wall is considered, the most reliable is still a combination of two or more of these methods.
And the most common combination is applying sealant over dried polyurethane foam. First, the master pours the foam (as described above), waits for it to dry, and then cuts off the excess. And then a layer of silicone (or acrylic) sealant is applied.
The result is a smooth joint with an ultra-strong level of protection from water. And if you also stick a border tape on top, the level of reliability and durability of the sealed seal will triple! And the bathroom itself will look complete in terms of design, neatly decorated.
( 50 votes, average: 4.70 out of 5)
Related Posts
Required Tools
What you need to create a beautiful silicone seam:
- A gun for silicone or a tube (before starting work, you need to cut its nose at an angle of 45 degrees. Make a hole slightly larger in diameter than the width of the future seam).
- A tool for forming a seam and removing excess grout.
- Sponge or cloth.
- A container for soap solution or detergent, and if you chose the dry method, masking tape.
- A small unnecessary container for removing silicone residues.
As a tool you can use:
- Special spatula.
- A plastic card with the corners cut off (the cuts should be slightly wider than the future seam).
- A stick with an oval edge (wooden, plastic, plexiglass).
A special spatula for creating an even seam.
Don’t forget to prepare the work area - it must be cleaned of dirt and dust and degreased. Then choose one of three ways to create a smooth joint with caulk.