Building a house or updating it is always very pleasant and expensive. From the very beginning of the process, we begin to wait for the long-awaited moment of completion. And in this interval, hour by hour we are surprised by unexpected expenses. If you want to save a little money or simply make a ceiling in a private house with your own hands, our article will help you make your dreams come true.
Plastic ceilings
If you are interested in how to decorate the ceiling with plastic panels with your own hands, a metal profile or wooden blocks are enough for the frame.
However, slatted ceilings include stringers and U-shaped strips, which can also be used to make a frame. For rooms where there is high humidity - just right.
Ceiling repair with plasterboard: beautiful, functional, convenient
Why has drywall gained popularity so quickly in the modern construction market, and continues to maintain it relative to other materials? The answer is simple - it is absolutely universal.
Drywall is applicable in almost all finishing works. It is easy to install, and so simple to process that it allows your design imagination to run wild. Therefore, for a modern ceiling, plasterboard is currently perhaps the most suitable option.
A single-level plasterboard ceiling is usually installed to provide additional sound insulation. Multi-level ceilings have a much more complex design, and due to this they can be made curly, stepped, and equipped with additional lighting.
Installing a multi-level plasterboard ceiling with your own hands is possible even for those who have never done such work. The gypsum board is mounted on an aluminum profile with guides. In this way, a frame space will be created, inside which wiring and utilities will be located.
Tip: with the help of a frame you can additionally insulate your room and isolate it from outside noise. This type of fastening is suitable for both single-level and stepped plasterboard ceilings.
Here are the materials and tools you will need if you decide to install such ceilings:
- Screwdriver;
- Laser level;
- Hammer;
- Hacksaw;
- Metal scissors;
- Pencil;
- Construction square;
- Pliers;
- Drywall sheets;
- Profiles for metal assembly;
- Self-tapping screws and dowels.
When choosing drywall, pay attention to the condition of the sheets: they should not be damp or damaged. For the ceiling of a kitchen or bathroom, choose moisture-resistant materials - they can be easily found in any hardware store or on the market.
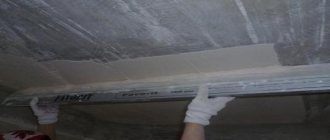
How to apply decorative plaster
First you need to remove the old layer of plaster and dust the ceiling.
Then 1-2 layers of the primer mixture are applied with a break of 3-4 hours between application of layers.
The dry mixture is diluted in the proportion indicated on the package.
The DF is laid with a spatula: it is scooped onto it and applied to the ceiling, distributed evenly. It is also used to level and smooth the layer of plaster.
Next comes the actual decoration of the plaster layer. However, this need not be done if a composition with medium- or coarse-grained filler was used.
The techniques used depend only on your imagination.
A video of creating a ceiling with your own hands will serve as more visual instructions.
Types of ceiling finishes: comparative characteristics, pros and cons
We are accustomed to thinking that during renovations, the ceiling is finished first, and then the walls and floor, in that order. But modern technologies make it possible to break this tradition without damaging the interior. For example, you can easily fix ceiling tiles or install a suspended ceiling without damaging the walls.
There are several types of ceiling repairs that are quite simple to perform. We will look at them in detail to make it easier for you to choose the most suitable option.
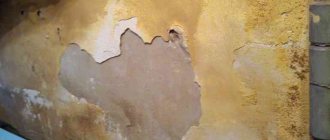
- The first option is whitewashing, which has been used for many generations. It can be chalk and lime, and among modern materials it is completely ready for application. Its advantages include low price, resistance to temperature changes and ease of application. The disadvantage is that whitewash is short-lived: it crumbles, cracks and is susceptible to moisture. In addition, you will have to carefully prepare the base for such a coating.
- The second option is painting. There are many types of paints for this: glossy, acrylic, water-based, matte, latex and others. They are inexpensive, and caring for the painted surface is quite simple. But painting work requires experience, the paint loses color and cracks over time, and the base will need to be prepared.
- The third option is to decorate the ceiling with your own hands using wallpaper. For this purpose, fabric, non-woven, or special wallpaper for the ceiling and for painting are used. This method is cheap and also helps to visually level the surface. But wallpaper wears out quickly, and gluing it to the ceiling is very difficult.
- The fourth option, very popular in recent years, is a plasterboard ceiling. There are many types of such ceilings - single-level, multi-level, stepped, geometric and others. They are easy to install, do not require surface preparation, and allow the installation of additional insulation and lighting fixtures. Among the disadvantages: drywall will block access to communications.
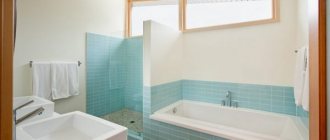
The main criterion for choosing the required material is in what room it will be used. In the living room and bedroom you can use any type of ceiling, and for the kitchen and bathroom you will need moisture-resistant material.
Installation of a panel ceiling in a private house
Panel ceiling is a universal design that is suitable for landscaping any type of premises. The name “panel” does not imply the installation of plastic or other panels, but the installation of pre-assembled boards from boards. Placed next to each other, they form the base of the finished ceiling. Such structures also have a second name: “panelboard”.
Before starting work, lumber is prepared. Each beam and board is inspected for rot, treated with an antiseptic and dried well. If there are cracks, they are covered with wood putty.
Panel ceilings are often rough and need to be finished. There is one requirement for such structures: the surface of the boards on the room side must be flat. Panels are assembled in any convenient place, but most often on floor beams during the construction of a house.
Panel ceiling
With this type of ceiling arrangement, rectangular beams are used as floor beams, to the underside of which cranial bars with a cross section of 4/4 cm or 4/5 cm are nailed. The thickness of the board should correspond to the size of one of the sides of the bar. Each panel is a row of boards, the length of which is equal to the distance between the cranial bars. At the top of the shield, thinner bars are nailed perpendicular to the direction of the boards. The bottom of the panel remains flat and smooth.
Each shield is placed in the openings between the beams so that it is supported by cranial bars. When viewed from above, such a ceiling consists of a series of cells, the recesses of which are filled with thermal insulation material. This can be expanded clay, mineral wool, polystyrene foam, sawdust.
Before laying the heat insulator, all the resulting “boxes” are covered with vapor barrier material so that the floor beams are also covered. In this case, the film sheets (membranes) are laid with an overlap of 10-15 cm.
If the ceiling is interfloor, boards are sewn on top of the beams to form a subfloor. If the ceiling is of the attic type, a backfill heat insulator is most often used and can be left open. The thickness of the backfill depends on how severe the climatic conditions of the region of residence are. Panel ceilings are built not only in private homes, but also in bathhouses, utility rooms, and country houses.