It is difficult to imagine a person’s home without doors, since they are a fairly important functional element. There are rooms in which doors must be present. Such rooms include bedrooms, both adult and children's, bathroom, toilet, kitchen, as well as utility rooms. Despite their purely technical functions, doors must also have decorative functions, emphasizing the design style of the entire home. Many people resort to various technologies that allow them to make new ones from old doors.
Preparatory operations
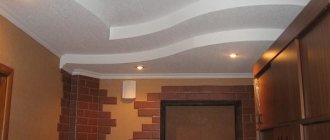
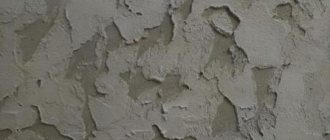
Regardless of the update technology, it will not be possible to skip the preparatory operations for a number of reasons. As a rule, old painted doors undergo a renovation process. Due to the fact that they were painted independently, there are quite a lot of painting defects, which boil down to various irregularities, as well as sagging, not counting many minor flaws. In order for the doors to be attractive and have a high-quality coating, all defects will have to be eliminated.
To do this, you will have to remove the door leaf from the hinges and lay it on a flat surface that is securely fastened. Using wood putty, all crevices, cracks, chips, depressions, etc. are covered. After the putty has completely dried, you can proceed to the next stage.
We buy wood putty
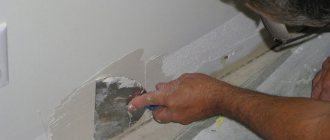
The next step is to use sandpaper, first coarse and then fine, to achieve a smooth surface. It is better to use an electric tool for sanding surfaces, since working with your hands is not only ineffective, but also tiring. The quality of surface treatment must be ideal. Otherwise, the quality may be lower, but only slightly.
Hand sanding takes a long time
After sanding, any remaining dust is removed and washed off with a solution of water and detergent. Then you will have to wait a little for the surfaces to dry. The next step is applying the primer. This stage is mandatory, since the quality of the coating will depend on it. If the doors are going to be painted, the paint color should match the previous color. Otherwise, you will have to remove all the old paint, and this is another, quite costly and difficult stage, although they usually start from this stage in order to achieve the highest quality of work.
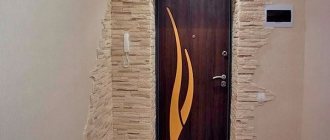
Update with wallpaper
To update old doors, it is enough to use ordinary wallpaper, especially since their choice is simply amazing. Naturally, it is not necessary to select wallpaper for doors to match the walls, although this option is also possible. The main task comes down to making the doors stand out somehow, otherwise the decoration loses all meaning, since the main functions of the doors are neutralized.
Doors are wallpapered in the following order:
- Wallpaper glue is diluted according to the instructions.
- The glue is applied to the door leaf.
- The wallpaper is glued quite carefully, avoiding the appearance of bubbles.
- To ensure that the edges are perfectly smooth, they are cut using a sharp knife.
- All you have to do is wait for the wallpaper to dry.
Covering old doors with wallpaper is a good way to turn old ones into new ones.
This may be the end of the decorating process, or maybe not, if additional decorating operations are involved, which will be discussed later.
Using photo wallpaper
Modern photo printing technologies make it possible to produce three-dimensional images on paper of various sizes. Moreover, you can make an individual order by choosing an image that is more suitable for decorating the doors. As a rule, such photo printing is carried out by various advertising agencies or printing houses. After the image you like on a certain piece of paper is in the hands of the owner, it is pasted over the door leaf using the same technology as for ordinary wallpaper.
Only three door options with photo wallpaper
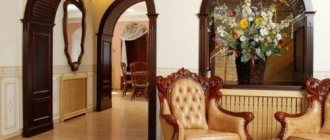
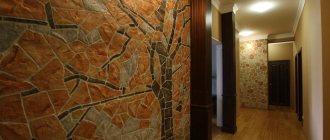
Combination of wallpaper with moldings
If you use moldings, doors covered with plain wallpaper will acquire a more modern, rich and attractive appearance. Thus, such doors can decorate any room decorated both in classical styles and in Provence style.
The sequence of work is the same as in previous cases. The main thing is to properly glue the wallpaper onto the door leaf so that there are no air bubbles left.
Renewing old doors with wallpaper
If air bubbles appear, they must be removed in any way without harming the surface as a whole. The edges of the wallpaper are trimmed only after they have completely dried or before they have had time to be completely saturated with glue. After complete drying, further decorating work begins.
First of all, you should apply markings using a simple pencil. After this, they begin cutting pieces of molding. All joints are made at an angle of 45 degrees. The molding is glued to the wallpaper using PVA glue (you can use any suitable one). Decorative elements are smeared, but not vice versa, after which they are glued to the surface strictly according to the markings.
We expel the remaining air, after drying we glue decorative elements on the door
After the work is done, the doors are left to dry completely.
Stylish new doors from old ones
It is not difficult to update old doors while maintaining the overall design style of the living space, as evidenced by the photo gallery.
Drawings and stickers
If monotonous decor is not your option, feel free to pick up a brush and paint your boring old door with interesting scenes. People with an artistic education can use it as a canvas, decorating it with still lifes, landscapes, and cartoon characters. For the rest, there are stencils or vinyl stickers - no less effective tools that will also provide a beautiful result.
In the case of stencils, the principle of operation is the same as in the first point: we prepare the product, apply paint, wait for it to dry. The base can be a painted or “bare”, pre-treated surface. Drawings on the texture of old wood look impressive.
Design approach
Updating old doors with wallpaper is a breeze, especially since it doesn't require any special design skills or insight.
There are approaches that allow you to turn old doors into some kind of art object. To do this, you don’t have to resort to the main preparatory stage, since the design allows you to hide almost all minor defects.
What kind of doors were there and how they can be made
First of all, you should start making papier-mâché, for which egg trays are used. The trays are sprayed with water and kneaded with hands so that their surface becomes smooth. Despite the fact that the alignment is accompanied by the appearance of individual fragments, this is not a problem, since it is the fragments that will be used for decoration. Similar pieces of the egg tray are glued to the surface of the doors (leaves) in any order. For this, any type of glue is used, but the main thing is that the decor is held on the surface quite reliably. After this, any unnecessary rubbish that has an unusual structure or unusual shape is glued to the surface of the doors. In this case, an old string bag was used, cut into separate fragments.
Creating decorative elements for the door
Alternatively, you can use various caps and caps, small perfume bottles, mosaic remains, etc., as they say, whatever comes to hand. You will need a lot of such unnecessary trash, so it is better to collect it in advance.
We glue decor on old doors
The process of decorating an old door is in full swing
When this stage seems complete, take acrylic paint in silver cans and carefully paint over the entire surface. For such purposes, you should not use cheap paint, as it may crumble after a while.
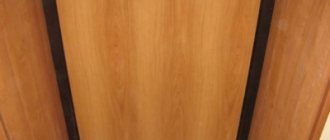
How to renew veneer doors and extend the life of the coating
The method of restoration of interior veneer doors depends on the nature of the damage. Often you can notice swollen areas on the surface, which are the result of improper gluing of the veneer, or arise as a result of high environmental humidity.
You can deal with such flaws using a hot iron, which should be used to iron the swollen surface. You must first place a wet cloth on it for 10-15 minutes to soften the veneer.
Swollen areas can be removed by gluing the peeled veneer fragments. To do this, PVA glue is filled into a medical syringe and injected under the coating. The veneer is pressed tightly against the canvas, the glue is evenly distributed. It is recommended to press down the glued area with a weight for several hours.
Dents on the surface of a veneer door are repaired using special wax
The surface of veneer doors may develop visible scratches and other minor damage. You can mask defects using melted wax, the color of which should match the shade of the finish. The surface should be given a slight roughness, then degreased and the voids filled.
If the canvas has deep, large damage, then it is repaired using veneer patches. To do this, damaged areas are cut out on the surface. If deep damage has formed underneath, they are repaired with putty.
Fragments of the required size and shape are cut out of the new veneer, which must also match the type and direction of the pattern. The patch should not stand out from the general background. It is glued to the surface using PVA glue.
If you want to completely renew the coating, the question arises of how to paint veneer doors. The surface is pre-cleaned, puttied if necessary and then primed. The canvas can be painted using hyphral, polyurethane or water-dispersed paints.
Old veneer doors can be updated by painting
Veneered doors can be finished with shellac varnish or cellulose polish, which will provide a glossy finish.
Repairing old doors is a simple and interesting task that you can do yourself using one of the proposed techniques. If you do not have the necessary skills, you can resort to the help of specialists who will prepare the surface and decorate it using one of the selected methods. In this case, the price of restoration of interior doors will depend on the condition of the door leaf and the complexity of the repair.
Decoupage technique for door decoration
This technique allows you to decorate the door leaf in a romantic style. To do this you need to have:
- Ordinary napkins, but with a pattern.
- About 200 ml PVA glue.
- An ordinary brush.
- Acrylic lacquer.
First of all, you should prepare the canvas as described above, after which it is primed and painted in a suitable color. After the paint has completely dried, proceed to further operations. First of all, take a napkin and separate the top layer with the pattern.
Separate the top layer of napkins with a pattern and tear them lengthwise into two parts
After this, the napkins, or rather the part with the pattern, are torn lengthwise into 3-4 parts. For decoration, it is necessary that the edges are not smooth, and parts with smooth edges should be set aside separately. The middle parts, without smooth edges, should be torn into squares, up to 5 cm in size maximum.
Tearing napkins
Take a small container, glue and a brush. Glue and water are poured into the container in a 1:1 ratio, after which the composition is stirred.
We dilute the glue with water
After this, you can begin the decorating process. The strip with a smooth edge is glued first. Such strips are glued around the perimeter to create a decorative border. Using a brush dipped in glue, the fragment is smoothed in different directions. If folds appear, they should not be smoothed out, as they allow you to obtain a more textured surface. Napkins with a pattern are quite thin, delicate and elastic, especially when wet, so attention and care are required when working.
Carefully work with a brush dipped in PVA
The result is a frame in which one edge is straight and the other is torn.
Making a frame on the door from napkins
After the frame is formed, it is filled with torn squares using the same technology.
Filling the middle of the “frame”
After filling the frame, the canvas is left for a day until the glue dries completely. After this, the entire surface is coated with water-based acrylic clear varnish to avoid the appearance of an unpleasant odor in the room, although the varnish is quite expensive.
This is what happens after the varnish dries
The decoupage technique allows you to obtain a beautiful, elegant surface with minimal investment of money and time.
Application of self-adhesive film
We can say that this finishing option is the simplest, although at first glance, since gluing the film is a responsible task.
For this you will need:
- Adhesive tape.
- A spray bottle of water diluted with detergent.
- Plastic spatula or regular soft rag.
- Sharp knife.
Self-adhesive film is selected depending on personal preferences, especially since the choice is simply huge.
Regardless of which film is chosen, its gluing technology is absolutely the same. This option uses self-adhesive film with photo printing (like photo wallpaper). It is very important to remove all fittings before starting this process.
The peculiarity of the film is that its sticker requires high-quality surface preparation. Before applying the sticker, you will have to check how the film adheres to the surface. To do this, take a small piece of film and glue it to the surface. If the film “refuses” to adhere to such a surface, then it will have to be primed, after which, to obtain a smooth surface, it is varnished or painted over.
Before sticking, use a spray bottle to apply a layer of liquid diluted with soap to the canvas.
Spray the doors
Then take the film and gradually remove the protective layer, but do not forget to wet the surface of the film from which the protective layer was removed.
Separate the paper backing on the upper corner and moisten the film with water
To begin with, it is enough to remove about 20 cm of the protective layer from the film. If you remove the entire protective layer, the film will stick to the surface, which will prevent you from doing the job efficiently. Due to the fact that the surfaces are wet, it is permissible to move the film over the surface for some time, which allows you to correct its position on the surface.
Apply the film to the upper edge of the door leaf and smooth it, removing air
After the film is laid correctly on the surface, take a plastic spatula (or rag) and smooth the surface from the center to the edges. This process removes excess air. Due to the fact that the surface is wet, this will not be difficult.
After gluing the initial fragment, the film stretches down. As a result, the protective layer is gradually removed from the film, and the film is also gradually glued to the base. The main thing is not to allow the surface to dry out. To do this, the surface is regularly sprayed with a spray bottle. After the process is completed, excess film is cut off using a sharp knife.
Cut off the excess
In addition, all that remains is to install all the fittings in place.
Useful tips for beginners
For ease of work and control over dipping the tool into paint, use a paint tray.
After purchasing the brushes, it is recommended to comb them out a little and soak them in water for a while. Firstly, this will prevent fallen hairs from reaching the surface, and secondly, it will soften the stubble before work.
It is more convenient to paint the canvas if it is located in a horizontal position. This way you won’t get unsightly streaks if there is too much paint in the corners and sides of the door leaf. Many people use specially prepared sawhorses for convenience, or take the easier route and place the door on 4 stools.
Protection of fittings from smudging. This is not a whim, but a reasonable step. It is advisable to twist it and put it aside for the duration of the work, but an option to protect it is also suitable, for which it is recommended to use masking tape.
Decorating doors using stencils
It is permissible to apply various designs to old doors, although few can boast of artistic talent. In this case, you can use regular stencils. You can make stencils yourself by drawing the appropriate design and then cutting it out with a sharp knife, or you can buy it in a store if you like the design.
Unfortunately, paper stencils do not last long, so it is better to use transparent film. In the video you can see how stencils for decoration are cut out.
DIY interior door decor
Various geometric shapes, as well as plant elements, including animals and birds, cartoon characters, etc., are suitable for drawing.
Here are some options for small stencils
These can be small fragments or fragments designed to cover the entire area of the door leaf. In this case, much depends on the style in which a person’s home is decorated. This applies not only to solid doors, but also to doors with glass. As a rule, old doors (many) use ordinary glass without patterns. In this case, you can apply the pattern yourself.
Stickers or drawings
The question often arises of how to decorate an old interior door so that it sparkles with new colors and does not seem so monotonous. You can fix everything using stickers, or if you have artistic skills, you can use the door leaf as a canvas on which you can bring the most interesting scenes into reality.
If it was customary to decorate using vinyl stickers, then before applying them, the canvas must be cleaned, painted, and only after it has completely dried, do you begin to apply the vinyl design. They will look especially beautiful on the texture of old wood.