Some general information about doorways
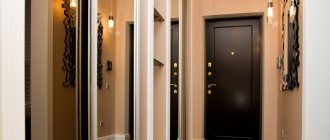
The front door will look complete only in one case - if the walls next to it are finished. As a rule, it is installed in a small recess in the opening in the wall, and on the sides of it completely ugly elements are formed, which need to be covered with something or somehow finished off. But the design process often depends on what shape the doorway is in the apartment.
Entrance door slopes: finishing options
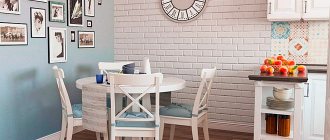
Finishing the doorway with MDF panels
Table. Types of doorways.
| Type | brief information |
| Classical | This is the usual rectangular entrance that is most common. Any option for finishing slopes is suitable here, and various materials can be used, which will be discussed below. Despite the general simplicity of finishing such a doorway, many are faced with certain problems, which are most often associated with the choice of the most suitable and easy-to-use material. In general, designing a classic doorway is not so difficult, since there are no complex or curved lines here. |
| Arched | This version of the doorway looks much more impressive than the usual classic one, and is a rectangle with a rounded top in the form of an arch. Doors that fit it are more difficult to install and technically more difficult to design. Typically, sufficiently elastic materials that can be bent or plaster are used to finish slopes. Often, the door comes with special linings that precisely match the shape of the door. In general, finishing such an entrance is much more difficult than a regular one. |
Types of materials for arched openings
Advice! If you want to have an arched entrance to your apartment, but install an ordinary rectangular door, then there is a way out. You can simply install an arched lining at the top of the doorway from the inside, but the door will look like a regular one from the outside.
Drywall slopes are a very common type of slopes.
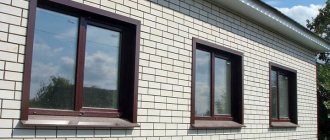
Sealing slopes with plaster after installing a metal door
The installation of any finishing in the area of the entrance steel system requires the same preliminary work - they also apply to subsequent plastering. The tightness of the foamed gaps is checked and, if necessary, strengthened. The entire surface of the walls in the working area is cleaned of broken pieces and dusty deposits.
- The prepared surface is primed in 2 passes - the second layer is applied after the first has completely dried.
- Finishing putty is roughly applied to the outer corners of the walls in the opening. Pre-cut perforated corners are placed on top and pressed. The mixture that comes out through the holes is removed with a spatula, after which the resulting rectangular frame is left to dry. As you work, a bubble level is used to create the correct geometry; if you don’t have one, you can use a plumb line.
- Since beacons in the form of corners are placed from the hallway, along which the slopes will be aligned, it remains to draw up the borders on the side of the doors. The choice of contours in this case is individual, since much depends on specific architectural references. You can visually mark them in various effective ways - for such delicate work as sealing slopes after installing a metal door, it is recommended to use a sharp nail or center punch - the risks will subsequently be hidden by the finishing material.
- Starting from the floor, the mixture is poured onto the 2nd side of the wall in the opening, using a narrow spatula in small portions to a height of up to 1 m - in this case there can’t even be a question of a ladle.
- Depending on the width of the load-bearing wall (metal systems are rare in partitions), leveling and rubbing is carried out with a wide spatula and/or a homemade rule. In this case, the external landmarks are the corners and drawn lines. In this way, 2 opposite vertical planes are finished.
- The mixture is poured onto the horizontal upper section - it is rubbed in step by step with a narrow spatula, after which it is leveled with a wider analogue. This step should not be rushed, even if the pre-applied primer has excellent adhesion.
After the slopes are formed, the vertical plane around the opening is leveled - in this case, the perforated corners again act as landmarks. After drying, the finishing surface is leveled - an analogue of sandpaper in the form of a porous mesh is used. Finally, the perfectly laid putty is covered with a primer, on top of which you can paint, glue wallpaper, or apply decorative plaster.
What are slopes?
The door frame is usually called jambs, but not everyone knows that the end part of the wall where the door (or window opening) is located is called slope . By the way, some decorative overlays that are used to finish the opening are also called slopes.
Door slopes
The slopes themselves can have different sizes, but in any case, according to their parameters, they must fit the end part of the wall where the entrance door is installed. In general, they can have different thicknesses, but if we are talking about decorative overlays, then in order to avoid deformation and damage to the material, its thickness should be at least 1 cm.
The easiest way to design a slope is to use “L”-shaped panels
The purpose of finishing and installing slopes is to achieve a beautiful frame for the door. In any case, when the door itself is installed, the slopes will be damaged, and in general the end part of the wall does not look beautiful - it is either concrete, or brick, or any other material that becomes visible to everyone. Usually the ends are quite uneven, and simply covering them with wallpaper will not work - some preparation will be required. The slopes will also help to hide the mounting foam, anchors and other elements and substances that were used directly when installing the door. Only if there are slopes or their proper finishing can the door look beautiful and the doorway look finished and neat.
Stone decoration of the arch in the hallway
On a note! Slopes will help achieve a certain level of heat and sound insulation - apartment residents will hear less sounds coming from the entrance. Do not assume that slopes are just a decorative component.
Doors
The slopes on the doors are not only an insulating element of the door decoration, but also perform an aesthetic function. The process of installing slopes on doors requires special attention, because there are different finishing methods and technologies. In this article we will consider issues related to installing slopes in various ways.
Table of contents:
- Methods for designing slopes
- Drywall door slopes
- Finishing door slopes with plaster
- Finishing slopes with plastic panels
- Finishing slopes with wood
- Detailed instructions for installing slopes for entrance doors
Methods for designing slopes
There are different options for installing door slopes, which are determined by the type of material, work technology, etc. When installing it yourself, it is important to follow the recommendations of specialists and detailed installation instructions. It is important to ensure that the materials used are practical and durable, and they must also perform insulating functions, especially when finishing the slopes of the front door.
The installation of door slopes must meet certain tasks, which include reliable fixation of fasteners, as well as performing a decorative function. When determining variations in the finishing of slopes, experts identify surface cladding with different materials, which are attached to the base with the assistance of mortar and plaster. Some elements can be attached to the frame base using a drill or other devices.
As finishing objects, you can veneer door slopes from laminate, plasterboard, plastic or wooden panels, MDF and the like. All materials are perfect for finishing, both for interior doors and entrance doors. In the latter option, it is necessary to ensure reliable sound insulation and complete sealing, which requires careful sealing of the slopes.
The slopes for the front door should not have any voids, which increases the strength and reliability of the cladding. You can use different finishing materials on top of the putty or mortar. The main thing is that they are combined with the interior design of the apartment or house. If a huge amount of mortar is needed for finishing, for example, to level corners, then a frame can be installed on the slopes. Its base can be wooden slats or a metal profile on which facing materials are installed.
It is worth noting that finishing the slopes under the frame will create a smoother surface than plastering. Moreover, finishing with wooden or plastic panels looks more attractive than painting the surface and so on. In particular, it is much easier to carry out telephone, electrical and other communications through frame slopes.
It is important that the doorway has a maximum service life, is durable and practically resistant to mechanical and other damage. To do this, you need to know the rules and technologies for installing slopes on doors yourself. No less importance is given to the choice of facing material, which includes:
1. Finishing with drywall. Such material will hide all the unevenness of the slopes. Using this option, you will get rid of unnecessary waste on purchasing putty and other solutions intended for leveling a certain area. In this case, there will be no possibility of installing a frame base.
2. Plastering the slopes on the door. This method is considered the most economical and practical, and all the work can be done independently. To do this, it is important to cover the working surface with plaster, after which you can begin finishing.
3. Plastic panels. Very often used for finishing window openings. They are rarely used in door openings, because plastic materials will stand out against the background of a wooden product. Moreover, this option is not reliable and durable.
4. Wooden slopes. This finishing option is the most popular. Wood is a durable and reliable material that will last for a long time. This finish will suit different room interiors.
Drywall door slopes
Drywall is not used for finishing, but is the basis for slopes. This option is used to save money on purchasing different mixtures for leveling walls. Installation work should begin with preliminary surface preparation, which includes cleaning the walls, as well as priming:
1. After the surface has dried, you need to take all measurements and prepare materials for finishing the slopes on the front door with your own hands. When cutting the material, make sure that some parts are cut at an angle. This is necessary for attaching parts to a tilted surface.
2. After cutting the sheets, check that all elements fit under the doorway.
3. Next, you should wait for the primer layer to dry completely, after which you can install the panels. Special glue or dowels can be used as fasteners. It is recommended to use the first option, which will allow you to fasten the sheets of drywall more evenly.
4. The installation process should begin with the installation of the side parts of the opening, and finally, the upper area can be finished.
5. Glue can be applied in a continuous strip or in separate dots, for example, every 15 centimeters.
6. After securely fixing the drywall sheets, it is necessary to finish the surface by attaching perforated corners using putty.
Finishing door slopes with plaster
This type of work does not present any particular difficulties and requires minimal costs. The process of finishing slopes with plaster has the following sequence:
1. First, the working surface must be cleaned and primed.
2. After the primer layer has dried, it is recommended to begin applying the solution to the surface of the slopes. It is recommended to use a spatula for this work.
3. To ensure that the corners of the opening are even, it is important to use perforated metal corners. They are attached to the surface using a layer of plaster and carefully covered.
4. After the plaster has dried, the surface of the slopes should be cleaned using sandpaper.
5. The last step is to treat the walls using paints and varnishes that will add aesthetics.
Finishing slopes with plastic panels
You can make door slopes with your own hands from plastic panels. The work is carried out in the following sequence:
1. First, you need to take measurements of the door slopes and cut plastic panels that would correspond to these parameters.
2. You should use an electric jigsaw, not a regular knife. This is necessary so that all parts in the cut areas are even.
3. After cutting, all panels must be checked against the doorway.
4. First, install slopes on the sides. For this purpose, a special profile is fixed to the opening using self-tapping screws.
5. Wooden slats must be attached to the edge of the wall. It is important to check the evenness of the installation elements with the assistance of the building level. Plastic panels will be attached to such slats using staples.
6. In the lower area, a plug is installed on the plastic panels, and the finishing item is inserted into the slopes on the sides and into the initial profile. The same procedure applies to finishing the slopes above the doors.
Basic information about door installation and design
In general, finishing the front door includes three stages:
- threshold design;
- finishing of slopes;
- installation of platbands and additions.
Types of door frames
All this work is carried out after the installation of the door leaf itself. As for the threshold, it must be strong enough and resistant to various types of loads. It is usually made of wood, metal, concrete. These types of materials are much more stable than the now so common PVC and can last for many years until the next door replacement.
As for platbands and extensions, they are usually used to achieve neatness in the design of the doorway. Thus, they help to hide imperfections and irregularities when the physical parameters of the wall and the very door frame that is being installed do not match. Without them, the door will look crooked and sloppy. Quite often, these elements are made from MDF, and then you don’t have to think about leveling the slopes themselves with putty. The voids between the extensions and the wall are simply filled with polyurethane foam.
Accessories for interior doors
On a note! Platbands and extensions will also help protect the door from subsidence that may occur in the future.
The slopes are finished after the door is installed. This can be done in various ways:
- sheathing;
- finishing;
- plastering.
Finishing the entrance door slopes
The last option is considered the best, as it allows you to achieve ideal evenness of the end of the wall and seal the doorway. Also, if you use your imagination, you can create an interesting unique design. And excess dust will not accumulate on top of the finishing materials.
Find out how to insulate an iron entrance door from the inside with your own hands in a special article on our portal.
Prices for various types of door frames
Door frames
Slopes for entrance doors - combination of materials
If you are not a master at leveling surfaces, this method is just right for you. The essence of the method is to attach the finishing materials not to the frame, but to a layer of cement-sand mortar or glue. To do this, the slopes for the entrance doors must already be leveled and covered with a primer. It is also necessary to indicate the level of the slope and provide support for finishing materials. For this purpose, screws or self-tapping screws are screwed into the surface so that their heads form one straight line. Take into account the thickness of the mortar and the thickness of the finishing materials themselves so as not to make a mistake with the overall dimensions of the slope.
Then mix the solution according to the instructions already described above and fill the entire slope space with the finished mixture. To be more reliable, we recommend bringing the cement-sand mortar a little less than to the level of the caps, as evenly as you can manage. Let it harden properly (at least 1 day) and apply the adhesive solution to the surface.
Also apply glue to the reverse side of the finishing material. Having applied the finishing sheets to the slope, lightly press them down so that they rest tightly against the surface and the air between them and the cement layer comes out. Using a level, find out whether you managed to align the sheets evenly, and while the glue is still wet, correct their positions. Then you can attach trims and corners, if any.
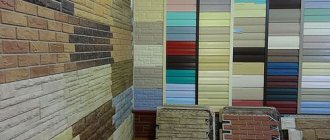
Selection of materials
Yes, the slopes perform a protective function, but no one took away their decorative function. And you can use a lot of different materials to decorate them. The main requirement for them is the absence of fragility and tendency to mechanical damage. The slopes must be finished so that they can last for many years without the need for repairs, not even major repairs, but cosmetic ones. Moreover, it is worth considering that the doorway is the place where all family members pass every day, and more than once, something constantly falls here, the door and the slopes themselves can be subject to impacts. So the material for finishing them needs to be one that can withstand all these loads for a long time and not deteriorate.
Finishing the opening: slopes, extensions
Plastering
This is a classic and the most common design option for a doorway. This method probably originated back when the very first front door was installed. A slope finished with plaster will serve faithfully for many years without complaints. The material is not afraid of temperature changes, damage, and plaster will perfectly hide and fill all the unevenness of the end of the wall (no other material can compare with it in this regard). Using this material you can achieve a perfectly flat plane at the end of the wall.
Plastering slopes - a method proven over the years
You can paint the plaster for beauty, cover it with wallpaper, or put some kind of pattern on it. In general, there is a lot of scope for imagination here. The main disadvantage of this method is the appearance of a large amount of dirt during the work. Also, the disadvantages include high labor costs, and it will also take time for the material to dry. If you have no experience working with plaster, then it is recommended to carefully study this issue or even invite a specialist - working with the material is not easy for a beginner.
Advice! In order for the slopes to look finished, after plastering they need to be sanded and puttied.
Plastering slopes
Prices for popular types of plaster
Plaster
Solving basic problems
When talking about the front door, most consumers immediately imagine the door leaf itself. The importance of the remaining elements of the structure is realized during its direct operation. The design of the door opening involves solving the following problems:
- Close the technological gaps that formed during the installation process.
- Provide sound insulation. If a powerful canvas with internal and external decorative panels is designed to hide from prying ears what is happening in your apartment, then the presence of even small gaps during installation will make your private life open to strangers.
- Improve heat conservation. Correct installation of platbands on metal doors will help maintain warmth and comfort.
- Emphasize the unity of style in accordance with the overall design project of the room. The decor of additional elements developed by Guardian specialists allows you to choose suitable solutions.
- Achieve harmony in the decoration of doors through the correct choice of shades of color and texture of the material.
- Achieve organic and complete visual perception of the entire structure when creating doorway decor.
Platbands on metal doors and other decorative elements are installed on the outside of the door (facade of the building, entrance) and the inside (hallway, vestibule).
Plasterboard finishing
This material is loved by many craftsmen, and it is readily used in construction and repair work. It is universal and easy to use, and therefore can also be used for finishing slopes. This option is also called dry plaster.
Plasterboard finishing
The main advantages of using drywall are increasing the speed of work and simplifying it. If necessary, drywall will perfectly hide all the shortcomings. In general, the work on using it to design slopes looks like this:
- The surface is primed after cleaning it of debris;
- a metal frame is formed from the profile;
- moisture-resistant wall plasterboard is cut into pieces of the required sizes and fixed to the frame, forming a box;
- after installing the sheets, the cracks and the sheets themselves are puttyed (it will not be possible to glue anything onto untreated sheets of drywall or cover them with some kind of decorative composition);
- when the putty dries, you can decorate the doorway.
Installation of plasterboard elements
On a note! If necessary, under the frame on which the drywall is fixed, you can lay insulation - then the apartment will be warmer.
MDF slopes
This is also a very popular option for decorating a doorway. At the moment, MDF finishing is considered perhaps the most common. The material is resistant to various influences, does not require additional decoration, has a lot of color variations and can be matched to the installed door. Veneered MDF as a whole is indistinguishable from natural wood.
MDF slopes
Advice! If the door slopes are designed not only inside the apartment, but also outside, then it is worth purchasing a moisture-resistant MDF version.
Installing this option is simple - even a beginner can handle it. You can buy materials in advance - all that remains is to adjust them to the required dimensions, assemble the box and install it. The cavities are foamed with polyurethane foam.
Prices for polyurethane sealant
Polyurethane sealant
Stages of preparing a slope for installation of MDF panels
Unfortunately, MDF is not cheap, and it is easy to scratch. So you need to handle slopes made of this material carefully. Plus, it tends to absorb odors, and fat on it easily leaves stains.
Cladding
An excellent option for those who want as much natural wood as possible in their home. By analogy with MDF paneling, you can decorate the ends of the walls near the front door. They will look very beautiful and noble.
Lining
Installation must be done on top of a wooden sheathing. So narrow slopes cannot be covered with clapboard. Natural wood is not cheap, so you need to be prepared to shell out more money.
It is also worth considering that with changes in humidity and temperature, natural wood tends to deform. Before installation, it must be coated with protective compounds to prevent rotting and the spread of insects. It is also better to impregnate it with a fire retardant to reduce the level of flammability.
After installing the front door, to complete the repair it is necessary to refine the doorway
Advice! Instead of varnish, it is better to coat the lining with a special wax-oil composition. She will look better and more noble.
PVC slopes and polyurethane linings
Wherever PVC is used now! So the front door can be framed with it. Installation is quick, and the price of PVC slopes is quite low. But this material does not have many advantages.
PVC is fragile and easy to break. Sometimes it’s enough to just lean on it and all the work will go down the drain. The slope cannot be repaired; it will only have to be replaced. And in general, the service life of the material does not exceed a couple of years. Some people cover plastered slopes with plastic, but in reality it looks ugly and cheap.
Plastic slopes
It is recommended to use plastic for finishing slopes only as a temporary option. It is better to change it as soon as possible for something more worthy and practical.
By the way, you can also decorate the slopes with polyurethane overlays, which can imitate stucco. This option looks decent. But the price for such overlays is high. You need to glue the overlays on a flat surface, so you will still have to pre-plaster or cover the ends of the walls with plasterboard.
Do-it-yourself rough plaster of slopes
The process of applying plaster to a slope is no different: a solution is poured onto a dust-free and wet surface. They do this with a wide spatula or a paint bucket - depending on how you are used to it. It’s more convenient to start from the bottom and work your way up.
By running a rule or template along the guides, rocking from side to side, the solution is leveled, and the excess is removed back into the container. For the first penetration, you don’t need to achieve a particularly flat surface, but be sure to monitor the condition of the corners - remove excess mortar regularly.
How does the process of decorating slopes with MDF panels take place?
Step 1. First of all, you need to prepare all the tools. This includes a tape measure, a square, a pencil, a miter saw, a sharp knife, a hammer, masking tape, a screwdriver, and a drill. You also need fastening materials and polyurethane foam.
Tools required for work
Prices for popular models of screwdrivers
Screwdrivers
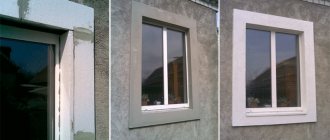
Step 2. Next you need to take measurements. The procedure is carried out after installing the door - you need to measure the width of the end part of the wall, as well as the width of the doorway. It is better to take measurements at several points vertically and horizontally.
Taking measurements
The width of the opening is measured
Step 3. Now you need to make markings on the MDF planks according to the obtained dimensions. The edge along which the cut will be made must be taped with masking tape. If this is not done, unsightly chips may appear on the panel during sawing.
Marking MDF panels
The edges of the cut are taped with masking tape
Step 4. Using a square, you need to draw an even cutting line.
The cutting line is drawn
Step 5. Using a miter saw, you need to cut the workpieces.
Blanks are being sawed
Step 6. Now you need to assemble the received additions into one design. Use a drill to drill holes for the screws. It is not recommended to screw them in directly with a screwdriver - the fasteners can damage the panels. The holes are made in several pieces at a distance of 10-15 cm from each other.
Assembly of accessories
Step 7. Next, the resulting box needs to be installed in the doorway. You need to install it evenly so that the gaps between the frame and the door are equal on all sides.
The box is installed in the opening
Step 8. Now you should make about 10-12 spacer elements from a wooden block.
Manufacturing of spacer elements
Step 9. Spacer elements need to be hammered between the wall and the box. About 3-4 pieces are hammered vertically, and 2 pieces along the upper and lower borders of the box. The block should not stick out; it must be hammered in tightly.
Spacers get clogged
Step 10. Now you can install the platbands. First you need to attach the trim and measure the desired length.
Installation of platbands
Step 11. Next, you need to use a saw to cut the trim to measure at an angle of 45 degrees.
Trimming trims
Step 12. Before installing the platbands, the gaps between the wall and the box must be foamed with foam. It will help further secure the box and provide sound and heat insulation. Excess foam can be cut off with a knife after it hardens.
Gaps are filled with foam
Step 13. Next, you need to secure the vertical trims to the extensions using small decorative nails.
Vertical trims are nailed
Step 14. Now you need to measure and saw off the casing at the top and bottom, and then secure it with nails.
Platband is measured
Step 15. After the structure has been assembled, you need to fix it on the door frame with masking tape for about a couple of hours. Once the foam is completely dry, the tape can be removed.
The structure is fixed with masking tape
Video - How to make slopes?
Stages of work completion
Like any job, this one requires certain rules for its implementation. Everything is built from several stages that should be performed in a certain sequence.
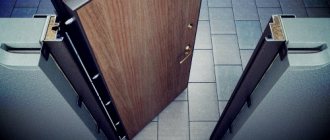
Sealing the box
The inserted box is sealed; this process is typical for any type of finishing. It will not allow extraneous noise to enter the room and will not allow damp air to pass through, and accordingly will contribute to thermal insulation.
- To begin with, the opening near the box is completely cleared of debris and dust. It wouldn't hurt to even vacuum it. The better the surface, the better the connection with the insulation;
After completing this work, we have two options for carrying out insulation:
- Using polyurethane foam. Before filling it, you should slightly moisten the surface with water using a spray bottle.
Attention: We should not forget that foam increases three times after it hits the surface. And after expansion, it can ruin the front surface, especially if the coating is varnish. So do this work quite carefully.
Now we wait for the foam to dry completely and cut off the excess with a sharp knife.
- The second option is to treat the cavity with insulation for the front door. It should be said that synthetic is more suitable for this.
It changes shape quite slightly and does not sag over time, unlike natural ingredients. The material should be cut and placed into the holes.
Do not forcefully push, but carefully place. It should be tight, but not pinched. From severe deformation it will lose its properties.
Surface preparation
After sealing the box, the surface should be prepared. This is done for any type of finishing and is a mandatory step in the work.
- The entire surface is cleared of the previous coating and a metal brush is used for this. We also look at the plaster, if it starts to flake, then it should be removed with a chisel and hammer;
- We inspect the surface and look for signs of fungus or darkening. If this is visible, then it is necessary to treat with an antifungal antiseptic, which is available in retail stores. Even if there is nothing on the surface, it is still worth doing the treatment to prevent the disease;
- After this, the surface must be treated with a primer, which will enhance adhesion. To do this, use a roller or brush. Apply a layer a couple of times. Give preference to deep penetration liquid. After this, let the surface dry completely.