How to prepare the surface?
Before painting, you need to try to empty the room, cover the rest with plastic wrap.
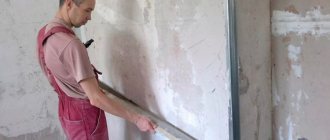
Start by removing any plaster that is peeling, after wetting it. Major renovations often involve complete removal of the plaster. Clean the fungus-affected parts down to the concrete base using a spatula and treat with an antiseptic primer. To avoid problems in the future, in a damp room it is better to treat the entire ceiling at once.
After waiting for the surface to dry, proceed with a penetrating primer for better adhesion to the putty, which then needs to be used to fill the uneven areas. When the ceiling is dry, sand it.
Now you can begin to putty the entire plane, preferably in two layers using a wide spatula. Each layer must dry. Then the ceiling is carefully sanded.
The next stage is re-priming, so the surface will be more durable and paint consumption will be reduced.
Paint selection criteria
When choosing what paint to paint the ceiling, you immediately determine how often it will have to be washed. If you cannot do without regular wet treatment (for example, in the kitchen), washable, abrasion-resistant paint is chosen. In other cases, a cheaper option is sufficient.
The required amount of paint is determined by the area of the ceiling and its consumption per 1 m², depending on the coverage. It shows how much paint is needed per 1 m² to cover a dark surface without showing through. For high-quality products, the covering rate is 20-60 g/m². Some manufacturers indicate how much area a liter (kilogram) of paint will cover for its color to become invisible.
All characteristics, including abrasion resistance and areas of application, are indicated on the packaging or label in small print. When purchasing, keep in mind that the ceiling is covered with at least two layers.
Regardless of color, paints are divided into matte and glossy. If there are difficulties in solving the problem of how to paint the ceiling to hide unevenness, it is better to use the first ones. At the same time, they will smooth out minor defects and make the room visually taller.
But caring for such a ceiling is more difficult than gloss. It is more wear-resistant, but all the flaws will be obvious, so very careful preparation will be required. However, a compromise is possible - purchasing semi-matte or semi-gloss paints with suitable characteristics.
Oil and enamels
Along with water-based compositions, ceilings are sometimes decorated with oil paints and alkyd enamels. In the first of them, the role of a binding component is played by organic oil or drying oil. The latter contain alkyd varnishes and organic solvents. It should be said that materials of this type are gradually being forced out of the market for compositions for painting ceilings in a room.
The reasons for this process are as follows:
- The ceiling coating created using alkyd enamel is characterized by strength and durability, but during application it is necessary to overcome a number of difficulties. We are talking about long-term drying and the presence of an unpleasant noxious odor. The enamel layer formed after drying does not allow steam to pass through easily, which leads to the effect of blocking the room. As a result, in the bathroom or kitchen this is fraught with condensation on the ceiling.
- Oil paints have even lower performance properties. In addition to slow drying, unpleasant odor and lack of vapor permeability, the resulting finish is fragile and weakly elastic. This often leads to the appearance of cracks on the surface. The only advantage of oil paint is its low cost.
Types of paint
The final choice is made after familiarizing yourself with the characteristics of the varieties of paints on the market. For painting the ceiling the following are used:
The option of painting the ceiling with water-based paint is very popular, as it is easily applied to any surface, is non-toxic and has no pungent odor. Wet cleaning is excluded, but it is easily washed off if necessary.
Acrylic paint is resistant to abrasion and sunlight, odorless, and can cover small cracks. Due to its high moisture resistance, it can be used in rooms with high humidity and subject to frequent washing.
Latex paint is economical because it has a high degree of coverage. It is resistant to abrasion and moisture, so it can be washed even with brushes. Hides cracks up to 1 mm wide. After application, it forms a porous layer that does not interfere with the “breathing” of the ceiling. Among the shortcomings, insufficient color fastness should be noted.
Silicate paint, made from liquid glass, is intended for application to mineral plaster. It is vapor permeable and has an inhibitory effect on microorganisms, which allows it to be used in damp rooms. When working, increased safety measures will be required, since the paint contains 10% alkali.
Silicone paint has good vapor permeability, antiseptic properties and a water-repellent effect, so it does not require frequent maintenance. When painting, you can hide 2 mm cracks. The silicone resin included in the paint significantly increases its service life. The only drawback is the high price.
The best latex paints for ceilings
Latex coatings are more expensive than others. But they adhere best to complex surfaces, masking minor irregularities.
The latex-based composition dries quickly and allows you to apply the next layer within a couple of hours. The finished coating is not afraid of water and remains elastic.
Beckers Elegant Takfarg – for masking minor defects
5.0
★★★★★
editorial assessment
96%
buyers recommend this product
See review▶
Matte white paint is easy to apply to most surfaces: plaster, brick, old paint, concrete, putty, fiberboard and drywall. Due to its thick consistency, it perfectly hides minor flaws and surface irregularities.
Beckers Elegant is suitable for rooms with windows on the sunny side because it is not susceptible to UV radiation and does not gray or yellow over time. And its good hiding power allows you to hide any other color of the base in just 2 layers. This paint is sold in 2.5 or 10 liter buckets.
Pros:
- does not fade in the sun;
- does not smell;
- hides small unevenness on the ceiling;
- can be washed;
- Available at most hardware stores.
Minuses:
- price about 800 rubles per 1 liter;
- not suitable for rooms with constant high humidity.
Takfarg is a wear-resistant compound and can withstand dry cleaning or washing with plain water. The main thing is not to use chemical cleaners so as not to spoil the coating.
Sherwin Williams SuperPaint Interior Latex Flat – super durable and opaque
4.9
★★★★★
editorial assessment
91%
buyers recommend this product
This paint in one layer can cover the dull color of the previous coating. She herself, even over time, will not lose her original whiteness.
The composition is self-priming, that is, it can be applied to the base without careful pre-treatment. In any case, the surface will be smooth and durable - so much so that it can withstand washing with any cleaning agents.
SuperPaint works well on brick, concrete, wood board and drywall, as well as metal and plastic. In addition, the coating can be applied to heating devices, since the formula can withstand high temperatures up to +80 degrees.
The paint formula contains antibacterial additives that prevent dark spots or mold on the ceiling. Because of this, it is often used to paint garages, bathrooms, kitchens and basements (if finances allow).
Pros:
- high thixotropic properties;
- does not fade;
- does not require preliminary priming;
- resistant to friction;
- not afraid of heating;
- has antibacterial properties.
Minuses:
- not cheap - about 1000 rubles/l;
- difficult to find in stock.
Sherwin Williams paint has an amazing composition, but when exposed to frost it loses its unique properties. The jar should be stored at a temperature not lower than 5 degrees Celsius.
Marshall Export 7 - the most durable ceiling paint
4.8
★★★★★
editorial assessment
83%
buyers recommend this product
This latex paint has an increased level of durability and can withstand washing with mild detergents. It applies to various surfaces, including wallpaper. You can apply the coating with a brush, roller or sprayer - in any case, there will be no streaks or smudges.
High consumption - 1 liter is barely enough for 6-9 square meters. meters of surface - justified by the excellent hiding power of the paint. One layer is enough to update the color, two layers are enough to cover another shade. The composition is recommended for rooms with average humidity levels.
Pros:
- ease of application;
- good hiding power;
- high wear resistance;
- snow-white color.
Minuses:
- highlights surface defects.
Marshall Export will last a really long time, but before application the base will have to be carefully prepared and leveled to perfect smoothness.
Applying primer
Priming is necessary for better adhesion of paint to the surface and increase the life of the paint. The required primer is usually indicated on the paint label. To prime a dark ceiling, you can use the base paint, diluting it with water. Hard-to-reach places are treated with a brush, the rest of the surface with a roller.
A separate set of tools is used to apply the primer. Treatment begins from the outer window to the wall opposite it in strips of 1 meter with overlap. The dark areas remaining after drying are primed again, but it is better to apply a second layer over the entire surface.
Errors and their elimination
The most common mistake when painting a ceiling is sagging. They appear if the roller was not pressed well to the surface. If the paint has not yet dried, you can fix everything with a sponge. In another case, places where there are sagging are sanded.
The next mistake is peeling paint. The reasons are the thick consistency of the composition and the ceiling not being dried before painting. It is necessary to dilute the paint according to the instructions.
Another common defect is stripes and uneven painting. The reasons are thick paint, improper painting.
In the last two cases, you will have to clean the ceiling with a mesh, wash it, apply finishing putty, and sand it. Then apply primer. It is necessary to observe the drying time of the surface. The paint needs to be diluted to a paintable consistency if it was thick. Drafts must be avoided. You need to paint the surface quickly, trying to keep the edges of the areas wet.
For large defects, you have to remove the entire layer of putty; simply repainting the ceiling in such cases will not work.
Painting the ceiling
Painting technology consists of a sequence of simple operations:
- The paint is prepared in accordance with the instructions (it may need to be diluted with water), mixed thoroughly and poured into the tray.
- First, brushes are used to paint areas that cannot be reached with a roller.
- Painting with a roller begins from the windows to the opposite wall in strips of 0.5 m. Each subsequent strip should overlap the previous strip by a few centimeters. To avoid the appearance of stains, the process is carried out without interruption.
- To paint the ceiling without streaks, you need to wait until each layer is completely dry. Stripes of the second layer are applied along the windows. After it has dried, the quality of the paint is assessed and, if necessary, another layer is applied.
- The stripes of the third are applied in the direction of the first layer. It is recommended to avoid matching the joints of the strips of the first and third layers.
Painting a plasterboard ceiling is done in the same way with preliminary puttying and sanding the joints between the sheets. The heads of the screws are recessed and also puttied. After which the surface is primed.
Ceiling spray gun - time saving
If you have a large area to paint or just high ceilings, the application process using rollers and brushes will be very, very labor-intensive. To simplify work, there is such a convenient tool as a spray gun or paint sprayer.
A hand-held spray gun is a device consisting of a sprayer in the form of a hose, a long container and a pump. Such paint sprayers allow you to paint approximately 200-300 square meters of ceiling area in 1 hour of operation.
Painting with a hand spray gun
Painting the ceiling with a spray gun will save your time and has several advantages over painting by hand. Let's take a closer look at these benefits:
- when spraying paint on the ceiling, there are no streaks left;
- painting speed;
- almost complete absence of paint contamination of surfaces during repairs;
- less paint consumption;
- good coloring of hard-to-reach places.
There are several types of spray guns: electric, manual, airless and pneumatic. The cheapest and easiest to use are, of course, manual paint sprayers.
To choose the right spray gun, you need to pay attention to its body and what material it is made of. The best devices that will serve you for a long time are made of aluminum. If you are going to do repairs only in your apartment, and this is not a permanent job for you, you can limit yourself to purchasing an inexpensive manual or electric spray gun.
Photo instructions on how to paint the ceiling
Quick-drying, odorless paint for interior work - main types, selection tips and benefits of useThe best aerosol paint in cans - main types, application features and advantages of use
The best water-based paint - ranking of the best manufacturers of 2018
How to choose façade paint for exterior use - a review of popular manufacturers and a rating of the best paints for exterior useWhich oil paint is better - a review of the best brands and criteria for selecting paints
The best interior paint for walls - 2021 rating and instructions for using interior paint
Removing old whitewash and paint
Removing the previous layer of whitewash is a necessary condition for painting. If you apply paint to the old finish, there is a risk of destroying the new finish. It is better to clean the walls and ceiling as follows:
Ceilings are washed off with water or a 3% vinegar solution, and the residue is removed with a spatula. Walls painted with oil or latex paint can be removed in the following ways:
- using a drill;
- heating with a hair dryer;
- cleaning surfaces with a scraper or wire brush;
- washing off with chemical liquids.
Mechanical removal produces a lot of dust; for this you need to use a respirator. Solvents do not always give positive results.
How to choose a color
Having chosen the type of paint, you need to choose its color and reflectivity:
- Glossy surfaces are more decorative, but require careful implementation of all stages of painting the ceiling; in the presence of the smallest defects, they significantly lose their appearance.
- On matte ceilings, small irregularities and roughness are not so noticeable, which greatly simplifies the technological process. But they look quite casual and ordinary.
- Recently, semi-gloss coatings have appeared on sale, which have the best qualities of the first two types. They give the ceiling a decorative shine, masking defects.
It is impossible to give definite recommendations regarding color, but it should be noted that white color has long ceased to be a dogma. The main thing is that the chosen shade is combined with other interior elements.
If you need to mix paints to obtain a specific shade, it is advisable to do this in a store. Then, if there is not enough paint, the master will be able to accurately repeat the previous coloring, and your ceiling will be painted evenly.
Stages of preparing the ceiling surface
Here everything depends on the degree of wear of the ceiling and the preparation that was carried out earlier, as well as on the finishing that was carried out earlier. Conventionally, surface preparation can be divided into several stages:
- removal of old coating;
The old layer of whitewash or paint must be removed in order to avoid surface unevenness and peeling of the new layer of paint in the future. This stage should be approached with special attention and responsibility. Even the slightest imperfections left on the ceiling can ruin the appearance of a newly painted ceiling.
- leveling the ceiling surface;
If the surface has uneven surfaces, it should be plastered or puttied until it is completely level. The layer of putty in this case depends on the unevenness of the ceiling. All cracks and chips must be strengthened with a special compound and carefully puttied to avoid further destruction and damage to the appearance of the ceiling. When carrying out this stage, you must remember that for painting you need a perfectly flat ceiling.
- ceiling primer;
After puttingtying the ceiling, it is necessary to prime the ceiling surface and clean it thoroughly. In this case, a special primer for the ceiling should be purchased for painting. It is best if it is a primer recommended by the manufacturer of the selected paint, matching the color of the selected paint.
- washing the ceiling and thoroughly drying it;
It is very important to thoroughly rinse the ceiling from construction debris and wait for it to dry completely. Upon completion of all preparatory work, you can begin the main stage of work, painting the ceiling surface. Do not forget to carefully check the cleanliness of the prepared ceiling.
- painting the ceiling.
At all stages of ceiling preparation, it is important to carefully ensure that chips and cracks in the ceiling surface are leveled and sealed with a special bonding primer. This will avoid chipping in the future, and therefore damage to the newly repaired and painted ceiling.
Tools you'll need
Let's start with the tools.
So, we need a roller. I painted with a long nap roller. The seller recommended it to me (I think for good reason), and later I found confirmation of this.
Foam and velor rollers are not suitable. We will also need a paint tray and a brush. It doesn’t matter what kind of brush, the main thing is a bigger one :).
I’ll go into a little more detail about paint.
I used water-based paint, of course you can use oil paint, but then it will be difficult to peel it off the ceiling in the future. I would also NOT recommend using glossy paint; it perfectly conveys any unevenness in the ceiling and looks somehow too glamorous. You will also need a rag and, oddly enough, construction glasses :).
Can you guess why? That's all. Let's move on to the actual painting process, or rather preparation for painting.
Let's get started
Having prepared everything you need, you can begin to work, sequentially performing the steps described below. After all, painting the ceiling with your own hands is not difficult:
- First, prepare the ceiling for painting. Use a spatula to clean the surface, fill the cracks, then smooth out the unevenness with sandpaper.
- Apply primer.
- Dilute the paint evenly to a medium consistency so that there are no clumps in it.
- They start painting from the corner of the room.
- Painting the ceiling is done with a roller dipped in the solution, then lightly wrung out. The mixture is gradually rubbed over the ceiling, passing it over one area several times. The new area should overlap the previously painted area by 5-10 cm.
- Each subsequent layer is applied after the previous one has dried.
- Ceiling plinths are protected with masking tape and, if necessary, carefully tinted with a brush.
- They examine the result of the work under different types of lighting and correct flaws, if any.
Now, having learned how and what is the best way to paint the ceiling in a room, you can safely experiment, create original design solutions, making your home comfortable and unique.
What else will you need?
In addition to the chosen paint for work you will need:
- paint roller;
- paint tray;
- protective film, masking tape;
- brush;
- ladder;
- spatula, fine sandpaper;
- putty;
- primer;
- good mood.
Having chosen what, we will now figure out how best to paint the ceiling.
Using a spray gun
If there is a large amount of work to be done, you can use a spray gun rather than a roller and brushes.
In addition, painting the ceiling with water-based paint using a spray gun is carried out if you have to work on plaster. The spray gun allows you to make a flat and smooth surface. But in order for the ceiling to be perfect, before painting you need to prime it with brushes and a roller.
The compactness of the tool is also its advantage. In addition, with its help finishing work can be completed much faster. The spray gun allows you to regulate the amount of material that is consumed.
In order for the painted layer to be thin, without streaks and smudges, it is necessary to follow some recommendations.
The jet from the spray gun should be perpendicular to the ceiling. The distance between the tool and the surface to be painted should not exceed 70 centimeters.
The pace of movements should be uniform, and their direction should be circular. If you don't do this and linger on some areas longer than others, it will be noticeable immediately after drying. As with roller painting, apply a second coat only after the previous one has completely dried.
Question details
Preparation – plastering or puttying?
Before you start painting the surface, regardless of what type of ceiling covering you choose, you should prepare the surface. So, first you should inspect the surface and remove pieces of the old coating. The process may take longer if you need to get rid of a layer of old water-based emulsion.
First, you should remove the remaining pieces of coating using a spatula, and then moisten the surface and do this several times, with an interval of 1/3 hour. During this time, the moisture will have time to saturate the previous layer. To speed up the process, you should open the windows and doors and then there will be a draft. The paint will swell quickly and can therefore be easily removed with a spatula. The resulting rust and stains should be wiped off with a fungicidal solution.
After this, using a tool such as a building level, you should definitely examine all the cracks and irregularities in the ceiling. Differences of up to 0.2 cm should be leveled using putty, and if they are larger, then using a plaster mixture. Small cracks need to be filled with putty, and if necessary, they need to be widened and filled. Next, apply the leveling mixture with a spatula and smooth it evenly over the surface. It is especially important to create an even coating that will not show any imperfections when using glossy paint.
It is not difficult to paint the walls and ceiling; in some ways the procedure is even similar. After the putty or plaster mixture has been applied, allow the surface to dry completely and you can begin sanding. To do this, use fine-grained sandpaper (“zero”). Remove any remaining dust from the surface with a broom, brush or vacuum cleaner. The prepared surface must be dust-free and completely dry in order to create maximum adhesion to the paint and primer solution.
Ceiling surface priming
Before you start painting, do not forget about the most important thing - applying a primer solution. This will help create excellent adhesion between the paint and the surface, as well as extend the life of the coating and reduce material consumption. The recommended type of primer is usually indicated on the paint can by the manufacturer.
In special cases, priming the ceiling is done with the same paint, which is simply diluted with water. When preparing the mixture, you must strictly follow the manufacturer's recommendations. Priming the ceiling should start from hard-to-reach places using a brush, and then you can move on to the main surface.
To perform priming in a short time, use a roller. It is recommended not to use the same painting equipment as for painting, so buy an additional kit in advance. You should start priming from the corner where the window is, and then you need to move towards the opposite wall. It is important to carry out the process continuously.
Apply a layer of primer in strips approximately 100 cm wide (overlapping). After drying, you can treat dark areas where gaps remain or apply a second primer layer over the entire surface. The primed surface should be allowed to dry according to the manufacturer's instructions.
Painting with a spray gun and roller
If you decide and will paint the ceiling surface exclusively with your own hands, without involving specialists for this task, then first you should carefully read the instructions. Each manufacturer of painting materials has its own nuances, which even experienced craftsmen follow so as not to accidentally make mistakes.
Some manufacturers advise diluting their paint with water, in which case the base layer will be less dense. If the instructions do not contain such a recommendation, then you can proceed to the next step. To do this, mix the paint thoroughly using a construction mixer or do it yourself with a wooden spatula so that the components of the mixture all connect with each other and react with each other.
Please note that before starting the action, you should curtain the window to prevent direct sunlight from entering. Windows and doors should be closed tightly. Heating devices cannot be used to quickly dry paint; this includes a household or construction hair dryer.
Start applying paint from hard-to-reach areas. Such places include ceiling plinths, corners, partitions, cornices, decorative beams, etc. To do this, use a pre-prepared set of wide and narrow brushes. Make sure that nothing sticks to the surface and remove all dust. After you dip your brush into the paint, be sure to wring it out so there are no drips. Press the brush moderately and increase the pressure gradually. Do not forget that the layer must be leveled.
In the future, painting the ceiling will be done using a lint roller. Pour the paint into a tray that has a mesh to squeeze out the excess, dip the roller, and roll it several times. Apply longitudinal lines first, and after completely painting the ceiling, make parallel stripes to create a maximum coverage layer without gaps.
Keep the width of the stripes to 50 cm, and overlap new layers of paint. When painting with a roller, do not open it from the ceiling surface, and gradually increase the pressing force. As the paint spreads, you can step aside and evaluate the result of the work. Apply the second coat of paint only after the first has dried.
To speed up the process, use a spray gun. Some vacuum cleaner models have a special attachment that will simplify painting work. the device will ensure uniform distribution of paint over the entire surface and without smudges. The optimal spray length will be 70 cm. We recommend maintaining the same distance from the floor and not keeping the sprayer in one place for a long time.
How to paint walls
Preparatory stage
How to paint walls? To understand how to do it correctly with your own hands, you don’t have to be a professional painter. All you need to do is stick to the plan and get great results.
Before you go to a hardware store, it’s worth measuring the area of the surface to be painted and this will make it possible to calculate how much paint is needed, because otherwise the paint you bought simply won’t be enough. Next, you should start preparing - remove the old layer of wallpaper or paint from the walls using a scraper, spatula or
sandpaper.
Please note that all irregularities and chips must be repaired using putty and wait for it to dry completely, and then treat all areas with fine-grained sandpaper. After this, treat the walls with a primer solution - such treatment will help the paint adhere to the wall, and will also help reduce its consumption.
For high quality painting, before starting the process, it is worth temporarily dismantling switches and sockets, as well as heating radiators (if possible). Items of furniture should be taken out or at least installed in the middle of the room, and then covered with construction film to protect it from paint splashes. To paint the walls without staining the ceiling, you should use wide-width masking tape. Glue it around the perimeter of the ceiling, while trying to lightly press it to the surface. The tape should be removed before the paint is completely dry, otherwise you may not get an even paint line.
Coloring
To begin, prepare the paint in the same way as when painting the ceiling - stir it thoroughly and, if necessary, add a little thinner, if such a procedure is possible for your type of paint product. It is best to start painting from top to bottom, the very top in the form of the ceiling is ready, and then you can start working on the walls - this way you can avoid drops of paint getting on the walls that are painted. Paint the surface in stripes, and if it is necessary to apply a second coat, wait until the first coat has completely dried.
Important! It is most convenient to paint the ceiling and walls using a wide circular roller, and at the same time use a special roller with a metal plate in the corners.

