Renovation is an opportunity to express yourself, show imagination and show an understanding of style. This is also a chance not just to decorate your home, but to make it more cozy and comfortable. However, few people know how to beautifully paint walls and make them truly attractive.
You can paint the walls with your own hands using several methods (see options for painting walls in the interior), but the most original look will be striped painting and gradient painting using the ombre technique.
Wall painting options
The variety of modern paints allows you to experiment with both the color and texture of the walls. An unusual effect can be achieved using painting compositions that have properties that are unusual for many.
Textured painting
Painting using special textured paint allows you to imitate a variety of surfaces from natural stone and fabric to orange peel. There are several types of textured paint:
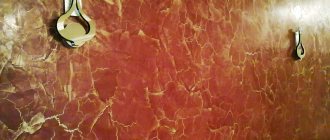
“Relief” is the easiest paint to apply, allowing you to achieve any effect using different tools. Consists of acrylic polymers with the addition of quartz chips.
Dividing the wall horizontally
The simplest option for decorating walls using paint of different colors is horizontal zoning. There are several standard techniques for this design option:
The wall is divided into two parts, a darker color is used to paint the lower part, and a lighter color is used for the upper part. You can use any matching colors: contrasting, similar or shades of the same color. If the border between colors is at a height of one meter or a third of the height of the wall, then such a division will create the visual effect of a high ceiling.
To create an even line or border between colors, you can use masking tape.
Gradient or ombre
Gradient painting of walls in an apartment involves creating a smooth transition of shades of the same color. Closer to the floor there is a darker shade, which becomes lighter as it approaches the ceiling. You can choose one of the ways to create a wall using the ombre technique.
Vertical stripes
An excellent solution for a room with a low ceiling would be to create vertical stripes of different colors. The stripes can be of any width: both the same and different.
Painting walls yourself using this method requires patience and accuracy. The edges of the strips are marked with masking tape. Lighter tones are used first, then you can move on to darker ones. After the first color has dried, the tape is removed and re-glued to a new place, then the next color is applied.
You can not only alternate different colors, but also create stripes with different textures.
Highlighting interior elements
An interesting technique used in interior design, which also applies to painting walls, is highlighting individual areas and interior details. Several selection methods are used:
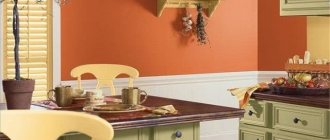
An “accent wall” is when one surface, usually opposite the entrance to the room, is painted a different color from the rest of the walls. Most often used in the design of living rooms and bedrooms.
Ornament
Instead of panels, you can decorate the walls with ornaments, for example, from geometric shapes. Any circles, rhombuses, broken lines, waves will look good. The process of implementing this option will be quite labor-intensive, but the result will be very impressive.
Artistic painting
Artistic painting of surfaces has always been considered the most impressive technique. It's essentially creating a piece of art on your wall. This design option requires taste and artistic ability, so it is not suitable for everyone.
Stencil drawing
Unlike painting, decorating a wall with stencils is accessible to everyone. You can buy stencils, or you can make them yourself. Drawings made using a stencil are distinguished by neat, clear lines and perfectly complement the interior.
Painting to look like wallpaper
Thanks to the availability of special embossed rollers on sale, it has become possible to paint walls with your own hands “to look like wallpaper.” When you see walls painted this way, it may seem that this technique is very complicated. In fact, it is very easy to get a pattern similar to a pattern on wallpaper. A rubber or silicone relief roller is carefully rolled out onto a wall painted in the background color. Paint of a different color is used for the drawing. The advantage of this type of painting over wallpaper is durability and practicality.
Walls
This is the most common and well-proven platform for applying ombre. Color tints can be applied to all walls of the room or just one. Both look incredible. With the distribution of color - where to apply darker and where to apply lighter - there is one trick: if the ceilings are low, up to 3 meters, then the dark shade at the bottom gives the walls solidity, and its gradual lightening upward, the transition to milky or white, visually increases the height of the ceiling. If the ceilings are more than 3.5 meters, you can safely experiment - go from dark to light from top to bottom.
Calculate the exact cost of repairs using an online calculator
and receive a free detailed estimate for repairs
Calculate
Photo: jcacena.com
Photo: sotano5.com
Photo: societyaberdeen.co.uk
Gradient wall painting
Purpose and features
Coloring with a transition creates depth and dynamics.
A gradient is a smooth transition from one color to another, in which a clear boundary between these shades is not visible. The style that uses coloring with a transition is called ombre.
At the same time, transitions can be observed not only in the design of walls, they are also used in furniture decoration, in the colors of curtains and curtains, bed linen, in other decorative elements or shaped parts of room decoration. This technique is used to give the interior dynamics, a certain element of movement, as well as for the visual effects of increasing space and creating depth and color relief.
Ombre involves the presence of transitions in various decorative details.
If we look at the natural environment around us, we will immediately notice that clear lines and geometricity are alien to it, as are identical repeating forms. Also, we will not be able to find right angles, squares, permanent borders and strict colors. Everything seems to flow from one state to another, the transitions are barely noticeable, the boundaries are blurred and changeable.
The photo shows that gradient transitions are familiar and natural.
This picture is familiar to us; we ourselves are not constancy and can change over time. However, the objects we create contrast with this picture: our rooms, pieces of furniture, houses, roads, cities - all have regular shapes and right angles. To somehow smooth out this contrast, a gradient painting technique is used in interior design.
Transitions can be quite abrupt.
The direction of the gradient can be horizontal, vertical, diagonal, diverging or mixed.
By placing dark and light areas in different zones, you can achieve the following effects:
- By darkening the bottom of the wall and lightening the top, the effect of vertically enlarging the room is created, the ceilings seem higher, and the floor seems more reliable and powerful;
- By darkening the upper part, the impression of a receding perspective is created, and the room visually expands. The boundaries between the floor and walls are a little blurred, especially if the color of the flooring is light;
- By darkening the corners and lightening the middle of the wall, the room loses its rectangularity a little, becomes rounded, and it may seem somewhat narrower. The interior becomes more contrasting and prominent;
- By lightening the corners and window areas while darkening the middle sections of the walls, the room expands and becomes lighter. The contrast drops and the lighting becomes more positive and brighter;
- Diagonal and wavy transitions introduce more dynamics, the room becomes less strict and geometric, straight lines and angles are visually smoothed;
- Spot painting with a transition in diverging directions is used in cases where it is necessary to repair a small area of the finish and make the boundaries of this area invisible. This method also allows you to “break” the rectangular geometry of the walls and adds depth to them.
Lightening the top of the wall with a vertical gradient makes the room appear taller.
Ways to make transitions
The light bottom makes the room wider, while the height of the ceilings seems a little smaller.
You can make a transition from one shade to another in different ways, so before you paint with a transition, you should choose the method that suits you. This can be spray painting with a transition, using a spray gun, using a roller or brush followed by polishing the edges, using the trimming technique with a sponge or brush, creating sharp edges and other techniques.
Making a border invisible using a brush is quite difficult.
The most effective way to paint with a transition with smooth “flowing” boundaries is to use a professional spray gun or airbrush. This tool allows you to regulate the intensity of paint supply during the finishing process; moreover, the specificity of applying the coating is such that the stain has a natural halo of a lighter shade, which can be used as a border between different colored zones.
The spray gun creates a natural border with a smooth change in color intensity.
When using a brush or roller to paint, you will have to decide how to buff out the paint transition, and this can take a lot of time and work, because it is not so easy to get your hands on, and damaging the walls in your own home is not the best option. The most difficult thing to do is to paint with a transition to a silver color, since it is very difficult to evenly distribute aluminum shavings.
Gradient curtains
One of the most popular options for using the ombre effect in the interior is curtains with a smooth color transition. They look especially stylish against the background of plain walls of a dominant shade. If the ceiling height is sufficient, you can afford to place the most saturated tones in the upper part. In pursuit of fashion trends, manufacturers have filled the market with various fabrics with gradient patterns of any color tone. They can use both barely noticeable transitions and stretches, as well as careless strokes.
Gradual transformations of one color into another look most advantageous against the background of white sections of the wall.
Ombre dyeing for light and dark hair: features
This coloring technique is suitable for both brunettes and blondes. The difference in ombre between light and dark curls will only be in the selection of color and the percentage of oxidizing agent. For dark ones, choose a higher one (6%-9%). And blond hair can be bleached by 3%.
There are also creative ombre options using non-standard colors (green, purple, pink, etc.). Ombre for blondes is the effect of sun-bleached strands with an almost white color. For brunettes, ombre is usually done in warm caramel tones, but today extreme options are also fashionable - from black at the roots to gray at the ends.
Ombre hair coloring is shown in detail in the video.
https://youtube.com/watch?v=OsJeCTgHuFs
Ombre for dark hair
So, the dyeing technique depends primarily on the length of the hair. Before bleaching, medium and long hair is collected in small ponytails and backcombed. This is the easiest way to do ombre at home.
It’s difficult to pull short hair into ponytails, so you’ll have to work in straight lines. With long ones you can also do without ponytails, but with them it’s easier.
The peculiarity of ombre for dark hair is that a high percentage of oxidizing agent (from 6%) and foil are used, which increases the temperature, thereby enhancing the lightening.
Remember that it is difficult to achieve a white ombre or ash color on dark hair, especially if it has been pre-colored. Usually the difference between the roots and ends when dyeing ombre is 2-3 tones. Therefore, lighten the ends to a red color and tint them to caramel, wheat, light brown, etc.
Ombre for blondes
If your hair is initially light, it will be even easier to create an ombre. You need to use a low percentage of oxidizing agent - 3% is quite enough. You also don’t have to use foil, since light hair is perfectly lightened when exposed to the powder.
Another advantage of ombre for blonde hair is that there is no need for tinting. If after bleaching you get a beautiful shade (and you usually do), you don’t have to tint your hair. If the color is very yellowish, choose a light dye with a purple pigment and apply it to your hair with a 1.5% or 3% oxidizing agent. Exposure time 20 minutes (applied to damp hair). You can also use purple shampoo or conditioner periodically.
Photo for inspiration:
Ombre style walls
The gradient in wall decoration certainly has its own charm - on a large surface it looks very impressive, seduces and tempts with its uniqueness. The number of fans of this technique is constantly growing. Thanks to the gradual tinting and dissolution of one color and the penetration of another shade into it, different climatic spaces can easily be conjured up.
The ombre wall painting technique fits perfectly into the aesthetics of the Mediterranean style, which is dominated by blue and white shades. Painting the walls in ombre style will allow us to create a climate in the home space reminiscent of the charm of resorts.
Dream of summer travel
The combination of turquoise sea, golden sand and warm sun will make you feel like you are on one of the paradise islands. With the right wall design, a calming maritime climate can be present in our home throughout the year. A space reminiscent of sunny days, regardless of the season, can be created using the ombre technique. To do this, various shades of blue are applied to the walls.
We can freely choose and combine: blues, azure, cornflower blue, cobalt or turquoise. The Mediterranean hacienda is bright and cozy, so remember that blue shades should be accompanied by white. Together they create subtle and fresh compositions. By using these colors and the art of shading, we can easily create the most wonderful holiday memories in our home. Who among us has not dreamed of a house on the seashore? The blue gradient will give us its sweet impression.
On the way to the color of the sea
This technique is best suited for well-lit rooms. A wonderful trio is created using shades: azure, blue and mint. Depending on personal preference, we can choose more intense or bleached tones. When dreaming of an ethereal space, you can use shades of blue and hydrangea. Blue can also be beautifully accentuated with purple. An extremely charming combination will be created by combining blue with lilac. Such an interior becomes extremely charming and will be associated with heather in a forest clearing.
Light ombre accents on the walls
People who are careful when manipulating colors may enjoy painting ombre walls in a muted version. This could be, for example, a combination of intense gray with a slightly softer and velvety silver tone.
Slightly yellow tones that bring a little light into our home will also work well. And blue additions will coordinate beautifully with the natural surroundings, such as a pebble beach that slopes into the sea.
A pink gradient on the walls will create a beautiful and romantic atmosphere.
Features of painting with tint transitions
Now, thanks to the discovery of the new ombre technique, everyone has the opportunity to inexpensively, but at the same time very effectively and unusually decorate the walls in any room. Why, besides an affordable price and a beautiful result, is it worth choosing paint with transitions for decoration?
Due to this, a complex gradient surface is created, where color and shade transitions can be performed in different ways:
- vertical;
- horizontally;
- diagonally.
This, in turn (depending on the location of dark/light areas), helps to divide the rooms into work areas. In addition, different graduations allow you to create all kinds of visual effects in the rooms.
| Type of graduated painting | Resulting effects |
| Lightening the top of the wall and darkening the bottom. | Visually increases the space. The ceilings appear higher and the floors appear more massive and stable. |
| Darkening the top area of the wall. | Makes the ceilings lower, but at the same time the room visually expands. |
| Lightening in the middle of the wall and darkening in the corners. | Allow the room to be a little visually rounded. The space may narrow, and interior details begin to stand out, becoming more prominent and contrasting. |
| Shade transitions are wavy or diagonal. | They bring more dynamics into the space. The interior does not look very strict and geometric, due to the fact that all the angular outlines of the details are visually smoothed out. |
| Spots with transitions expanding in all directions. | They add depth to the wall planes and “break” their rectangular geometry. |
| Darkening in the middle of the wall while simultaneously brightening the window and corner areas. | Visually makes the room lighter and more spacious. The contrast decreases, making the lighting look brighter, but at the same time soft and pleasant. |
All of the above makes this method of painting walls, in contrast to the traditional method, preferable, since it can effectively adjust both the width and height of rooms, as well as create the desired atmosphere in the rooms. And although it is more labor-intensive, the effect obtained from it is worth studying this technique. After all, there is nothing overly complicated in it, so any adult with at least some skills in painting work can handle it with their own hands.
Ombre
The only difference between ombre and gradient is the flawless transitions between colors, when clear color boundaries are allowed in the gradient.
To paint walls in ombre style, you will need paints of two different colors and the above-mentioned tools from the previous method.
The painting technology is slightly different. In this case, it is necessary to paint the entire surface in a light shade and let it dry. This happens within a few hours or days, depending on the paint used.
Then you need to mark the border with a dark color and paint the selected area right up to the outline. Without waiting for the paint to dry, you need to start shading the outline. This is done using special brushes. The result should be a smooth transition between the two tones.
Ombre wall - fashion trend
Ombre, translated from French, means “shading”. This is a special coloring technique that allows you to smoothly transition from one shade to another, gradually combining them in the middle, thereby creating a very interesting effect. This technique is very common in hairdressing, which is why in recent years we have often seen girls with an ombre effect on their hair. This trend is also penetrating into the design of our homes.
The ombre fashion lasts continuously for several seasons. And if until recently this technique was associated only with the beauty industry (make-up and hairdressing) and the clothing industry, today it has also made a brilliant triumph in interior styling. World designers have become passionate about this trend. And for good reason, the ombre effect on the walls looks very impressive. Depending on the execution technique, the walls resemble works of art, as if a real artist had worked on our interior.
How to paint nails with color transition master class
If you decide to experiment boldly with manicure at home, you need to check out the master classes on painting nails with a gradient effect. There are two styles of applying varnish - painting with a brush or using a sponge. Everyone chooses for themselves what is best. Having mastered this technique, masters offer not only two-color options, but also three-color ombre manicure. Colors are selected from the same palette according to the principles described above.
Sponge
For a gradient manicure you will need:
- several colors of varnish from the same manufacturer or the same density;
- sponge, cut into a couple of pieces;
- transparent fixative;
- manicure remover;
- cotton buds;
- palette (regular glass or a flat surface that does not absorb liquid);
- fat cream.
Application steps:
- Lubricate your fingers in areas close to the nails with rich cream. Then it will be easier to remove manicure mistakes.
- Having chosen the main color of the polish, apply it to all nails. This is provided that there is the same gradient manicure everywhere.
- Take a mixing palette, mix 2 or 3 shades so that the length of this stretched drop is approximately the length of your nail. Using a toothpick or needle, mix the varnishes at the point where they touch.
- Take a sponge that is not much wider than your nail. Dip it in varnish.
- Make an imprint on your nail. The light color should be closer to the cuticle, the dark color should be at the ends. This manicure technique visually stretches your fingers. If you do the opposite, you will get the opposite effect.
- Wait until it dries and repeat the procedure.
- Use a stick of nail polish remover to remove excess from your fingers.
- Apply gloss sealer. Manicure is ready!
- A little secret: if you use an applicator instead of a sponge, there will be almost no polish marks on your fingers.
Brush
This method is suitable for those who have already mastered the gradient manicure technique. Its advantage is that an ombre effect of 3 or more colors is possible. On a sponge, such a gradient will not look so clear. The only downside to a manicure with a brush is the investment of time and patience. If you want a gradient of five colors, then you need to manually extend each junction. The presence of gel polishes and an ultraviolet lamp greatly simplifies the task.
- How to deal with onion fly
- Knitting socks on 5 knitting needles: step-by-step master class
- Anemia - what is it, symptoms in children and adults
You will need everything the same as for a manicure with a sponge, only instead of it - a brush. If you have gel polishes, start applying the base, and then color variations:
Choosing a light shade, paint half of all nails from the cuticle to the middle of the nail. Using another dark color, go from the ends to the joining point. Take a brush, needle or toothpick and make vertical strokes at the point of contact
It is important to carry them out before they dry out. Repeat the procedure again. You will certainly get a soft transition from one color to another.
Stretching
Color stretching includes the two styles described above, but if the technology for their implementation implied any special nuances, then they are not here. A color stretch can include two or more colors.
Shade transitions are performed in different ways; in total, there are three options for color stretching:
- Vertically
- Horizontally.
- Diagonally.
When the lower part of the wall is darkened and the top is lightened, the visual effect of increasing space is created in the room, due to which the ceilings seem higher, and the floor, on the contrary, becomes more massive.
In order to make the ceilings visually lower, but at the same time expand the rest of the space in the room, it is necessary to darken the upper section of the wall.
By darkening the corners and brightening the middle of the wall, you will be able to visually round out the space of the room. There may be a visual narrowing of the room, against which some decorative elements begin to stand out.
Wave-like or diagonal shade transitions make the room more dynamic.
The angular outlines become more rounded, and the interior does not seem too geometric or strict.
Where is it best to apply a gradient in the interior?
This color will look best on one accent wall. The colors that contrast the least with each other will look best, and mixing them will not cause any trouble. Tools and consumables for work:
- Primer
- Roulette
- Pencil
- Level
- Stool or stairs
- Duct tape
- Two to three paint colors
- Measuring cup
- Bucket or plastic container
- 3 paint trays
- 3 medium paint rollers and holder
- Small brush
- Two large brushes
Carpets
Still, there is a way to inexpensively and effectively decorate floors using the ombre technique: carpets. This is much cheaper than laying out the entire floor with colored mosaics, and it is warmer. So far, the range of gradient carpets is small: manufacturers are cautious and focus more on individual orders. And there is only one shape of such carpets: rectangular. They are discreet, their presence fills the room with calm nobility, but it is impossible not to notice them. They “talk” to the furniture or decorative elements, support them and add a touch of aristocracy to the interior.
Photo: homedecomalaysia.com
Photo: wemp.app
Photo: bluebellgray.com
How to choose paint?
Depending on what exactly you are going to paint, you need to use the right coating option. There are paints for external and internal use. They are distinguished by their moisture resistance and ultraviolet resistance. If we need to prime the surface before painting, then the first thing you buy is primer paint, which will also help you level the surface you will be working with.
For interiors, it is best to use water-based paints, because they do not have a strong odor, they are easy to apply and the brushes are easy to wash after work. If you need to paint a nursery, it is best to use acrylic and water-dispersion paint, which allows the walls to breathe and does not contain toxic substances, because they are based on water.
However, for the bathroom you need to use a completely different option. The most suitable here would be oil or gloss paints, which are made on a solvent basis. Their advantage will be fast absorption, easy leveling and good resistance to moisture and abrasion.
If you like this type of paint, then it is important to know that it also has several types of gloss, which are indicated on the packaging. There are 6 options in total:
There are 6 options in total:
- 90-100 – the highest degree of gloss;
- 60-89 – just glossy paint;
- 30-59 – semi-gloss version;
- 11-29 – semi-matte version;
- 6-10 – matte paint;
- 0-5 – super matte.
If you have a perfectly flat surface, you can not be afraid and use glossy paint, which will advantageously emphasize the impeccable shape of the room. For those cases where there are flaws, it is better to paint the walls with matte paints, they will help hide all the imperfections. In the case when inconvenient surfaces are painted, where paint can flow or drip into the face, it is better to take thixotropic paints, which are thicker than regular ones, so they are more convenient to use.
You can understand how well painted walls look in the interior and whether it is convenient to paint from the reviews of those who have already done this procedure. Many note that the current generation of paints is significantly superior to the same enamel with which they had to work previously. The disadvantage of enamel is that it has a strong, pungent and unpleasant odor and, in addition, streaks can often be observed if the surface is painted in a thick layer.
To avoid making a mistake with your choice, it is best to consult a specialist
If renovations are being carried out in a nursery, it is important to choose the right paints so that the baby does not breathe in harmful substances. The results of using acrylic-based products are amazing, as customers note
Ease of application, lack of strong odor, quick drying, amazing appearance and absolute safety - all this speaks for itself. To get the same result, you just need to choose the right type of paint, and your room will very soon sparkle with new colors.
Ombre technique or gradient painting
Currently, gradient wall painting is quite popular. This approach will make the room truly attractive, but will also require effort from its owner. Moreover, there are also certain difficulties and nuances that must be observed when painting with a transition. Conventionally, this technology can be divided into six steps or stages, the implementation of which is mandatory.
Gradient wall painting
Stage No. 1.
At this stage, a light shade is applied. Moreover, it should be applied evenly over the entire wall, creating a base dense coating. This color must be chosen most carefully, as it will help correct flaws when applying other colors and create a “cloud effect”. Quite often, the base for painting walls with a gradient is done in blue.
Stage No. 2.
At this stage, the darkest shade is applied. As a rule, it is applied to the lower part of the wall (about 1/4). During application, you do not need to strive for a perfectly even strip; you can even make small waves.
Stage No. 4.
At this stage, a transition is created using a mixed dark and light shade. The transition is applied to the second quarter of the wall, partially affecting the first, already painted in a dark color.
Creating a transition when painting walls with gradients
Stage No. 5.
This stage is considered the most important. During it, a medium shade is applied to the third quarter of the wall from the bottom. To smooth out the transitions, you can take a little light shade and “blur” the border with light touches of the roller.
Stage No. 6.
At the last stage you need to prepare a soft and hard brush. These are the ones you will need to bring the transition painting to perfection. Moreover, everything is smoothed and leveled in two steps:
- paint that has not yet completely dried is “corrected” with a soft brush regarding the desired effect;
- already hardened layers are processed (including transitions) with a stiff brush for the best effect.
Using a brush allows you to softly blur the boundaries of the transition
Horizontal “ombre” or even mixing clear transitions with waves will allow you to create an individual style. The main thing is to periodically evaluate the overall picture. This technique will also be an interesting solution when creating furniture or dyeing fabrics.
To better understand the process, we suggest watching a video that demonstrates the transition painting technique step by step.
Thus, painting walls with a transition or even stripes is a simple task that anyone can do. All it takes is a little time, effort and imagination. Show your imagination, be creative and create a truly interesting, original and vibrant individual design for each room in your home.
Fade painting is a creative way to decorate walls in an unusual and attractive way using traditional paints. This painting technique is also called “ombre”, which means “shade” in French. What is it and how is it performed? All this will be discussed further.
How to paint
Painting walls does not require special skills or expensive equipment. You just need to know a couple of simple things that will help you achieve the desired effect, and also buy the necessary tools for applying the material.
Painting ombre walls: tools
You will need:
- a roller with thick pile or dense foam;
- hard brushes;
- two paint trays;
- White paint;
- three types of colorant you want to paint the room with;
- oilcloth to cover the floor and furniture;
- masking tape.
What materials are needed to create a color stretch defect?
- Paint in three different shades (for example, you want to get a blue-blue ombre. Then take dark sapphire, sea green, and light blue paint);
- Roller and bath;
- A pair of brushes of varying degrees of hardness;
- Scotch.
Once all the components have been purchased, you can begin to create a masterpiece.
Stage 1. Protecting the floor
Before starting actual work, it is necessary to protect all open surfaces: cover the floor with newspapers, and cover the furniture with plastic wrap and wrap it with tape.
Stage 2. Applying the first coat of paint
The first layer should be the lightest. Dip a roller into the paint and go over the entire wall, carefully and evenly distributing the color from the ceiling to the floor. You need to apply light paint in several layers so that in case of stains of other colors, there is a main base color underneath.
Stage 3. Apply the darkest color
Here you should divide the wall “by eye” into 4 parts. The very bottom of the wall must be painted in a dark color. If the upper boundaries are not perfectly smooth, this will only be beneficial.
Stage 4. Making the first transition
At this stage, you need to mix light paint with dark paint; this can be done in a bath. After dipping the roller into the resulting mixture of colors, you need to paint the second lower part of the wall.
Stage 5. Medium color
The third quarter should be painted with a color one tone lighter than the previous section of the wall. To do this, dilute the paint that was used in the previous step with a slightly light shade and paint it.
How to make Ombre on the walls in an apartment? Is it possible to do this yourself, and how can I achieve the desired result?
House painting technique: step-by-step instructions
More often, ombre is done on dark hair, gradually lightening the ends. You can imitate the ombre style with your own hands using multi-stage lightening.
At the same time, there are different techniques. If you get acquainted with several, you can choose one that can be easily reproduced on your own.
Preparation
In addition to paint, you need to prepare in advance the devices that may be needed in your work:
- container for diluting dye components;
- paint brush;
- food foil, cut into strips 10 cm wide and 5 cm high longer than the intended painting area;
- gloves;
- hair bands.
First you need to prepare your hair: comb it and divide it into strands; it is better to cut off split ends immediately.
Secure each strand with an elastic band 1 cm above the coloring area. There is no need to divide long hair into strands in 2 tiers, this will only get in the way.
For independent actions, it is enough to make 4 ponytails - 2 on both sides of the face and 2 behind.
Stir the dye according to the instructions, and see the recommended exposure time there (usually 40 minutes). Wear gloves.