One of the mandatory stages of bathroom renovation is leveling the surfaces. This stage of work must be completed before painting the ceilings and walls, since all the roughness and unevenness will be very noticeable on the decorative layer, worsening the design of the room.
For this work, it is necessary to choose a material that is not afraid of moisture. Using a special putty, you can get the most even surface possible, while improving its water-repellent qualities and preventing the appearance of fungus. Thanks to the special composition, the moisture-resistant putty for the bathroom only becomes stronger when exposed to moisture.
What is wall putty in the bathroom?
Do-it-yourself bathroom putty
We begin bathroom renovations with a careful inspection, assessing the scope of work. We pay special attention to treatment with antifungal agents. In order for the walls and ceiling in the bathroom to be smooth, it is necessary to complete several main stages of work:
- Leveling difficult areas (we lay the material in the area of depressions, irregularities, cracks, and then level it with a spatula)
- Priming and drying the surface (after treating the surface with a primer, you need to dry everything). Moreover, the best option for drying: naturally, without the use of heating devices.
- Applying the finishing layer (apply a layer of putty, leveling the walls and ceilings)
- Smooth the surface until it is as smooth as possible and dry again.
After the putty on the walls in the bathroom has dried, you can apply a decorative layer: lay tiles, paint, etc.
Puttying walls in the bathroom (video)
Insulation materials
0 votes
+
Vote for!
—
Vote against!
The bathroom is a room with high humidity, therefore, for finishing the walls, it is necessary to use a special moisture-resistant putty. This composition, when exposed to moisture, improves performance characteristics and becomes more durable. We will learn further about how to finish the walls in the bathroom using moisture-resistant putty.
Table of contents:
- Moisture-resistant putty for the bathroom: application features
- Moisture-resistant putty for drywall: selection and characteristics
- Moisture-resistant putty price and application tool
- Bathroom putty for painting: application features
Moisture-resistant putty for the bathroom: application features
The putty used to finish the walls in the bathroom must have certain properties that ensure the quality of its use. Regardless of the further finishing of the walls in the room, the putty for the walls in the bathroom should be:
- resistant to moisture - ordinary putty, under the influence of moisture it swells, peels off, deforms and generally collapses, while moisture-resistant materials should become stronger under the influence of moisture;
- long-lasting - the minimum service life of the putty after its application to the walls should be twenty years;
- resistant to changes in temperature - since the bathroom is a room with an unstable temperature regime, the putty for walls should easily tolerate these fluctuations; expansion and contraction of the putty when the temperature changes leads to its destruction.
Please note that these criteria are decisive when choosing a putty composition for finishing bathroom walls. Individual additions depend on further wall finishing. So, for example, if after finishing the walls in the bathroom are painted, then the surface should be perfectly even, which means the putty should fit perfectly on the wall. For walls finished with tiles, this criterion is less important.
To decorate the walls in the bathroom, the following compositions with a mineral or polymer base are used:
1. Cement-based bathroom putty.
For the manufacture of this composition, high quality Portland cement is used. When exposed to moisture, it becomes even more durable and strong. The coating, after being applied to the wall, is additionally moistened with water. The main components of this composition, in addition to cement, are fine sand and clinker chips. In order to improve the plasticity of the composition, various additives and fillers are added to it.
2. Acrylic or latex putty compositions based on polymers.
Consists of various types of mineral and synthetic additives. This composition is characterized by greater plasticity than cement. It does not shrink and is easily applied to the wall, spreading on its surface. However, the cost of such putty is an order of magnitude higher than that of its cement counterpart.
Some experts use façade putty to decorate bathroom walls. However, before purchasing a product, make sure that it does not contain harmful or toxic substances.
Gypsum-based mixtures are not recommended for use on bathroom walls under any circumstances, despite the fact that some of these compositions are also labeled as moisture-resistant. This type of finishing is not able to withstand constant steam and changes in room temperature.
When answering the question of which bath putty to choose, we definitely recommend choosing an acrylic or latex version of the composition. If the cost of the composition is critical for you, then purchase a cement-based putty with moisture-resistant characteristics.
Moisture-resistant putty for drywall: selection and characteristics
Depending on its purpose, drywall putty is divided into types:
1. Moisture-resistant finishing putty - often sold in ready-made form, used for final finishing of indoor walls. After finishing with the finishing compound, the walls are prepared for painting.
2. Moisture-resistant leveling putty - used for the initial leveling of the wall, this composition allows you to get rid of joints between sheets, holes for fasteners, etc.
3. Universal putty compounds - allow you to perform leveling and final finishing at the same time.
In relation to the composition, moisture-resistant bathroom putty is:
1. Compositions based on gypsum - do not shrink, but have poor moisture-resistant characteristics.
2. Cement compositions - have excellent moisture resistance, resist mechanical stress well, but they shrink slightly. With the help of such compositions, the walls in the bathroom are decorated with tiles.
3. Polymer putty mixtures are the best option for perfectly leveling walls. The putty has high plasticity and is well distributed on the wall, leveling it. The only drawback is the high cost, which is fully justified by the performance characteristics of the material.
However, please note that before applying any mixture, it is necessary to coat the walls with a primer, which will ensure high-quality adhesion of the wall to the material and perform an antiseptic function.
In relation to readiness for use, moisture-resistant putty for bathtubs is:
- dry - to dilute this material you will need water, the compositions are less convenient to use, since they require a certain consistency and the use of a mixer for their preparation, in addition, such mixtures harden quickly, so they are prepared in small portions;
- ready-made - the compositions are more expensive, but are easy to apply; before using the composition, you just need to mix it well; in addition, their shelf life is quite long, and they do not lose their characteristics over time.
Moisture-resistant putty price and application tool
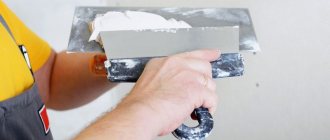
In the process of plastering walls, it is necessary to prepare in advance the equipment that will be needed during the work. First of all, stock up on spatulas of different sizes, with which you will apply the putty composition to the wall.
If you are using a dry composition, then prepare materials for diluting it. A bucket or additional container, water, a drill with a mixing attachment, or a construction mixer.
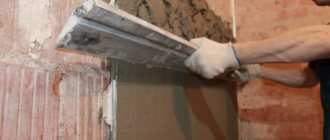
Also, it is necessary to select a primer in advance, the type of which is determined by the type of putty used to finish the walls. The putty is applied to the wall with a wide spatula, and on a wide spatula it is applied with a narrow one. If there is more than one square meter of wall area, use the rule to level it.
To avoid the appearance of cracks on the walls, a mesh is used during the puttying process, which improves the mechanical strength of the composition.
Bathroom putty for painting: application features
Bathroom putty for painting should have the following performance properties:
- high moisture resistance;
- antiseptic characteristics that prevent the development of fungus and mold in the bathroom;
- minimal porosity;
- high adhesion to the base, regardless of moisture and temperature changes.
It is with the help of a polymer composition that it is possible to create an ideal coating for painting bathroom walls. When in contact with air, the putty polymerizes, providing high performance characteristics.
After applying the composition, it is possible to obtain a very smooth surface that does not require additional grinding. Such formulations are sold in finished form and do not require additional dilution with water.
Polymer-based putties are:
- acrylic - with their help, both finishing and initial finishing of walls are carried out, they have a high level of plasticization, therefore they are able to fill minor unevenness and eliminate defects, ready-made compositions are distinguished by the absence of an unpleasant odor, therefore they are used indoors for people suffering from allergies, they have a high degree of adhesion to surfaces made of concrete or wood;
- latex composition - allows you to obtain a perfectly mirror surface, has high adhesion, therefore it is universally applicable on all types of surfaces, and is not prone to cracking and shedding during operation.
Before applying putty to the walls in the bathroom, you need to prepare the walls. Initially, remove the old coating from them, assess the condition and, depending on this, perform the following actions. If there is fungus or mold on the walls, you need to get rid of them using abrasive compounds. To remove old plaster or putty, use a spatula; sandpaper will help with final cleaning.
If it is necessary to deform the tiles from the walls, use a hammer drill. After this, you should get rid of dirt and dust in the room. In relation to the main material from which the walls are constructed, evaluate them for the presence of cracks and chips, and if necessary, plaster the walls.
Treat the walls with a deep penetration primer, which will prevent the development of mold and mildew on the wall. We recommend choosing an acrylic-based primer. With its help, not only will the mechanical strength of the coating improve, but also its resistance to moisture will increase.
Please note that by removing the finishing to the main part of the wall, you increase the material and physical costs of renovating the bathroom. Therefore, if the base is of good quality, it should not be removed. In any case, first of all, it is necessary to assess the situation by conducting a visual inspection of the walls.
Old plaster remains on the walls in the following cases:
1. They are securely fixed on the wall, without deformation, swelling, or cracks. If tapping on the wall keeps the plaster tightly on it, there is no need to replace it.
2. Remove the decorative coating without damaging the plaster layer. Use a spatula to remove wallpaper or paint. Dismantling of tiles is almost always done with damage to the plaster.
If you are sure that all technological nuances were observed when plastering the walls, then feel free to leave this layer on the wall.
To putty the walls and ceiling in the bathroom, you need to take care of installing beacons, the interval between which is up to half a meter. To do this, use a laser level. The most convex point of the wall will be a guide for determining the thickness of the putty. If there are cracks on the walls, install in their place a cut piece of fiberglass or a special mesh that prevents delamination.
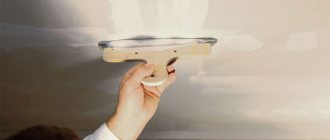
If the ceiling in the room will also be puttied, then start work there. Prepare the composition for use by mixing it thoroughly. Using a small spatula, apply putty to the corners and spread it over the surface.
To facilitate the puttying process, carry out preliminary leveling with the starting composition, and then apply the finishing mixture.
Puttying walls begins with installing the putty composition inside the deepest cracks and defects. Level the composition with a spatula and wait until it dries. Treat the wall with another coat of acrylic-based primer and continue working. Please note that the adhesion of the finished putty composition to the wall depends on the quality of the primer. Apply the starting compound and level the walls.
After it dries, sand the walls. Using a small float, apply finishing putty, the thickness of which should be minimal. To treat a small room, use a spatula to apply putty. Wait for the composition to dry and apply another layer of putty.
Drying walls should be carried out in the most comfortable conditions. There should be no drafts in the room, and the optimal temperature is about 20 degrees. If the putty has a cement base, then excessive humidity in the room will only strengthen it.
After the putty has dried, the walls are prepared for painting. Please note that this process begins a few days after the final alignment of the wall. If this process is performed later, the cement composition becomes highly durable and it will be impossible to sand the walls.
Before starting work, put on protective clothing, a mask and a respirator. Since during operation a large amount of dust is released, irritating the eyes and respiratory tract. Attach the abrasive grid to a hand or power tool to level the walls. It is possible to replace the mesh with fine-grained sandpaper.
The plane of the walls is processed using circular movements. At the same time, keep an eye on the workflow. Sanding is carried out until there are no unevenness on the wall. To check the wall, use a level or rule. Next, you should get rid of dust in the room and prime the walls. The primer improves the strength of the walls and additionally fixes the putty.
Further steps in finishing the walls in the bathroom involve painting them. For these purposes, you should also use compositions with moisture-resistant characteristics that tolerate temperature fluctuations well.
Types of putties
For the bathroom they should be:
- waterproof;
- protect walls from dampness and fungus;
- with the lowest porosity values;
- resistant to sudden temperature changes;
- It wets the surface well, which makes it possible to apply a very thin layer of material.
Manufacturers offer two groups of putty:
- cement based
- polymer compositions (acrylic, latex)
There is also putty for enamel bathtubs and sinks, but its use has slightly different purposes, namely the restoration of the coatings of washing containers. With careful preparation and execution, this allows you to reliably protect products from further destruction. We use epoxy bathroom putty here. The subtleties of carrying out such work will be discussed by us in a separate article.
Types of composition
The material is divided into groups: according to the degree of readiness, type of main component, purpose. Depending on the degree of readiness, it can be dry or ready to use. For a room with high humidity, the most suitable option is cement-based and polymer-based building mixtures. They protect against corrosion, fungus and cracking. You can consider the characteristics of all types of compositions, there are several of them.
- Cement: advantages – The type of material is resistant to moisture. It is recommended to use it in the bathroom before painting. Increased humidity levels do not affect the quality of the mixture. Reliable and affordable. Disadvantages: Grainy structure. Dried walls will have a gray color. When choosing light shades of paint, this must be taken into account so that the color of the walls does not become tinged with gray or dirt. It is better not to consider white color with this option. In addition, the cement material tends to shrink, so it is better to make several layers and sand them thoroughly. The slab takes quite a long time to dry, the room requires ventilation;
- Gypsum: advantages, lighter powder, dries quickly. The surface after drying becomes light white. Any colors are applied to the gypsum material in an even layer without changing the shade of the color. Ideal for pale paint colors. Disadvantages include the inability to use for exterior repairs and susceptibility to temperature changes.
Requirements for putty
How to putty a bathroom yourself
The main requirements that putty for a bathroom must meet:
- Increased water resistance. The mixture must maintain its characteristics over a long period of time, regardless of exposure to moisture. This requirement remains unchanged even if the wall leveled with putty is covered with a facing material (tiles, lining, moisture-resistant wallpaper, etc.).
- Resistant to deformation over a wide temperature range. Otherwise, if the bathroom is tiled with ceramic tiles laid on putty that “floats” with temperature changes, then the tiles will simply begin to fall off after several showers.
- In addition to being water-resistant, bathroom putty should have a long service life. And if all stages of finishing work are carried out correctly, then there should be no complaints for about two decades.
What kind of putty should be used for a bathroom?
Bathroom putty should have increased resistance to condensation and temperature changes. Before applying the topcoat, it is necessary to prepare the base, ensuring protection against fungi and mold. The durability of the repair depends on the correct selection of plaster and the quality of surface preparation.
Calculation of the required amount of materials
Each stage of work on puttying bathroom walls is performed with a different type of finishing material. Starting, or in other words, “rough” putty is used at the very beginning. Finishing, or “finishing” is the final one and is intended to create a perfectly flat surface on which you can glue wallpaper or tiles. How to correctly calculate the amount of putty for the ceiling and walls in the bathroom for painting or other type of finishing?
Leveling the putty
Unfortunately, it will not be possible to calculate material consumption with an accuracy of 1 kg. This is due to the fact that each type of surface has its own characteristics, and the curvature of the walls is always individual. For standard flat walls, normal putty consumption is 0.8-0.9 kg/m2. And unevenness, cracks and surface defects can easily “raise” these figures to 8-9 kg/m2. Feel the difference!
When making calculations, the main focus is always on the information provided by the manufacturer on the packaging of the material. But in order to avoid getting into a situation where literally half a kilogram of the mixture is not enough, it is best to use this method. We multiply the consumption data given on the packaging by the area of the surface to be treated and add another 10% to the result obtained. Please note that the consumption figures on the packaging are shown when applying a layer 1 mm thick. If during the work the putty layer becomes thicker, proportionally more material will be lost.
Choosing a manufacturer
Be sure to pay attention to the manufacturer when purchasing. It is better to opt for well-known brands. The most popular are Rotband and Vetonit. Such compositions are offered for sale in special packages, bags, and buckets. The container is designed for a certain area, which is indicated on the packages. Manufacturers clearly prescribe storage rules and preparation proportions. The material for the final layer has small volumes - up to 1.5 kg. A smaller quantity is required, which is why manufacturers offer such a container weight.
Popular compositions and their features:
- Vetonit VH: it is suitable for bathrooms, the mixture is cement. The layer thickness is up to 2mm. The shelf life of the prepared mass is 3 hours. The surface dries in 1-2 days;
- Vetonit KR+: polymer composition. The layer thickness reaches 5 mm. You can work throughout the day. It also dries in 24 hours;
- Vetonit KR: adhesive (organic material). The layer thickness is 1-3 mm. It is recommended to use the prepared mixture 24 hours in advance; the surface dries within 24 hours.
Leveling the walls with putty with your own hands
After the starting and finishing layers have been applied, dry the surface thoroughly. Drying requirements:
- Stable temperature conditions.
- No drafts.
Plastered walls should be sanded no later than after 3-4 days. Otherwise, the surface will harden so much that you won’t be able to handle it with any grinding machine. The process of leveling the walls itself, although labor-intensive, is not difficult.
During surface treatment, a large amount of dust is generated. Be sure to use a protective cap on your hair, a respirator and special construction glasses when working.
In conclusion, we note that moisture-resistant putty is used in the same way as other similar materials. A distinctive feature is the components that allow it to be used under aggressive influences of humidity.
Work before painting
In order to carry out finishing work, you either need to involve professionals or try to do everything yourself. It is necessary to take into account a large number of nuances and pitfalls. Take into account the cost, quality of the material, calculate the area and condition of the surface being treated, the number of corners, the depth of flaws, and much more.
- You should inspect the walls or ceiling before painting for the presence of microorganisms, rot or mold.
- Mandatory dismantling of outdated coating. Special mixtures that are used according to the instructions will help here. In addition, you can use sandpaper, a scraper or even a grinder. Although the most effective method is a grinding machine with a diamond tip.
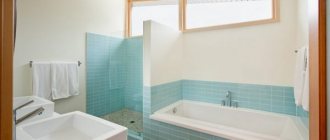
Photo gallery of finished works
?????????????????????????????????????????????
Choosing putty
Based on these requirements, mixtures based on cement and polymer compositions are most suitable for use in wet areas. They are able to provide effective protection for rough walls and counteract the development of bacteria and fungi.
Cement putty can shrink slightly, which is important if there are significant roughnesses. Therefore, you will have to apply several layers or grind the surface. It is a dry powder mixture of Portland cement and plasticizing additives. To apply it to walls, it is mixed in certain proportions with water according to the instructions until a homogeneous composition is obtained. Drying speed depends on the humidity level and room temperature.
Polymer compositions make it possible to create coatings with high surface quality without shrinkage. To dry them, special conditions are not required, as is the case with cement compositions. Polymerization of the layer occurs upon contact with air for a short time (from 20 minutes). As a result, the room is ready for applying the finishing coating within a few hours. During operation, polymer compounds are least prone to cracking and peeling. The surface is almost perfectly smooth and does not require additional sanding. Therefore, such putties are ideal for finishing leveling. They are supplied in the form of ready-made mixtures, which guarantees full compliance of the composition with the requirements and construction standards.
Polymer putties are divided into the following types:
- Acrylic. Designed for roughing and finishing. They have high plasticity and therefore are able to easily fill various irregularities and pores. They have high strength and durability. The finished solution is odorless and therefore can be used even by allergy sufferers. It has a high degree of adhesion to wooden and concrete surfaces.
- Latex. Used to obtain an ideal mirror surface. They have a high level of adhesion to almost all modern building materials, which makes them universal. They do not shrink, do not crack or crumble over time.
Selecting latex putty for finishing bathroom walls
Prerequisites
The conditions of the bathroom really suggest that only wear- and moisture-resistant materials with minimal hygroscopicity should be used in it. In particular, waterproof putty for the bathroom should be made with a cement binder and nothing else.
Cement waterproof putty.
- Bathrooms are characterized by high humidity. More precisely, humidity fluctuations in a wide range of values: after taking a hot shower, the atmosphere in it will be saturated with steam, but after half an hour of ventilation operation, the humidity will stabilize at the same level as in living rooms;
Where there is a shower, there is high humidity.
- The walls and, to a lesser extent, the ceiling of the bathroom are susceptible to dirt. They are exposed to splashes of shampoo, soap and detergents that are used to clean the bathtub, shower stall and washbasin.
Bathroom putty: destroying myths about the requirements for finishing damp rooms
Prerequisites
The conditions of the bathroom really suggest that only wear- and moisture-resistant materials with minimal hygroscopicity should be used in it. In particular, waterproof putty for the bathroom should be made with a cement binder and nothing else.
Cement waterproof putty.
- Bathrooms are characterized by high humidity. More precisely, humidity fluctuations in a wide range of values: after taking a hot shower, the atmosphere in it will be saturated with steam, but after half an hour of ventilation operation, the humidity will stabilize at the same level as in living rooms;
Where there is a shower, there is high humidity.
- The walls and, to a lesser extent, the ceiling of the bathroom are susceptible to dirt. They are exposed to splashes of shampoo, soap and detergents that are used to clean the bathtub, shower stall and washbasin.
Even splashes of clean water can leave marks that need cleaning. Water contains a large amount of lime and salts, which, after it dries, settle on the previously wetted surface. If in doubt, look at the bottom of your own kettle.
Scale consists of lime dissolved in water.
Comrades, what do you think: will you get very wet in the rain if you wear a raincoat made of waterproof material?
Stupid question, right? You are protected from water by a reliable barrier, so you will probably get home in a dry suit.
Why did I ask this question? You see, finishing walls does the same thing to plaster and putty that a cloak does to your dress suit. What difference does it make to putty on walls before painting if the paint is impermeable to water?
Yes, but where can I get such paint? - the reader will ask, perplexed.
As they say in Odessa, I have them. Meet: rubber water-dispersion paint.
Rubber water-dispersion paint of domestic production.
I will give its characteristics using the example of a dye that I have repeatedly used when decorating my own home - Rezel + produced by the Sevastopol Accent LLC.
Technology and preparatory measures for puttying work
Before you start puttingty, you need to prepare the walls.
- First you need to check the room for mold and mildew. If necessary, you should treat the affected areas of the walls with bleach and antiseptic. The wet surface is first dried with a blowtorch, and then the walls are cleaned with a wire brush.
- If there are malfunctions in the bathroom ventilation, it is better to eliminate them. This will prevent the negative consequences associated with the formation of mold.
- At the next stage, remove the layer of old putty, including cracks and seams. The joints between the plates must be filled with foam. You can putty directly on concrete, plaster, and moisture-resistant gypsum cardboard.
Grouting tile joints in the bathroom with your own hands - how to do it correctly, read on our website.
You can read about how to choose linoleum for a bathroom in this article.
Using a building level, you need to determine unevenness and slopes of the walls. If the differences are more than 5 mm, the walls must be leveled using plaster. Protruding irregularities need to be knocked down with a hammer drill, an ax or a grinder. If panels are planned for painting, then the surface must be perfectly smooth. Mixtures must have a fine-grained structure.
After such work, it is necessary to prime the walls using penetrating compounds. They will provide better adhesion. In order to completely level the walls, the putty should be applied in several thin layers. This is caused by thicker layers cracking and peeling off. To avoid cracks in painted bathroom walls, it is recommended to use special reinforced mixtures with a polymer mesh or fibers. With their help, it is easy to prepare and level surfaces for painting.
Thus, working with moisture-resistant and conventional putty is not much different, since they are performed using similar technology. An important feature of puttying the walls of rooms with high humidity is the preparation of surfaces, which necessarily includes antibacterial treatment. Leveling the walls with moisture-resistant putty is possible only in several layers, since the thickness of each should not exceed 5 mm. In this case, the final versions of the mixture should be more plastic and less grainy, and also not exceed a thickness of 1 mm.
Carrying out puttying
Moisture-resistant bath putty should be diluted in small quantities. More often the material is applied in 2 layers. In this case, the previous coating must be completely dry before the next one.
Bathroom putty for painting
After treating the walls with primer, a gypsum-cement composition is applied to them: it is better suited for painting. Experts recommend using putty and finishing material based on the same component.
The technology provides for the following types of work:
- Applying the mixture. They do it overlapping. The thickness of the coating often does not exceed 2-4 mm. This can be achieved by using the correct pressure on the tool. The solution is applied in several layers.
- Drying the walls. To do this, protect the room from drafts or direct sunlight on the surface (if there is a window in the bathroom). Artificial drying using a heat gun or hair dryer. The average drying period for the putty is 12 hours, but further work is best done every other day.
- Surface grinding. A jointer with coarse sandpaper attached to it removes the sagging. The procedure is carried out in bright light.
After rough sanding, a thin layer of finishing putty is applied to the base. After it has completely dried, the surface is treated with fine-grained sandpaper. To achieve a mirror effect of paint, the walls are polished.
Puttying wooden surfaces in the bathroom
For treating wood flooring, it is better to use universal acrylate-based compounds. They are well absorbed into the texture of the base.
The following mixtures are used for work:
- latex;
- hydrophobic;
- oil-glue;
- polymer putty.
The maximum layer thickness is 1.5-2 mm. After the mixture has dried, the surface is checked under a bright light for defects or unevenness. Lastly, the base is treated with fine-grained sandpaper.
What tools are needed?
The following tools are used for work:
- bucket for mixing putty mixture;
- a device for applying a substance to a trowel;
- a drill with a special attachment or a construction mixer;
- spatulas of different sizes;
- rule for checking the vertical level of the base after leveling;
- sanding machine or sandpaper of varying degrees of grain;
- roller or brushes for applying primer;
- metal brush;
- pencil, building level, square, plumb line, measuring tape.
Masking tape is used to protect adjacent areas.
Brief summary
Cement moisture-resistant putty for the bathroom is not the only material that can be used to level walls. Gypsum mixtures can also be used for puttying.
Gypsum-based building mixtures.
In this case, two conditions must be met:
- The final coating of the walls must be waterproof . I provided a list of possible solutions a few paragraphs above;
- The room must be equipped with effective exhaust ventilation . With constant dampness, any mineral-based material will inevitably be affected by fungus.
Low ventilation performance will quickly lead to the appearance of fungus.
In a typical city apartment, for normal ventilation operation, it is enough to install an exhaust hood in the ventilation duct. You should not connect the fan in parallel with the lighting: the bathroom needs ventilation around the clock, but it is used for its intended purpose only one or two hours a day.
Exhaust hood in the bathroom ventilation duct.
To fill minor defects in walls and ceilings, you can use façade acrylic putty. After setting, it tolerates short-term contact with water even without protective painting.
Facade acrylic putty is sold completely ready for use.
On thematic forums you can come across an interesting question: who coated a metal bathtub with noise-reducing putty? I appreciated the mindset of its author, who was inclined to look for non-standard solutions; however, it is much easier to foam the bottom of the bathtub or stick thick microporous rubber on it.
Polyurethane foam applied to the bottom will turn a noisy bathtub into a quiet one.
In order not to be unfounded, I will tell you how and with what I finished the combined bathroom when building the attic of my own house.
The frame is a galvanized profile 50 mm thick (guide and rack).
The wall frame is assembled from galvanized profile.
Sheathing - wall plasterboard. Due to a small error in the calculations, there was not enough moisture-resistant plasterboard, so part of the wall and ceiling cladding was made of ordinary, white plasterboard.
From left to right: regular, moisture-resistant and fire-resistant gypsum plasterboard.
Puttying
How to putty plasterboard in the bathroom along the seams and fastener heads? After a brief reflection, I boldly used gypsum mixtures - HP Start to fill the joints and ABS Saten to level the surface.
Finishing gypsum putty ABS Saten.
I really liked ABS putty because of its long (at least 45 minutes) lifespan after mixing and the fact that it almost never clumps when mixed, even if it does not have time to be completely saturated with water.
The putty for painting for the bathroom was sanded using an oscillating sander and mesh No. 80 and No. 120. The first was used for rough grinding, the second for final smoothing of the surface. After sanding, the walls were vacuumed to remove fine plaster dust and primed with acrylic primer.
For small amounts of sanding, you can get by with a hand grater.
I already wrote about which paint to choose. My choice was the notorious “Rezel+”. Due to the small area of the walls and the abundance of corners, I painted with a brush; In total, I had to apply 4 layers of paint, since with less, the coloring remained uneven. The drying time of one layer did not exceed 60 minutes.
Wonderful paint made in Sevastopol.
If you are tinting the paint, mix it with pigment with a reserve. The instructions are due to the fact that sooner or later the walls will require minor repairs; It is basically impossible to get exactly the same shade again when mixing with your own hands.
When tinting by hand, mix the paint with reserve for future repairs.
A tiled splashback was glued to the wall above the bathtub. The tiles were glued in a somewhat unusual way - with silicone sealant applied in spots. It was also used to fill seams.
The finish is durable and completely waterproof.
The apron tiles above the bathtub are glued with silicone sealant.
Ventilation
A duct fan with a capacity of 105 m3/hour is installed in the exhaust grille of the ventilation duct. Its power supply circuit is dimmable. The dimmer allows you to choose between ventilation performance and silence.
Next to the switch is a dimmer that controls the speed of the exhaust fan.
Operation report
Almost three years have passed since the finishing work was completed, and the interior of the room has retained its impeccable appearance and has no visible signs of damage to the finish.
The photo shows a wall finished with gypsum putty in the bathroom of my attic.
From the article you learned that there are no restrictions on the type of binder for putties and plasters used in the bathroom. With the right choice of finishing, you can safely use building mixtures intended for dry rooms. You can learn more about finishing bathrooms from the video in this article.