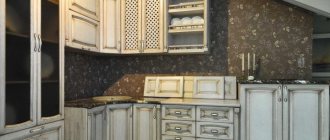
Today, not only residential and utility rooms in country houses, but also city apartments are often decorated in an antique style. Living spaces decorated in the “Provence” style, which is characterized by an abundance of wooden decorations darkened by time and sometimes cracked, look especially elegant.
To form this design style, the interior must be filled with appropriate, solid wooden furniture. In order to give wooden structures an aged look, there are several technologies, but patination will allow you to age not only wooden panels or furniture, but also metal fittings and plaster stucco, which will allow you to create an interior design in a single temporary style.
Features of patination technology
The definition of “patina” originally characterized the appearance on products made of copper and its alloys of a thin film of oxides, which gave the item an “aged” appearance. Modern patination technology makes it possible to age wooden surfaces, furniture elements and products in general, which significantly increases their decorative value.
Industrial patination technology is quite complex, but there are simplified aging methods that, with available reagents and certain skills of an amateur chemist and restorer, will give objects an antique look.
In order not to spoil the furniture product, before patination it is necessary to test the chosen method on a piece of wood.
The simplest and safest way to age furniture is to rub dark wax into its surface. This gives it a natural appearance, associated not with careless care, but with time, contamination.
To increase the decorativeness and naturalness of aging, many restorers use ordinary paints that match the color, “diluting” them with bronze or aluminum powder (powder). All these materials can be found in construction and finishing accessories stores. In addition, special patination kits have recently appeared on sale, which include not only coloring and decorating compositions, but also the tools necessary to perform the operation.
On a note!
In addition to metal powder, you will need sandpaper of varying abrasiveness, cotton or foam swabs, and for aging large wooden surfaces - a paint roller.
It should be borne in mind that home patination is essentially a conventional coloring, in which, instead of standard paints, special compounds are used that do not change the structure of the wood, actually aging it, but only give the product an antique look. This coating, in case of an unsuccessful experiment or if you don’t like the appearance, can be easily removed from the surface of the object without causing significant harm.
Most often, experiments on artificial aging are carried out in relation to furniture. To do this, you can use chairs, tables, chests of drawers, cabinets that have lost their visual appeal, and their design does not meet the requirements of the time.
From quite strong, functionally suitable furniture products, you can create the interior of a living space or kitchen in one of the retro styles. In addition to the applied tasks of increasing decorativeness, the restoration technology under consideration also pursues practical goals. The applied new paint layer will not only change the appearance of furniture items, but will also additionally protect the surface from adverse external influences.
stain
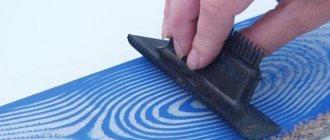
- this is a material that makes wood look like stained wood, that is, it gives a shade to the wood itself, impregnating its fibers. After tinting with stain, the color of the wood becomes saturated and the texture becomes pronounced. The stain does not create a continuous varnish film on the surface of the wood. Two types of stains are widely used: texture-emphasizing and leveling (sometimes the term “harmonizing” is used).
Emphasizing stains
- This is a classic type of stain that provides deep impregnation. Such stains are solutions of dyes and do not contain binders or resins intended to fix dyes on wood. Dissolved dyes penetrate the wood together with the carrier solvents and are retained in microcapillaries, microcavities about hundredths of a micron in size. Thus, highlighting stains provide volumetric rather than superficial coloring of wood, without veiling the texture, without a grayish tint, which sometimes occurs when binder resins are present in the composition. Of course, areas of the wood grain that are more absorbent, the early layers of growth rings absorb more stain and acquire a richer color. The tone of such areas becomes darker. Emphasizing stains reveal not only the structure of annual rings and flakes, but also visually highlight individual fibers on the surface of the wood.
When emphasized moderately under a silky clear varnish, wood with an accentuating stain can shine with an inner light. This tinting looks most natural on species that do not have a pronounced color texture, for example, on birch or on poorly absorbent species (oak, ash). The effect of emphasizing texture depends largely on the thinner used to dilute the stain concentrate to the desired color intensity, and on the technique of applying the stain. Diluting the stain with a slow thinner, applying it with pneumatic spray with a too “wet” torch, and even on wood with high absorbency, can lead to excessive emphasis. As a rule, the so-called negative effect is considered undesirable, in which the initially lighter areas of the early wood of the growth rings become darker.
In Russia, alcohol-based highlighting stains are of greatest practical interest, but water-borne stains also have a certain area of application. This is the tinting of assembled furniture, most often chairs, using the dipping method. This method, compared to pneumatic spraying, provides greater efficiency, uniformity and tone reproducibility. Diluting the stain with a special water-borne binder allows you to achieve a moderate highlighting effect without smudges.
Leveling (harmonizing) stains
- this is a type of tinting composition, when applied, a decorative effect is obtained, intermediate between the results of using emphasizing stains and stains. Coloring when using such compositions is ensured by insoluble pigments, the scales of which do not penetrate deep into the wood along with solvents, but remain mainly in the surface layer and are fixed with the help of binding resins, which are necessarily included in the composition of leveling stains. NC resins are usually used as binders in spiro-based stains. However, stains of this type also do not form a continuous varnish film. As with highlighting stains, the development or concealment of texture (the leveling effect) largely depends on the rate of evaporation of the thinner and the technique of applying the stain. Typically, leveling stains are diluted with quick thinners. For maximum leveling, such stains should be applied with a dry torch.
On furniture facades made of several parts with multidirectional stains, the use of leveling stains makes it possible to achieve an appropriate harmonizing effect.
Stains
Stains - this word has been known to many since childhood and is mainly associated with a certain liquid in bottles. Stains are used for tinting, that is, adding color to wood or veneer, followed by painting with varnish. Stains contain few resins and impregnate the surface layer of wood, emphasizing its texture.
A good stain should give the wood the desired shade, even out its color and protect it from fading. Some types of stains also provide deep impregnation of wood.
There are several types of stains that differ in properties:
- stains obtained by dissolving dyes
- stains in the form of a dispersion of small drops of colored pigments. Dispersions are when a substance does not dissolve, but is present in the form of small drops in solution.
Also, stains are divided based on binders:
- nitrocellulose binders based on organic solvents
- waterborne acrylic resins
The above differences in stains must be taken into account when working.
Application of stains based on soluble dyes.
When working with stains based on soluble dyes, keep in mind that these dyes are absorbed into the wood along with solvents (there are no binding resins in the formulation of such stains) and take the place of air in the microscopic pores that penetrate the wood. At the same time, the color of the wood becomes more saturated, and the volume of the wood texture appears.
In areas of wood where there is increased absorption, more dyes are concentrated, these areas acquire a darker shade. These are stains with an emphasizing effect.
Stains based on soluble dyes produce colors that are closest to natural wood colors, but it is difficult to obtain rich and pastel colors (for example, pink, green) with their help. This is due to the fact that a significant part of the dyes goes deep into the wood.
The depth of impregnation of wood with stains depends on the thinner used (the slower, the deeper), as well as on the type of wood. Softwood can absorb highlighting stains to a depth of a millimeter or more, so shallow scratches may not be noticeable.
Application of stains in the form of a dye dispersion.
Stains with insoluble pigments, in contrast to the first ones, have a color leveling effect.
The leveling effect is due to the fact that the flakes of insoluble pigments are not absorbed deep into the wood along with the solvent (do not pass through microcapillaries), but remain mainly on the surface and are fixed with the help of binder resins, which are necessarily included in the formulation of leveling stains.
With the help of such stains, the problem of different shades of parts can also be solved, at least partially.
These stains, as a result of a higher concentration of dyes on the surface, can produce brighter, more saturated colors of wood species, as well as pastel colors of the main spectrum - blue, pink, green. Particularly bright and uniform colors can be achieved using water-based stain dispersions.
Stains based on organic solvents.
Stains based on organic solvents dry very quickly (1-10 minutes; as a rule, white stains take the longest to dry), so subsequent layers of paint and varnish can be applied in a very short time. Stains are not recommended for use on products exposed to atmospheric conditions. Special water impregnations have been developed for this purpose.
Glazes
Glaze is an unusual tinting composition: in terms of the number of binders it is similar to stain, but the result of its use is closer to what is obtained when using highlighting stains. Using glaze you can achieve a unique effect of aged wood with dark pores. The emphasizing of pores turns out to be more moderate than after applying a decapé patina, but they are developed more evenly. To achieve a similar effect, after application the glaze is rubbed along the grain of the wood. At the same time, excess is removed and the pores are filled. After rubbing, the color structure of the wood surface is enriched, various halftones and “speckles” appear.
Glazes are diluted with slow thinners (drying - 2-3 hours), in order to ensure the possibility of rubbing after application. Disseminated-vascular rocks acquire an “antique” appearance, and tangential sections of annular-vascular rocks are graphically emphasized.
Technology Notes:
In the practice of tinting wood with a transparent finish, there are many ways to repeatedly apply tinting compounds in one finishing system. For example, to obtain the maximum leveling effect on variegated oak, stain is applied first to the wood and then to sanded colorless primer. When finishing complex products such as chairs, which are difficult to tint evenly, the stain applied to the wood is added to the varnish (1–2%).
When applying alcohol-based stains to oak using pneumatic spraying, it is difficult to ensure complete coloring deep into the pores. This is especially noticeable if the tone is dark. Water-borne stains penetrate pores much better. A compromise option would be to use a universal stain, diluted half with water and half with alcohol thinners.
Modern tinting materials allow you to achieve any desired degree of manifestation of wood texture - from a translucent plastic effect to a bright highlight.
Patina
Patina is quite an exotic product for the common man. In construction supermarkets, they usually sell adapted compositions taking into account household use, and it is seriously different from the patina that is used in production conditions.
What is this paint and varnish material used for? And a patina is needed to give a decorative effect, the so-called antiquity effect. When applying patina, darkness is created in the corners of the facades, in some cases the wood texture stands out.
There are two types of patina, as well as two types of stains:
- solvent-based patina
- patina on water
In factory conditions, the patina is applied using a spray gun. The patina is initially applied in a thin layer to a large surface, and the excess is removed. To ensure that the patina can be easily removed after application, this material initially has reduced adhesion. This interesting word adhesion means the adhesion of a finishing material to the surface on which it is applied.
To obtain darkness in the corners, the patina is sometimes applied locally with a spray gun with a very narrowed spray.
You can try to apply patina with a brush, but it will turn out rude and unprofessional.
Removing excess patina.
Okay, the patina has been applied, how can I remove it? Excess patina is usually removed with Scotch Brite or steel wool. These are mildly abrasive grinding materials that remove patina, but do not scratch the surface of the facade.
By the way, if you apply a thick layer of patina or dry the patina for a long time before applying varnish, then there is a possibility of weak adhesion of the applied varnish over the patina. Poor adhesion means that over time the varnish will peel off along with the patina. The result will not be decorative, but rather disfiguring.
Diluting the patina.
To dilute patina with solvents, use special quick thinners, acetone, ethyl or isopropyl alcohol (when using alcohol or acetone as a solvent, you must be sure of their purity. You cannot apply patina in the “wet-on-wet” mode, as it is difficult to clean off later It is also advisable to apply the patina with a fairly dry torch in one pass of the gun.
Many solvent-based patina tones are available: primary colors, wood colors, gold. You can mix them and also add some stains. Solvent-based patinas are not recommended to be applied to water-based paints and varnishes.
Patina of metallic colors (gold, silver) must be filtered before application.
Patina on the water.
Patina on water differs from patina on solvents in that it has a larger dry residue, increased brightness, and hiding power (that is, opacity). By graphically emphasizing the texture, a more vibrant effect is achieved with a water-based patina.
Drying time for waterborne patina is 30-40 minutes. There are several colors of water-based patinas; the neutral version can be tinted with the same pigment pastes as water-based enamels.
Special effects
Decorative paint and varnish special effects are designed to embellish, embellish and exclusively highlight the beauty of products made from both natural wood and MDF. Below we will look at some of the huge number of possible special effects.
The Decape effect is used to artificially age furniture by releasing wood pores into a patina. On wood species without a porous texture, light brushing is used to create a decapé effect.
Brushing (eng. Brush - brush) is not exactly a paint and varnish special effect, but nevertheless, it consists of scraping soft fibers from the surface of the wood, due to this a relief texture is obtained. When applying patina and then wiping it off, the patina remains in the formed pores and hollows, producing the effect of artificial aging. On oak or ash wood with natural pores, the aging effect is obtained without brushing. Afterwards the surface is varnished.
The Starry Sky effect speaks for itself. This is enamel with metallic glitter, finished with a layer of acrylic varnish.
The Cracolet effect or Craquelure (French craquelure) is the cracking of a layer of varnish or paint on works of art. Colorless one-component composition, with the possibility of tinting in any color. Apply to nitrocellulose primer. The size of the cracks depends on the thickness of the layer of composition applied to the surface. For brighter effects, crackle is combined with patina. It is fixed with a finishing layer of acrylic or PU varnish on a still wet surface.
Metallic effect (primary colors gold, platinum, bronze, aluminum) are enamels with a pronounced metallic sheen. It is possible to reproduce metallic colors according to the RAL catalogue. Acrylic varnish is used for the final layer.
Mother of Pearl effect. This is a transparent finish with a pearlescent shimmer. Applied to enamels of various colors. The top is coated with transparent acrylic glossy varnish.
Chameleon effect. This special effect changes color, smoothly flowing from one to another, depending on the viewing angle. For a more pronounced effect, it is better to apply on a dark base. Transparent acrylic gloss varnish is applied on top.
Our company offers paint and varnish products for wood processing on the Russian market. The company produces a wide range of paints and varnishes in all industry segments, including for professional wood processing.
Stains, glazes, patinas and special effects offered by our company are represented by a series of solvent stains ELM***, a series of glazes P***, and a series of patinas and special effects CH***A and JYS***, as well as in a binder for waterborne patinas NHB02A.
Pavel Usovik 02/02/2016
Do-it-yourself patination of furniture
Patination of furniture requires not only the availability of the necessary materials and tools, but also thoroughness, accuracy and painstakingness in carrying out the work. The process itself takes quite a long time, which is explained not by the complexity of individual operations, but by their stage-by-stage implementation, in which each subsequent procedure must be preceded by the complete completion of the previous operation.
Before starting the process, complex furniture products - cabinets, chests of drawers, tables with drawers - must be partially disassembled - remove the doors, pull out and place the drawers separately. After this, all metal fittings are removed from individual elements - hinges, handles, locks, which require a separate technology for “aging” the metal. The sequence of patination of wooden parts and furniture surfaces is as follows:
- first remove all defects from the wooden surface by sanding it with sandpaper, after which the wood is thoroughly cleaned of dust residues;
- the surface is primed with a special primer (included in the antique restoration kit) and dried for 24 hours;
- apply the first, main layer of patina paint, avoiding smudges, and dry it for a day;
- the second layer is applied with small brush strokes in different directions - when excess patina or coloring composition is formed, they are rubbed with a foam swab;
- without allowing the second layer to fully set, rub it with a dry cloth;
- after drying, if there are “rubbed marks,” they are removed by local tinting, which I also rub with a dry cloth;
- After complete drying, a finishing layer of varnish is applied to the surface.
When patination of wooden products, it is necessary to use special “fat varnishes”, which have an amber color with a purple-burgundy tint. These paints and varnishes create a fairly strong, smooth film on the surface that reliably protects the wood from adverse external influences.
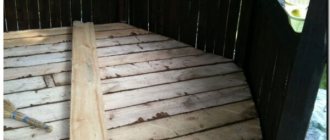
Wood patination process
Before you start, practice on a scrap piece first to get a feel for how patination materials work. Let's get started!?
- First you need to sand the wood with coarse sandpaper. This is necessary to create the effect and relief of the solid wood. Remove any accumulated dust.
- To work, you will need to purchase at least two paints of different colors. The base can be any color, and the second can be used to create a worn effect. For example gold, silver or copper.
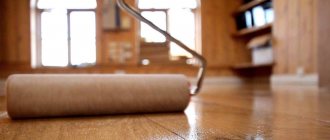
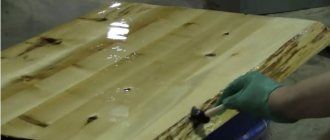
- Using a roller, apply the base paint in an even layer and let the paint dry. Depending on the result, you can apply a second coat of base paint. Also, wait for it to dry completely.
- Next you need a dry brush. We begin to apply the second paint in small strokes. It can be applied either to the entire surface or in fragments. We wait until the paint sets, but does not dry completely
- We rub with sandpaper or cloth in the corners, edges, protruding parts of wooden objects. Where they usually wear out the most during operation.
- We apply varnish over our work.
That's it, we performed artificial aging of wood with our own hands. Now you have an “antique” piece of furniture.
Subscribe to our Yandex.Zen channel
Surface treatment
To patina large-area wooden surfaces - door leaves, furniture facades, wall panels, you can use a slightly different aging technology. The preparatory operations are similar to those discussed above, and the surface should be primed with a special primer based on polyurethane or acrylic.
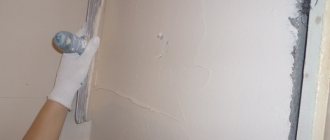
After the primer has dried, apply one thin coat of paint for patination. The completely dry painted surface is sanded with a metallized sponge - scotch tape - with Bright.
Next, the surface is wiped and opened with colorless polyurethane, acrylic or nitro varnish. The shade of the varnish depends on the natural color of the wood being rolled. For surfaces made of walnut, birch and linden, light, yellowish varnishes are used; for oak, alder and wenge wood, darker varnishes are used.
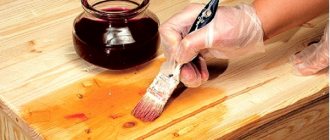
Patination wax how to use
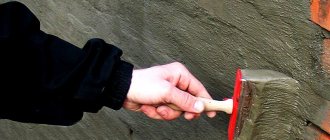
Bituminous varnish, acrylic, and wax are applied quite simply. The compositions are applied with a brush. You can apply it with a sponge or cloth, wiping off the protruding parts, so the patina will remain only in the recesses. You can, on the contrary, apply only to protruding parts with a dry brush. Excess is removed with rags.
If necessary, after drying, apply a second or third layer. Shading is in progress. The dried surface is treated with fine sandpaper. Shellac varnish is applied on top. To create the effect of an old oak surface, stain is used. Water stain is applied to the brushed surface. To highlight the relief, remove excess paint with a sponge. A white spirit-based fixing compound is applied on top.
To remove the texture, wax is applied to the surface with the stain applied. Everything is fixed on top with shellac. A more expensive finish is craquelure. It uses patina and beveled varnish. First, bevel varnish is applied in two layers; when it dries, you can begin patination.
We recommend reading: Waxing laminate flooring
Additional processing
Additional cracks, called craquelures by restorers, add greater decorative value to wood that has been aged by creating a patina. To use the “crackle” technique, a crackling varnish, which has the property of cracking, is additionally applied over the layer of patina varnish. In order to visualize the cracks that have formed, they are rubbed with a special contrasting compound.
On a note!
At the final stage, the product is thoroughly wiped with a damp swab, dried and additionally treated with varnish, which will additionally protect the resulting cracks from destruction.
Craquelure technique
Additional cracks, the so-called “craquelures,” provide the wood with a high decorative effect. To do this, use a special varnish, the main feature of which is cracking. In order for the created cracks to become noticeable, they are rubbed with a contrasting composition. Craquelure is often considered decoupage.
The surface is treated only with a primer; the use of a brush or sandpaper is prohibited. The first layer is applied with craquelure/decoupage varnish, which is selected according to the color of the wood. If required, a second layer is applied to make the nuance brighter.
A layer of decoupage varnish is applied to the still uncured varnish, which partially cracks during drying, forming cracks characteristic of the old coating. The finished surface is rubbed down. To consolidate the result obtained, the part is coated with a layer of varnish (most often shellac class).
- Artificial aging
- Patina on wood
- Detailed description of the compositions
- Patina technology
A perfectly clean and glossy surface is a sign of the newness of an interior item or furniture. But aged wood is often valued more highly, especially when it comes to the classic furnishings of a room. Artificial patination of wood is a quick way to get an aged surface on any wooden surface and not only.
Initially, patina was an oxidized copper layer on furniture, mirror moldings, columns and other architectural elements in the palaces and estates of wealthy people. This effect was achieved after many years of service of the item. The film has a bluish or greenish tint.
Over time, patina began to be called any plaque that appears on metal and wooden surfaces.
Sets
In order to speed up the aging process of wooden products and not have to experiment independently with the choice of technologies and paints, it is advisable to purchase special kits that are widely used for independent antique restoration.
Today on the market of paint and varnish products there are a sufficient number of special sets produced in various series, bearing the general name “Patina” or “Patinating Set”. The most famous are “Idea Patina”, “Patina Verde Green” or “Patina Gold”. To age metal fittings, you can purchase “Metallic Patina Paint.”
To give products an antique look, American produces various two-component compositions that allow you to create the following effects:
- antique gold;
- green (malachite) patina;
- old copper;
- worn patina
All kits are universal and can be used for aging wooden, metal or plaster objects. Additionally, this company produces varnishes to create a craquelure effect on a patented surface.