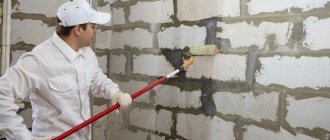
For painting and creating small designs on various surfaces, simple brushes are usually used, but processing with an airbrush and spray gun in most cases allows you to achieve a much better result. A correctly configured tool will help you paint walls, decorate a facade, a fence or a car body. But not many beginners know how to use an airbrush. First you need to understand its characteristics and operating principles.
Preparing the model for painting
As with any work with plastic or metal, the surface must first be prepared before painting:
- matting - the formation of adhesion due to the application of fine sanding abrasives with a grain value of 1500 or 2000;
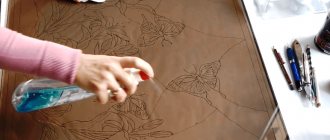
- degreasing - before applying the design, it is necessary to degrease the surface using a universal anti-silicone cleaner and a special degreasing cloth, because touching the surface with your hands or other ways of getting fat on it is possible;
- priming - applied after the surface acquires an even matte shade without unevenness, possibly even in several layers.
Nitroenamel and its features
The second most popular application method. Learning to paint with an airbrush using nitro-enamel paints is a little more difficult, but this experience can be very useful. Most often, this type of paint is used for decorative application on cars. Nitroenamel has a number of useful properties and advantages, which is why many artists prefer it.
- Drying time. Nitroenamel dries much faster than acrylic. This allows you to get the job done more quickly.
- Rendering fine lines, outlines, contours. No other types of paints are capable of forming a pattern as clearly.
- Semi-transparent fill. This is a decorative effect that occurs during certain manipulations with an airbrush. Adds volume to the picture.
However, these paints are not without some disadvantages. Shades and halftones when applied with nitro paint look less bright and pronounced. The hiding power parameters are also significantly lower than those of acrylic. When working with two colors, it is quite difficult to achieve a clear decorative tone. Experts recommend using a light-colored substrate in case of gray shades.
Important! Not all airbrushes are suitable for working with nitro paint. You will have to buy a special model, which will cost more.
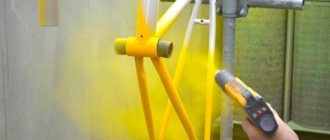
Nitro paint, as you can easily guess from the name, is quite toxic . To work with such material you need a special room. Spraying paints in the air can lead to undesirable consequences. A car body painting box is best suited for such tasks. In such a room there is ventilation and there is no dust. You can remain calm that the nitro paint will end up on an unwanted surface. It is important to remember that nitro paint can only be applied in special clothing. Working without a respirator can have an extremely negative impact on your overall health.
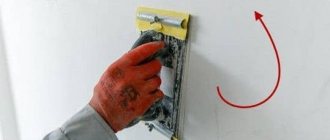
Painting models with an airbrush - applying the base
The base is applied over the primer with repeated movements in layers of thin spraying. That is, with each wave of your hand, you need to press the airbrush trigger down, opening the way for the air flow and pressing the air valve, and then pull the lever towards you, allowing the paint to come out.
If you simply press the trigger down and back once and move it back and forth near the surface, the paint will lie with air bubbles and bumps, forming a “shagreen” pattern. Therefore, when applying the base layer, there is no need to rush; it is better to work thinly and in layers. You can immediately place accents on light and shade, based on the logic of where the light comes from, where the tone will be denser and darker.
Those areas that need to be painted a different color and protected from possible pollination can be covered with masking tape or very thin vinyl contour tape.
Criterias of choice
The choice of tool depends on what types of airbrushing will be performed. Typically, inexpensive airbrushes with a thin nozzle and needle are used. Even beginners can work with such a device. But those who want to engage in airbrushing at a professional level should consider the following points when choosing:
- Volume of the dye tank. It is best if it is from 2 ml;
- Sealing the needle and nozzle - drawing will be more comfortable if the seals are made of Teflon;
- The nozzle diameter in high-quality airbrushes should be at least 2 mm;
- The device should be easy to replace the main components such as the reservoir, trigger and nozzle;
- Protection of seals from the effects of used reagents;
- Possibility of adjusting pressure and paint supply.
Purchasing a tool taking into account all the criteria will allow you to perform high-quality and beautiful painting of any surface.
Features of working with acrylic paints
When painting models with an airbrush, the quality of the paint, its hiding power, dispersion and other properties matter. Among the paints for modeling, enamels and water-acrylic paints stand out. Enamels have a number of advantages:
- metallics look more realistic;
- transparent enamels can create a candy effect, like on real cars, if the task requires it;
- All enamels fit and adhere to the surface better than acrylic.
Painting models with acrylic paints is overwhelming due to the fact that all the advantages of enamel are usually canceled out at home by a rather pungent odor. Having a wide palette in the rulers, with a water-acrylic ruler, beginners in modeling may have problems with dilution. Especially with a shallow trigger stroke, acrylic particles quickly harden on the needle and quickly clog the nozzle, so it is better to dilute the paint to a “milk” state. As a thinner, you can use vodka or a proprietary thinner from the manufacturer (airbrush thinner). If, after liquefaction, the paint continues to clog thin nozzles with a diameter of 0.15-0.2 mm, a drying retarder - retarder medium - can help.
When choosing the right airbrush, you can rely on the following rule:
- 0.15-0.3 mm – drawing camouflage and other subtleties with an airbrush using the “free” hand method;
- 0.35-0.5 mm – applying a base layer, priming and varnishing the model. Because with an airbrush with a narrower nozzle it is extremely inconvenient to dilute primers and varnishes, which are always thicker in consistency.
The problem of thickness and possible sticking on the needle is especially pressing when painting models with acrylic paints. And when bred, they may lose their originally inherent qualities. Also, the soil may be coarsely dispersed and form a difficult-to-wash film on a thin diameter.
After painting models with an airbrush and finishing work with acrylic rulers, you must thoroughly rinse the tool with the same vodka or alcohol; if the case is already advanced and there are old particles of dried paint left, washing liquid will help to soak and wash them clean.
If, after the stage of painting the models, the airbrush is clogged, a video on disassembling and reassembling down to the last bolt will save you from possible breakdown of spare parts. Although it is better not to let it become completely clogged and to clean the tool immediately after work with alcohol or rinsing.
Cleaning the airbrush after use
After finishing work, you must thoroughly clean the airbrush of any remaining paint. To do this, first pour the solvent into the tank and rinse it well, then carefully pull out and wipe the needle. To clean the internal surfaces of the nozzle and small parts, use cotton swabs soaked in solvent. After cleaning all parts, the device is assembled and blown well with compressed air. Remember that proper cleaning and regular lubrication of rubbing parts will extend the life of your airbrush for a long time!
Painting a tank with an airbrush
It is almost impossible to obtain a uniformly painted surface of a model with a brush or sponge; the level of accuracy for such work can go off scale. Some paints can only be applied with an airbrush. Camouflage stripes on the tank are drawn at a small distance from 1.2 to 1.4 bar. The thinner the line you need to create, the less you need to press the trigger of the airbrush and draw closer to the surface; if the thickness is a hair, you can even remove the protective cap of the needle from the airbrush, drawing using the “open” needle method. It is better to keep the airbrush nozzle normal to the surface so that the edges of the camouflage are not created too blurry. When painting a tank model with an airbrush, you cannot keep the tool in one place near the surface; it is better to make movements along the contour of the model.
As a rule, the annotation for the model indicates the exact colors with paint numbers for each manufacturer. You can rely on this when choosing the right colors, or simply select similar analogues and color them.
The law of aerial perspective - based on the scaling of the model: objects located quite far away seem to be brightened by the thickness of the air, as if they were under a blue filter. We multiply the number of meters through which we observe the model and see it in its entirety by the scale. We lighten all colors using the resulting %.
Setting up the airbrush before work
To properly set up an airbrush, you must first become familiar with the operating principle of this device and the purpose of its parts. All airbrushes are divided into several types according to the method of action (single or double), according to the location of the paint container (upper or lower), according to the principle of mixing (external or internal). But, despite the diversity, all devices have the same basic elements:
- Tank (various volumes, from 2 to 100 ml). From it, the paint flows into the airbrush, where it mixes with air.
- Nozzle. These are tips with different outlet diameters that are attached to the front end of the airbrush.
- Needle with lock. As it moves, the amount of paint that passes through the nozzle under air pressure is adjusted. The required position of the needle is secured with a lock.
- Trigger (button, trigger, control lever). In single-action tools, pressing a button only adjusts the air flow intensity. In double-action instruments, the button is structurally connected to a lever that moves the needle. The movement is carried out in two planes: pressing up and down regulates the air supply, and moving back and forth moves the needle in the nozzle, adjusting the flow of paint.
- Needle regulator. It is located at the end of the device opposite the nozzle. By rotating the regulator clockwise or counterclockwise, the desired width of the paint jet is set.
- Air valve. Located inside the airbrush body. When you press the button, it opens and lets in the compressed air coming from the compressor.
The operating principle of an airbrush is quite simple. The device is connected to a compressor, which supplies compressed air through a hose. When you press the button, the air valve opens, allowing it to flow into the airbrush body, where it mixes with the paint. A jet of aerosol under pressure emerges from the nozzle, painting the surface.
When setting up the airbrush correctly, when you press the button halfway, only air should come out of the nozzle. If paint immediately sprays when pressed, the device may need to be adjusted. To do this, the needle lock is slightly unscrewed, the button is pressed halfway, and the needle moves forward a little. Then the clamp is screwed back on.
Washes, special effects, decals and other modeling tricks
You can show additional volume with the help of correct toning of the model, i.e. emphasizing the relief and texture of the surface by darkening the recesses and highlighting the upper parts with highlights. Removers are thinly diluted paints with a reduced pigment content that flow into recesses and cracks. When the wash dries, remove the excess with a cotton pad. It is important to pay attention to the chemical composition of the remover, which may contain solvents and affect the acrylic painted surface layer.
The “dry brush” method is where a light pigment or slow-drying paint is rubbed into the base coat in the lightest areas. The brush should have a minimum coloring effect, so it should be wiped dry initially.
Decals are a technique for applying decals, most often used to transfer symbols or attributes of various branches of the military in modeling. The decal may appear whitened due to the fact that residual air bubbles accumulate between the decal and the model. Most often this occurs when the model is coated with matte varnish. Therefore, there is a reason to coat the areas reserved for decals separately with a glossy varnish. General leveling can be done by painting the surface with a final layer of matte varnish.
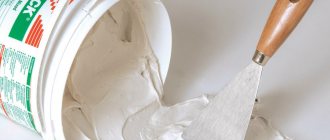
Soil and its varieties
Airbrush painting on metal or plastic also includes pre-treatment, incl. covered with soil. For high-quality application, it is extremely important not only to decide on the type of paint, but also to choose a primer. This material is a primary (base) coating for leveling the surface, which directly determines what type of paint will be used in the work . It is the soil that determines the strength of the paint composition. In addition, some paints simply cannot be applied without a preliminary primer.
For high-quality paint application, the primer must have a number of characteristics:
- high degree of adhesion;
- good hiding power;
- smooth surface, silky texture;
- repellent properties of the coating so that the paint is not absorbed.
There are three main types of soil:
- adhesive;
- epoxy;
- primer-filler.
Adhesive
To create a good bond between the surface to be applied and the paint layer, this type of primer is used. The main advantage of adhesive primer is its rapid drying. In addition, it adheres very well to metal structures and plastic surfaces. This allows you to apply it both to the car body and to plastic elements.
Epoxy
The first thing that is important to know for anyone who prefers to use this type of soil is that the material is very toxic. That is why in the room where it is planned to use the soil, it is necessary to have powerful ventilation. It is advisable to work with such material in a respirator. The main characteristics of epoxy are as follows:
- the application layer is thick;
- very long service life;
- easy to sand;
- Corrosion resistant.
When working with epoxy primer, you should follow the operating instructions. It is important that the metal surface is properly treated before applying primer. If the metal is not clean enough, the primer will not apply evenly.
Advice! Before applying epoxy, do not treat surfaces with acidic agents with an etching effect.
Soil filler
This soil composition is two-component. Most often it is a cross between base acrylic and urethane. This primer can be applied in two ways: on a prepared, cleaned surface or on epoxy. It is highly not recommended to use this type of primer together with acid-based products.
Effects of dirt and streaks
The tank, being a piece of military equipment, is subject to corrosion and is constantly covered in dirt and oil stains. Over time, the paint “weathers” from the surface. Painting a tank model with an airbrush step by step:
- covering the tank model with the main color;
- highlighting the most rubbing surfaces of the model using paint several tones lighter than the base;
- In life, after a short period of use, a dark film of dirt and smudges forms around the most protruding points on the tank parts, which accumulates in all the recesses of the model. You need to realistically reproduce these moments, which a black wash will help with. You can also use it to level out dark and light transitions. The black wash highlights small parts of the tank - welds, bolts and rivets, etc.;
- Glossing the surface - Gloss makes the protruding parts stand out even more and makes the surface look like painted steel instead of plastic. You can add glossy varnish to the paint mixture or blow it over the paint;
- The lower part of the tank hull can be covered with a simulated earth effect.
Weathering is an effect that gives any military equipment more realism. When done correctly, it helps to hide the “jambs” of painting; if handled ineptly or overdone, it spoils the appearance of the work and negates the result of the first stages of painting. Weathering also focuses attention on the small details of the model. To add realism to weathering, the modeler must reproduce for himself the conditions in which the equipment was located (climatic and natural corrosion, historical and military).
Weathering stages:
- imitation of scratches and chips on the surface - manual application of wear with a piece of sprue with a slight bend at the tip. Then paint is applied to all edges and corners of the models, preferably oil-based. The number and depth of scratches and chips depends on the background of the tank model, based on the historical context or a personally invented theme. However, the fenders should be scratched much more severely than the top of the tank's hull and turret. For greater realism, in addition to the edges, you can lightly scratch the surface nearby, as a continuation of the marks. It’s better not to forget about the scratches along the hull and fenders, which appear as the tank passes through obstacles and rubble. At the end of this stage, after thorough drying, you can use a black lead pencil to go over the center of the scratches and cracks, but selectively, and not over all.
- imitation of dirt and dust - many modellers usually simply take filtered earth, moss and water-acrylic paints with earth tones, mix in PVA and water and apply it to the model. This is followed by drying for a day. It is most logical to apply dirt to the bottom of the hull and track elements. The main thing is not to overdo it.
- wash - a wash applied in several layers helps to achieve a more realistic effect. The model is covered with a thin layer of wash with a brush. The movements of the brush go in one direction: on vertical and inclined ones - from top to bottom, on horizontal ones - from the center to the edge. After applying the first layer of wash, you can take a wider brush and work on flat surfaces, and not just run it into the recesses and depressions. After a short drying period of 10-15 minutes, you can remove excess remover with a brush. You can also complete this step with a third layer on the bottom of the body.
- lightening No. 00 are cut off, then a light earth color paint is applied to it, then wiped with a napkin . And use the dry brush method to walk along the lower part of the body.
- fresh dirt and installation of tracks.
Additional recommendations
Once you figure out how the tool works, you can decorate various surfaces beautifully. The following recommendations will make using an airbrush easier for beginners:
- When we paint, it is better to hold the tool perpendicular to the surface being treated. In order for the dye to be distributed evenly, the angle of application of the dye must be greater than 45°, the optimal one being 90°.
- The intensity of the applied tone, the thickness of the layer and the overall result depend on the distance between the tool and the coating being processed. When a worker draws, he can change this distance, but this should be done carefully and smoothly.
- When we draw, small drips may form, but it is not necessary to remove them immediately. The drawings need to be given time to dry, after which the excess is carefully sanded off with sandpaper.
- To speed up the drawing process, you need an additional paint tank with a different color, then changing the palette will not take much time. There is no need to clean the container; just rinse the tool and attach another container with dye to it.
As you can see, airbrushing is not very complicated, but it allows you to create amazing paintings. Professionals who have been working with such a tool for many years can create 3D images. But a beginner who has recently mastered the principle of airbrush painting will also be able to decorate a facade, fence, car and other surfaces without any problems.
Airbrush setup and care tips (2 videos)
How and what you can draw on (23 photos)
Device
The airbrush device is structurally similar to a spray gun, which is widely used for all paint and varnish work in automobile workshops. The device is intended for fine work, where the emphasis is on the minimum size of lines drawn with a minimum thickness of paint applied to the working surface.
The standard package includes:
- container for paints;
- trigger buttons or handles;
- control unit (button);
- replaceable nozzles;
- needle.
Additional elements of the machine, which are designed to simplify the artist’s work, include:
- device stand;
- airbrush holder;
- compressor;
- air hose;
- filter for the working environment;
- The airbrush is equipped with replaceable nozzles. The thickness of the applied paint spot and its width depend on the size of the spray unit. The compressor supplies air under high pressure, allowing you to quickly paint large surfaces and create subtle color transitions and smooth lines.
A high-quality tool comes complete with at least two types of attachments, nozzles of various diameters and several replaceable needles.
Types of products
All airbrushes are divided into:
- Models with a single operating principle. Are affordable. Allows you to spray dyes with constant characteristics. They work when you open the air controller by pressing the pedal. They can be used when applying dyes through stencils.
Single action external mix airbrush - Models with a double principle of operation. At the same time they can control the supply of paint and air. The principle of moving the device pedal backwards promotes a gradual increase in the amount of substance applied to the surface. This allows you to control the application of dyes (line thickness, shade saturation).
Double action internal mixing airbrush
What paint should I use?
What do you need for airbrushing? Special paints are used for painting on surfaces, which make airbrushing a comfortable and simple task. When choosing them, it is necessary to take into account the type of surface and the pressure with which they will be applied. The most popular types of paints are:
- Polyurethane. Such airbrush compositions must be water-based. They allow you to apply a durable, quick-drying pattern that can withstand different temperatures. There is no need to use protective equipment when painting with this mixture; the work can be done both outside and inside the room.
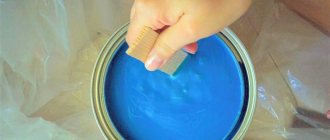
- Water soluble acrylic. Such mixtures in the form of a liquid allow you to work on any surface. Airbrush painting will help you decorate the walls inside a building, or draw patterns on a facade or car. Acrylic paints are suitable for beginner artists as they are easy to use, dry quickly, are environmentally friendly and, when used correctly, can create a good piece of art.
- Acrylic solvent. How to airbrush with this mixture? Before use, the composition will need to be diluted with a special solvent, which is usually included in the kit. When using this type of paint, be sure to wear protective clothing, as the mixture is toxic. It is not recommended for beginners to paint with an airbrush with a solvent solution; as a rule, this type of composition is used in professional workshops.
Airbrush capabilities for modeling
In order for the model to become an exact copy, it must be painted like the original. With full compliance with all necessary processes, while conveying all the subtleties of the overall background and shades of the coating. Some sets include brushes and paints. But this is for those who took up the assembly for the first time.
By painting your model with brushes, you will only make it look like the original, no matter how accurately you assemble it. And for high-quality coloring in modeling there is a special tool, and it’s called an airbrush.
Using an airbrush, paint and varnish coatings are applied to the body and parts of the model with high quality. You can set color tones and halftones, depict camouflage colors, apply signs and write inscriptions. Airbrush basics for beginners: how to use an airbrush?
However, before you start working with an airbrush, you need to understand how it works, what types of airbrushes for modeling there are, and what features different types of this tool have. All this knowledge will help you understand which airbrush is more convenient for solving certain problems and which model of the tool is right for you.