Sealing seams and joints is one of the finishing touches to finishing a bathroom. Despite the fact that the completion of the renovation is already close, there is no need to rush. It is better to save a conscientious approach to work until the last moment, so as not to regret the haste when looking at mistakes. Let's talk about how to properly apply sealant in the bathroom, and the video at the end of the article will complete the coverage of the topic with a visual demonstration.
photo from the site https://gidpoplitke.ru
How to use sealant: instructions
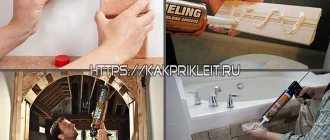
Sealing compounds are usually produced in 310 ml tubes. The cylinder is prepared for operation:
- The tube is opened, the end of the plastic distributor is cut at a certain angle (depending on the size of the space to be filled).
- Mounting is done in a mounting gun. The back of the tool contains a long rod bent in one direction. It needs to be pulled back. This action opens the stem part into which the tube is inserted. Initially, the base is placed, then the spout is tilted towards the front of the trunk. The hook rotates, points up, the serrated side points down. This tool will allow for uniform distribution of mass on the surface.
- The end of the distributor is guided and inserted end-to-end. When you press the trigger of the gun, the mass begins to come out and be distributed over the surface.
How to avoid buying low-quality silicone and fakes
No one is protected from purchasing low-quality sealant and counterfeits, even in large hardware stores. To avoid the risk of the seal coming off or cracking, consider the following:
- Damage on the label indicates that the sealant storage rules were violated. When the package has been frozen and then thawed, the material in it cannot be used.
- The weight of the tube is more than 340 g with a capacity of 310 ml, indicating a high content of non-functional impurities in the material.
- If the seal density level is less than 0.85 g/cm, this means that the product is of poor quality.
- The inscription “100% silicone” indicates that the product is falsified.
- The excessively low cost of the sealant also indicates a fake.
- In any case, the products must have accompanying and warranty documents.
How to apply correctly
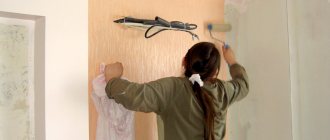
In order for sealing to take place effortlessly and leave the desired result, you need to know how to apply the sealant correctly. Application process:
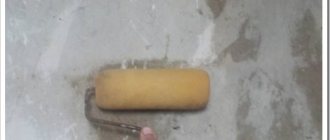
- The surface is thoroughly cleaned of dirt and dust deposits, wiped dry, and degreased.
- The dryness of the opening is checked (this is very important to ensure high-quality adhesion).
- To avoid contaminating the area around it, seal the gap on both sides with mounting tape.
- The sealant, ready for use, is distributed over the area.
- The mass is applied from the corner part, while the cylinder is tilted at all times; the distribution should occur evenly.
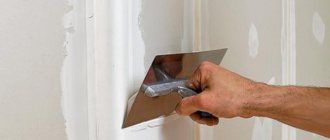
- A seam is formed using a moistened rubber spatula.
- The protective layer of masking tape is removed.
- The excess is removed with a spatula or a clean rag.
- Further work is carried out only after the seam has completely dried.
Tips for using sealants
- In addition to the rules for applying and selecting a sealant, we must not forget about the rules of protection and safety. As protection, experts recommend using masks and protecting your eyes as much as possible. When working with sealants, there is a risk of damage to the eyes.
- It is best to open the sealant only after you have calculated the amount of work and are ready to begin. Otherwise, the sealant will have to be stored in compliance with the rules. Since most materials harden at a rate of 3 mm per day, storage rules will need to be provided.
- Prepare the work area before sealing seams. Remove all unnecessary items and prepare an arsenal of tools. To protect the bathtub and tiles, you can use construction tape.
- Before purchasing sealant, check the materials you are working with. There are sealants for certain types of surfaces. Make sure to check the normal expiration date so you don't end up with outdated sealant. If stored improperly, it may lose its properties over time.
- Don't forget the instructions. There are sealants with the addition of various chemicals, so you must strictly adhere to the manufacturer's recommendations. It is especially important to maintain the polymerization time.
How to apply silicone sealant
The most common is silicone acriplast. Silicone sealant is easy to use. It can withstand sudden changes in temperature and high humidity, so it is often used for sealing work in the bathroom. In addition, it contains special antiseptics that prevent the spread of fungal growths and mold.
Application will not be difficult, since silicone sealants are available in convenient tubes. They should be placed in a syringe or applied directly from a container.
The rules for application are the same as for other products. But some features should be taken into account.
Complete drying of the composition occurs after two days (the indicator depends on the thickness and depth of the seam). Although the surface appears dry after an hour, it is prohibited to put it into operation. There should be no direct contact with water during drying.
Before starting work, the old sealing compound is removed from the surface. To do this, you should use a spatula and special removers.
If the filling of the space is uneven, then it is worth starting to form the seam immediately. For smoothing, a spatula, knife dipped in soapy water or a moistened finger are suitable. Seam formation process:
- The selected instrument is moistened with soapy water.
- The spatula is pressed to the far point, without strong pressure, and a uniform movement is made towards you.
- The line is drawn without breaking; if this fails, the process is repeated again.
- The instrument is washed under running water.
There are guns on sale that immediately form the shape of a roller. But it is not advisable to purchase them for a one-time application.
It is worth buying a high-quality composition, where the fourth part is silicone polymer, 5% rubber mastic, 3% thiokol, 2% epoxy, 0.5% cement component.
If the composition contains antiseptics, then such products are not used on surfaces that may be in contact with food. This mass is not applicable for aquariums.
Silicone masses are universal; you can choose them for any purpose or surface. We recommend videos on the topic:
Steps
How to remove old sealant and clean the surface
- Cut off the old sealant.
You can use different tools to remove sealant, but the most effective are a scraper with a blade, a mounting knife, or a palette knife. Work with quick, firm strokes to cut away streaks of old caulk. Move the blade along each seam.
- If the shower is new, there is no need to perform this step.
- Keep in mind that metal blades and chemicals can damage a plastic bathtub. In this case, it is better to use a plastic knife.
- Remove cut sealant.
After trimming all the caulk with a knife, remove it with your fingers. If you have carefully cut the caulk along the seam, you can grab one end of the seam to peel off the entire strip at once.
- If the sealant does not come off well, try cutting through the seam and prying it off with a knife.
When the bulk of the caulk is cut away, there will still be small pieces of material left on the walls. Wipe surfaces with a dry, non-abrasive cloth or sponge to remove as much of the old sealant as possible. After this, the walls should be wiped with medical alcohol or treated with an all-purpose detergent to remove residual material and other deposits.
- If silicone sealant was used in the shower, soak a napkin or rag with white spirit to destroy the structure of the substance.
Use a soft, non-abrasive cloth to avoid damaging the surface.
Advice:
Different cleaning solutions are best for different types of sealant. A non-abrasive cloth and an all-purpose cleaner will likely allow you to remove small residues of non-silicone sealant. In the case of silicone sealant, you should use rubbing alcohol or white spirit.
Wash and dry the surface.
Remove any remaining material with a clean, damp cloth. This will remove cleaning solution, dust and other contaminants. Then dry the surface thoroughly with a dry cloth, hair dryer or paper towels. You can also simply wait for the moisture to dry on its own.
- If dirt and debris remain on the surface, the adhesion of the new sealant to the surface will not be strong enough.
Apply masking tape to both sides of the seam for subsequent sealant treatment. The strips should be parallel at a distance of approximately 10 millimeters from each other.
- The tape will allow you to make a straight and even seam.
How to choose a sealant and prepare for work
- Choose a sealant that is designed for shower areas.
When choosing a sealant, you need to pay attention to labels like “Bathtub and Tile” or “Kitchen and Bathroom”, since the chemical composition of such sealant prevents mold and provides good adhesion to smooth surfaces. Shower rooms typically use one of two types of sealant:
- Silicone Sealant: This is a very flexible, durable and water-resistant material. Among the disadvantages is that it is difficult to level, and you have to use white spirit for cleaning. The color range is also very limited.
Acrylic latex sealant: Easy to apply, clean and level. Wide range of colors. However, this material hardens and shrinks more than silicone caulk, so the service life of this material is usually inferior to silicone caulk.
Inexpensive guns tend to be less predictable and can result in sloppy application of sealant. A professional gun will provide constant pressure.
- A body or semi-body caulk gun provides optimal and constant pressure and will prove to be a better long-term investment than a frame gun. When using the latter, it is better to choose the “no drips or drips” option.
Professional pistols are usually inexpensive. Electric guns can be very expensive, but you'll be fine with a mechanical option.
Cut the tip of the tube at the very edge at a 45 degree angle. The hole should be smaller than the width of the seams. As a rule, the hole at the tip of the tube should be 2/3 of the width of the seam being filled. For most showers this is usually 5 millimeters.
Advice:
if the initial cut does not allow you to get a wide enough seam, then the hole can always be widened a little (but a cut that is too wide cannot be made narrower).
Pierce the inner seal in the tube tip.
Insert a nail or small pin into the end of the tube. The seal is located at the junction of the tip and the tube. Now you can apply sealant to the tip of the tube using pressure.
- If the nail is not long enough, use a thin, stiff wire such as a coat hanger or electrical wire.
The installation method usually depends on the type of gun. In most cases, the gun stem must be fully extended first. Next, place the tube itself in a special chamber on the gun and move the rod so that it rests against the bottom of the tube.
- In some cases, after installing the rod in the working position, the pressure will be sufficient for the sealant to begin to come out of the tip of the tube. Be prepared to catch any drips with a damp cloth.
After installing the tube into the syringe gun, you need to press down the handle a little so that the sealant begins to come out of the tip. Immediately stop pressing the handle when the sealant comes out of the tip. Wipe up excess material with a damp cloth.
- If sealant flows from the tip, the gun is ready for use.
How to apply seam sealant
Advice:
After the first pull of the trigger, do not pull the trigger again until sufficient sealant is dispensed from the tip. If there is excessive pressure, too much sealant will be supplied.
When the sealant begins to come out of the tube, move the gun along the seam. If the flow rate of the sealant and the speed of the gun are too different, the joint may be too wide or too narrow.
- If you move the gun too quickly, the bead of sealant will be too narrow and uneven.
If you stir the gun too slowly, the seam will be too wide, the sealant will be wasted, and it will be much more difficult to smooth the seam clean.
Wet your finger or lint-free cloth to smooth out the sealant bead immediately after application. For napkin, press the fabric against the seam with your finger and move along the strip with enough pressure to smooth out the caulk. If you are using only the tip of your finger, clean it periodically with a damp rag to avoid smearing the sealant beyond the seam.
- Use continuous strokes to achieve a uniform, smooth concave line.
You can save time by smoothing the sealant immediately during application. Place the tip of your index finger over the seam while applying caulk. Using gentle, even downward pressure, the sealant can be applied and smoothed out immediately.
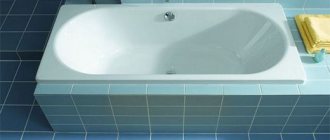
The junction of a bathtub or shower tray with a wall has always been and will be a problematic area.
You may not know for a long time that the sealing was done poorly. Your neighbors will be the first to know about it. Moisture accumulates gradually after each shower and, over time, finds weak points in the waterproofing of the floor (if any).
It’s good if the floor under the bathtub is sloping and the flowing water is noticeable. If not, then increased humidity will create ideal conditions for the development of fungus.
There are several ways to seal the joint between the wall and the bathtub. There are no simple or effective ones.
Accessibility and simplicity usually suffer from fragility and poor appearance. And high-quality sealing requires significant labor costs. That's why it's rarely done.
The Ravak company offers to install a decorative strip for bathtubs in the joint between the bathtub and the wall. Seal the joint and attach the strip using silicone from the same company.
sealing the joint with decorative strip “Ravak”
Good recommendation. And probably right. But the corner is noticeable, stands out strongly and does not brighten the room. In addition, plastic, over time, turns yellow and becomes dirty, and is difficult to wash. This advice from Ravak has been around for many years and is not particularly popular. Although this method can achieve reliable waterproofing.
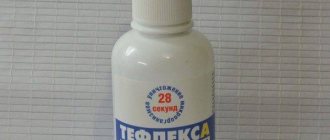
The most common method today is sealing with white plumbing silicone.
White color is the most optimal for any tile. It blends in color with the bathroom and is least noticeable.
Many years of practice of this method have developed two manners of its execution. Both are working and effective, leading to the same result. It's hard to say which one is better. It all depends on who gets used to doing it.
First.
For this technique, it is necessary, in addition to silicone with a gun, to have a spray bottle with soapy water and a plate for forming a slope on the sealant. The material of the plate can be anything, from a purchased special profile to the rounded end of the handle on a brush.
Applying silicone along the bathtub joint
The technology is simple. Apply silicone along the seam using a gun. At this stage, the main thing is to achieve a uniform thickness of the silicone being squeezed out. The second stage is moistening the surface around the applied silicone. Its meaning is that, when forming a slope, the silicone does not smear on the sides (and does not stick). A soapy, wet surface will prevent this from happening. On a dry and clean surface, the sealant adheres firmly. Therefore, the joint to be sealed must be dry and clean.
Wetting the surface with soapy water
The next step is to form a slope using a plate. Some people use their finger for this. The finger is soft and does not give clear edges. Silicone with depressions is smeared over the surface.
Forming a silicone seam with a plate
The STAYER company produces a set of special plates for forming a silicone seam. If it produces it, it means there is a demand for such a device, which means the method is popular.
“STAYER” SPATULA for forming a seam on sealants
Second way.
Using this method, the edges of the tiles and bathtub are kept clean using two strips of masking tape, without wetting with soapy water. The tools and technology are the same. After removing excess silicone with a plate, the tape is removed. The edges remain smooth and the tile and bathtub surfaces are clean.
Pasted tape before sealing
Removing excess sealant from the joint
Removing tape
When using this method, one feature must be taken into account. The distance between the two tapes must be made taking into account the size of the bevel on the plate used to form the seam. The diagram shows that if the silicone comes into contact with the paint during the formation of the seam, then by removing the tape, we undermine the edge of the sealant. The silicone around the edges will, in this case, have some thickness, and not fade away as we planned.
Correct “A” and incorrect “B” distance between paint strips.
The applied sealant must be leveled quickly (within a minute), in one pass along the entire length of the seam. If you interrupt, irregularities at the junction will become noticeable. Therefore, you need to manage to even out the joint with one smoothing. If you try to straighten it later (after 3-5 minutes), the sealant becomes covered with a film and begins to stretch.
How long after applying the sealant should I remove the masking tape?
– Everything needs to be done immediately and quickly. Until the silicone hardens. Then there is still a chance to smooth out the seam in case of unsuccessful removal of the masking tape.
If you remove it the next day, when the sealant has already set, the edges of the seam will tear differently. You won't get a straight line.
What is the disadvantage of sealing a joint with silicone?
- Silicone turns black from fungus.
- The strength of fastening if performed incorrectly is weak. If you pull the torn piece, the entire tape will pull.
Blackening of silicone in the bathroom
Removing old silicone in the bathroom
This may serve as an answer to the problem: “How to remove old caulk from a bathtub?”
You can easily remove it with a sharp blade, but in some cases you have to use, in addition, a chemical method. There are special products on sale that soften old sealant - Remover, Gasket, Penta-840. You can use nail polish remover (regular, manicure). In this case, it is better to wet a felt mitten. Hard bristles help remove, and the wool will not come apart (like a sponge) under the influence of the solvent.
The next method of sealing a joint is the simplest and most accessible. This is a self-adhesive profile. The names may be different - curb tape, self-adhesive tape. Everyone produces them - Poland, Ukraine, Russia.
An alternative to silicone - curb tape
Different types of border tape
Before fastening, remove old silicone (if any), clean the surface from residues with a solvent and wipe dry. Then, remove the protective film from the profile and press it to the surface. The joining in the corner is made by cutting two profiles diagonally at the same time.
What are the disadvantages of this method?
Again, all the same plastic, and all the same problems. Although the tape is less noticeable compared to the “Ravak” decorative strip. The Germans have a particularly interesting solution.
Self-adhesive profile produced in the EU
Removing protective film from curb tape
What is the best way to seal a joint?
The most successful is the most dreary. I saw it by accident. Its purpose is to apply silicone to the surface of the tile during tiling. Keep the seam between the tiles and the bathtub minimal. This requires precise alignment of all tiles. The top of the bathtub is not level. Each tile is cut according to its installation location.
Applying sanitary silicone to tiles when tiling
Applying silicone to the end of the tile
You can’t do without silicone - the grout will definitely burst along the edge of the bathtub due to temperature expansion or fluctuations in the case of an acrylic bathtub. To prevent the silicone from coming off like a “sausage,” it is applied to the end and back of the tile. By pressing down on the tile, we connect both layers. It is no longer possible to pull it out without tearing the tile.
But for this method, it seems to me that it is necessary to additionally apply silicone to the end of the bathtub during installation.
Applying “Ravak” silicone to the end of the bathtub before installation
Sealant seams
An excellent alternative to the already boring plastic corners for tiles. If you often work with tiles or want to decorate corners in the bathroom with high quality, then this master class is for you.
Until recently, I used only two methods for decorating the internal corners of tiles: a plastic corner or filling the corner with grout (joint). But the problem is that the plastic corner does not fit perfectly to the tile, and there are still cracks that allow moisture and dirt to get in, and the corner with grout cracks over time. And then one day I learned an excellent method for forming seams from sealant (silicone)
.
And so on in order.
The first thing that is vital is the silicone itself, matched to the color of the grout. Fortunately, now almost all well-known companies that produce jointing have a separate line of colored silicone, which matches the range of grout.
We cut off the spout of the sealant at an angle of approximately 45 degrees. The diameter is chosen slightly larger than the width of the seam that needs to be made.
To form the seam you need to make a spatula. There are ready-made branded spatulas for sealant, but they are very difficult to find on sale.
You can make it from an ordinary plastic card by cutting off its edges at an angle.
The cut corner should be slightly larger than the width of the seam that needs to be refined.
Let's get down to the main work. The surface to which the sealant is applied must be dry, free of dirt and dust. Using a gun, squeeze out the silicone
along the corner.
Wet the surface with a separator. This is done so that when removing excess silicone, it does not stick where it is not needed. The composition of the separator is very simple: water and ordinary liquid soap. The proportions should be the same as for soap bubbles (I hope everyone remembers childhood?).
We take a spatula we made ourselves and carefully, slowly, remove the excess sealant.
Don't forget to clean the spatula periodically. We remove the excess silicone into some kind of container; an unnecessary socket box will also do.
That's all, the seam is ready
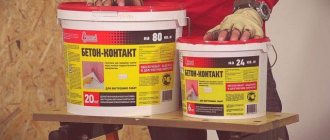
Preparing surfaces for sealant
Preparing surfaces before applying sealant is an important step in the work. The level of adhesion and type of coating will depend on its quality. Preparation process:
- To remove dirt and dust residues with a brush or vacuum cleaner, you can use a damp sponge, but then you must wait until the surface being treated is completely dry.
- Degreasing the surface with alcohol and acetone, paying special attention to the internal areas.
- A paint strip is glued on both sides, allowing you to limit the area where the product is applied.
- Drying the work area: wiping with a dry cloth or a hair dryer.
Design and principle of operation
Gun device
Regardless of what type of pistol, the basic structure is the same for all. It has a body, a rod, with the help of which the sealant is squeezed out, a trigger and a latch that holds the rod. The task of the work is to squeeze the contents out of the package. This process is very simple: you pull the trigger, which, in turn, sets the rod in motion. Next, the rod is pressed onto the bottom of the sealant package, which serves as a piston, and it comes out with ease.
Types and classification of pistols
Sealant guns are divided according to several parameters: appearance, complexity of the body structure, method of supplying the sealant.
| By design features |
When choosing which pistol to buy, you need to consider how often you plan to use it and what your financial capabilities are.
Can sealant be applied to sealant?
Craftsmen do not recommend reapplying sealant to an already applied layer. From the first time it is necessary to completely apply the sealant and replenish all openings. But when sealing pipes, such a case is possible.
If the surface contains a layer of acryplast that needs to be renewed, then it must be thoroughly cleaned, the surface dried, and then applied. Surface application without cleaning will not give a full result.
Applying crown sealant with a brush is also not the best option. To penetrate the mass more deeply, it is necessary to treat with a brush.
Interesting video on the topic:
Advice from professionals
The areas of use of silicone sealant are divided into 3 categories:
- compaction of foundations on the outside of buildings;
- sealing seams and joints indoors;
- compaction of surfaces in damp rooms.
This must be taken into account and select a sealant with the appropriate inscription on the packaging.
Before purchasing, you should find out the composition of the sealant. A high-quality seal consists of the following components:
- silicone polymer (26%);
- organic (rubber) mastic (4-5%);
- thiokol, polyurethane polymer and acrylic putty (total volume up to 3%);
- epoxy resin (up to 2%);
- cement additive (up to 0.4%).
Sealants with antiseptic additives must not be used on surfaces that come into contact with food and drinking water. Also, such seals are not suitable for terrariums and aquariums.
To seal dark wood, mirrors, glass, mosaics, it is best to choose a transparent sealant. It is advisable to treat floor joints with a dark sealant.
Silicone-based sealant is available in several varieties. Therefore, it is universal and can be used to seal seams and joints on any substrate, both indoors and outdoors.
Watch this video. It contains a lot of additional information and information on the topic of the article.
To distribute the sealant evenly and accurately, you can use a device called a gun. Proper use of a mounting gun not only increases the capabilities, but also the economical consumption of the substance. In this article we will examine the issue of proper use of a sealant gun.
We make the outer corner from silicone.
This method can only make short external corners; long corners are best made from special corners.
In our case, we are making an external corner at the built-in toilet. The tiles were initially cut at 45 degrees.
Apply 2-3 mm masking tape. from the edge of the corner.
Apply silicone to the corner.
We cut a right angle from the card and remove excess silicone . No need to moisten with separator!
Without waiting for the silicone to begin to harden, remove the masking tape.
We admire the finished corner :)
Spatula manufacturers
The Russian construction market offers products from domestic and foreign manufacturers.
- Russia: “Master Plast”, “Our Instrument”, “Politex South”.
- Belgium: "Soudal";
- Poland: Startul Master and Torex;
- Germany: "OTTO Fugenfux" and "Storch".
These manufacturers produce durable tools that last a long time and are of high quality.
Chinese companies also present their products on the domestic market. Such goods, as a rule, are of low quality.
Required materials and tools
The sealant is applied using:
- mounting gun, scissors;
- clean rags, sponges, napkins;
- rubber spatula to form a seam;
- degreasers: alcohol, acetone, solvent (you need to choose based on the type of surface);
- soap solution in a spray bottle;
- mounting tape, stationery tape.
Work must be carried out with gloves. It is also advisable to use a mask. Many materials have a strong odor. It is dangerous for humans. If the composition gets on the skin, irritation and red spots may occur. If your hands or any other part of your body gets dirty, wash off the product immediately.
Spatula for applying sealant
What it is
We are talking about a small, light and convenient device that easily fits in your hand. A spatula for silicone or polyurethane is a plate of a certain shape with several cutouts along the edges. These cutouts help shape the contour of the sealing joint, making it angular or rounded.
The spatula helps to easily remove excess silicone sealant, which inevitably forms when sealing seams. This useful tool has a number of advantages:
- small dimensions, so storage is hassle-free;
- long service life and repeated use;
- versatility, as they are suitable for forming external and internal corners.
Caulk spatulas are made from a variety of materials, including:
- rubber and silicone are the ideal choice, since these materials are highly elastic, and therefore less likely to crack and retain their original shape well;
- plastic and rubber are less practical materials because they are sensitive to deformation, but many craftsmen prefer to work with them due to their increased density.