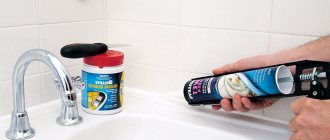
A caulk gun is used not only for interior repairs, but also for some exterior work in home construction. This tool got its name because of the peculiarities of its action. The sealant comes out when the trigger is pulled, which is why the tool is compared to this firearm. But this comparison, of course, is conditional, since the composition is squeezed out by a piston, which moves after the trigger is pulled. Therefore, it is more of a syringe.
How to use a caulk gun in pictures
- 1 Operating principle 1.1 Video - how to use a sealant gun
- 2.1 Video - Sealant application technology
- 5.1 Video - Using acrylic sealant
Sealant gun operating instructions
First, a little advice. If at the right time the gun is suddenly not at hand, then in order to knock the sealant out of the cartridge, you can use any available tool. For example, a hammer.
To use the gun successfully, follow these steps, which we have illustrated with pictures.
Step 1. First, take care of personal protection - at a minimum, wear gloves.
Step 2. Next, prepare the surface to apply sealant. In this case, we cannot advise anything specific, since everything depends on the instructions of the cartridge manufacturer. Everything should be written on the back of the latter. To remove the previous coating, use a sharp knife or triangular scraper. Remove remaining crumbs with a brush or use a vacuum cleaner.
In addition, the working surface must be degreased.
Step 3: Next, remove the limiters. If we are talking about a half-body or skeleton pistol, then this procedure will happen quickly. First, make sure that the tube does not have a special bottom-limiter. And if it is still present, then remove it.
Step 4. Let's figure out further how to use a sealant gun. Then pull out the rod in the device. To do this, press the lever and remove the part. Place the cartridge in the place that was vacated by the rod and apply a few gentle pressures on the hook to finally strengthen the container.
Installing a cartridge in a skeleton sealant gun (photo)
Step 5. Next, make a hole in the container through which the sealant will be supplied to the cone, which, in fact, ensures a uniform and even line.
Note! In most cases, such cones come sealed. And if you also have it sealed, you will have to cut off the end of the cone to form the required seam diameter. It is important that the cut dimensions are smaller than required for the job.
But if you decide to use a tubular or syringe tool for work, then you should use it slightly differently.
Installing a cartridge into a tubular (syringe) gun for sealant
Photo - diagram of a tubular gun
Step 1: First, make a hole in the sealant tube. If you are using packaged material or a “sausage”, then cut off one corner/end with extreme care so that the mixture can easily come out of the bag.
Step 2. Next, place the prepared container with the material into the tool itself, but so that it is the cut end of the container that goes to the tip, through which, in fact, the strip of material will be squeezed out.
Step 3. Of course, before this you need to remove the rod - do this in the same way as with a skeletal-type device.
Step 4. Guns are often equipped with several nozzles with such tips. Choose one of them and screw it onto the cylinder. If you notice that there is no hole on it (the tip), then take a utility knife and cut the tip, but strictly at an angle of 45 degrees. Of course, you also have to guess the size of the future hole in order to get a seam of the required diameter.
Be that as it may, if you have a sealant gun on your hands, then you must also have the manufacturer’s instructions. Take the time to familiarize yourself with it, since manufacturers often equip tools with some improvements and developments that are not provided in standard models.
You might be interested in this
Previously, we looked at the characteristics of self-adhesive penafol, which is very often used for insulating premises. We advise you to look at this article
Video - Sealant application technology
Operating a pistol - tips for beginners
As we have already found out, if the tool is properly equipped, then there should be no difficulties with its operation. And if you installed the cartridge as described in the instructions above, then you have already done half the work. Therefore, all that remains is to slowly press the trigger and apply the mixture to the desired seam. If you have a semi-body or skeletal type tool, it may take a couple of initial clicks for the required amount of material to fill the void in the tip. After this, make only smooth movements.
And if the model is battery-powered or electric, then by pressing the trigger you will regulate the intensity of the material supply. Therefore, if you are picking up a tool for the first time, then first practice in inconspicuous places - for example, seal a seam in the far corner of the room. After a little practice, you can move on to more visible places.
If you need to trim something or insert material into a gap, wet your fingers a little and run them along the surface. Use soapy water for this so that the mixture does not stick to your fingers. By the way, it is with this water that it is most convenient to remove the formed drips.
Note! The sealant does not require additional drying - in the fresh air it will acquire the required strength in just two to three hours.
And one more good tip: after you finish sealing, be sure to rinse the instrument with warm water.
Go ahead. To make the seam beautiful, use masking tape - stick it on both sides of the gap and remove it immediately after applying the sealant. To make a beautiful and, more importantly, high-quality corner seam, do the following. First, gently wet the side surfaces with soapy water. First prepare a small stick made of plastic or wood; Cut one side of the stick so that you can use it to set the shape for the seam. Accordingly, the final shape of the upper part of the seam will no longer be formed by the tip of the gun, but by the stick mentioned above.
Note! If you accidentally squeeze out too much sealant, don't worry - there's nothing wrong with it. Simply dry the seam with a hairdryer and remove the remaining material from the side surface using the same stick dipped in soapy water.
Basic classifications
Based on the type of compartments for cartridges (that is, containers with the mixture), the tool is divided into two categories:
- leafy;
- framed
The latter are more popular because they fix the cartridge more securely. Depending on the method of squeezing out the mixture, guns are divided into four more categories.
- Cordless tools are characterized by their autonomy, because, as the name suggests, they operate on batteries (mostly lithium-ion). The mixture is squeezed out and adjusted using a sensitive handle - the harder you press, the more intense the tool works.
- Electric-type devices are characterized by the absence of batteries, since they operate from the mains. With their help, the sealant is applied quickly and accurately, thereby saving consumables. Typically used by professionals, they allow the use of various types of cartridges. They are, of course, expensive, so it is not advisable to buy them for renovations in an apartment.
- In air pistols, extrusion occurs due to air pressure after pressing the trigger. They have a simple design, but are often equipped with various limiters that make it possible to obtain a strip of material of the required thickness. They are good because they work with various containers.
- Mechanical (or hand) tools are the most accessible, but at the same time the most short-lived. In fact, they only allow you to squeeze out a few cartridges, so they are not used on large objects.
Finally, according to the design features, pistols can be:
- skeletal (designed for cartridges with a volume of 310 milliliters);
- half-body (the volume is the same, but the mechanism is simpler; designed for several cartridges, but extremely inconvenient to use);
- tubular, working with any cartridges.
Note! The best option is a skeleton pistol. It costs a little more, but is more durable.
But how to choose the right option? Let's get a look.
Design and principle of operation
Gun device
Regardless of what type of pistol, the basic structure is the same for all. It has a body, a rod, with the help of which the sealant is squeezed out, a trigger and a latch that holds the rod. The task of the work is to squeeze the contents out of the package. This process is very simple: you pull the trigger, which, in turn, sets the rod in motion. Next, the rod is pressed onto the bottom of the sealant package, which serves as a piston, and it comes out with ease.
Types and classification of pistols
Sealant guns are divided according to several parameters: appearance, complexity of the body structure, method of supplying the sealant.
| By design features | |
| Semi-hulled - they are not designed for long-term use. Such guns are suitable for small household work, are not very durable in use and are relatively inexpensive. |
| Skeleton pistols, like half-body pistols, can cope with the same amount of work. They differ from each other in that the skeleton pistol is more convenient to use. It consists of two ribs and a rod, which allows the tube with sealant to be more firmly fixed in it, resulting in better quality of work. The cost of a skeleton pistol is higher than that of a half-body pistol, but it will also last longer. |
| Case pistols are intended for those who do repair or construction work quite often. They are distinguished by their versatility; they can be used both for sealant in hard tubes and for sealant in soft packaging. Their cost is higher than all others, but due to the fact that the consumption of sealant with a housing gun is minimal, it is considered more profitable. |
| According to the method of applying sealant | |
| Mechanical is the most affordable option. The supply of sealant in such guns occurs only due to the physical strength of the hands. Mechanical pistols are purchased for small household purposes. |
| Pneumatic - used for medium-sized work. The principle of its operation is such that the sealant is released due to the pressure of compressed air. This type of gun has a special valve that allows you to discharge excess sealant and minimize its losses. |
| Electric - allows you to make a more even seam and reduce the time required to complete the work. But to use them, appropriate experience is required. In addition, the cost of such a pistol, compared to mechanical and pneumatic ones, is much higher. |
When choosing which pistol to buy, you need to consider how often you plan to use it and what your financial capabilities are.
Features of choosing a sealant gun
The most important criterion is the amount of future work. If you only need to process a couple of joints, you can safely purchase a skeletal tool. And if you have a more complex task ahead (such as, for example, repairing an entire home), then buy a tubular-type pneumatic tool.
When only accuracy and speed of work are important, the best option is a battery-powered or mains-powered tool. Directly at the time of purchase, see how convenient the gun is for you personally, and whether the elements will interfere with operation.
And pay special attention to the hook itself: see if it is fixed tightly enough, what it was made of, etc. Finally, if we talk about specific brands, then, of course, give preference only to trusted manufacturers who have already earned trust.
Results
As you can see, there is nothing complicated about how to use a sealant gun. All you need is the right tool, a quality mixture, a little practice and, of course, good step-by-step instructions. You have already found the last one - here - so all that remains is to go to the store to buy it.
And finally, another useful video. Good luck with your work!
Areas of application of sealing file packages
Silicone and polyurethane sealants are used in installation and construction work for sealing seams and joints, since both materials have good adhesion to a wide range of materials: from wood and glass to concrete and brick. A feature of silicone sealant is greater elasticity, a wider range of permissible operating temperatures and better chemical resistance. Unlike household ones, neutral silicone sealing composition does not emit organic acids during curing and can be safely used in conjunction with metal products. Cork sealant is a suspension of cork chips in a bitumen binder and is used where particularly good thermal/sound insulation is required: when constructing a roof, sealing joints in walls, etc.


