Painting walls is one of the finishing methods that has been used for decades, but does not lose its popularity. And it’s not surprising, because painted walls are easy to care for, and when painted correctly, they look original and stylish. However, before starting work, careful preparation of the walls for painting is required, which we will discuss in this article.
Preparing walls for painting
Features of painted walls
Wall paint has been used for a long time. For quite a long period, paper wallpaper was used instead for decoration, considering it the best option. However, these judgments are relevant when talking about Russia. And even with the widespread use of wallpaper for a long time, it is impossible to call paint “old and uninteresting” and wallpaper “progressive” materials. The fact is that in the USA and a number of European countries, wallpaper has never been considered particularly chic, and the walls in houses abroad are always painted. And in Russia, despite the emergence of a large number of different finishing materials, paint is now considered interesting and relevant. Looking at the portfolio of any designer, you can see all sorts of finishing options, including painting the walls.
Preparing walls for painting - work order
Why does paint still remain relevant and is used for interior decoration? It's simple - it has too many advantages that you can't turn a blind eye to.
Painting walls in the interior gives room for creativity and imagination
Our people are wary of the idea of using paint instead of wallpaper, although in European countries it is much more common to see painted walls in houses
Table. Advantages of paint as a finishing material.
| Dignity | Characteristic |
| Opportunity to customize the space | You can decorate the walls with paint in any color you want, give them any shade and, as an option, even paint them with paint to order or yourself. Wallpaper involves applying a certain pattern that is already on it. Of course, we are not talking about paintable wallpaper or plain options. But as for the latter, it is the paint that offers much more shades of color. Plus, using colors, you can choose the desired shade yourself. |
| Easy to care for walls | Despite the emergence of washable wallpaper and other materials that can be cleaned using water, paint is still much easier to clean from any contaminants. Also, the paint is almost not destroyed under the influence of a number of cleaning agents, unlike the same wallpaper or some other materials. So for those for whom cleanliness in the house is important, but at the same time children and pets live in the home, paint can be the best solution for wall decoration. |
| Easy to change wall color | Painted walls can be easily repainted in a different color if desired. If we talk about wallpaper, then they will have to be re-glued, and this requires a large number of works. With paint, everything is simpler - you can apply a new color over the old one. |
| Possibility of finishing any surfaces | The paint can be applied to any materials - concrete, wood, drywall, etc. Even a log house can be easily repainted using it in the desired shade. But you can’t put wallpaper on it anymore. |
Wall painting
Of course, paint is far from an ideal material. It also has its drawbacks. So, with frequent exposure to it, it will no longer look neat - it will become worn out, scratched. However, this minus also applies to wallpaper. Also, paint, contrary to popular belief, is far from the cheapest finishing option. Thus, it will require certain preparatory work, which sometimes turns out to be quite costly and troublesome.
What is cheaper - wallpapering or painting the walls?
Important! It is not always recommended to paint walls in a new building. The fact is that a new house is subject to shrinkage, and the paint will quickly become covered with a network of cracks. Typically, painting is done a couple of years after the construction of the structure. For the first time, it is better to put up wallpaper - the resulting defects on the walls will be less noticeable.
In a new building it is better to put up wallpaper first
How to paint wallpaper correctly
When producing non-woven wallpaper, cellulose is added, which is processed using special technologies. The canvas has two layers: the inner one is non-woven fabric, the outer one is polyvinyl foam. When buying just these, check, because there are two types of them - paintable and regular.
Wallpaper with a uniform structure is painted exclusively from the front side using a roller or spray. For those who like to experiment, you can paint non-woven fabrics on the inside and, after the paint has dried, glue them to the wall. After drying, the paint will appear on the front side and will have its own specific tone in those places where there is no top polymer - this looks quite interesting.
Non-woven wallpaper will look much more interesting if you paint it first in one tone, and then apply a completely different tone of paint. The first paint will show through under the second in places.
How you want to paint it is up to you to decide, there are many options and there are absolutely no difficulties in doing so. You should never be afraid to experiment, because if anything happens, everything can be repainted again. I think we all loved to paint on the walls as children! Plus, painting wallpaper is a fun activity that the whole family can get involved in. The renovation will be twice as pleasant!
>Video – technology and technique for painting wallpaper
General information on preparing walls for painting
Preparing walls for painting is a must. Otherwise, you shouldn’t expect a beautiful and neat result. Moreover, the order of work must be strictly observed. Applying the paint itself is sometimes not as difficult as properly preparing the walls, especially those that need leveling and other additional work.
Wall painting technology
Main stages of wall preparation:
- cleaning the walls from old coatings, if any. It is important to remove old wallpaper, peeling paint and other materials that, by their presence under the final coat of paint, can ruin the entire work;
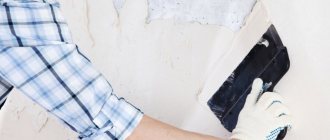
- puttying, which will get rid of all irregularities and minor surface defects. The putty is applied in 1-2 layers, the second is the final one;
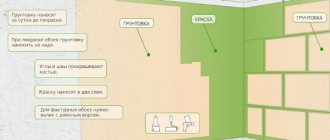
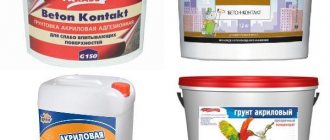
- priming makes it possible to ensure a more even application of paint in the future. The primer also increases adhesion and is applied under the putty;
- It may be necessary to treat the walls with antiseptics, anti-fungus, mold, and to prevent other negative consequences.
In each individual case, you need to prepare the walls for painting differently.
Important! Each stage of preparation is performed sequentially; it is important to wait until the layer of one material has completely dried before applying another.
Applying finishing putty
The final putty achieves the most even wall possible, ready for painting.
Using finishing putty, you can achieve a perfectly smooth surface, which will allow subsequent materials to lay smoothly without flaws. Since the starting layer contains sand in its composition, it gives a rough coating that is completely unsuitable for painting.
And the finishing layer of putty contains a filler of fine particles. Therefore, the solution easily fills the roughness of the rough layer and makes the surface smooth. Of course, finishing will require time and expense for quality materials. But the result of such preparation for painting will be a smooth surface on which the paint will lie in a perfectly even layer.
For the best quality coating, you need to mix the finishing putty solution as thoroughly as possible, breaking up all cement and sand lumps. Here you will need a construction mixer or a special attachment for a drill, and you also need a suitable container for diluting the solution.
By following the recommendations below, you will achieve a high-quality diluted material for finishing putty:
|
After using the next portion of putty, in order to avoid lumps of the old mortar getting into the new one, it is necessary to thoroughly rinse the mixing container, construction mixer or attachment for stirring the mortar.
The finished mixture for finishing putty just needs to be carefully stirred until all lumps are dissolved and a uniform texture is formed without compactions and solid particles.
When puttingty, you should adhere to the following rules:
- Dilute a small amount of the mixture. The putty dries quickly, and you may not have time to use it if there is a lot of solution.
- Calculate the amount of mixture needed for about an hour of puttying.
- Keep in mind that putty is usually applied in 2-4 layers to eliminate all surface defects.
- After puttying, the surface acquires strength, reliability and will serve you for many years.
- Remember that putty is applied only from the corner to the center of the surface.
Make sure the surface is completely dry after priming before applying a coat of finishing filler.
The technique of applying putty with a roller is quite simple provided that a number of conditions are met:
- provide the room with sufficient lighting, it is better to have several light sources;
- the solution must be non-solid;
- you need to roll the roller no more than half a meter at a time;
- It is best to work with a velor roller and tray;
- pour the mixture into a special tray;
- dip the roller into the tray, without shaking, apply the mixture to the surface;
- work can be carried out with a surface width of 3 m at the same time.
The spatula is also easily used for puttying walls. The principle of operation of the spatula is as follows:
- use a narrow spatula to scoop out the mixture;
- transfer the mixture onto a wide spatula (in a layer of about 3 cm);
- the spatula is brought to the surface at an acute angle of 30°;
- Apply a strip of putty about 30–40 cm at a time;
- excess material is removed using a narrow spatula and put back into the container with the solution;
- The action is repeated until the entire batch of solution is used.
The solution is applied with a spatula in lines that can be:
- straight;
- arcuate.
Please note that the finishing putty is applied in a layer no thicker than 2 mm.
After applying the putty, thoroughly sanding is carried out. High-quality sanding will prepare the walls for painting or applying other decorative coatings.
Grinding work is carried out using a special grinding mesh placed on a block. The mesh is bent along the contour and secured with clamps. The grinding technique involves the following steps:
- the surface is polished in a circular motion;
- the force of pressure on the block depends on the depth of the defect on the surface;
- Care must be taken to ensure that no indented areas are formed due to excessive pressure.
What tools are needed?
The set of tools required for preparatory work for painting may vary depending on what work needs to be done. However, in general, we can name the main tools that will be needed for these purposes.
Drill with chain attachment
- A drill equipped with a special attachment will allow you to get rid of old plaster.
- Sandpaper with a block or a grinding machine will make it possible to properly level the walls and remove minor irregularities.
- A vacuum cleaner will help get rid of dust generated during the cleaning and sanding of walls.
- To remove old paint, you need to use special compounds, as well as a spatula, a hair dryer and a drill with an attachment made in the form of a metal brush.
- Water in a spray bottle and a wide spatula will help remove old wallpaper.
- Also, for preparatory work you will need a roller or brushes for applying the primer, spatulas that will help apply the putty.
Paint remover
Do not neglect preparing the walls for painting. If this work is not carried out, then the paint will not lie smoothly or will not adhere as firmly as we would like, and will soon peel off.
What are the tools?
To do the painting work yourself you will need:
- a pair of spatulas of different parameters for applying the mixture;
- marker for preparing and marking walls;
- lamp for lighting;
- axe, hammer and chisel;
- an abrasive mesh, a sanding sheet and a couple of whetstones.
During the puttying process, you need to have all the equipment at hand so as not to get lost.
Removing old coatings
First, you should inspect the surfaces that need painting. Depending on the condition they are in, the order of preparation work will depend. If you plan to paint walls that already have finishing, then it is important to first remove all old coatings, as well as all protruding elements that interfere with the work - lighting fixtures, decorative elements, shelves, etc. It is better to remove the furniture from the room if possible, or at least carefully wrap it up into the covering film.
Features of using covering film
Advice! It is better to carry out work on preparing walls using a respirator to avoid inhaling dust.
Old wallpaper is much easier to remove than old paint. Those with a paper backing are the easiest to remove. Sometimes they come off very easily - you just need to pull one edge of the wallpaper sheet. In some cases, the wallpaper may not come off so easily, and then it is better to first moisten it with water, and then, using a spatula, remove it in layers. It is recommended to use warm water for these purposes.
It’s not difficult to remove regular paper wallpaper from walls.
Advice! It is recommended to damage vinyl and non-woven wallpapers well before spraying with water using a serrated roller or a stationery knife. You can also use a steamer to remove them faster.
Whitewash is the most difficult to remove - it must be carefully removed from the entire surface of the walls, and this is not an easy task. If the whitewash is poorly removed, the paint will not lie smoothly. You can remove this material using water, as in the wallpaper method. The simplest option for whitewashing can be simply washed off with plenty of water. In some cases, you will need to use spatulas, sanders and other devices to get rid of the material. They say that the following composition works well for whitewashing: 10 liters of water, 2 tbsp. l. laundry soap, 5 tbsp. l. soda
You can wash off whitewash from walls using a regular sponge and water.
Old paint can be removed using special compounds. Sometimes you don’t have to remove it, but only if the previously applied layer is smooth and without defects.
If you need to remove ceramic tiles, it is important to remove them along with the adhesive that holds them in place. After this, the walls must be carefully leveled to perfect condition. The ceramics themselves can be removed using a hammer drill with a chisel.
Removing old tiles
Step-by-step work order
The stages of painting work consist of the following manipulations:
- The first is initial sanding.
- The second is puttying with a base composition.
- Third - application.
- Fourth – finishing putty.
- Fifth - direct alignment.
First, it’s worth inspecting the base being treated. If it is reliable and without significant deformations, then the old coating is removed and leveling is carried out.
“Classic manipulations before painting include the use of a simple sanding sheet and a suitable block. But if you are the owner of special equipment, then it is acceptable to use.”
Once the initial coating has been cleaned and leveled, the surface must be re-inspected.
So, if you find harmful fungi or mold infested, they must be removed, and if there are holes, they are sealed with special means and left to dry.
Next, the walls are treated with antifungal solutions before painting, and then with a primer. So, these are short-term actions, and they are very elementary to perform.
But if the base is far from ideal, and the condition of the plaster would be better, then you should choose a different leveling path.
So, first the first balls are completely removed and new ones are applied.
As an alternative, you can install plasterboard panels. Of course, only you are the master of the situation, so it’s up to you to decide, based on your experience and financial capabilities.
Initial puttying
Upon completion of surface preparation, the next stage is application of finishing and leveling.
The plaster is not suitable for painting due to its porous structure and high moisture absorption.
So, because of this, the color may change significantly and the base will become rough, so the walls should be puttied.
First you need to make the right choice of material and treatment with basic putty.
So, it has a fine fraction of sand, with the help of which the mass will fit well onto the base in a thick ball, and it will not flow during drying.
As a tool, you should use a wide and small spatula (suitable for precision work).
As a rule, dry powders are sold in stores, the solution of which should be made according to the instructions.
When you putty walls yourself, to increase service life and reliability, experts recommend reinforcing the surface.
“The first ball of putty material is created once, then a nylon mesh is applied, which is pressed with a spatula. Then it is treated with a solution that seeps through the mesh structure.”
During the leveling process, many craftsmen want to immediately achieve the standard evenness of the walls, and at the same time they automatically make mistakes.
So, you just need to casually level the base and distribute the product over the entire area.
Therefore, do not rush headlong and strive for ideal evenness of the surface at this leveling stage.
The base coat should be given time to dry (wait about eight hours) and then begin the sanding phase. An abrasive will help you with this, with which you can level and remove distortions.
We carry out the final alignment - what is the order
Finishing putty material is used to create the top ball.
So, its composition does not contain unnecessary additives or large grains, due to which the coating is perfectly smooth.
Thus, the base material is applied in a four-millimeter layer, and the finishing material in a two-millimeter layer, which will protect the coating from the formation of cracks and deformations.
To perform the finishing, a wide and small spatula is used to distribute the material.
This product is easily applied to the surface, but any bumps that appear should be removed immediately.
We leave the product to dry for six hours, and then we pass over the surface with an abrasive mesh marked “60”.
The main thing here is to stick to the “golden mean” and not accidentally remove only the applied putty.
Elimination of serious defects
After the old coating has been removed from the walls, you can begin further preparation of the walls, that is, puttying and priming. However, if there are serious defects on the walls, such as deep cracks, then it is important to repair them first.
Prices for popular types of putty
Putties
So, any large crack that cannot be filled with a small amount of putty must first be widened and deepened, no matter how strange it may sound. Next, the gap should be thoroughly cleaned of debris and dust and the cavity should be well treated with a primer.
Such places on the wall must be sealed with plaster.
Once the primer layer has dried, you can seal the gap with regular putty. The composition should fill the crack well so that cavities do not form and maximum adhesion of the composition to the surface is achieved. Also, you need to glue a reinforcing tape to the front part of the sealed gap - you need to press it into the layer of putty that has not yet hardened, coat it well with it and then dry the putty and sand it.
Alignment of walls
After large irregularities have been repaired, you can begin to level the entire surface of the walls. If this stage is neglected, then during the final application of paint you will be able to see wall defects that were previously invisible. The walls can be leveled by sanding, plastering or installing plasterboard sheets.
Leveling walls with plasterboard
Grinding is used to level concrete walls and prepare them for painting. The main thing is that the surface itself is durable and does not crumble, and also does not have serious defects. You can sand with a special machine or even sandpaper. This procedure will remove all minor defects and irregularities.
Wall and ceiling sander Aspro-C3 (no vacuum cleaner required)
Prices for sanding machines for walls and ceilings
Sanding machine for walls and ceilings
You can also use stripping and plastering to remove small defects. After completion of work, level differences on the wall should not be more than 2 mm per 1 linear meter. If everything is good, then you can start plastering and priming.
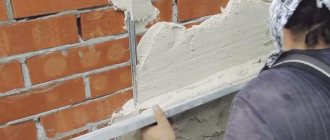
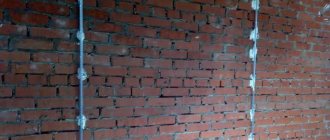
Plastering allows you to get a perfectly smooth wall surface. The composition must be applied in such quantity that it is sufficient to completely level the walls. Thus, thick layers of plaster can be applied along the beacons - this is how concrete walls are usually prepared. Before applying the putty, the walls must be primed to increase adhesion. The primer layer takes several hours to dry.
Plastering a wall
Important! The layer of plaster cannot be made more than 3 cm. If it is planned to be thicker, then you will have to lay a reinforcing mesh, which, by the way, must be laid if you plan to paint brick walls.
After plastering, it is important to apply a thin finishing layer of putty to the walls. Only after it has dried can you proceed directly to priming and painting the walls. Before applying the finishing layer, the starting layer of putty also needs to be sanded, just like the walls. The main thing is not to get carried away and sand off the entire finishing layer. It is better to remove the resulting dust with a dry cloth so as not to spoil the putty layer. After applying the putty, the wall must be primed again.
Primer for walls
Prices for deep penetration primer
Deep penetration primer
How to level a wall with your own hands
So, if you decide to level the wall yourself, you should take the following steps.
- Decide on the leveling method - dry (using GPL) or wet (using plaster and putty).
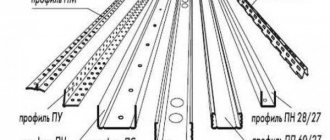
- When choosing the plasterboard method, decide how to attach the canvas: to the frame or attach it to the wall with glue.
- When choosing to smooth the surface using the wet method, go through all the stages: cleaning areas of old materials, installing beacons, applying two layers of plaster, rubbing seams and uneven areas, and then treating the walls directly with putty.
- After all the stages, when the walls have a fairly smooth surface, you can apply paint.
When determining the evenness of a surface, you can use a plumb line. To do this, attach a nail with a cord to the ceiling the entire height of the wall with a weight at the end, and after the weight has become level, you can determine the existing gaps.
Even without experience in construction and repair work, it is possible to carry out all stages of wall alignment as correctly as possible. The main thing is to choose a method that even beginners can do. By taking responsibility for completing the work, you can save money and also gain the necessary experience.
The process of preparing walls for painting
Step 1. The first step is to inspect the surface of the walls that you plan to paint and assess its condition. This procedure will help you understand what work will need to be done to prepare the walls.
First the walls are inspected
Step 2. Using a spatula, you can remove some of the debris from the wall, including pieces of cement.
Everything unnecessary is removed
Step 3. Using a rule or a straight line, you need to evaluate the evenness of the wall. The rule needs to be applied to the wall and see if there is a gap between it and the wall, which will indicate the unevenness of the wall. It is especially important to check the corners carefully.
The rule is applied to the wall
Step 4. All large irregularities, especially in the corners, can be knocked down with a hammer drill.
Irregularities are removed using a hammer drill
Step 5. Next you need to apply the primer using a regular roller. You can also use a brush, but the work in this case will take longer.
Applying primer
Step 6. Now you can use plaster to tighten the corners and seal large irregularities with it.
The corners are tightened with plaster
Step 7. After applying the putty in the area of the corners, it needs to be stretched using the rule.
The mixture is stretched by the rule
The result of the work done
Step 8. Now it is recommended to glue corner-forming tape in the corners, which will allow you to beautifully form the corners in the room and prevent the corners from cracking in this place. Gluing it is simple - you need to apply putty to both sides of the corner of the room, then take a piece of tape, bend it in the middle and paste it into the corner.
Angle forming tape
Forming corners indoors
Step 9. Next, running a spatula along the tape, you need to remove all excess putty.
Excess putty is removed
This is what the formed angle looks like
Step 10. Now you need to mix the finishing putty according to the instructions.
Finishing putty is mixed
Construction mixer price
Construction mixer
Step 11. The finished putty must be applied to the entire surface of the walls in one even layer.
The putty is applied in an even layer
Another photo of the process
Step 12. After the first layer of putty has dried, before applying the second, you need to remove with a clean spatula the small tubercles that formed when the first layer of putty was applied.
Use a clean spatula to remove small bumps
Step 13. Now you can apply the second layer of putty. It is important to illuminate the wall from the side - this measure will allow you to see whether the layer is applied evenly. Application is also done with a spatula.
Wall lighting
The second layer is applied
Step 14. When the second layer of putty has dried, you need to sand the surface well using fine-grain sandpaper.
Sanding a wall with sandpaper
Step 15. Now you should prime the walls again. The primer can also be applied by roller or spray.
The primer is applied with a spray gun
Step 16. Next you need to glue the fiberglass. It is glued using an airless painting machine. It can also be glued with a roller. First, the adhesive is applied, then the fiberglass itself is glued and leveled with a spatula. It is important to glue fiberglass using glue with dye. Then, when applying the last layer of putty, it will be clear whether it has been applied in a sufficient layer.
First, the adhesive is applied
Next, the fiberglass itself is glued
Step 17. After the layer of fiberglass has dried, you can apply the so-called superfinish putty, which has a very fine fraction.
Superfinish putty is applied
Step 18. Superfinish putty is also applied under lighting from the side. It must be applied after the previous layer has dried.
The wall also needs to be lit from the side
Step 19. The final stage is sanding the wall with all layers with fine sandpaper. The wall is ready for painting.
At the end the wall is sanded again
Video - Preparation for painting
Checking the evenness of the walls and choosing a method for eliminating identified deviations
Not every room has completely smooth walls. Deviations can be minor or significant. The choice of method for eliminating such a defect depends on this.
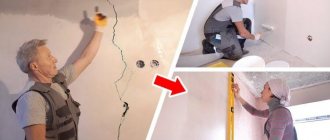
You can check the evenness of the surface using a plumb line and a building level. It is enough to lean the indicated instruments against the wall and observe the level of its differences. If it is more than 5 mm, you will have to level the base completely. Small irregularities of about 3 mm can be corrected with a thin layer of putty or plaster.
In other cases, large-scale work remains. They are often performed using drywall. It allows you not only to achieve the desired leveling, but also to insulate the room and increase the level of sound insulation. The sheets are attached using glue or frame sheathing. In the latter case, the area of the room will be slightly reduced due to the frame.
Drywall allows you not only to achieve the desired leveling, but also to insulate the room and increase the level of sound insulation.
