Preparation stages
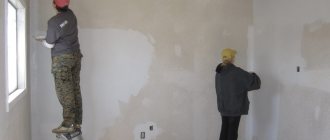
The specificity of the painting technology is that the wall must be prepared with special care. A thin layer of paint and varnish composition will not be able to hide even the smallest flaws of the surface being painted. The technology for preparing walls for painting depends on the type of surface to be painted, the material from which it is made, and the type of paint. In general terms, preparation for painting walls in a new building without preliminary finishing consists of the following steps:
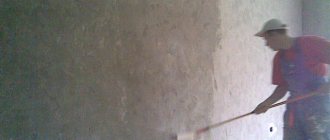
- Rough leveling using base plaster.
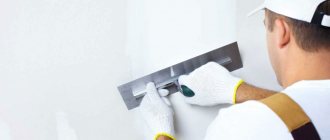
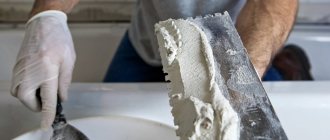
- Surface putty: starting and finishing.
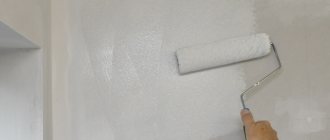
- Primer.
- Coloring.
The wall, which has already been treated by any means, must be cleaned of the old finish right down to the very base. Only after this can you begin to prepare the wall for painting.
Painting stages
Preparation technology
The quality of the final result depends entirely on the preparation procedure.
The main point of painting is preparing concrete surfaces for painting. An unprepared area cannot be immediately painted. The preparation technology consists of the following manipulations:
- Cleaning the surface with a scraper from old layers of paint.
- Removing fungus and oil stains with a protective antiseptic.
- Complete drying stage.
- Repairing cracks and other mechanical damage.
- Leveling a concrete or plastered surface with putty.
- Sealing gorges and openings.
- “Prim Promkor” or primer is applied.
Painting procedure
Before painting a concrete or plastered surface, you need to clearly determine the material and possible costs, which will include a cost estimate. Each type of paint has its own purpose and cost. The intended use and operating conditions should also be taken into account. The dyeing process itself does not involve anything complicated. Before application, the dye is thoroughly mixed and, using the selected working tool, evenly applied to the surface. If the area of the surface to be painted involves the presence of windows, doors, slopes and other openings, the boundaries of the painting should be separated with masking tape. If it is necessary to apply a second layer, you need to wait until the initial one has completely dried.
General information on preparing walls for painting
You should not neglect preparing the walls for painting. This will allow you to get a high-quality and even coating. Defects and irregularities easily appear through a thin layer of paint and varnish composition. If they are not eliminated, the coating will look sloppy.
Preparation includes dismantling the old cladding, puttying, and priming. Sometimes it is necessary to additionally treat the surface with antiseptics and antifungal compounds to reduce the risk of mold development.
It is necessary to carry out preparation strictly step by step and sequentially. Before the next step, wait until the wall is completely dry.
You should not neglect preparing the walls for painting.
Preparing walls for painting - step by step
When preparing walls directly for painting, there are several important steps that need to be taken. This will make it easier to carry out repair work yourself.
Step 1. Dismantling paintings, nails
Before painting, remove wall decorations such as prints, pictures or photo frames. If you don't plan to hang the art in a specific location, you should also remove any nails or pegs from which the wall decorations were hung. That's not all, because after removing the pictures and nails, you should seal the holes in the walls.
The hole must first be washed with paint soap to remove any dust inside. Leaving it in place will make it difficult for the filler to stick. Using a spatula, you can fill the gap with ready-made repair putty. Let it dry and then sand the filled areas of the wall with coarse paper.
Step 2. Removing old layers of paint and wallpaper
The easiest way is to paint untreated walls, that is, over freshly laid mineral or gypsum plaster. Then there is no need to carry out preparatory work in the form of removing old layers of paint, wallpaper or other coatings that previously covered the wall.
You can check the adhesion of the paint. You don't need to use any specialized tools for this. A simple sticky tape is enough. Stick it on the wall and quickly tear it off. If there are paint particles left on it, the coating does not adhere well to the wall and must be torn off before painting.
Usually wallpaper, old wallpaper can be easily removed, so there should not be any great difficulties in performing this work.
You should also determine what kind of paint you are dealing with. If the walls were painted with latex or acrylic paint, then in preparation for painting, it is enough to vacuum and wash them well, but with walls covered with oil paint, you will have to work. Oil paint remover will help remove old paint.
Such preparations act in such a way that they soften the coating, making it easier to remove paint residues using a spatula or orbital sander. When sanding walls, dust will certainly rise in the room, so it is recommended to wear a respirator and goggles when performing such work. This will protect you from inhaling hazardous substances and getting them into your eyes.
Of course, no one needs to be convinced that walls with wallpaper must first be cleared of such coating, and only then can they start painting. Remove the wallpaper from the walls with a knife, being careful not to damage the plaster. If the wallpaper does not come off, you can moisten it with hot water and leave it for a few minutes to soften it. Spatulas with wide ends or knives can help remove wallpaper. Stubborn wallpaper can be removed using a special removal solution. You need to apply this product, wait, and then tear it off.
You can use a regular spatula to remove old wallpaper.
Step 3. Washing the walls before painting
The wall to be painted must be clean. When touched by hand, there should be no pigment from other paint coatings on the skin. In this case, washing the walls is usually simply necessary. How to clean walls before painting? If there are greasy stains on the walls, detergent will help remove them.
A degreaser is best. It happens that there are pockets of mold and mildew, especially in the corners of rooms. They must be removed using an appropriate fungicidal agent. Typically, all walls should be washed with paint soap dissolved in water. Put rubber gloves on your hands and wipe the walls with a soft cloth soaked in soap. After some time, rinse the surface with warm water. Before proceeding with further work, you need to wait until the walls dry well.
For cleaning walls, it is best to use a medium-hard universal brush.
Step 4. Leveling and plastering the walls
If there are any uneven surfaces, cracks, scratches or depressions on the wall, these will need to be removed and repaired before painting can begin. You can use putty for this. How to putty the walls? First you need to clean out dents and other cavities.
The easiest way to get rid of a crack on the wall is with the help of building plaster (alabaster)
When the wall is dry after cleaning, mix the putty in the appropriate proportions recommended by the manufacturer, or use a ready-made mixture. Fill the holes in the walls and level the surface using a spatula. After the solution has dried, it is necessary to sand the base first with coarse-grained sandpaper, and then with fine-grained sandpaper until a perfectly smooth surface and a flat wall are obtained. Finally, the dust and dirt from the filler and sanding imperfections need to be removed. Then the wall will be clean and smooth.
The finishing coating is selected depending on the type of base and external conditions. In rooms with high humidity and aerated concrete surfaces, for example, finishing plaster cannot be used. The so-called gypsum plaster, that is, applying plaster to the wall, will give the effect of a perfectly smooth surface.
Laying plaster does not require extensive knowledge, but practice and preparation of the appropriate tools for this purpose. The coat is applied with a spatula or roller. There are also specialized devices that are used to perform this activity. After the plaster has dried, it must be sanded evenly to achieve a flawlessly smooth wall.
In order for the paint to lay evenly on the wall, you need to remove all irregularities from the surface.
Step 5. Prime the walls before painting
Primer for walls
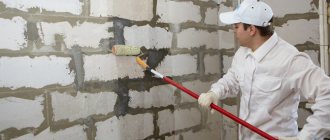
The next stage of painting the wall is primer. What to prime the walls with? The priming procedure is carried out using various types of products, mainly on a previously unpainted surface. The use of a primer is justified when old paintwork has been removed from all or part of the coating. Putty was applied to these areas. This is what should be primed. The primer is designed to stabilize the substrate and increase paint adhesion.
Gypsum plasters require priming before painting. Use a primer, it will strengthen the surface and also improve the adhesion of the new paint. For the priming itself, you can use primer paints and primers designed for a given surface or for a specific type of paint. They are very easy to apply - just spread evenly over the surface. Usually, after priming the walls, you need to wait 24 hours so that the wall absorbs and dries well.
Step 6. Preparing paint for painting work
Prepared walls can be painted with a roller or brush. But first you need to mix the paint thoroughly - in a jar or bucket. This can be done using a mixer mounted on a drill.
High quality paint allows you to create a perfect smooth surface
A certain amount of paint should be poured into a special tray. The bucket with the remaining paint must be covered so that it does not dry out. If necessary, the paint can be diluted with water or a thinner recommended by the manufacturer.
Types of surfaces for painting
When carrying out renovations, an important question for the apartment owner is: how to prepare the walls for painting? The work may require different materials, the choice of which depends on the base. Most often you can find concrete walls. Also, partitions made of wood or plasterboard can be erected in the apartment, the preparation of which for painting has its own characteristics.
Walls may differ in appearance:
- smooth surface leveled with plaster or putty;
- surface with relief;
- smooth, flat surface made of finishing material;
- facing with relief.
Preparing walls for painting in most cases is done by leveling and puttying.
Surface to be painted
Depending on what surface you plan to paint, you can use different preparation methods. The main types of surfaces that need to be painted are:
- the surface of a smooth finishing material (wallpaper, panels or tiles);
- relief finishing material;
- smooth plaster with putty;
- textured plaster.
For each type of surface, various preparatory measures are provided. The most labor-intensive process is the preparation with puttying and leveling the surface with plaster. The stages that are included in it contain other preparatory processes in various combinations.
Painting indoor surfaces
Anyone can handle painting surfaces, since the process in question does not require specific knowledge, complex tools or materials. However, some complexity is caused by the fact that immediately before the painting process it will be necessary to properly prepare a particular surface.
Advantages and disadvantages of painting
Painted walls avoid many problems. They are easy to care for - wash, repair, decorate. Defects that appear can be easily eliminated with your own hands, unlike wallpaper, which cannot be made whole again.
What is the superiority of painting over other technologies?
- During the preparation process, the walls will change qualitatively, they will become solid, smooth, and there will be no cracks on them.
- If necessary, you can repaint the room in any color, and it will cost much less than putting on new wallpaper.
- Restoring chips or scratches requires minimal investment.
- Stained areas are easy to wash, and even easier - wipe with a melamine sponge, which removes traces of ink, coffee, and tea.
- Painted walls are the best choice for cat lovers. Clawed pets are not interested in such a surface.
The disadvantages of this technology include:
- the need for preliminary preparation of walls - and this is expensive, difficult and time-consuming;
- Producing a high-quality initial painting is also not easy. To do this, you need to own special equipment;
- the paint is a real “dust collector”. Its pores become clogged with tiny particles over time, so the walls must be washed regularly;
- monochromatic colors may seem boring, and the room may resemble an office. But this effect is successfully neutralized by decorative and textile interior items.
How to properly prepare walls for painting
Preliminary preparation of walls involves an impressive range of work. The result of their consistent and careful implementation will be perfectly smooth surfaces. The list includes cleaning the wall from the old coating, removing crumbled plaster and applying new one, leveling the base, filling potholes, cracks, priming, and treating with an antiseptic solution. Owners of new buildings with so-called “gray” renovations are luckier - at least they won’t have to remove the old finishing and organize garbage removal.
A new house may settle in the first few years and eventually cracks will appear in the paint. The situation will be saved by fiberglass or facade mesh for exterior use, glued to the wall at the plastering stage.
The first step is to clear the room of furniture, curtains, and hanging structures. After this, you need to carefully examine the surfaces and choose the right algorithm of action.
Let's talk about coloring technology
Preparing the wall
Cleaning seams.
- Initially, the wall to be finished is examined for the presence of white salt stains. They must be completely removed, since when painted, the layer will not lie evenly or may even peel off after drying. But before that, we advise you to find out the reason for the salt protrusion. If the new masonry is covered with efflorescence, then the mortar is to blame; the salt is simply removed mechanically.
- But if the masonry is old, then efflorescence indicates the presence of excess moisture in the wall; the cause of this moisture must be eliminated, because then stains will appear on the new cladding or the paint may peel off. Secure the flashings, inspect the roof, and check the integrity of the plumbing system in the house.
- Salt stains can be easily cleaned using a metal brush with your own hands. But now on the construction markets there are special attachments with metal bristles that are inserted into an electric drill. With their help, the process will be much faster and more efficient.
Drill cleaning attachment.
- Paint stains are removed in the same way. After cleaning, the wall needs to be washed; for this it is convenient to use a stiff brush and a garden sprayer.
- Preparing a brick wall for painting at the next stage involves fragmentary repairs. Carefully inspect the surface and fill all chips and cracks. You can use special cement-based putties, but it is cheaper to use a regular cement-sand mortar, although it will take a little longer to dry.
- If the masonry is overgrown with moss or mold, the plaque must be carefully removed and the area treated with special antiseptics.
Fragmentary surface repair.
Important: after removing vegetation from the wall, it must be thoroughly moistened and only then apply an antiseptic. If you apply a disinfectant composition to dry masonry, it can be deeply absorbed and subsequently cause efflorescence.
Application of primer
Efflorescence on the wall.
- There is a widespread belief that brickwork does not need primer; it is enough to purchase special paint. There is some truth in this statement, but it only works in interior spaces. For facade work, unheated rooms or painting stoves, application of primer is mandatory.
- First of all, primer will save you a significant amount of paint and increase adhesion, because less composition is consumed on the prepared surface. Also in favor of the primer is that these compounds have an antibacterial effect and significantly increase the durability of the finishing layer.
- Instructions for application are on any package; general recommendations include that the primer is applied to a dry surface and if there are stubborn oil or other stains, this area is covered several times.
Application of primer.
Painting walls
- First of all, let's say a few words about the instrument. It is most convenient to work with a spray gun - the compositions lie evenly and penetrate into all the pores of the wall. But using a spray gun is advisable for painting large surfaces. It is not profitable to buy a compressor and a spray gun for cladding a balcony.
- If we are painting a brick wall on a loggia, then it is cheaper and more convenient for us to use a brush or roller. A brush should only be used with hard bristles; a soft brush on a brick surface will quickly wear off. We take a roller with long pile.
Advice: it is not recommended to use glossy paints or varnishes for facade work; a matte surface will look much better.
Working with a brush.
- We apply the paint in 2 – 3 layers; the direction of movement of the roller or brush when painting the walls is not of fundamental importance, but we recommend applying the layers perpendicular to each other. Do not forget that layers are applied only to a dry surface.
Plastering
Gypsum plaster
Applying plaster involves preliminary preparation of the load-bearing surface. Depending on the material, it may vary slightly in nuances.
Step by step process
Before preparing the walls for painting, you should familiarize yourself in detail with all stages of the work. In a new house with untreated walls, it is necessary to determine how smooth they are. To do this, use a long building level or plumb line. By measuring the entire wall area with a tool in both vertical and horizontal directions, you can get a complete picture of all deviations from the norm.
According to the SNiP regulations, the permissible value of the “blockage” of the wall is no more than 0.5 cm for every 3 m. If the deviation is larger, it is necessary to level it using plaster mortar.
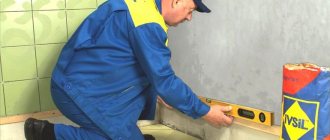
For ease of work, beacons are installed along the entire wall - marks made of smooth metal tubes or wooden slats. They are installed on mortar patches as follows:
- 2 starting beacons are placed in the corners of the wall.
- Twine is stretched between them in the upper and lower parts.
- The remaining beacons are placed along it every 0.8 - 1 m.
When installing intermediate beacons, they should not be pressed tightly against the stretched twine. Otherwise, there is a possibility of its gradual deviation outward. There should be a gap of 1-2 mm between the beacons and the thread.
Installation of beacons
Types of plaster solutions for different walls
Then plaster mortar is applied to the wall and left for 0.5-1 hour. After it has dried slightly, it should be pulled out using a rule or a wide spatula, and the beacons should be removed. After 12 hours, when the plaster has set, final leveling is carried out with metal grout or a wooden polisher. Plaster mortar can be purchased at a hardware store in the form of a dry mixture, or you can make it yourself - the proportions of various solutions are given in the table.
Increased adhesion
It is easiest to plaster a brick wall, thanks to its relief structure, to which the mortar clings well. In this case, the plaster can be applied directly to the wall, only by cleaning it from dirt and treating it with a primer. The need and method of priming when preparing walls for painting with your own hands will be discussed below.
For high-quality plastering of walls made of monolithic reinforced concrete, it may be necessary to increase its adhesion. Modern technology for pouring a monolith involves the use of collapsible formwork made of sheet steel or laminated panels. This makes it easier to install and dismantle the formwork, as well as obtain a more even surface.
But an overly flat concrete surface also has its disadvantages. The wall, smooth to a glossy shine, has a very low adhesion rate with any finishing compounds. As a result, coating with any solution will not be durable.
The building is a concrete monolith
To increase adhesion, the concrete wall is pre-treated with various abrasive or impact tools: a grinder, a mason's pick, a hatchet, a chisel, etc. As a result, the surface becomes covered with notches or acquires a rough structure.
Another option for increasing adhesion is plaster mesh. It is attached to the concrete using dowel nails and serves as a strong base for the plaster mortar.
Wooden surfaces have poor adhesion to plaster mortars. This is due to the physical characteristics of wood, as a result of which any mixtures will not stick to it.
The wooden wall must be additionally prepared for plastering. For this purpose, a plaster metal or fiberglass mesh is also used, or shingles - thin wooden slats - are criss-crossed onto the surface.
The mesh can vary in cell diameter: the thicker the layer of plaster, the larger the mesh must be used.
Necessary tool
Before you prepare the walls for painting, you need to make sure you have the necessary tools. The number of devices depends on the condition of the surfaces. But most likely during repair work you will need:
- Drill. It should have a special attachment, then using the tool you can easily remove the old plaster.
- Sander or sandpaper. They are necessary to eliminate unevenness on the surface.
- Vacuum cleaner. Without it, it is difficult to combat the dust that forms during grinding.
- Spatula and wire brush, paint removers. They will be needed if the walls have already been painted or the old coating is cracked or swollen.
- A spatula and a spray bottle with water, in the case where there was previously wallpaper.
- Brushes and spatula for applying primer and putty.
Before carrying out such preparatory work, it is important to protect the floor near the walls with newspapers or oilcloth.
Putty knife
Sanding machine with wire brush
Removing old coating
Before you start preparing the wall for painting, you need to get rid of the old finish, and this is not easy. Our tips will help you do this quickly and without unnecessary labor.
Wallpaper
At first glance, removing wallpaper is not difficult, but sometimes you have to work hard to get rid of all the remnants of the coating. The base must be cleaned completely, and only then can you proceed to the next stage.
Paper sheets are quite easy to remove. Pry them from below with a spatula and they will easily come away from the surface. If the material has firmly grown into the base, arm yourself with a spray bottle. Fill it with warm water and treat the old finish. Do not skimp on water - the more the wallpaper is soaked, the better. When the paper gets wet, it can be easily removed with a trowel.
Modern options are non-woven, vinyl ones cannot be removed so easily. Such wallpaper, especially the latter, is almost impossible to get wet through. Therefore, all that remains is to literally “punch” the way for the water using a toothed roller or knife. Moisture will penetrate through the damaged surface and soak the dried glue. If the toothed roller fails, a steamer will come to the rescue, of course, if you have one at hand.
Try replacing the steamer with a powerful hairdryer. Warm the moistened problem areas with it and remove the sheets with a knife.
If your household does not have such units, you will have to prepare yourself for the long and painstaking process of scraping off wallpaper and glue. If you need to clean the wall down to the concrete or brick base, you have every right to skip this unpleasant process and remove the wallpaper along with the old plaster.
Whitewash
Cleaning walls from whitewash is an incredibly difficult and tedious task. It is necessary to get rid of even the reminder that this material was present on the walls. Remains of lime or chalk will not allow the new finishing layer to be applied evenly and efficiently. A lot of pellets will form on the walls that will need to be cleaned off.
The following will help completely remove whitewash residues:
- warm water - spray the wall with a spray bottle and remove the composition with a spatula. Water is quickly absorbed, so you need to repeat wetting from time to time. Compositions that do not contain special hardeners and other additives can simply be washed off with plenty of water;
- tools that can be used to scrape off whitewash - a grinder, sandpaper, an iron brush and a spatula. During grinding, a large amount of construction dust is generated in the room. From time to time you should take breaks and leave the room until the suspension settles;
- a folk remedy consisting of soda, crushed laundry soap and water. A thoroughly mixed solution is applied to the surface, after which the finishing layer is removed using a spatula or sponge.
The main requirement is thorough cleaning of the base. If you do not pay due attention to this stage, you will have to say goodbye to the dream of beautiful walls.
Plasters and ceramic tiles
Old plaster can sometimes be left behind. If there are small defects, it is more profitable to simply repair them and thereby save a lot of money. Sometimes the putty comes off and voids form between it and the plaster. Then you can remove only this thin layer, after moistening it with water. If, after a thorough study of the formation, you find places of shedding, this is a sure sign of the presence of voids. It is better to get rid of a weak foundation. Often the problem is removing stubborn areas, but don't let that fool you. It is impossible to guarantee their reliability subsequently.
The tiles must be removed along with the tile adhesive. Cleaning the walls from ceramic cladding is done using a hammer drill equipped with a chisel-shaped attachment. First, the tile is knocked down, then the fixing material is removed. If there are defects in the exposed layer of plaster, you need to clean it down to the concrete base. There is no need to give up durable coating.
Old paint
The paint is removed using special solvents. The composition must be applied to the wall, then scraped off with a spatula. It is not recommended to cover old paint with new one, since it is impossible to guarantee a perfect result.
A hair dryer will be an excellent helper. When the painted area is heated with hot air, the paint swells with bubbles and is easily removed.
Surface preparation steps
The technology for preparing walls for painting is simple. It depends on what was there before: paint, wallpaper, whitewash, what condition the old coating is in, what compositions will be used for painting. Without construction skills, this is not so easy to do on your own.
Removing old coating
Removing wallpaper is not too difficult. Especially when it comes to paper canvases. Often it is enough just to pry the edge with a spatula and pull it, the wallpaper will come off on its own. If they were glued recently, good glue was used, then they will have to be soaked first. It is better to use warm water. If there was whitewash on the surface, you will have to remove it with special care, otherwise the paint will not adhere well. There is only one way out - to wash away the chalk using a large amount of water. You can add a little detergent or soda to it. To remove old paint, special compounds are needed. It can not be removed if the coating is in perfect condition and the painting will be done with paint of the same chemical composition. Many people are interested in how to properly prepare walls for painting if they have tiles on them. This is the most difficult option. Before painting you will have to knock it down. After this, you will need to spend a lot of time leveling the surface.
Use a wire brush to remove old coating
Alignment of walls
In order for the walls to look beautiful after painting, they must be leveled. There are several ways:
- Using plaster. To perfectly level the walls, the mixture must be applied in several layers. After this, finishing is applied with putty.
- Using putty. If there are only small defects, then only putty will be enough. After drying, you will need to use sandpaper to make the surface perfectly flat and smooth. When using putty and plaster, you must follow the recommendations on the packaging.
- Due to drywall. This is an excellent option if there are significant irregularities and repairs need to be completed quickly. It is preferable to cover walls with plasterboard in a large room, since it slightly conceals the space. After all, to install it you need to install a frame. But the plasterboard surface is perfectly flat.
Pay attention to: How to fix paint on fabric
The choice of method depends on how serious the defects are on the walls.
Before painting, be sure to level the walls
Preparing for painting
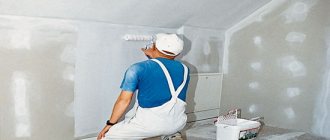
The final stage of preparation, regardless of which leveling method was used, is the application of a primer. This is necessary so that the paint lies evenly on the surface. It is applied with a wide brush; a roller with a fleecy surface is also suitable. Processing begins from the top and gradually goes down. By applying a primer, the paint layer will not crack.
Primer of walls
Elimination of serious defects
The solid base does not need to be removed. Sometimes, to save the situation, it is enough to carry out a series of simple manipulations, after which you can be confident in the reliability of the intermediate layer. Most often, the integrity of the coating is compromised by cracks. How to get rid of them?
- We “expand” the crack – we increase its dimensions – width and depth. You will need a chisel, hammer and spatula.
- We clean the resulting depression from dust and pieces of plaster using a brush.
- We prime the improvised “gorge” using compounds with maximum penetration ability.
- Fill the hole with putty using a spatula.
- We glue the reinforcing material - press it into the putty layer, coat it and leave it until completely dry.
- We sand the restored area.
It makes sense to carry out spot restorations only if the amount of damage does not exceed 25% of the wall area.
Removing ceramic tiles when preparing walls for painting
The method for removing ceramic tiles directly depends on whether you need to keep the old tiles intact or whether they are not intended to be reused. If the tile is of high quality and has a decent appearance, it can be reused for cladding a balcony or rooms in a country house. This is a great way to save on materials.
If the coating will not be reused for cladding, a simpler method of removing tiles by breaking them is used. In this case, the base under the tile remains as undamaged as possible.
The method for removing old tiles is selected taking into account:
- adhesive solution on which the tile was installed;
- the possibility of reusing old coating.
If cement was used when laying the tiles and the seams were rubbed with it, then during dismantling it will most likely not be possible to leave the entire tile intact.
It is important to use gloves to protect yourself from injuries and cuts from broken tiles.
First of all, you need to remove the grout from the joints between the tiles. This is done if there is a need to preserve the integrity of the old coating in order to reuse it in the future.
- To begin with, the seams are moistened with water, then they begin to remove the grout using a spatula or knife. If necessary, the seams are wetted several times until there is no material left in the gaps. But this method is suitable for removing only soft grout.
- Next, remove the remaining solution with a metal spatula.
- Next, select one of the top tiles and break it with a hammer and chisel.
- The next step will be to carefully clean all the seams between the tile elements, without damaging the tile.
- To avoid chipping at the corners, you need to make sure that the cut between the tiles goes deeper than the height of the tile itself. It should be repeated once again that if cement mortar is used during installation, there is almost no chance of keeping the tile intact when dismantling it.
- Next, all the tiles are removed from the surface one by one using a metal spatula or a thin chisel.
- The spatula is inserted under the edge of the tile and gently but firmly hit with a hammer.
- Next, move the spatula to the other edge and continue tapping. In this way, the tiles are removed from the surface from top to bottom. Having removed one vertical row, proceed to the next one.
- You can also use a special steel wire hook if the tiles are not firmly attached to the base. For this method, you need to carefully remove all the grout between the seams so that you can insert the hooks under the tiles.
- Using steel wire, the tile is removed in the following way: its bent end is inserted under the tile from different sides and pulled slowly. The tile should make a clicking sound when it is successfully removed from the wall.
- If the surface is plasterboard, then the tile can be removed only if one or more parts are replaced.
Remains of the adhesive solution from the tile itself should be removed with caution, because in this case, if handled carelessly, the danger of splitting the tile increases.
Using a hammer drill to remove tiles is advisable in rooms where noise and large amounts of dust will not disturb anyone. The device is connected, the attachment (chisel) is inserted into the spaces between the tiles. The tiles can be easily removed, but all the tiles will be broken. But with this method you can quickly obtain a high-quality surface.
You can also use a chisel and hammer to remove old tiles:
- A chisel is placed under the edge of the tile, and the chisel is hit hard with a hammer.
- Use a chisel to separate a piece of tile from the base.
- With this method, the tiles crack, break off and are partially removed in pieces.
After all the tiles have been removed, a fan heater is used (50 mm is the optimal distance between the fan heater and the wall) to soften the remaining adhesive. After this, the solution is removed using a scraper.
Preparation of plastered surfaces for painting
Lesson Plan
Lesson topic:
“Preparation of plastered surfaces for painting”
Learning objectives:
• teach students how to correctly perform all operations to prepare plastered surfaces for painting;
• teach students the correct organization of the workplace, grip of tools, working posture;
• instill care in handling materials and tools, accuracy and precision in performing work;
• it is necessary to teach how to follow safety rules when preparing plastered surfaces for painting.
Tools used in preparing plastered surfaces for painting
- Brush – for cleaning the surface from dust.
- Knives – used for cutting cracks.
- Trays, buckets - for primer, drying oil, putty.
- Brushes (fly brushes, flute brushes, hand-brush) for priming and applying paint composition to the surface.
- Rollers (foam rubber and fur) for priming and painting the surface
- Plastic spatulas with a wide blade - for continuous filling. Metal spatulas - for filling, cutting cracks, for cleaning surfaces.
- Trowel – used for filling the surface.
- Sanding cassettes and sandpaper.
Mechanisms:
- Festo grinding machine.
- Electric spray gun.
- Hand spray gun.
Description of the technological process on the topic: “Preparation of plastered surfaces for painting.”
Before starting to process new plastered surfaces for painting, it is necessary that the plaster is well dried and has a moisture content of no more than 8%.
Cleaning of new plastered ceiling surfaces is carried out with a scraper on a long handle or a metal spatula from an inventory table. Use scrapers to clean surfaces from splashes of solution. In this case, the tool is held at an angle of 45° to the surface and, moving from left to right, the surface is processed with grippers 0.6 - 0.7 m wide. plastered walls (treated) are cleaned of splashes or sagging mortar using a steel scraper or metal spatula, also in small areas. The tool is held at an angle of 30° to the surface.
Smoothing of walls and ceilings is done with a jointed float on a long handle or a float with the end of a tree. This operation is performed in small sections, moving around the perimeter of the room. The movements are reciprocating.
Cracks on a plastered wall are cut from the floor or from an inventory table using metal spatulas or a knife. All cracks are cut, including hairline ones, at an angle of 60°, to a depth of at least 2 mm. After this, sweep the dust from the surface with a brush, fly brush, or rag.
When cleaning and smoothing surfaces, the painter must wear safety glasses and a respirator. Safety glasses are used to protect the eyes, a respirator is designed to protect the respiratory system. One of the main conditions for the safe smoothing and repair of cracks on plastered surfaces is compliance with the rules when arranging scaffolding means and working on them.
After cleaning, smoothing the surface and filling out the cracks, the next operation is priming the surface; the main purpose of priming is to give uniformity to the entire painted surface. The primer composition is selected depending on the subsequent painting.
For water-based paints, use an alum primer, soap-boiler, casein, emulsion or latex primer. For non-aqueous paints, the surface is drying oil. For small areas of the surface to be primed, the primer composition is applied with a roller or brushes. Priming is performed with smooth but strong movements so that the brush touches the surface only with the ends of the hair.
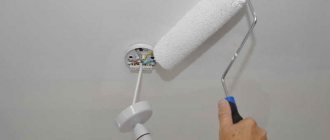
The primer is applied with brush movements in two mutually perpendicular directions. The walls are primed first with horizontal movements, and then with vertical movements, the ceilings are first perpendicular to the direction of light, and then parallel to the direction of light.
For mechanized application of primer, paint sprayers, electric spray guns or hand spray guns are used. A hand spray gun is mainly used. When working with a spray gun, the rod moves in a circular manner at a distance of 75 cm from the surface.
Partial lubrication of cracks is carried out with a special lubrication paste or putty.
The priming paste is selected according to the surface material (concrete, plaster, wood) and type of paint (lime, adhesive, oil)
Apply the compositions with rubber, wooden or metal spatulas onto the dried primer or drying oil.
Cracks and unevenness on the ceilings and the top of the wall are greased from inventory tables.
The composition is applied with mutually perpendicular movements of the spatula, first across and then along the crack. If shrinkage cracks are found after drying, a secondary lube is applied, the treated areas are primed, sanded or varnished.
Continuous puttying is carried out on a previously primed and completely dried surface. Putty compositions must be correctly selected in accordance with the type of painting and brought to a working consistency. The putty should adhere well to the spatula and the surface, but not stretch, not peel off and be easily leveled over the surface. New plastered surfaces are completely puttied. Layer thickness 0.5 – 2mm.
When completely filling the surface manually, plastic and metal spatulas with wide blades are used. Puttying is done from left to right. You can apply putty from top to bottom. In places where the spatula is turned, small irregularities and gaps are formed, which are smoothed out with horizontal movements of the spatula. When applying the composition, the tool is held at different angles to the surface, and the smaller the angle, the greater the thickness of the applied layer.
For large volumes of plastered surfaces, putty is applied mechanically. To do this, use a sprayer in combination with a paint injection tank. When working with a sprayer, a stream of sprayed putty is directed at a right angle to the surface being treated. The next strip of putty is applied overlapping.
Materials:
- Flame, wood end, sanding paper - for cleaning the surface, for smoothing, sanding.
- Primer compositions (primers for water-based paints, drying oil for non-aqueous paints).
- Lubricating pastes – for sealing cracks, plaster.
- Putty – for complete and partial putty.
- Painting compositions.
Preparation for painting textured plaster and wallpaper
To ensure that the paint lays evenly and to reduce its consumption, decorative plaster, fiberglass and non-woven wallpaper are primed before painting. This is not to say that these are mandatory manipulations, but if you want high-quality repairs, do not neglect them.
Requirements for the wall surface vary depending on the future decor. If you plan to use textured paint, they do not have to be completely smooth. The relief of the coating will hide minor defects. But if you want to apply a monochromatic shade, draw a design using a stencil, or decorate the walls yourself using a sponge or fabric, the surface must be flawless. Otherwise, all the flaws will be noticeable. Take this nuance into account when treating walls before painting.
Technology for leveling walls before painting
After complete cleaning of the surface, they begin to level it.
Leveling is additional work when preparing a wall for painting. It is only necessary when the unevenness is deeper than 0.2 cm and there are significant defects in the form of chips and cracks in the plaster. In other situations, you only need to sand the old plaster coating with sandpaper or a sander. More visible defects can be eliminated in the following ways:
- Applying plaster. First, the wall is cleaned of old plaster. A brush removes all dirt and dust generated during the work. After the dust settles, the surface is impregnated with a primer and wait until it dries completely. And only then do they begin to apply new plaster and level the surface using beacons.
- Finishing with plasterboard sheets. Using drywall you can quickly achieve a flat surface, but this method slightly reduces the area of the room.
After the leveling work has been completed, you can begin puttying.
Processing and leveling walls
When painting walls in a simple way, you need to pay special attention to eliminating various defects: unevenness, cracks, gaps. There are several ways to eliminate surface unevenness:
- plaster;
- polish;
- level with plasterboard.
You can resort to sanding the walls only if the concrete wall or the plaster already applied to it is not damaged and has sufficient strength. In this case, you can remove the thin top layer of coating with a sanding block or sandpaper.
Scheme for plastering joints.
Consider the need to treat the old surface with an antiseptic and apply a primer to it. If fungus or dampness has damaged the coating in some places, then these areas must be thoroughly cleaned and sealed with a solution identical in composition to that used during the previous plastering. As a result, the surface should not be smooth, and the difference in level between two opposite sides should not exceed 2 mm.
After this, you can move on to the next stage - puttying the walls.
If there is significant damage to the wall covering or if there are significant differences in level, there are two options for preparing the walls: re-plaster them or finish them with plasterboard. You can determine the method that is more suitable for you, taking into account your financial capabilities and aesthetic preferences.
When implementing any of these methods, you will need to completely remove the old coating from the walls. How to prepare walls for decorative painting? You should not leave the plaster in some places where it still seems strong to you.
After this, the walls are covered with plasterboard or re-plastered.
When you get a smooth surface, it must be treated with a primer and left to dry for 5-6 hours. Only after the walls have completely dried can you move on to the next stage of preparation.
Preparing the surface for painting.
Preparing the surface for painting is very important. This preparation is part of the paint application system. The basis of such preparation will be cleaning the surface of all excess, degreasing and polishing it; only after performing all these procedures will the surface have good adhesiveness. Adhesiveness determines how long the surface coating will remain in good condition. Next, we will consider the stages of preparing the surface for painting.
To calculate paint consumption, you can use a paint consumption calculator.
Initially, you need to remove loose material, such as dirt, scale, grease deposits, oxide film, etc. This will help the paint adhere better to the surface.
Attention: If there is dirt on the surface to be painted, uniform application of the paint layer on the surface will be difficult, because the contaminant will prevent the uniform and dense application of paint.
After cleaning the surface from dirt, it is necessary to increase the surface area of the base; for this purpose, its roughness and metal standard are increased. To determine the operations for preparing surfaces for painting, you can use the table below.
Table for preparing surfaces for painting.
If there are no special conditions for painting certain surfaces, then abrasive sandblasting Sa 2.5 SIS 05 5900 can be used.
Methods for preparing surfaces for painting
When choosing a treatment method, the required degree of cleaning and surface roughness appropriate to the paint system being applied should be taken into account. In order to reduce the cost of work, you should choose the degree of surface preparation for painting in accordance with the purpose and type of paintwork or coating system in accordance with the degree of cleaning that can be achieved.
Abrasive blast cleaning is the most effective mechanical treatment method and is characterized by the following properties:
- the ability to achieve high productivity;
- jet abrasive equipment can be either stationary or mobile;
- the method is applicable to most types and shapes of surfaces;
- different degrees of preparation and surface profiles can be achieved;
- It is possible to partially remove individual sections of the damaged PC, leaving the main PC of satisfactory quality intact.
Surface preparation for painting according to ISO 12944-4 can be primary or secondary.
- primary (general) is the treatment of the entire surface until the steel is exposed;
- secondary (local) is a treatment leaving firmly adhered parts of organic and metal coatings.
The primary preparation of surfaces for painting is carried out to remove mill scale, rust and various contaminants before applying the primer layer. After primary processing, the material is bare steel.
Scale is an unreliable substrate, since it has a different expansion coefficient than steel, and therefore, when temperatures change, the brittle layer of scale can peel off, which leads to destruction of the coating.
Secondary surface preparation for painting is carried out for the purpose of local removal of rust and foreign material from the steel surface coated with a primer before applying an anti-corrosion paint system.
Preparing the surface for painting means not only cleaning, but also various operations performed to increase the protective and physical-mechanical properties of the coating. This type of processing is one of the main prerequisites for successful protection.
The choice of processing method for painting is influenced by the material of the structure being cleaned, the thickness of the material, dimensions, conditions of the cleaning work, as well as the nature of the foreign inclusions to be removed.
The international standard ISO 8501-1 establishes standard degrees of mechanical primary surface preparation.
ISO standards specify seven degrees of surface cleanliness for painting. Each preparation method is indicated by letters. Cleaning the surface for painting using the abrasive blast method is designated by the letters “Sa”; cleaning with hand and power tools is designated by the letters “St”. The number following the letters indicates the degree of purification.
ISO standards specify six degrees of surface preparation for painting at the secondary stage.
Experience in operating painted structures shows that during repair work it is not always necessary to completely remove all previous coatings. This especially applies when maintenance is carried out regularly.
In cases where local coating removal is carried out, the following conditions must be observed:
- the remaining intact coating should contribute to the service life, improve corrosion protection of, and be compatible with the new paint system. Guidance on compatibility is given in ISO 4627;
- when cleaning local areas of coatings affected by corrosion to the metal, neighboring areas should not be damaged;
- the possibility of a real reduction in the cost of maintenance.
The degree of deterioration of painted surfaces to be cleaned shall be assessed in accordance with ISO 4628:1982. “Colorful and varnish coatings. Assessment of the condition of paint coatings. Determination of the intensity, number and size of common types of defects.” If possible, it is necessary to have additional information about the type of previous coating, the number of layers applied, the thickness of the coating, its adhesion, as well as the name of the manufacturer of the structure.
After local preparation of the surface for painting, the remaining parts of the existing coatings must be free of contaminants; If necessary, they should be roughened to ensure satisfactory adhesion. The adhesion of the remaining paint coating shall be verified by a cross-cut test in accordance with ISO 2409.
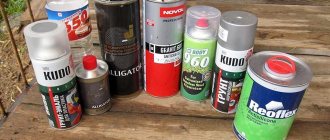
Paint selection
The final stage is choosing paint. Almost any type of paint composition is suitable for painting interior walls. The main thing is that it best suits the taste of the apartment owner. After all, the main purpose of painting walls is to give the room aesthetics and create a cozy atmosphere.
Water-based paint
Water-based. The most popular type of coloring compositions today, the main advantage of which is the creation of a film permeable to air. Thus, they do not interfere with the free exchange of gases through the walls of the building.
Latex. Their peculiarity is a flat and smooth surface that protects the walls from the penetration of dampness. This coating is recommended for use in rooms with high humidity levels.
Acrylic. It is created on the basis of acrylic resins. It is resistant to abrasion and ultraviolet radiation, and is vapor permeable. Suitable for painting any surfaces: plaster, concrete, wood, metal, as well as for outdoor work.
Oil and nitro enamels. The classic version, used many decades ago, which is distinguished by its strength and durability. Among the disadvantages are the high consumption of material and a persistent chemical smell.
By observing technology and the requirements of building regulations, it is quite possible to make high-quality preparation of walls for painting with your own hands. The main aspect that influences the technology is the characteristics of the surface being processed.
The video shows the process of preparing walls for painting.
Applying the finishing layer
Preparing walls for painting involves eliminating the graininess of their surface; this can be achieved with finishing putty.
There is no sand or other large particles in it, so it creates a smooth surface . In addition, it does not absorb moisture well, and the paint will not be able to penetrate it deeply.
The technology for its application is the same as in the case of starting putty, but the layer should be no more than 1.5-2 mm. Otherwise the coating will crack. It is much easier to make the putty perfectly even if its layer is thin.
After applying the finishing putty, you must also sand the surface. For this, use an abrasive mesh marked 60-80. Sanding must be done carefully, as the coating can be completely removed.
The finishing coat can be applied in several layers if it was not possible to obtain a smooth surface the first time. You can determine the presence of defects using a lamp. The more powerful it is, the better. Place the lamp so that its light falls obliquely on the wall.
In this position, all the slightest irregularities will cast a shadow, and you will be able to detect even small differences. They need to be removed during sanding.
Preparing metal surfaces for painting.
Often non-ferrous metals need painting, for example, zinc, bronze, aluminum, copper, etc. They are used in construction and industry, they are painted for protective or aesthetic purposes.
Thus, aluminum is often used in aviation, shipping companies and construction, so it is important to prepare the surface for painting well to ensure good adhesion of the paint layer. To do this, it is necessary to remove dirt, oil and grease, after which the surface is sanded using power tools or sandblasting. The next step is to apply the primer with a specially formulated coating. This principle is used when cleaning bronze and brass.
Contamination on metal, its effect on paint adhesion.
It is more difficult to prepare galvanized steel. Sometimes paint systems do not work when used on this type of coating. This occurs due to insufficient surface preparation or lack of necessary soil. If you do not clean the surface, then the following scenarios are possible: when the copper-acid solution reacts with the surface, the color may turn black; if fat or oil remains on the surface, the color will be bright metallic.
Galvanized steel must be degreased from the very beginning, after which the surface must be thoroughly washed to remove soluble salts. After removing dirt and degreasing, it is necessary to clean the surface; for this you can use a light abrasive treatment along with sandpaper. All this will have a positive effect on the quality of paint adhesion to the surface.
Why do you need wall preparation?
Without preparing the walls, the result will not look very nice, the paint will not adhere well. This procedure also has a number of other advantages:
- Eliminates unevenness. There are few rooms where the walls are perfectly even and smooth, without the slightest defect. When applying a coat of paint, imperfections will be noticeable if the walls are not primed.
- Helps fight fungus. Mold often grows in corners. If you simply paint such walls, the fungus will not go away, it will appear again. Especially when using water-soluble compounds. Treatment with special means eliminates mold.
- Protects from destruction. If you do not repair minimal cracks on the surface, then over time they will only increase and the plaster will begin to crumble. In addition, this is a way to eliminate holes that were formed from old fasteners (screws, nails). Fungus happily settles in any holes.
- Removes traces of grease and rust. Any stains, especially from rust, easily show through the paint layer. To eliminate them, processing is required.
- Allows you to save paint. If you need to repaint from a dark color to light or paint over bright patterns, then applying paint in one layer is not enough; you will have to repaint it several times. After puttying, only one layer will be enough.
- Prevents peeling. Over time, the old coating begins to peel, crack, and peel off. If you do not clean the surface, the new layer of paint will begin to peel off along with the old one. Surfaces will quickly lose their attractive appearance.
All irregularities and cracks must be puttied.
In addition, preparation ensures better adhesion of the composition to the surface. The paint will lay down in an even layer, without drips.
Pay attention to: Painting walls with water-based paint: surface preparation, choice of paint and step-by-step instructions for painting
Preparing concrete surfaces for painting.
If you are working with masonry, concrete or plaster, then there are some peculiarities. New concrete must cure for at least 4 weeks before painting. The surface is thoroughly dried and cleaned, and laitance that may be on the concrete is removed using mechanical means, sandblasting or acid. It is necessary to understand that hardening components and oils will reduce the adhesion of the coating to the base, so you need to get rid of them. Sandblasting using a non-metallic unit is the best means of obtaining a good quality surface.
For acid etching, a solution of hydrochloric acid (10-15% concentration) is required. However, on reinforced concrete you need to use organic acid, it reacts with the calcium components in the cement, this can be seen when bubbles appear. After this, the reaction product, calcium chloride, is washed with fresh water.
To remove old coating from concrete you need a rotating chisel or mechanical flails. This method is suitable for areas to be repaired in which lime mortar was used to reshape the surface.