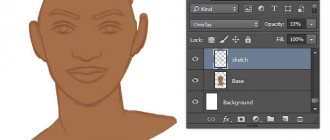
How to process a model after 3D printing: step-by-step instructions
Processing of finished products after printing is completed can be carried out using different methods. The choice of method depends on the final goal and the characteristics of the filament with which the product was printed.
Removing supports
If the part was printed using support structures, the first priority in post-processing will be to remove them. The processing method directly depends on what material was used in their creation - soluble or insoluble.
IMPORTANT! Unlike other finishing methods, removing supports is a mandatory step. However, their removal does not guarantee an improvement in the quality of the surface of the object.
To remove support structures printed with insoluble materials, you will need the following tools:
- Pliers.
- A set of brushes with bristles of varying degrees of hardness.
The material from which the supports were made can be easily removed from the surface of the product. This process does not require much effort. In places with difficult access (recesses, holes, etc.), you can remove excess layers using pliers or a brush.
This post-processing method does not affect the geometric proportions of the manufactured object, but during cleaning it may leave marks on its surface that can be removed during further processing using other methods.
Printing on supported products almost always leaves marks on the surface of the item. This not only worsens the appearance of the product, but also reduces the accuracy of printing if the 3D printer settings are not of sufficient quality.
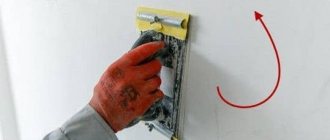
Stripping
Once all supporting structures have been removed, the product can be sanded. This will not only level the surface, but also make it smooth, as well as remove obvious defects and marks left in places where the product comes into contact with supporting structures.
The choice of sandpaper depends on how thick the layer was when printing, as well as the quality of the finished product.
For example, if the layer thickness is 200 microns, sandpaper marked P150 is suitable for post-processing. If there are obvious imperfections on the product, and the layer thickness during printing was 300 microns or more, cleaning should begin with P100 sandpaper.
The sanding process can be continued with different sandpaper grits up to P2000.
IMPORTANT! During cleaning, the surface must be cleaned using brushes, soap solution and a soft sponge. This will remove dirt, dust, and improve the quality of processing.
It should be remembered that sanding is recommended to be carried out in a circular motion, cleaning the entire surface of the product. Parallel or perpendicular movement of the skin must be avoided - this can lead to the formation of deep grooves and scratches.
After the cleaning stage is completed, the surface will acquire the necessary smoothness, and further post-processing stages will be much easier.
The disadvantages of the method include the impossibility of its use for parts that have one or two shells due to the high risk of damage to the printout, as well as the difficulty of applying the method if the product has a large number of small parts.
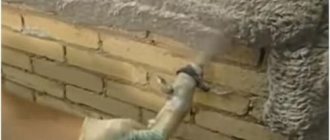
Filling voids
After the supports are removed and the part is sanded, voids may form on its surface. This defect can appear directly during printing in cases where the layers are incomplete for some reason.
Small gaps and voids can be filled with epoxy resin, and large defects, which often arise when printing a large product consisting of several parts at once, can be filled with a special filler used in body work. However, this method has a significant drawback - the filler used in body repairs, like any other polyester epoxy adhesive, leaves discolored areas on the product when it dries.
IMPORTANT! After filling the voids, the part should be cleaned again.
You can also fill voids in a printed product using putty. The part in which the voids are filled with its help can be easily processed with sandpaper and then painted. In addition, the voids connected by filler acquire additional strength, which has a positive effect on the performance characteristics of the product.
If the print was made using ABS plastic, the voids can be filled in a special way with liquefied ABS. After filling, the solution reacts with the walls of the cavity and seeps into the voids.
A popular product is also dichloromethane, which is suitable for most types of filament, including ABS, PLA, HIPS, SBS, etc.
How to prime?
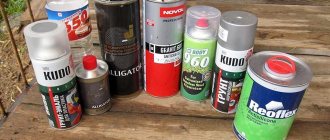
After the printed product has been cleaned, it can be treated with primer. For this you will need:
- Lint-free material that will be used to wipe the product.
- Toothbrush.
- Sandpaper with grit 150/220/400/600.
- Primer for plastic (preferably using an aerosol).
- Polishing sticks.
- Polishing paper.
- Personal protective equipment – mask and gloves.
IMPORTANT! The method is suitable for all types of filaments.
Having prepared the part, you should treat its surface with primer from a distance of 20–25 centimeters, evenly applying the primer coating. After the primer has dried, the uneven surfaces will need to be smoothed out with sandpaper of P600 grit, after which a second coat of primer will be applied.
Painting
When the layer of primer on the product is completely dry, you can begin applying paint.
IMPORTANT! You can paint a product printed on a 3D printer with any tools, but the greatest smoothness will be ensured by using a special spray gun.
When painting, it is not recommended to use aerosol paints intended for household needs. As a rule, they are characterized by high viscosity and their application is quite difficult to control. The best option would be to use paints designed for painting models.
The application of paint should also be carried out in layers, and each subsequent layer can be applied only after the previous one has completely dried.
When the product is painted, you should wait until it dries completely and treat it with polishing paper. After using it, the coating will shine.
IMPORTANT! Do not shake the can while applying paint. Mixing propellant and pigment leads to the formation of bubbles, which reduces the quality of the coating. To mix the paint, it is recommended to rotate the can in a circle for several minutes, ensuring that the mixing ball rolls.
Epoxy coating
To coat a product with epoxy resin you will need:
- Epoxy resin (two-component).
- Applicator for applying the composition.
- A container in which the ingredients will be mixed.
- Sandpaper marked P1000 or higher.
Processing must be carried out in several stages:
- Cleaning up.
- Mixing resin and hardener. It is not recommended to use a glass container, as the resins have high exothermic characteristics.
- Mixing resin and hardener. Mixing should be done smoothly to avoid introducing air bubbles into the mixture.
- Applying the first layer of resin. At this stage, it is necessary to minimize the number of irregularities on the product.
- After the first layer of the composition has completely polymerized, you can begin applying the next layers.
- When the result is achieved, the product should be cleaned with sandpaper.
Removing Soluble Supports
If soluble filaments were used when printing support structures, to remove them you will need:
- Container of sufficient volume.
- Solvent.
Typically, the process involves placing the printed part in a container of solvent long enough to dissolve the supports. Any container made of non-porous material can be used for this purpose.
IMPORTANT! You can speed up the process by using an ultrasonic cleaner, heating the solvent and replacing it in a timely manner.
Cold welding
The cold welding method involves the use of the following materials:
- Acetone (for ABS plastic).
- Glue (for PLA filament).
The method is used in cases where the product is too large to print in one go. In this case, the model is divided into several parts, which are subsequently connected to each other.
For PLA filament, assembly is carried out using Bond-O brand glue or other suitable compounds, and when using ABS, the components are attached to each other using acetone.
The surfaces prepared for connection are lubricated with a connecting compound and pressed against each other. They should be held together until the chemical reaction is complete.
What to grind and polish with?
For grinding the following are used:
- Soft fabrics.
- Sandpaper with different types of grit (from P100 to P2000).
- Toothbrush.
- Soap solution.
The initial grain size of the sandpaper depends on the layer and print quality.
Grinding is carried out to a grit size of 2000. During processing, the model should be regularly wetted. This will help reduce friction and help keep the sandpaper clean.
For polishing use:
- Special compositions for polishing polymer materials.
- Sandpaper with a grit of P2000.
- Cleaning material.
- Polishing wheel.
- Microfiber cloth.
IMPORTANT! The product cannot be polished if it is to be painted later. After polishing, primer and paint will not adhere to its surface.
Smoothing
The smoothing procedure can be carried out on all FDM thermoplastics. For this you will need:
- Solvent resistant container.
- Cloth for wiping.
- Solvent.
- Aluminum foil.
- Individual protection means.
Line the bottom of the container with paper towels and apply a small amount of solvent to them. It is important to lightly wet rather than soak them.
Acetone is suitable as a solvent for ABS, dichloromethane and other compounds are suitable for PLA. Place a stand made of foil in the center of the dampened towels and place the printed product on it.
Then the container must be sealed. Polishing with solvent vapors can take varying amounts of time, so it is recommended to check the workpiece from time to time so as not to miss the right stage.
You can speed up the process by gently heating the container.
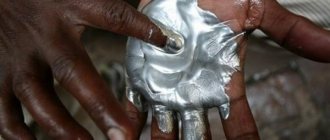
Metallization
Metallization of products allows you to give the forgings the appearance of metal products. To carry out this post-processing method you will need:
- Solution for galvanization.
- Consumable anode.
- Conductive paint.
- Acetone with graphite.
- Power rectifier.
- Conductive metal screw.
- Non-conductive container.
- Contacts.
- Non-conductive protective gloves and glasses.
At home, the galvanization procedure can be performed using copper or nickel. It is extremely important that the surface of the product is as smooth as possible. Any irregularities after processing will be enhanced, which will spoil the appearance of the product.
The procedure takes place in several stages:
- Preparation of the product surface.
- Application of conductive paint.
- Connecting a screw or eye hook to the negative terminal of the rectifier.
- The anode must be connected to the positive contact of the rectifier.
- After turning on the rectifier, the printout is immersed in the container.
- Next, you should set the voltage to 1–3 Volts and wait for the product to metallize.
- When the process is completed, the product must be removed from the container and coated with a varnish designed to protect against corrosion.
Post-Processing Errors and How to Avoid Them
The most popular mistakes made by users during post-processing of products are:
- Excessive exposure. If the wall thickness is insufficient, it is easy to rub the walls to holes when polishing and grinding.
- When working with glue or solvents, you must take precautions: work in well-ventilated areas, and also use a mask, goggles and seals.
- When sanding PLA plastic, you should not rush - the material may roll under the influence of sandpaper.
- If mechanical treatment of parts is carried out after chemical treatment, you should wait until the coating has completely dried.
- Before applying primer and paint, the surface should be thoroughly cleaned of dust and solid particles.
Post-processing is an important process that can give a printed product its final shape and make it more durable and of higher quality.
- March 21, 2021
- 137
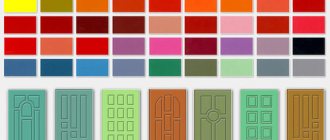
How to choose a painting method
Before professionally painting your collection, it is recommended to practice on small models, the kit of which includes parts made of multi-colored plastic with stickers. Such products only require gluing; painting is not necessary. Then you can purchase products that require decoration of the entire surface.
Methods for painting models.
The painting method is selected depending on the size of the workpiece:
- small parts are painted with a brush;
- For larger models, you can use an airbrush.
The first option will be cheaper. The second method is more expensive, it is used by experienced craftsmen, but it is faster and more effective. When using an airbrush, you will additionally need a compressor and a hood.
Before you start designing your collection of military equipment, it is recommended to practice working with a brush on glass. If after several attempts you cannot apply the paint without streaks and bumps, then it is better to use an airbrush or aerosol cans with the desired colors.