Determining the type of paint on surfaces
They produce paints and varnishes of various compositions. First of all, the coating is checked for water resistance.
To do this, do the following:
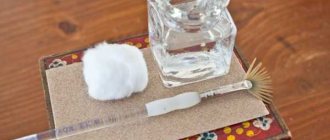
- Prepare a sponge or a small piece of fabric.
- Dip it in a container of water and soak it well.
- Place it on the surface and moisten it with several movements.
The appearance of blisters on the wall indicates water-based paint. Traces of it will remain on the sponge. This variety dissolves easily in water and is therefore not suitable as a base for putty. It is washed away and then a leveling solution is applied in the traditional way.
If the water has no effect on the coating, then puttying over the paint is allowed.
To ensure this, the finishing layer is left wetted for some time, then checked for softening with a spatula or other hard tool. It must completely retain its original strength, only then can putty be applied to the paint.
When not to putty over the composition
The following signs indicate the inadmissibility of applying the solution to paintwork, regardless of whether it is waterproof or not:
- Peeled areas, swelling, cracks and other defects that indicate the lack of a strong connection with the plaster. Putty applied to such a surface will soon fall off under its own weight.
- When you tap the base, a booming sound is heard. This indicates the presence of voids under the plaster, as a result of which the finish will be short-lived.
- The surface is affected by mold. Thorough cleaning and treatment with a disinfectant is required. For example, a solution of copper sulfate (5 g per 1 liter of water).
Mold colonies thrive in high humidity conditions. Before carrying out repairs, you must find the cause, otherwise the fungus will appear again.
The following options are possible:
- Moisture condenses on the wall due to insufficient insulation. It is required to cover the outside with mineral wool.
- There are leaks in communications.
- The roof is leaking.
- Ventilation is disrupted. Exhaust duct inspection required.
Before puttying, mold on the walls must be removed.
What types of dye can putty be applied to?
If the composition of the coating is known, there is no need for testing.
The putty can be applied to acrylic paint, water-based paint with additives that impart moisture resistance, nitro-enamel and oil paint.
Putty can be applied to walls painted with oil paint.
How and with what can you paint surfaces after puttying?
Painting of putty surfaces is done with oil or some types of water-based paint. The preparation of walls for painting must be done efficiently to ensure an even coating with the dye.
The work is carried out in stages:
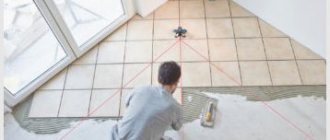
- The walls are inspected and the scope of repair work is assessed. The consumption of finishing materials is affected by the quality of the base. The deviation from the vertical of the wall is assessed using a rule.
- Puttying is carried out with 2 compounds (starting, finishing), the work is carried out with a spatula, which is held at an angle of 30°.
- The starting putty is applied in a layer of 50 mm, the finishing putty is applied in a layer of 2 mm.
- The finished base is rubbed with fine-grained sandpaper.
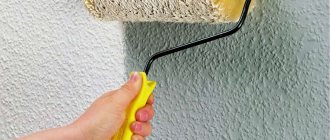
- After the putty has dried, the coloring composition is mixed in a container and applied with a roller to the wall.
- The first layer is dried, then the painted base is re-tinted.
- Corner areas are painted with a thin brush.
- The treated base is dried.
Determine what paint to paint the surfaces in accordance with the characteristics of the putty composition, which can be:
- polymer;
- plaster;
- cement.
Polymer compositions
Polymer putty is optimal for the finishing layer before painting. The composition is intended for interior work. Using the solution, the surface is smoothed, making it easier to paint the walls. The thin structure of the product helps eliminate minor deformations. This type of putty has high adhesion to the surface and does not peel off during use. It is necessary to take into account the high cost of polymer materials.
Surfaces are painted with polyvinyl acetate water-based paint. The material is easy to apply, comes in a wide range of colors, is environmentally friendly, fireproof, and dries quickly.
Plaster
Gypsum solutions are used for interior work; the product is suitable for eliminating cracks, small defects, and joints. Gypsum putty is painted with acrylic or polyvinyl acetate water-based paint.
The advantage of putty is its affordable cost, economical use, environmental friendliness of components, and ease of sanding. Gypsum putty hardens quickly, so work is carried out in small areas. The mass is not used for concrete bases and for finishing rooms with high levels of air humidity and building facades.
Cement
Cement mixtures for puttying before painting are strong, durable, resistant to temperature changes and air humidity. In addition to cement powder, the putty contains lime, which increases the plasticity of the mass. The putty mixture is affordable and easy to apply. The structure of cement putty is coarse-grained. Surfaces are painted with water-based and powder paints.
Rules for putting putty over paint
The coating will be strong and durable if the following conditions are met:
- The base is clean and rough.
- The solution layer has a minimum thickness.
- A special mixture with increased adhesion is used.
Epoxy putties have the greatest adhesion force, for example:
- EP 0010.
- EP 0020.
- "Vetonit KR". In rooms with high humidity, the VH modification is used.
Epoxy mixtures require a high level of skill from the performer because they set quickly. For a beginner, it is better to use oil-adhesive putties. They are inferior to epoxy in adhesion, but on a properly prepared base they also hold up well.
Examples of oil-adhesive putties:
- Brozex. Domestic material. It is of high quality, but will cost less than imported analogues.
- "Master 001".
- "Tex."
Putty for walls.
Why do you need concrete contact?
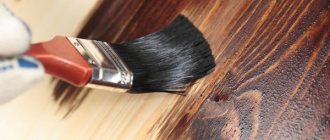
Oil paint applied to the surface of the walls penetrates deeply through the porous surface and forms a durable, smooth coating to which it is impossible to attach the finishing material in the future. In order to prepare the base of painted walls for further repairs, apply a layer of binding material - concrete contact primer. Due to the small particles of the quartz component, the treated walls become slightly rough to the touch after drying and are ready for further finishing work. On such a surface, you can apply putty mixtures, plaster with gypsum and lime mortars, and even lay facing tiles without fear of peeling.
Preparing the painted surface
They operate in the following sequence:
- Furniture and household appliances are removed from the premises. Objects that cannot be moved, as well as windows and doors, are covered with plastic film.
- Use a knife or spatula to scrape off the peeling and cracked paint. Doubtful areas are tapped and scraped with a chisel. If they are not held firmly, they are also cut off.
- Tap the wall to check for voids under the plaster. If any are found, the solution is beaten down to the concrete, then a fresh cement-sand mixture is placed in the recess. Do the same with cracks.
- By knocking down the paint with a chisel and hammer, several lines are formed in the form of an oblique grid. This is easier and faster to do with a hammer drill with a special blade in the chuck.
- The paint in the “cells” of the mesh is treated with a coarse-grained abrasive in order to give the surface roughness. Use an angle grinder, a hammer drill with grinding equipment, or sandpaper on a special grater.
- Use an old broom and then a damp cloth to remove dust from the wall. After this, the paintwork is degreased with a soap solution. After a few minutes, the composition is washed off.
To speed up the drying process, the structure is heated with a heat gun.
Remove paint from the wall.
Is it possible to putty over paint: expert advice
Any finishing work involves surface preparation. This is especially important when it comes to repairs. It is then that a situation arises in which you have to remove the old coating from the walls. Most often this is wallpaper or various paints and varnishes. If everything is clear with the first option, then the second one causes a lot of difficulties. It is not always possible to completely remove a layer of paint, then a reasonable question arises: is it possible to putty over paint?
This question is not idle. The fact is that it is not always possible to remove the entire painted layer. There are always mistakes left. They can be removed, but then you will have to remove part of the coating. And this, in turn, leads to additional costs. And in general, will the putty layer stick then?
Is it necessary to apply a primer?
Putty does not adhere well to painted surfaces. Therefore, the question of whether the wall needs to be primed disappears: to increase adhesion, all available techniques are used.
The best results are provided by special compositions based on adhesive or acrylic with quartz sand as a filler. They are produced under the brands “Quartz-grunt”, “Betonokontakt”, etc. They are intended for processing non-absorbent substrates - painted, plastic, glazed, metal and glass.
The glue in the primer adheres well to any materials; sand makes smooth surfaces rough.
After drying, the composition is reapplied.
In the absence of “Betonokontakt”, one of the following compositions is used as a primer for oil-adhesive putty:
- pure drying oil;
- latex diluted with water in a ratio of 6:1.
Applying primer.
What you need to know before starting work
Smooth surfaces are problematic due to the difficulty of removing small particles from previous products.
Therefore, you should not simply paint over it. Primers for oil paints increase adhesive properties.
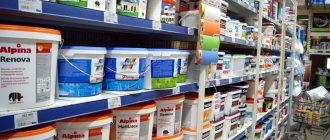
The materials market is filled with a large list of manufacturers. Which one will be better for use, foreign or domestic manufacturer?
Oil paint or putty? Foreign primers are suitable for all types of surfaces.
Our primers are used exclusively on water-based paints. Check the composition of the emulsion, because not everyone is suitable for oil-based products.
What is the need for primer?
- increases adhesion
- shortens the drying process
- reliable protective layer against corrosion and fungi
The variety of soil materials distinguishes:
- use (concrete or metal products)
- protective properties (antiseptic, destructive)
Technology of applying putty mixture
The work is performed in this order:
- Fill potholes and other defects with the mixture. If they are large, after the putty has hardened, fragments of reinforcing mesh should be placed on top of it. The material is glued with a primer.
- Apply starting putty starting from the corner. The maximum layer thickness for an oil-adhesive mixture is 2 mm, for other types - 3 mm. The solution is leveled with a spatula up to 60 cm wide if puttying is done for painting, and 60-80 cm if for wallpaper.
- Having covered the entire wall, it is left until completely dry. Oil-adhesive putty requires 3-4 hours for this.
- Sand the coating with sandpaper. It will make the surface smooth and open up air-filled cavities. The grain size depends on the finishing: for paint - P120-150, wallpaper - P80-120. Do not press the tool with great force - this will lead to the appearance of unevenness.
- In the dark, check the quality of the surface by illuminating it from the side with a flashlight. Depressions are identified from the shadows and outlined with a pencil.
- Apply finishing putty. It contains a smaller fraction of filler and therefore forms a smoother surface. The spatula is moved perpendicular to the direction in which it moved when laying the first layer.
- After waiting for the wall to dry, sand it again.
- If the structure is leveled for subsequent painting, then another 2-3 layers are applied, controlling the evenness using oblique lighting. This is not required for wallpaper.
We sand it so that there are no drips and apply finishing putty.
Technology of puttying walls for painting
In order to properly putty walls for painting, it is necessary to level the walls with starting putty, then apply the finishing mixture and grout the surface. Let's look at these three stages in more detail.
Preparing the walls
Preparing the walls before applying putty for painting is a mandatory stage of work. If finishing will be carried out on plasterboard, then the joints between the sheets should be carefully sealed. You will also need to cover cracks, holes and dents with reinforcing mesh before puttingtying.
Before puttying, the walls must be cleaned of dust and dirt, wiped with a damp cloth and dried. Then you need to apply a primer to the base. The solution is applied using a roller or brush. The surface should be primed in several layers.
The drying time of the primer is indicated on the packaging; each subsequent layer is applied only after the previous ball has completely dried. After completing the priming work, you can proceed directly to puttying.
Starting layer
You will need to level the base with the starting mixture by applying a thick layer of the composition to the base. The first step is to dilute the dry mixture with water in the proportions indicated on the package. Then the composition must be mixed well using a construction mixer and left for fifteen minutes. If you use gypsum putty for painting, it is not recommended to dilute it all, since it sets quickly and will be unsuitable for use. Prepare the solution in small portions.
Putty work for painting should be carried out in the direction from top to bottom. The putty is applied using a wide spatula; a narrow tool is used to scoop up the mixture and seal the base in hard-to-reach places.
You need to hold the spatula at an angle of thirty degrees, and scoop out the mixture in small quantities. This manipulation allows you to eliminate defects on the base as much as possible. Before applying the first layer of material, large holes should be covered with a double-glazed window or reinforcing mesh.
Finishing layer
The finishing layer is not much different from the starting ball of putty. The same tools are required to carry out the procedure. However, the main difference between these two types of putty is the thickness of the application layer: the starting layer is about fifty millimeters, and the finishing layer is two millimeters.
The ball must be smooth and free from defects. After completing the procedure, the base will need to be left to dry for several days.
Grout
After the finishing ball of putty has completely dried, the base will need to be rubbed down. Grouting should be done carefully, since after it there should be no defects or flaws left on the surface.
In order to identify roughness and defects, you need to use a lamp. The correctness of the putty work affects how easy it will be to paint the walls later, since all the slightest roughness will be visible during painting.
Recommendations from experts
Experienced plasterers adhere to the following rules:
- Use a thick primer. Liquid flows down a smooth painted surface.
- Wallpaper putty is purchased dry. Ready for paint. This variety produces a smoother, more uniform surface.
- Structures made of plywood, metal or plastic are covered with putty with polyester fibers, used in auto repair. The same is done with the door frame and other elements that operate under conditions of vibration and temperature changes.
Preliminary surface study
Surfaces found in houses and apartments are usually coated with oil-based, water-based paints and enamels. Complete removal of such coating is not always necessary. The old layer can stick very well and not delaminate. Thus, before taking drastic measures, you need to check whether anything should be done. This can be understood if you resort to a simple test: run a well-wetted rag over the painted wall. What you can see:
- The coating will begin to “wash off”. The marks will remain on the rag and the layers will begin to peel off. All these signs indicate one thing - water-based paint was used. It can be easily removed when exposed to water. If you put putty on it, the same thing will happen. Namely, the solution will simply fall off. The work will go down the drain. To put it simply, everything will have to be removed and redone. The worst thing is when this happens while wallpapering.
- There may be another option. The surface will not react to exposure to water. This means that this is a paint based on drying oil or solvents. Such materials are not afraid of increased moisture. It's not scary to apply putty on them. Although here, not everything is so simple. The painted layer should adhere very well.
If the type of paint is not suitable for puttying
Water-based compositions are unsuitable for applying putty, since they soften upon contact with moisture. Other types also have to be removed if they are laid poorly or contain a large number of defects.
To level the surface, cleared of paint and varnish materials, use a standard cement-based putty, for example Vetonit TT and LR. The first one is the starting one, the second one is the finishing one.
If the wall is external and poorly insulated, use putty with perlite filler “Unis Teplon”. It will prevent condensation from forming on the inner surface of the structure in winter.
Putty "Vetonit TT" and LR.
Removing old coating
Water-based paint is washed away with an iodine solution (a bottle in a bucket of water).
For oil and other moisture-resistant compounds, the following removal methods are used:
- Mechanical. The coating is knocked down manually with a chisel or using a hammer drill equipped with a spatula.
- Chemical. Use solvent removers. Formulations with liquid, jelly and paste consistency are available on sale. There are also dry mixtures intended for self-preparation.
The remover is applied to the paint and left for a while.
Efficiency depends on the duration of exposure:
- 30 minutes – softens 2-3 layers;
- several hours - up to 10 layers.
If the goal was not achieved at one time, the composition is applied again.
Surfaces with three-dimensional patterns are treated with an alkaline-based paste. It penetrates well into the recesses and causes the paint to swell, after which it can be easily removed with a knife, spatula or wire brush.
The most popular removers are 2 brands:
- "Composite" (Kompozit);
- "Dimet."
After scraping off the coating, the wall is washed with water or white spirit (exact instructions are given in the instructions). All removers are toxic. Before use, you should organize ventilation in the room and wear goggles, a respirator and gloves.
You can remove paint using a hair dryer, as is sometimes recommended, only from a wooden surface. The effect is explained by the large difference in the coefficients of thermal conductivity and thermal expansion at the base and coating. The enamel bubbles, lags behind the wood and is easily scraped off with a spatula.
Concrete, brick and cement plaster have approximately the same coefficients as paint. Therefore, on a stone wall it only softens, but does not bubble and does not lag behind the base. In this form, it is almost impossible to scrape it off.
Removing paint from walls using a hairdryer.
Surface priming
Before laying cement putty, the surface is treated with a deep penetration primer. It holds the base together and increases adhesion, while leaving the pores open. This is necessary for the penetration of the cement mortar into the plaster, which provides high adhesion force.
A primer such as “Betonokontakt” is not applied under such putties. As a result of polymerization, the adhesive included in its composition turns into a continuous impermeable film that does not allow the cement to “grow” into the base. Only materials based on glue or epoxy resin can be placed on Betonokontakt.
Preparing painted walls
Walls coated with oil paint do not breathe and adhere poorly to the putty. In this regard, they are being prepared for finishing.
If part of the paint layer has been removed, and the surface of the wall is covered with potholes and deep scratches, then they are puttied before priming, and when dry, they are sanded with sandpaper.
A mesh of notches is also applied to the surface - scratched with a spatula or chisel to achieve a rough surface.
But to avoid unnecessary problems, it is better to get rid of the paint as much as possible.
3 removal methods: thermal, chemical or mechanical. The first involves the use of removers and solvents. They soften the enamel layer, making it easy to remove with a spatula. This method ensures reliable ventilation.
Thermal speaks for itself: heating the paint with a hair dryer or blowtorch. The method is effective. The paint is quickly removed with light movements of the spatula.
Removing paint mechanically
The mechanical method is based on working with a grinding machine, a drill with an attachment, sandpaper and a spatula.
After the surface is ready, primer and putty are performed.