Materials for leveling walls
Perfect alignment of the walls is unlikely to be required for wallpapering.
But it is worth remembering that if the canvases have a uniform structure and are monochromatic stripes, any defects will immediately become visible and will be evident every day. Few owners agree to such conditions, which is why it is better to prepare the wall first and only then stick wallpaper on it. The preparation of walls for painting must be of high quality. This process has many nuances and subtleties. With wallpaper everything is a little easier. It is enough to simply level out the largest and most inorganic defects of the underlying surface and only then proceed to gluing.
There are three options for the most common materials with which you can level walls with unevenness of varying complexity: putty, plaster and drywall.
putty
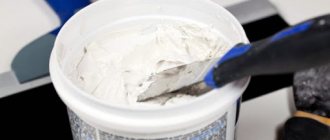
Gypsum putties today have a wide variety from starting to finishing. You can choose different types of this material, ranging from a dry mixture to a ready-made, paste-like material.
A more convenient option is dry putty. Ready-made material usually has a limited shelf life. Dry putty allows you to dilute the amount of mixture required for a particular case. This allows you to reduce waste of material and money.
It is important to consider that the starting putty should be applied in two layers. It is better to place a painting mesh between them, which prevents cracking of the surface
Plaster
Plaster is intended for more labor-intensive work when the walls have significant unevenness. Usually, the work of leveling such walls with plaster also requires a significant time investment, because each new layer of plaster is built only on the dried previous one.
Modern plaster in most cases has polymer additives that give the plaster a special strength. So, when leveling the walls, you can even do without a polymer mesh.
Today there are many types of plaster designed for leveling brick and concrete walls. Among them:
- Lime-gypsum.
- Lime-clay.
- Lime-clay-gypsum.
- Cement-lime.
Drywall
The seemingly complex process of installing this material can be done with your own hands. When the unevenness on the walls is critical and it is not possible to correct them with putty and plaster, drywall is the only possible option for leveling the walls.
Drywall has a number of advantages. It is environmentally friendly, has high levels of noise insulation and thermal insulation. If the curvature of the walls is less than 7 centimeters, then sheets of this material are simply fixed to the wall using a gypsum compound.
If the unevenness is excessively large, you should stop at constructing frames from two types of profiles. This is the only possible option for attaching drywall. Also, do not forget about puttying the joints between sheets of drywall. For this purpose, it is recommended to use a special gypsum solution, which can be purchased at hardware stores.
Which is better: pros and cons
There are many different coatings available for leveling vertical surfaces. All mixtures have their own advantages and disadvantages.
Drywall
A popular solution in construction is to level the walls with plasterboard. The undoubted advantages of the material are that it is environmentally friendly and does not require much time during installation. Plasterboard sheets can eliminate even very strong unevenness on wall surfaces. The advantage of the material is the creation of an additional layer of heat and sound insulation, as well as the affordable price at which it can be purchased.
Plaster
This material is used to level not only vertical, but also various horizontal surfaces. A significant advantage of this substance is its ability to get rid of relief imperfections of any complexity. The ability to use plaster for various types of work reduces costs during the renovation process.
The disadvantages of the coating are the laboriousness of its application, as well as the long time it takes to make the surface completely flat.
Depending on the material on which the solution will be applied, different types of this coating are chosen:
- Cement-sand, suitable for a brick surface. This variety is characterized by a special technique for applying it to the wall - by throwing it on a damp surface.
- Gypsum used on foam concrete walls. Most often, gypsum plaster is used to make a concrete wall level, the level of which is determined by fixing screws on dowels in the corners of the surface and pulling the threads between them. This type of plaster dries quickly, so if you plan to cover the walls with several layers, then take a break of about a couple of hours between each application.
We recommend: How to conclude an agreement with a real estate agency
- Gypsum with mineral components is good for concrete surfaces.
- Clay, suitable for covering wooden walls.
- Mixtures of Portland cement and polymers are best suited for regular or liquid wallpaper. Polymers provide strong adhesion of wallpaper to the wall surface.
Putty
Small imperfections are often masked with putty, which comes in a wide variety of types. These products include base coatings that are applied directly to the concrete wall, as well as special types for finishing coatings.
Based on your experience in applying the leveler, choose either a dry mixture that you need to dilute yourself, or use a ready-made product that is immediately applied to the wall.
The advantages of this method include the fact that the material does not hide the space of the room and can be used to level walls in rooms with high levels of humidity.
The disadvantages are the duration of the preparatory surface treatment and a lot of debris after the leveling process is completed.
Putty and plaster are popular as bases to create painted walls. With the help of plaster, sometimes even a special surface relief is created.
Purpose of the instruments
Before you start working with wallpaper, you should clarify how these tools are used, what each of them is intended for and how to use them correctly.
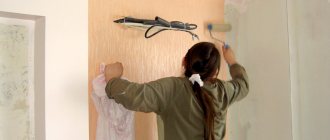
It is more convenient to apply glue with a medium pile roller
Painting bath. Intended for wallpaper glue, its size must correspond to the size of the roller. It comes with a corrugated surface and a smooth recess. To evenly distribute the glue over the surface, the roller must be rolled several times along the grooved side.
A paint roller is needed to apply glue to a strip of wallpaper. It is available with long and medium pile. A roller with medium-length bristles is considered more convenient to use.
Rubber roller. This tool is not used for applying glue, but only for leveling the surface of already glued wallpaper. It will help smooth out all the unevenness and air bubbles that often appear when gluing wall coverings.
Needed when working with thin wallpaper, when using a spatula is not recommended. A yellow roller is used when there is a relief pattern on the wallpaper.
Wallpaper for uneven walls or what wallpaper hides uneven walls
If the curvature of the walls is not very large and you don’t want to bother with the coating, there is wallpaper that hides unevenness.
Related article: DIY cardboard table: tabletop, legs, finishing
If the curvature of the walls is not too noticeable, you can use special wallpaper that will help hide it
Here is their list:
- Paper two-layer wallpaper - due to the thickness of the wallpaper, some small irregularities are hidden;
- Vinyl wallpaper - this type of wallpaper also has a greater thickness, compared to single-layer paper versions, and also has volumetric embossing, which will help visually reduce the curvature of the walls;
- Non-woven wallpaper - has a textured surface, often produced in white, which allows you to cover it with the desired color, this will even better strengthen the surface of the wallpaper;
- Liquid wallpaper is a good option for filling small cracks and irregularities, but it is extremely expensive.
Required Tools
Depending on the method chosen, different tools will be used. For plasterboard cladding you need:
- rule for leveling putty;
- plumb line and level to determine the geometry of the structure;
- cord and tape measure for taking measurements;
- knife for cutting drywall;
- rubber mallet or mallet;
- glue container;
- construction mixer for diluting the mixture;
- jigsaw for cutting material;
- perforator;
- screwdriver
Before you start, prepare the necessary tools
For putty you will need:
- spatulas
- level
- rule
- cord (twine).
High-quality plastering is performed using the following tools:
- level and rule for leveling surfaces;
- trowel for “delivering” glue to the corners;
- spatulas of various sizes;
- trowel for grouting plaster;
- containers for mixing the solution;
- drill with attachment or mixer;
- tape measure for taking measurements.
To prepare the walls for work, you will need to use scrapers, metal brushes, and sandpaper.
you will need to use scrapers, wire brushes, sandpaper
Detailed consideration of each method
A lot of theory has been provided, thanks to which you know what is needed to level walls for wallpaper and can choose the right means for leveling walls for wallpaper. It's time to move on to practical guidance. In this part of the conversation, all existing methods of leveling vertical surfaces will be described in detail.
Application of plaster
Leveling walls with wallpaper plaster is more difficult than with putty. But the end result will be perfect. If you are not afraid of difficulties and are ready to go to the end in order to achieve a high result, then the instructions below will be useful:
- The surface is cleaned and covered with primer.
- The space between the beacons is filled with an excess amount of solution, which is called “basting”. For this work you need a trowel and a “falcon”.
- The applied solution is leveled using the rule; movements should be directed upward.
Application of putty
Leveling the walls with wallpaper putty is a little easier than the previous option. This option can be used for small height differences. Otherwise, the application of putty will serve as the final layer in a multi-layer structure. The work is performed according to the following scheme:
- Apply the mixture to the wall in small strokes.
- The applied material is leveled to form a layer no more than 2 mm thick. The spatula should be at an angle. As the angle of inclination of the spatula increases, the thickness of the material layer decreases.
- The hardened material must be washed with a primer. Such actions will allow you to get rid of sagging, unevenness and other minor defects.
- The dry surface is treated with fine sandpaper.
- If the putty is applied in two layers, then the previous one is covered with primer.
That's the whole technology for leveling walls under wallpaper with putty. Not difficult, right?
Application of Rotband
This name hides the starting putty, which is produced by the Knauf company. The mixture has a gypsum base, so use for external work and in rooms with high humidity is extremely undesirable.
This is not just putty for leveling walls under wallpaper. It is incorrect to call this material putty, because its characteristics are at a higher level. When diluted, the mixture surprises with its high plasticity and slow drying. Such features make it easy to level walls and wallpapering much easier.
The application process is similar to the processes described above for applying plaster and putty. Significant irregularities are covered with a mesh.
Application of drywall
When you need to carry out serious and global leveling of walls for wallpapering, mixtures are not enough. Walls with deep unevenness and significant differences in heights must be leveled in a different way. Of course it will be drywall, there are simply no other options. This material is affordable and highly effective.
The stages of leveling walls for wallpaper vary depending on the chosen method of installing drywall: with or without a frame. In order for you to choose the best option for yourself, you will have to consider each one.
The frame method requires the construction of frame profiles or wood. This structure will serve as the basis for fastening the sheets. By the way, wood is rarely used for such work. The sequence of leveling walls for wallpaper using the frame method is as follows:
- The profile guides are screwed to the ceiling in increments of no more than 60 cm. The width of the sheet of sheathing material must be taken into account.
- Between the profiles you can lay material for heat or sound insulation.
- The sheets are screwed to the mounted frame with self-tapping screws.
The frameless method involves gluing sheets directly to the wall. This procedure for leveling walls under wallpaper is the simplest of the existing ones, but it is not applicable for serious defects.
Substrate application
The list of methods for leveling a surface cannot be complete without mentioning substrates. This material is new, but its popularity is growing rapidly. The wallpaper backing for leveling the walls inside consists of foamed polyethylene. On the outer sides it is covered with special paper, cork or non-woven fabric. Such a lining under the wallpaper to level the walls allows you not only to smooth out unevenness, but also to protect the room from extraneous sounds and heat consumption. It is better to stick thick wallpaper onto such a substrate, through which it will not be visible.
This special wallpaper paper for leveling walls also has other advantages that you will be interested to know about.
- high strength and resistance to mechanical damage;
- absolute environmental friendliness;
- hygroscopicity and suppression of condensation formation;
- durability;
- practicality.
Agree, this is an excellent option for leveling walls with small defects.
We hope that this article will be useful to novice builders who want to make repairs with their own hands. If you follow our recommendations and do not deviate from the practical guide, then everything will work out. Everyone can achieve an ideal result.
Plaster mixtures
How to level: popular brands
Plaster mixtures can be made not only based on cement, but also gypsum (suitable for rooms with low levels of humidity), acrylic resins (mainly finishing compositions), as well as silicone and potassium glass, which do not absorb moisture. This rough finish can be used to level a wide variety of walls: concrete, wood, clay, brick.
Cement-based plaster is suitable for finishing walls in the bathroom and kitchen, gypsum plaster is suitable for the bedroom and living room. Durable silicone compounds can be used in the corridor and loggia.
All types of plasters are divided into:
- starting: for sealing areas up to 50-70 mm thick; if a layer of greater thickness is required, then it is applied in several stages, thoroughly drying each layer;
- finishing: it is used to finally level the walls to give them perfect smoothness.
When you need to level a large area under wallpaper, you can choose dry mixtures:
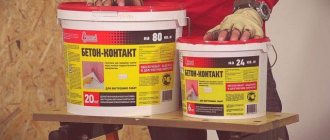
- “Knauf”: cement “Grunband”, “Adhesive” or gypsum “Rotband”, “Goldband”; compositions of the “Start” type are intended for machine work, but they can also be used for manual application;
- "Volma": fairly economical and relatively inexpensive mixtures with a lightweight recipe; they can be used for interior, exterior and wet rooms;
- "Bergauf": a wide range and good quality have made the products of this company also quite popular;
- “Prospectors”: one of the leaders of Russian manufacturers in this area, special fillers significantly reduce the consumption of solutions; all compositions are quite elastic and have good adhesion to the surface;
- “Hercules”: this Novosibirsk manufacturer also offers good quality products at reasonable prices.
Plastering under wallpaper
Work begins after removing the old crumbling plaster and cleaning the walls from dust:
To increase the adhesion of smooth concrete surfaces to putty, it is better to pre-coat the plastered surface with a primer.
Beacons are placed on the wall or ceiling - a small amount of plaster; their location is checked with a building level; if necessary, the beacon is either pressed in slightly, or, on the contrary, more solution is added to it. This method allows you to level the walls without profile beacons.
The distance between the beacons must be kept 5-10 cm less than the width of the rule - a construction tool in the form of a steel strip, which is used to level the mortar.
As beacons for significant unevenness, you can use wooden slats and metal profiles, which are attached to the walls with self-tapping screws. The rest of the putty begins to be laid out after the beacons have completely dried;
The solution is applied from the bottom up and carefully leveled according to the rule, the thickness of each layer should be 5-7 cm, no more. A new layer is applied after the previous one has dried.
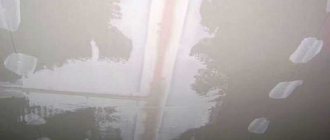
When gluing wallpaper, applying a finishing layer is not required: after drying, it is enough to treat the surface with a construction float to remove large irregularities and defects, and also apply a primer.
Conclusion So, leveling the walls is a responsible and mandatory process when decorating a room correctly with wallpaper. But having sufficient knowledge and skills, it is not at all necessary to invite specialists. All the work can be done independently, with your own hands.
Note that there is no need to create an ideal plane for liquid wallpaper; more or less even walls in the apartment are enough. This type of finishing has no joints, and its rough surface well masks small irregularities and wall defects.
Secrets of choosing a building mixture
The material for leveling walls under wallpaper is selected according to the rules, and not according to cost and popularity.
Selection based on wall material
- Brickwork is best leveled with cementitious materials. This material can be applied in a thick layer and is inexpensive. If the layer exceeds 2 cm, you will have to use a reinforcing mesh.
- A gypsum solution is applied to a smooth concrete wall that has been previously primed. Due to the presence of quartz in the mixture, the wall after work acquires roughness, which is necessary for good adhesion. For reinforcement, a 5x5 mm mesh is selected.
- Concrete with a rough surface can be leveled with both gypsum and cement mixtures.
- A foam concrete wall is leveled with gypsum mortar, but first a primer with a deep penetration effect is applied.
- Partitions are often created from tongue-and-groove slabs. To work with such material, you need to choose a regular primer and gypsum material.
Choice based on room type
Leveling mixtures have a different set of features and performance characteristics. Accordingly, different operating conditions are suitable for them. You can find out which putty to use to level walls under wallpaper in different rooms below.
- Living rooms with normal humidity are best finished with gypsum material. In this case, a normal climate will be maintained in the room.
- In rooms with high humidity levels, it is necessary to apply a cement-based material to the walls. Such mixtures are resistant to moisture and fungus formation.
Even if you still have unused mixture, for example, gypsum. It is not suitable for renovations in the bathroom or kitchen. Saving in this case will lead to disastrous results.
Ways to level walls
Under the old finishing layer, a surprise may await you in the form of uneven walls. For high-quality painting of walls, a flat base is necessary. It is not advisable to proceed to the next steps if this condition is not met. There are various ways to level walls, each of which will be optimal in each specific case. Surfaces can be adjusted using plaster, putty or drywall.
Drywall
A great way to quickly level up. Smooth material does not require plastering. The paint can be applied directly to gypsum boards, or to a thin layer of putty. For large rooms this method is ideal. But it is worth mentioning that to cover walls with plasterboard, you need to build a frame of metal profiles. The structure will serve as a basis for sheets of material, but at the same time it will “eat up” a lot of space. It is better not to resort to this technology if every cm is important to you. The material is not strong enough, it is impossible to place heavy suspended structures on it.
Plaster
Plaster is the most successful intermediate finishing option if the walls are to be painted. It is applied directly to the wall and allows you to create a perfectly flat surface. To form a thick leveling layer, work is carried out in several stages using beacons.
Step-by-step instruction:
- Mark the wall by setting and fixing landmarks at 60 cm intervals using a plaster mixture.
- Apply a primer to improve the adhesive properties of the surface.
- Prepare the solution by combining the contents of the bag with water according to the instructions.
- Apply the mixture to the surface using sharp strokes using a trowel.
- Spread the plaster using the rule. Your movements should be short and zigzag.
- We glue strips of façade mesh or fiberglass and leave the wall until completely dry. This must be done to prevent cracks in the finish coat.
Putty
Sometimes you can do without plaster altogether. Replace it with putty, which comes in the form of a dry mixture. On relatively flat walls it is enough to apply two layers of this material.
Before you start puttingty, you need to prime the wall. This can be done with a roller, but a spray gun can handle this task faster and better. Next, apply the putty using top-to-bottom movements. After drying, sand each layer with a spatula. It is necessary to eliminate transitions and tubercles formed during the distribution of the composition. The second layer is sanded using 150-grit sandpaper attached to a special platform. The next step is re-priming the wall and gluing the fiberglass.
Leveling with putty
Leveling surfaces using putty includes the following steps:
- Cleaning the wall from dust, dirt, and remnants of the old coating.
- Padding. This stage is necessary to improve the adhesion of concrete and leveling material, as well as to counteract fungus and bond all surface microparticles.
- Applying putty.
- Grinding. To do this, you need to attach sandpaper to a wooden block or use a sanding machine.
Let's take a closer look at the stage of applying putty.
To work you will need:
- starting and finishing putty or one universal composition;
- spatulas - small, large, angular;
- sandpaper or sanding machine.
Stores sell ready-made putty and dry mixture, which will need to be diluted with water and mixed with a construction mixer until a uniform mass is obtained.
Tip: you need to purchase putty at the rate of 1 kg per 1 sq. m of surface with a layer thickness of 10 mm. More detailed instructions and composition should be read on the packaging.
- Using a small spatula, the putty is taken from the container and transferred to a large spatula.
- Using a wide spatula, apply a starting layer to the prepared walls.
- The next leveling layer will be located perpendicular to the starting one. Before applying it, you need to wait about 12 hours until the previous one has completely dried, sand it and prime it.
Large and small spatulas are washed with water during work, ridding them of the drying mixture.
- The finishing putty is applied in the same way as the starting putty, but in a thinner layer.
To level the inner corners of the walls, it is best to use a special corner spatula. A special perforated corner pad, which is sunk into the solution, adjusted to the level, and after drying is covered with a layer of putty, will help you form the outer corner correctly. When sanding the corner, it is important not to overdo it and not remove the excess layer of putty, otherwise the overlay will be visible.
USEFUL INFORMATION: How to choose wallpaper for the living room: interior design
Step-by-step photos and a video on leveling walls for wallpaper will help you better understand how to properly putty walls.
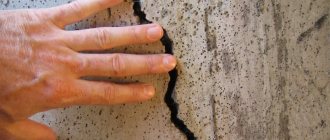
Detection of wall curvature
To determine how to level the walls in an apartment with your own hands, you need to measure the unevenness with a vertical plumb line. To do this, you will need a long cord with a weight at the end. The plumb line should be fixed at the top of the wall, for example, on a driven nail. Hold the cord from below and measure the differences in the wall at three points - top, bottom and middle. Horizontal unevenness is checked with a level; to select the correct material, it is also necessary to measure the diagonals of the room.
- If the differences are significant, you will have to use plaster or drywall to level the walls.
- If the unevenness is insignificant, you can start priming the wall for putty.
And yet, why do you need alignment?
To reinforce the idea of the need to carry out work to level the working field, we decided to present the positive results of this process:
- increasing the level of adhesion of the decorative coating to the base;
- adding elegance to wallpaper;
- a significant increase in the service life of the decorative coating;
- eliminating the appearance of negative phenomena on the surface in the future (drips, stains, changes in shade).
Now in your life the question of whether you need to line the walls with wallpaper will definitely not arise.
Work order
Before you begin leveling, you should check the initial evenness. This process can be easily carried out independently - just have a building level on hand that is easy to use. It should be used to measure the following indicators:
measure the verticals of all walls in the room; determine the horizontal lines of the areas where the wallpaper will be glued; measure the equivalence of the diagonals.
The results will allow you to correctly determine the scope of upcoming work. If the difference in diagonals is small, you can level the surface quite quickly, but if the difference is large, this process should be carried out.
Each method of leveling walls with your own hands has its own stages of this process. Some stages are universal in nature, while the presence of others depends on the selected material for the work.
To prepare the surface for treatment with putty, be sure to follow the following procedure:
it is necessary to rid the wall surface of dirt; treat the walls with an antibacterial drug; cover the walls with a layer of primer; apply starting putty. The thickness of its layer will depend on the angle at which you apply the spatula to the wall surface; to protect against cracks in the future, you need to put a painting mesh on the putty layer; the second layer of coating is applied perpendicular to the first; When dry, apply finishing putty and also let it dry; soak the layers with primer after they have set together; Using a special brush, smooth the surface using circular movements.
For more details on the process of wall putty, see the following video.
In order to level the walls with plaster, the following technology is observed:
Clean and prime the wall surface. To protect against cracking, install a plaster mesh and place wooden slats or special perforated construction beacons along the edges. Usually two beacons are installed using powerful gypsum adhesive. Place intermediate beacons at a distance of 0.2 m from each other. The protrusions on the beacons must correspond to the thickness of the mortar layer. The distance between them is called a step, which usually ranges from 20 to 30 cm. A variation of beacons are products made from scrap materials - small pieces of tiles, drywall and plywood sheets connected with a special cord. Apply a solution with plaster to the damp surface of the walls. The mixture is applied in a continuous layer no more than 0.5 cm thick. When the coating sets to the wall surface, but does not dry completely, apply a finishing layer with a thickness of 0.2 to 0.4 cm. The final leveling takes place using a metal construction float.
See below for all the secrets of leveling walls with plaster.
Finishing the walls with plasterboard before wallpapering is also carried out in stages:
You need to start by choosing the type of fastening of the sheets to the walls. To get rid of small irregularities, fastening with glue is suitable. For large differences in surface level, a special frame is used to install the sheets. Determine and mark in advance the places where sockets and switches will be located. Cut the sheets so that they fit perfectly into the mount. If you decide to fasten the sheets using an adhesive base, then apply glue in several parts of the sheet so that the distance between sections is 0.3 m. The adhesive mass is applied in slides, approximately 30 cm high. If you use the frame method, then for fastening sheets, self-tapping screws are better suited. Check the position of the sheet using a level. Treat the wall surface with putty.
Leveling with plasterboard
Using drywall is a good way to level a wall yourself. It is used in rooms with very uneven walls or to save repair time, since the installation of gypsum boards is carried out very quickly.
You can use two methods of leveling with drywall:
- frame method, which involves installing a frame from a metal profile;
- a frameless method in which drywall is attached to the wall using special glue.
USEFUL INFORMATION: Improved wall plaster: we follow the requirements of SNiP
You should determine in advance the locations of sockets and switches and mark them on sheets of drywall.
Regardless of the chosen method of installing gypsum boards, the joints between the sheets must be sealed with a special gypsum putty for seams, reinforced with a special tape or serpyanka mesh, and the recesses from the screws must be filled with putty.
Since some types of wallpaper have a slight transparency, it is strongly recommended to putty the entire surface of the drywall. In this case, the wall must be primed before and after applying putty. If you decide not to putty the entire surface of the plasterboard walls before wallpapering, they must be primed, otherwise the wallpaper glue will soak the surface of the sheets. In addition, during subsequent repairs, it will be almost impossible to remove wallpaper from untreated drywall.
Installation of beacons
Beacons will make it easier to create a flat surface
To make perfect alignment, you should install special landmarks on the wall - the so-called “beacons”. They can be metal profiles, smooth wooden blocks, metal pipes, etc. String beacons are also available for sale in the form of metal strings stretched from one corner of the wall to the other.
Conventional vertical beacons are installed as follows:
- We begin installation from one of the corners of the wall. To do this, first along the corner, from top to bottom, we make 4-5 splashes of plaster mortar.
- Then we take the beacon (batten, pipe, etc.) and bury it in the patches of mortar, using a building level to make sure that the beacon stands clearly vertically. The distance from the wall to the outer surface of the beacon should be 2–3 cm, that is, the thickness of the plaster layer.
- We take the second beacon and install it in the opposite corner of the wall in exactly the same way. Let's wait until the patches of the solution set, firmly holding the beacons.
- We stretch twine between the beacons in their upper and lower parts, along which we position the remaining beacons. We fasten them using the same technology using patches of plaster mortar.
Plaster
If you are unlucky with the walls and defects and unevenness are visible even with the naked eye, then you cannot do without complex and labor-intensive work with plaster. Such work will take up much more of your time, because it is correct to apply plaster only on a completely dry previous layer. It is best if you want to do this work yourself, to purchase a ready-made mixture of plaster based on Portland cement. This is best done, because it is very difficult to measure the required amount of materials with your own hands. Every year, engineers at manufacturing plants only improve the quality of the plaster produced, which makes repair work easier for us. Agree, now the quality of plaster has increased significantly compared to past decades. Often the plaster is so strong and adheres well to the walls that it is quite possible to do without a polymer mesh. Just a few years will pass, and we will already forget about such a tool as the grid. If your apartment has brick or concrete walls, then choose cement-sand mortar. It is more durable and suitable if your walls are prone to excessive moisture. And to level wooden walls yourself, you will need a clay-cement or clay-gypsum plaster solution.
Before you work on leveling the wall with gypsum plaster, you will need to remove dust and various dirt from the wall and apply a primer. If in your particular case you need a large layer of plaster, then it would be best to install a specialized plaster mesh on the walls. Otherwise, part of it may crumble and the finishing will have to start all over again. It is better to worry about such issues as securing the mesh in advance and avoid unnecessary problems in the future.
After you have completed the preparatory work, you will need to secure two vertically located beacons. This is done using a level. Sometimes in such work you can get by with a plumb line. Beacons are attached to the ends of the wall using quick-setting gypsum adhesive. You can use specialized metal strips for these purposes or get by with wooden slats. After all the manipulations, it will be correct to remove the latter from the wall. Intermediate beacons are attached between the main beacons, in increments of twenty cm less than the rule by which you will align the walls.
Plaster application occurs in 3 stages:
1) spray - a layer of weak plaster is placed on a wet wall. There is no need to make thick layers; a layer of about 5 mm in size will be enough (for wooden walls up to 9 mm). This layer covers all recesses and bulges, seams and even cracks. The plaster must be applied in a continuous layer. What is this layer for? An intermediate layer is applied between the wall covering and future layers of plaster. This layer will ensure the bonding of different layers of coating. Make the solution for this stage liquid, about 60% water;
2) soil - this layer should level your walls. This stage is the main one and the plaster is applied in 2 or 3 layers. Dilute this solution much thicker. This solution should contain approximately 35% water. The layers do not need to be thick - 5-7 mm is enough, it would be better to repeat the application later than to make the layer thicker. Layers of plaster that are too thick can simply fall off. It is better to avoid this, so as not to increase the already quite labor-intensive work. The layers must be very carefully leveled according to the lighthouse rule - pay special attention to the last layer, it is the most important at this stage;
3) covering - the final layer used to smooth the walls. This layer must be made very thin, no more than 4 mm. If you use a cement-sand mortar, then use finely sifted sand, otherwise you will get grooves on the wall when rubbing. This layer is applied in a circular motion. And then a grater and a trowel are used until the walls become completely smooth.
At first glance, the surface is ready for wallpapering, but it’s not. Next, it would be best to putty the walls to avoid mistakes during repairs. We described how to apply putty above.
Is it always necessary to align walls with wallpaper?
How to determine whether walls need to be leveled for wallpaper? You can take accurate measurements using a laser level, but there is an easy way. You need to attach a level strip or level to the wall section, the length of which is at least two meters. The gaps between the slats and the wall will show the size of the unevenness; based on this, it is determined whether preliminary preparation is necessary before wallpapering.
In addition to checking the surface itself, you need to make sure whether the walls are parallel to each other, that is, check the geometry of the room. If the geometry is broken, alignment is necessary. Measurements can also be taken using a laser level or by measuring the diagonals with your own hands. Two diagonals on one wall should be equal to each other and the diagonals on the opposite wall.
Where to begin
Ideally, the premises of the apartment are made in exact accordance with the project, which implies the correctness of the geometric shapes and sizes. So, the room, unless otherwise provided by the designer’s imagination, should have the shape of a parallelepiped with even right angles and the same dimensions of opposite walls, as well as the ceiling and floor. Life makes its own adjustments to this ideal picture. Therefore, we start by measuring the sides and diagonals of the walls. If the corresponding dimensions coincide with an accuracy of 1 - 2 cm, we move on to the next stage. Otherwise, we correct the “jambs” of the builders. Depending on the size of the identified deviations, plaster and the use of drywall are applicable. Both methods allow you to align walls with wallpaper. The choice of specifics depends on circumstances, including:
- the magnitude of geometric deviations;
- availability of necessary skills among performers;
- time allotted for repairs;
- customer preferences.
Dismantling
Preparing walls for wallpapering begins with removing the old finish.
This procedure is often difficult, but it is very important, otherwise subsequent work may be useless
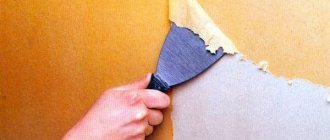
- Paper wallpaper must be thoroughly moistened with soapy water, so it will come off easier.
- Scratches and cuts should be applied to thick and washable wallpaper so that the solution penetrates inside. Then they are removed with a metal spatula. If necessary, the soaking procedure is repeated.
- Vinyl wallpaper is removed according to a different scheme; for this, horizontal cuts are made on it, and then the top layer is removed. The bottom layer can be used as a base.
How to putty walls under wallpaper
To smooth out sections of the wall or hide defects, cracks or holes from nails or dowels, use putty.
1. Pour cold water into a small plastic bucket. Add the dry putty mixture there and mix until you get a homogeneous mass.
2. Take a small amount of putty on a spatula and apply it to the wall in strokes. If the depression or crack is deep enough, apply putty in two layers, first waiting until the first layer is completely dry.
3. Wait until the putty is completely dry, then sand it using sandpaper.
Correct alignment of walls for wallpaper, basic methods
Innovative finishing technology and materials will allow you to achieve a project design style. When designing an apartment, not only the design, but the durability of the solutions used are taken into account. Fittings and wallpaper will look great when the partitions are made of a durable plastic composition, original fillers, and hardeners.
The putty is practical, budget-friendly. What is the best way to align walls with wallpaper? For this, a variety is useful - a dry mixture, which is easily diluted with water. Instructions are located on the packaging label. The putty is prepared according to the manufacturer's instructions. Ready-made mastics are divided into starting and finishing compositions based on gypsum.
Putty is a practical, budget solution.
Leveling walls with plaster (wet method)
Leveling walls using the “wet” method ensures a minimum of losses in the area of the room. Unevenness and roughness are eliminated. Aesthetics when leveling, smoothing with elastic putties is eliminated. The master chooses the type of material, an option on how to level the walls with wallpaper with his own hands. How to restore walls with decorative wallpaper. Especially when the repair is aggravated by work with complex defects (pores, depressions, deep seams, cracks).
Leveling with the wet method is the most labor-intensive activity. During finishing, a large amount of dirt and fine dust is generated. The effectiveness of the wet method is always highly rated and is done with high quality by master finishers. With this type of finishing, in addition to wallpaper, up to 100 options for designer decorative finishing using other materials are performed.
Leveling walls using the “wet” method ensures a minimum of losses in the area of the room.
Leveling walls with plasterboard (dry method)
Leveling partitions without plaster is done when installing gypsum plasterboards and gypsum boards. They are placed on structures with the most unfavorable geometry, large and deep depressions, and a difference of more than 5 mm. The panels ideally remove maximum debris. The material is good for sewing up corners, openings around the perimeter of doors and windows.
GCRs make smooth planes per 1 m2 of area, which does not pose a global question of how to level the walls in an apartment for wallpaper. The panels cover the uneven areas, leaving only the processing of seams and joints between adjacent sheets. Minor roughnesses are smoothed out, finishing putty is performed, if installed correctly.
The panels ideally remove maximum debris.
Leveling walls with putty
Do-it-yourself leveling with putty begins with preparing the surface to be treated. The quality of adhesion and the size of the putty layer depend on this. For example, when bright wallpaper colors are chosen, mixed on a plain white and black background, it adds richness to the interior of the room. The partitions will show the defective finish layer and highlight unevenness: cracks, dents, bumps.
The partition is puttied in a new building on top of the plaster, always with mesh laid. Until the previous layer reaches 70% strength, the parts of the previous layer are not puttied. The hardening of the layer is determined by light tones. There are no special rules when putting putty on top of concrete. All methods are suitable. The question of the next coating is not particularly important, the main thing is to carry out the joint venture technology.
The partition is puttied in a new building on top of the plaster, always with mesh laid.
How to line walls with wallpaper
The correct choice of finishing material guarantees high quality work:
- Lime gypsum mixture;
- Lime clay liquid amalgam;
- Standard cement lime mortar;
- Lime clay gypsum base.
Gypsum solutions are used for dry rooms with wooden partitions. Cement ordinary sand mortars or clay fillers are good for finishing brick and concrete structures. Ready-made mixtures are immediately suitable for leveling walls under wallpaper. When choosing products for repair, the consumption per m2 of partition area and cost are characteristic. The more solutions, the cheaper formulations are required. Expensive mastic is suitable for finishing layers.
Gypsum solutions are used for dry rooms with wooden partitions.
Leveling methods and materials used
There are two main materials for leveling walls:
- dry material;
- liquid mixtures.
Methods by which alignment can be achieved:
- putty;
- plaster;
- use of drywall.
Before deciding on the upcoming choice of material, it is necessary to evaluate the quality characteristics of the existing walls. You can consult either repairmen or a seller at the construction market.
putty
If the wall plane has small defects and flaws, then putty can be used as a leveling compound. It can be found in the form of a liquid composition, which is ready for use, as well as in the form of dry mixtures that must be properly diluted before starting work. It is usually written on the packaging container how and in what quantitative proportions this should be done.
This option for the initial preparation of the wall before finishing is considered classic. It is chosen by most buyers.
The technology of leveling walls under wallpaper using putty is a careful application of the composition. Before this, the required steps are:
- Preparing and cleaning walls from obvious defects.
- Application of an antibacterial composition.
- Surface primer.
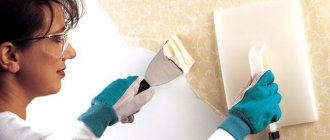
Then the finished putty mixture is evenly applied to the walls with a long spatula. You will also need a small tool with which it is convenient and quick to draw the liquid solution from the container. Some people find it more convenient to apply the composition onto a surface with a small spatula.
Leveling walls under wallpaper with your own hands using putty is quite easy to do; even those who are doing it for the first time can cope with it. The main thing is to do everything extremely carefully, do not be lazy to remove small excess material before it dries.
In many cases, several layers will be needed, the first of which is called the starting layer. A special mesh is required between the layers to prevent small cracks from appearing in the future.
The starting and finishing layers should be positioned perpendicular to better perform the plane leveling technology.
The last layer should be quite thin. It is finally washed away with a primer. After the final completion of the work being performed and the product has completely dried, it is necessary to go over the putty areas with sandpaper suitable for this task.
After the putty composition has completely dried, another layer of primer must be applied to the wall.
Plaster
How to level walls for wallpaper using plaster? The question arises for many novice craftsmen and those who are starting repairs for the first time. This material has been used in construction and interior finishing work for quite a long time. This is a universal way to get rid of defects on almost all surfaces of premises.
Working with plaster is a little more difficult and takes longer, but the result will be better than if you simply level the walls with putty.
For brick it is better to use mixtures based on sand and cement, for concrete - gypsum, for wood - gypsum and lime, cement and clay. The technology for preparing a wall before application consists of several stages:
- Clean the desired surface from dust.
- Prime.
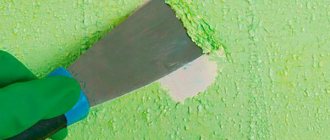
If the wall is uneven and has a number of significant flaws, you should first apply a plaster mesh to the wall, and then a base layer of plaster, which is approximately five millimeters. After drying, you need to apply a base layer of 6-7 mm.
The finishing layer is applied thinly and only after the previous two have dried. It is needed to ensure that even the slightest defects do not remain on the finished leveled surface.
After completing all the work, you need to sand the walls well to give them an even smoother and even surface. In order to avoid having to redo everything all over again, you need to perform all stages efficiently from the very beginning.
How to properly level walls using plaster? Professional craftsmen who have been involved in all stages of renovation of premises for many years will help you figure this out.
On video: recommendations from experts on leveling walls.
Sheathing with plasterboard
Before covering curved and uneven walls with wallpaper, it is recommended to use drywall. The material consists of individual sheets that are quickly and easily installed.
The coating allows you to quickly improve the quality of the walls, but visually reduces the living space of the room, and if the room is already small, then this will be very noticeable.
The method is widely used in buildings or structures that were built a long time ago, where there is no point in using other materials due to high consumption. This significantly affects the financial side of the work being carried out.
The product is environmentally friendly, suitable for apartments or houses where people with allergies or asthmatics live. It is allowed to be used in children's rooms. It is used to significantly increase sound insulation and thermal insulation. It is usually used in bedrooms where an increased level of comfort and peace is needed.
For bathrooms or rooms with high humidity, it is recommended to choose moisture-resistant drywall, which has a greenish tint.
If the wall level does not coincide by 70 mm, then before installation you should make a frame from special profiles. Mount the material already on this system. If the defects are not very large, then you can attach it directly to the plane of the wall using special glue. It is applied to the sheets every 30 cm, along the perimeter. Fastening to the frame occurs using ordinary self-tapping screws.
During installation, it is mandatory to note where exactly the sockets and light switches are located. The material is easy to cut and does not require specialized equipment.
After installing the drywall, you need to very carefully putty the seams between the sheets.
With the help of this product it is possible to give the room not only the effect of smooth walls, but also to implement various types of design ideas.
Preparing the walls
In order not to be disappointed with the final result, you need to clearly know how to prepare walls for pasting. To treat the surface you will need a spray bottle with water, a spatula, and unnecessary rags.
To remove the old layer of wallpaper, you need to spray it on it and wait until the canvas gets wet and begins to move away from the wall. To enhance the effect, use warm water and soap solution.
Then the canvases begin to be torn off with a spatula or knife. If the wallpaper comes off well, you can remove it by hand.
After this treatment, it is better to transfer the pasting to the next day so that the applied layers dry thoroughly.
Materials and tools
To carry out the preparatory work, the finisher, regardless of whether he is a beginner or an experienced builder, must have a variety of tools and devices. Their set is dictated by the type of covering to be removed: trellises, paint or plaster; wall type:
- brick;
- concrete;
- wooden;
- plasterboard, etc.
The owner of a house or apartment who carries out repairs on his own needs tools and materials for a specific situation, and therefore there is no need to provide a general list of everything that will be needed during the repair.
To easily navigate the necessary materials and tools, a list of them will be given before the description of each type of work. The only thing you should always have at hand is a stepladder or portable platform (horses). Therefore, there will be no further mention of this device.
Walls
Each repair process requires completion, which consists of leveling the corners in the room. In the article we will consider the main methods, features and sequence of work with different materials, and also provide a list of necessary tools and devices.
Table of contents:
- Principles and methods of alignment
- Preparing the wall surface
- Leveling method using plaster
- Leveling method using drywall
- Mark Alignment Method
- Method using a contraschultz
- Features of alignment of external corners
- Features of alignment of internal corners
Preparing walls for wallpapering: removing old coatings
To effectively glue canvases, you first need to clean the surfaces of the old coating - this is the first and very important stage in preparing walls for wallpapering. First you need to figure out how much work you will have to deal with. After all, walls can have different coatings, in particular:
- surfaces covered with chalk or lime;
- walls in a new building without wallpaper;
- surfaces covered with wallpaper;
- painted walls.
In each of these cases, when preparing walls for gluing by cleaning the base, certain difficulties may arise. Therefore, you first need to understand the scope of work, decide on the tools that will be needed in the process of cleaning the walls from old coatings. It is necessary to prepare personal protective equipment, because dust and dirt can enter the respiratory tract, and hands will be subject to mechanical damage.
It is important to take care of protecting the flooring (if it is not intended to be completely replaced) from exposure to dust and dirt, as well as the safety of the furniture that remains in the room. For this purpose, it is best to use plastic film, although plain newspapers will also work.
It is necessary to prepare personal protective equipment, because dust and dirt can get into the respiratory tract and eyes when removing old wallpaper
If we are talking about old whitewash without the use of fixing components, then you can remove the old coating using a simple spatula, and then wash off the remaining marks and stains from the surface. A significantly larger amount of work is expected if it is necessary to remove wallpaper and old paint from the walls.
Causes of curvature
For a more detailed understanding of how to align the corner of a wall, we will need to familiarize ourselves in detail with how curvatures appear and what could be the reason for this. First of all, it should be noted that, despite the use of a whole range of tools by mason builders (from simple vertical plumbs, which can easily be made with your own hands using improvised means, to complex laser levels and other high-tech tools), brick or block The masonry still does not turn out perfectly smooth. It turns out that as a result of manual masonry, all kinds of convexities, concavities can arise, and tilts and deviations of both partitions and load-bearing walls from the vertical are possible. We must not forget about the irregularities that exist in the horizontal plane.
So it turns out that it becomes difficult to correctly and evenly hang wallpaper, which, as a result of curvature on the walls, as well as at the point of their contact, becomes completely unattractive. They may separate, or, on the contrary, form unsightly folds.
Note! Since any angle represents the very point at which two walls touch, their evenness is the determining factor. In cases where the walls are smooth, the angle will also be right (90 degrees, with rare exceptions). However, if the partitions themselves are curved, and even do not adjoin at a right angle, this can lead to the formation of excessive curvature and the appearance of irregularities noticeable to the naked eye.
Before wallpapering, you need to measure whether the corners are even.
Related article: How to make a chimney for a gas boiler
In other words, that same line, which is a kind of “transition” from one wall to another, instead of a straight line turns into a curved curve, which, in very bad cases, is a kind of wave-like sinusoid. Moreover, there may be an option when the line noticeably deviates both horizontally and vertically from the initially specified parameters. By the way, in addition to the inability to stick wallpaper evenly, such cases are also fraught with the fact that you may experience difficulties when installing floor and ceiling skirting boards, and even when installing certain pieces of furniture.
So, there is hardly any need to provide further evidence of the difficulties and problems that can arise if the corners in a room are curved. Of course, to carry out high-quality repairs we only need right angles. Therefore, now let's move on to a more specific description of what exactly needs to be done in such cases.
Proper preparation for gluing
General requirements state that before gluing non-woven wallpaper, you must:
- Wash the floor, or better yet, lay cellophane on it. This will save time on cleaning.
- All electrical wiring outputs are isolated.
- By removing socket covers and switches, the room is de-energized.
- If there is not enough natural light in the room, the “glasses” with connectors for sockets and switches are sealed with masking tape, which is then removed.
All necessary equipment must be in good working order, clean, and preferably new.
How to dilute glue correctly?
It is best to do the preparation immediately before gluing non-woven wallpaper. Strips of the required length are cut in advance. The dry granular mixture is poured into a dry container. Then it is filled with the required amount of water. In this case, you need to continuously stir the resulting mass until the granules are completely dissolved, monitoring the consistency.
The optimal quantity is for 4-5 strips.