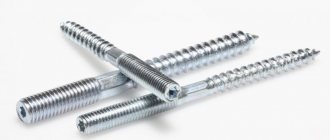
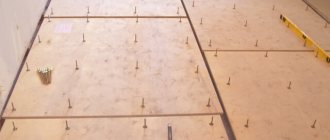
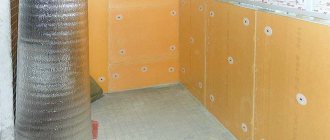
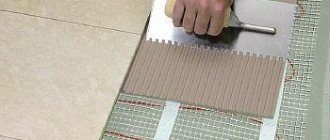
Plywood can be laid on both concrete and wooden floors. In both cases, it can be glued, fortunately, construction stores today are replete with a variety of offers of adhesives of different price categories and quality. The question of how to glue plywood can have many different solutions and buying the cheapest or, conversely, the most expensive glue for laying plywood will be fundamentally wrong - it must be chosen depending on what kind of flooring the plywood is chosen for and in what conditions it will be used be exploited.
Types of glue for fixing plywood to the floor
Water based glue
Water-based adhesives are the answer to the question of whether it is possible to glue plywood to a wooden floor without releasing strong odors and maintaining an environmentally friendly atmosphere. Therefore, it is recommended for use in residential areas.
It is best to use them to glue moisture-resistant wood.
But water-based adhesives also have disadvantages:
- they take a long time to dry;
- require additional fastening with dowels.
If communications are laid in concrete, and there is no diagram of their location, then you will have to abandon the use of nails or dowels so as not to inadvertently damage the electrical wiring. Otherwise, the floor will have to be opened with diamond cutters, the damaged wire will be corrected, and the concrete will be re-concrete.
Main types of water-based adhesives:
- polyacrylate;
- latex containing artificial rubbers;
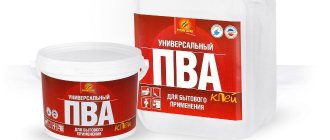
- PVA (emulsion of polyvinyl acetate in water);
- contact compounds.
One-component adhesive
One-component adhesive for plywood floors contains a non-flammable solvent, but when using it, the screed must first be primed. Here you also need dowels for intermediate fixation.
Toxicity requires good room ventilation and the use of a respirator.
In addition to the solvent and polymer, one-component polyurethane adhesives contain a hardener - isocyanate, adhesion enhancers and other additives.
This glue has a number of advantages:
- perfectly penetrates into voids and cracks, which makes it possible to increase the solidity of the subfloor;
- after drying, the glue remains elastic, so it does not crack during use;
- used for plywood made from types of wood prone to deformation from high humidity.
Two-component adhesive
Any two-component adhesive for plywood on a concrete floor, due to its fast reaction (hence they are called reactive), sets very quickly and produces a durable and very strong seam. Buying glue from two components is much easier than gluing it, since immediately before use it is necessary to mix the resin with the hardener in the required proportions.
When working with this glue, you should wear personal protective equipment.
The price of glue for plywood on a concrete floor, consisting of two components, is significantly higher than that of one-component adhesives, but there are also plenty of advantages:
- no intermediate fastening with dowels or screws is required, which saves effort, money and time;
- after the glue has quickly hardened, you can start sanding the surface of the chipboard much earlier;
- provides the highest bond strength.
Video on how to glue plywood to a concrete floor with two-component adhesive:
Installation of parquet on plywood
Installation can be done in two ways:
- Dry, without using a fixing base, only with snaps.
- For the adhesive mixture.
Let's consider the second method in detail.
- Preliminary work stage:
- Prime the concrete surface.
- Lay the plywood on the surface in a checkerboard pattern, leaving small gaps between the sheets so as not to interfere with the natural expansion and contraction of the wood as the temperature changes.
- Glue it, secure it with self-tapping screws to securely fasten it.
- Sand, remove dust, prime the plywood sheets.
- First lay out the parquet on the plywood flooring.
- Apply glue to the plywood with a notched trowel, but not immediately over the entire surface, but as the parquet or parquet board is glued. Pay attention to the working time of the glue.
- The parquet is applied to a plywood surface coated with glue and pressed tightly.
- Lay out, maintaining a gap between the wall and the parquet for the natural expansion of the wood.
- The next row of parquet is installed in the groove, hammered and pressed tightly again. Be sure to leave small gaps between joints.
Use one-component or two-component glue; dispersion glue is only suitable for oak parquet.
This method of gluing parquet is convenient, but if the floor is repaired, it will be difficult to tear off the parquet covering from the glue.
We advise you to look at the instructions for laying parquet on plywood:
Features of choosing glue
Depending on the finishing floor covering
When choosing an adhesive for gluing plywood to the base of the floor, you need to start from the material of the latter and the conditions for further use of the room:
- When deciding how to glue ceramic tiles to a wooden floor, you will need tile adhesive for plywood that does not include water and is not aggressive towards wood.
- If you need parquet adhesive for plywood on a wooden floor, you should choose between epoxy-polyurethane or pure polyurethane systems containing artificial resins and solvents.
- To glue linoleum onto plywood, you need an appropriate adhesive that can provide a long-lasting, strong seam. It is affordable, safe and approved for use in residential areas.
Laminated plywood (with a film coating) cannot be glued. Therefore, before applying the epoxy compound to it, the film must be removed from the surface with sandpaper.
For unveneered plywood
After gluing to the screed, plywood can be either an independent coating or simply serve as an intermediate layer for the finishing coating.
For unveneered plywood, you can use any glue. The only important thing here is that its surface is clean and dry. The adhesive can be applied evenly with a roller or brush to both surfaces to be bonded. Long-curing adhesives require preliminary fixation of plywood sheets to the screed using dowels, nails or clamps after approximately 30-40 cm. After work, excess mixture must be removed along with unnecessary nails.
Outdoors or indoors?
For indoor processing, it is better to use PVA glue, which is non-toxic, does not change the color of the material, but adds strength to it.
For external use, it is better to choose an epoxy composition with phenol, and to connect plywood to metal, it is better to use epoxy glue.
Step-by-step instructions for gluing plywood
Before the gluing process, it is necessary to ensure the strength of the concrete coating. If everything is in order, then prepare it for coating with an adhesive base and attaching plywood sheets.
Preparation of concrete screed
Before preparing the concrete surface for attaching plywood, you need to make sure that it is completely dry and does not release moisture. This can be checked by leaving the oilcloth material on top of the floor for up to half a day. If there is moisture underneath, it means the floor is not dry yet.
It is prohibited to carry out gluing work on wooden surfaces when the floor is not completely dry.
Preparation stages:
- Thoroughly clean the floor from dirt and dust.
- Preparation of materials and tools: purchase glue and primer. It is advisable that they be of the same brand. Using the same brand of primer with the adhesive will improve adhesion between the materials. You need to buy such material with a reserve. You will need a roller and brush.
- Pour the primer onto the surface, spread it over the surface with a roller, and in some places with a brush.
- Apply a second coat after the previous one has completely dried.
- Wait until dry.
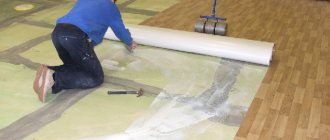
Gluing plywood to concrete screed
If the floor has unevenness, then they must be compensated with an adhesive composition. The layer of the mixture will create a solid layer, which will prevent the sheets from sagging.
Gluing process:
- Lay the sheets flat and mark the cutting areas. Sheets of plywood are cut in a separate room to avoid dust on the primed screed.
- Prepare the adhesive composition according to the instructions or stir the already purchased one.
- Pour a small amount of the mixture onto the floor covering, spread it with a spatula, taking into account uneven surfaces.
- Attach a plywood sheet and press a little.
- Place the next sheet so that there is a gap of up to 4 mm between the sheets.
- If necessary, fasten with dowels. Fixation is first done in the corner parts of the coating.
- Sand the surface.
Immediately after drilling, dust is removed with a vacuum cleaner. The protruding glue is removed with a dry rag.
We recommend watching the video instructions:
Glue drying speed
It depends on the properties of the solvent:
- Adhesives with volatile solvents dry the fastest, allowing you to continue working after a few days.
- Eco-friendly water-based compositions take much longer to dry, which makes many people abandon them.
- The fastest option is a two-component adhesive for plywood on a concrete floor, which dries on average within 24 hours. In addition, you can do without dowels, and if the screed is primed with epoxy, then the plywood can be laid on a damp base.
Laying and gluing: technological process
Before work, the concrete surface is cleaned with a vacuum cleaner.
Before laying the substrate, it is necessary to perform a number of preparatory operations:
Types of glue for linoleum on concrete floors
- sanding plywood;
- cleaning the subfloor;
- surface leveling;
- priming the base.
Before laying the substrate, it is necessary to remove the old coating and give all materials the same moisture content. The last requirement is met simply: the plywood, glue, solvent and hardener are kept in the workroom for 2-3 days. During this period the room is not heated.
Dust is carefully removed in several stages. It is necessary to carefully monitor the presence of remnants of the old coating and peeling screed. The strength of the surface in doubtful places is checked with a spatula. It is advisable to wash the floor with clean water, let it dry, then vacuum it.
The surface quality of the base is measured. Acceptable characteristics may vary. If the substrate is planned to be mounted on PVA, then the possible level difference is 2 mm. In the case of gluing concrete using rubber or polyurethane adhesives, unevenness can reach 7 mm. Leveling is carried out with cement-asbestos building mixtures, the level is checked with a spirit level.
Primer of concrete before laying plywood
For priming, use compositions recommended by the manufacturer of the selected material. In general, the primer is applied in two stages. First, the surface is treated with a low-density adhesive solution; in most cases, the mass is diluted in a 1:1 ratio. If the resulting film after drying does not prevent dust formation on the concrete surface, the operation is repeated. The concentration of the adhesive mass in the primer solution is increased.
The sheets begin to be laid from one of the far corners. The glue is applied to the concrete-cement base and spread over the surface using the comb edge of a spatula.
Important! If the instructions for the material indicate a holding time, the requirement must be met.
Secrets of using plywood glue
The strength of the bond depends not only on the properties of the glue, but also on compliance with the gluing technology. Deviation from the latter inevitably weakens the connection.
It is also important that no voids form between the plywood and the base; to do this, the plywood must be carefully pressed against it and the glue must be distributed evenly.
Using a primer improves adhesion and saves glue.
Do you trust plywood adhesives? What glue did you use for plywood most often, and under what conditions? Share your experience in the comments.
What adhesive mixtures are used
Parquet can be glued using a variety of adhesives. There is a huge range of them on the market today; the substances differ in types, manufacturers, volumes, prices and parameters.
- Minimal shrinkage - the composition should not decrease in volume when drying.
- Elasticity - during operation, parquet can change its linear dimensions (thermal expansion and hygroscopicity of wood play a role here). The glue should compensate for the changes, eliminating the appearance of squeaks and peeling.
- Long service life - parquet is considered one of the most expensive flooring options, so no one wants to change it every 5 years.
- Minimum volume of water - natural parquet is hygroscopic, so direct contact with water is destructive for it.
- Environmental safety – absence of toxins, unpleasant odors and harmful fumes that can negatively affect people’s well-being and health.
- Maximum adhesion to concrete - especially important where heavy loads on the coating are expected.
- Artelit is a rubber compound that can be used to glue parquet to any substrate, suitable for heated floors and surfaces that are affected by vibration.
- Moment – glues any types of parquet (wood, plywood, laminate), dries quickly, is resistant to moisture, durable.
- Coswick is an elastic polyurethane waterless adhesive for universal use.
- Bostik Tarbikol is a vinyl water-dispersion adhesive that sets quickly and is used for gluing small-sized parquet boards that have a rough working surface.
- Kraft is a durable two-component composition, suitable for massive slats.
- Kiilto is a PVA-based composition, environmentally friendly, non-flammable, hardens quickly, ideal for a piece set of small lamellas.
- Super-Grip is an epoxy composition that can withstand severe temperature changes. Glues any material.
- Murexin is a polyurethane two-component adhesive, universal, providing a high level of reliability.
- KS is a universal composition with mineral additives, non-flammable, non-toxic, glues to any surfaces and bases.
- Axton is a water-based dispersion adhesive for parquet, safe and environmentally friendly, very durable.
- Slim – suitable for gluing any type of parquet onto concrete/slabs. Durable, two-component type.
- Repox is an epoxy-polyurethane composition, used for work on any substrate, demonstrating a high level of adhesion.
- Stauf is a line of compositions based on water, alcohol, and polyurethane.
- Eurocol Frodo 148 is a universal reactive adhesive, used for any board and any substrate.
- Adesiv pelpren is a two-component parquet composition; any elements can be placed on it.
- If plywood is placed on concrete, the glue must be elastic, with a high level of adhesion; a two-component composition or a solvent-based one is best.
- Solid board - it is better to choose two-component boards based on rubber.
- For piece parquet - PVA compositions.
- The width of the lamella - if it is less than 12 centimeters, you can choose any composition; if it is more, it is better to choose a substance based on polyurethane.
One-component
Such adhesive compositions are easy to use, are sold ready for use, and do not require dilution or preparation.
- Water-based glue is inexpensive, environmentally friendly, and uses water as a solvent. Suitable for mounting boards whose width is at least a centimeter, and the base of the lamella is not sanded. It is forbidden to use wood that can absorb moisture (beech, alder, ash, fruit trees); the composition is not suitable for forming flooring in unheated or damp rooms.
- Solvent-based – there is no water in the composition, universal adhesives provide maximum adhesion, making the parquet able to withstand considerable loads and temperature changes. This glue can be used for wood that absorbs moisture.
The disadvantage of adhesives with solvents is toxicity and an unpleasant pungent odor. Personal protective equipment is used during work. It is forbidden to use this type of glue near a fire source, as solvents are flammable.
READ MORE: How to treat concrete floors from dust
Two-component
Such compositions are distinguished by their elasticity, strength, ability to dry quickly, and versatility both in terms of base and coating. The products contain no solvents; polymerization occurs by mixing the polymer base and hardener. All adhesives of this type are quite expensive, but they do not shrink and guarantee a long service life of the floor.
- Polyurethane – increases the strength of parquet by an average of 35-40%, without toxins.
- Polyurethane-epoxy - additionally strengthens by 15-20%, has an unpleasant odor (while it dries), is cheaper, and can be fragile.
Requirements when choosing a two-component glue: elasticity, moisture resistance, time of use (usually indicated on the can), dosage. Usually the entire volume of the jar is mixed at once, otherwise the components may not be calculated and the glue simply will not harden. So, if the composition has not hardened within 3-4 hours, it is better to glue all the lamellas again.
Other formulations
When working with parquet glued to a concrete base, different types of adhesives can be used. The most popular ones are described above; below are substances that are also on the market and are used quite often.
- Universal - based on natural resins or rubber, hardens quickly, exhibits low adhesion, a special screed is made under it and primer is applied.
- Alcohol is an odorless substance, comfortable to work with, and dries quickly. Suitable for moisture-absorbing types of wood and plywood, relevant for heated floors.
- PVA - based on polyvinyl acetate dispersion, without toxins, demonstrates high resistance to temperature, moisture, suitable for parquet of any type, installation of decor, etc.
- Hybrid - based on silane-modified polyurethane, elastic, durable, without restrictions on use in terms of base and coating materials, without water and solvents.
The photo shows a two-component material.
Two-component (polymer hardener) polyurethane and epoxy adhesives are applied to a primer of the same composition. They have maximum strength. You can sand the base and apply the topcoat after 2 days.
When using this composition, the sheets do not need to be additionally secured with self-tapping screws.
Other advantages of two-component adhesive:
- harmless composition;
- no odor;
- ease of work;
- does not contain water and is not dissolved by it;
- has good elasticity;
- does not lose strength over time;
- long period of viability of the prepared composition;
- the solution is suitable for gluing any materials.
When installing plywood with such glue, there is no need to sand it, because the sheets will not warp. If the room is flooded, the coating will not come off.
| Glue costs | Average retail price | Most popular brands |
| 1.2-1.5 kg/m² | 400 rub./kg | Zero% Ibola-R/200 Sipol Parketolit-1549 |
The use of alcohol composition.
The next candidate for gluing plywood to a screed is alcohol-based compounds and solvent-based analogues based on synthetic resins. This fixative is used on special soil, has a pungent odor, but dries quickly - the topcoat can be laid after 3-5 days. The material fills the void well and retains elasticity after drying.
However, solvent-based glue also has many disadvantages:
- strong pungent odor, harmful fumes;
- rapid grasping, which can be inconvenient to work with;
- the base needs to be kept for 24 hours for subsequent installation of the topcoat;
- Over time, the material may lose its adhesive qualities.
| Glue costs | Average retail price | Most popular brands | Primers used |
| 1.2-1.5 kg/m² | 300-400 rub./kg | Ibola-L/12 Aned-A/1 Artelit-RB/110 Stauf-WFR/300 | Ibola-LP Grund-A/15 Stauf-VDP/130 |
Dispersion composition.
Water-dispersion solutions based on acrylic and polyvinyl acetate are used with a special primer or mixed with water in a 1:1 ratio and used in this form as a primer.
This glue is absolutely environmentally safe and does not smell. However, it takes a very long time to dry; work on laying the finishing coating can begin only after 7-10 days.
In addition, dispersion adhesive has the following disadvantages:
- contains water, its influence bends the edges of the sheets, so they need to be sanded;
- moisture evaporates slowly through the plywood; when the finishing coating is laid on it, it may warp;
- glue cannot be used at low temperatures;
- after the sheets have been glued with your own hands, you must wait until all the water from the fixative has evaporated, only then can you begin laying the floors;
- water-dispersed compositions are not elastic; when the plywood sheet is shifted, it can come off.
The cheapest composition of this type is the Russian “Universal KS”. Its average price is 50 rubles per kilogram. Wooden plywood must be laid on it in sheets cut into four fragments. Then the coating must be additionally secured with dowels.
| Glue costs | Average retail price | Most popular brands | Primers used |
| 1-1.5 kg/m², which depends on the quality of the screed and its absorbency | 50-300 rub./kg | Stauf-M-2A/700 Povicol Stufex-P-90/E Uzin-MK/61 | Primer-D/Plus Stufex-PR/99 Stauf-VDP/130 |
- When unveneered and unsanded (NSh marking) plywood is used, any type of adhesive can be used. The main condition here is that the surface of the base must be clean and dry.
- For installation in interior spaces, you can use water-dispersed compounds, such as PVA glue, with the obligatory marking “for woodwork.”
- For exterior work, the instructions recommend using phenol or two-component compositions based on epoxy resin.
- For mating plywood sheets with metal surfaces, epoxy glue is also the best choice.
- Laminated plywood, labeled as FOF, has a top layer of film. In theory, it should not be used as subfloors. Its scope of application is the production of wooden furniture and cladding. However, if you decide to make a floor base out of it, first clean the sheets using medium-grain sandpaper.
Cutting and fitting plywood
Having decided on the appropriate grade and brand of plywood, go to a specialized store and buy the required amount of material. Setting the last indicator is quite simple: calculate the floor area and add about 5-10% for the margin.
Plan for cutting and fitting plywood
In accordance with approved technological standards, the size of a plywood sheet is 1.25 x 1.25 m. In the vast majority of cases, working with elements of this size when arranging a subfloor is inconvenient, so the plywood must first be sawn.
Cutting and fitting plywood
The best option is to cut into 4 squares measuring a little more than 600x600 mm. With such cutting, it will be possible to create the required number of damper joints that compensate for temperature and humidity deformations of the wood. At the same time, smaller elements are not as susceptible to the mentioned deformations compared to their larger counterparts.
For cutting plywood, it is preferable to use an electric jigsaw - this tool does not leave any chips or delaminations on high-quality material.
Place the cut material on the base for preliminary adjustment, without using glue or screws. This way you can adjust the elements to the floor area, taking into account existing niches, protrusions and other features of the room configuration.
Layout of sheets
Maintain 8-10mm joints between squares and 15-20mm gaps between deck edges and walls. Place the sheets like brickwork, i.e. with some offset of the rows to eliminate the possibility of four seams crossing at once in one place.
Having adjusted the elements to the area of the room, number them and photograph them or draw a diagram of the surface so as not to waste time on re-fitting when doing the job completely.
How to use?
After choosing and purchasing glue, you need to decide on the type of connection. The gluing technologies here will vary slightly in each specific case. Let's look at some of them.
Gluing sheets of plywood to each other
In this case, the plywood can be glued or spliced.
When gluing, a ledge is formed at the junction of two sheets. The joints are cleaned with sandpaper, dust is removed and degreased. Both sheets are coated with glue according to the instructions. If necessary, wait a while. Then the surfaces are tightly pressed together. If necessary, fasten with clamps or hardware until the adhesive dries.
Splicing is used in cases where the seams will not be subjected to serious loads in the future. The ends of the plywood are sanded and glue is applied. After joining, the seam is once again lubricated with adhesive and covered with fiberglass, after which it is compacted with a roller.
When the glue is completely dry, remove any excess. Fiberglass fabric is left to enhance the strength of the joint.
When splicing, you can use another method. The sheets are placed on top of each other, and a “mustache” is made with a jointer (their length is approximately equal to 10 sheet thicknesses) along the edge at an angle. Next comes grinding, degreasing the surfaces, and applying glue. The joints are compressed and secured with hardware or clamps until dry.
Gluing plywood to wallpaper
In this case, the best option would be to use moisture-resistant plywood. The usual one will need to be treated with drying oil and paint. When gluing wallpaper onto plywood, water-based and water-dispersion types of glue are used.
In this case, it will be difficult to create a perfectly flat surface. The joints of plywood sheets must be sanded, puttied, and then treated with epoxy or acrylic paint. Use masking tape along the edges of the sheets.
Pasting must be carried out taking into account the type of wallpaper.
Gluing foam rubber to plywood
Plywood is often used in furniture production. When gluing it to foam rubber, styrene or neoprene adhesives, as well as dispersion ones, are most often used.
Glue is applied with a gun or brush
It is important to adhere to the drying time of the glue, which is indicated in its instructions. Glue is applied to one of the surfaces, and the parts are pressed tightly against each other
When using some solutions, the surfaces, after compression, are ironed with a hot iron through the cloth.
Thus, a properly selected adhesive composition can significantly facilitate working with the material. Many experts also recommend priming the surface before gluing. Applying primer improves adhesion and reduces glue consumption.
You can learn how to properly glue two sheets of plywood with PVA glue from the video below.
Laying technology step by step
Installation of plywood on a screed under a parquet board is carried out in six steps. All operations are available for self-production. Minimum set of tools for this:
- markings - ruler, pencil, square, marker;
- cutting - hacksaw, hand-held circular saw, jigsaw;
- installation - spatula-comb with a tooth of 4 - 6 mm, hammer drill, screwdriver, hammer;
- sealing seams - a gun for sealant in tubes;
- finishing - an orbital, belt or vibration sander.
Usually all this tool is available in the arsenal of a home craftsman.
Preparing the base
Before laying plywood, the concrete screed must meet the following parameters:
- unevenness within 2 mm/m²;
- absence of dust, grease stains;
- humidity not higher than 4%;
- no cracks or delamination.
Treating the screed with deep penetration primer.
Before installation, the screed is vacuumed and thoroughly primed; it is advisable to do this the day before installation. When using a spatula with a tooth height of 6 mm to apply glue under the plywood in the following stages, the layer thickness will be a maximum of 3 mm. Therefore, irregularities larger than this size will remain unfilled.
Film screed test for moisture.
Humidity is checked using the standard method - for 12 hours, a piece of plastic film must be secured with tape around the perimeter of the screed for 12 hours. Work can only begin when there is no condensation under the film. Otherwise, the structure needs to be dried naturally additionally. Evenness is checked by the two-meter rule.
Cutting plywood sheets
At the slightest change in humidity in the room, the plywood begins to warp if it is rigidly screwed to the base. Therefore, laying this sheet material on concrete in large pieces is not allowed.
Depending on the size of the slab, you should use pieces with sides of about 60 - 70 cm. For example, a sheet of 122x122 cm cut into 4 parts will have a format of 61x61 cm. And for a sheet of 152.5x152.5, the pieces will have a size of 76.25x76.25 cm, respectively.
Installation of sheets
The prepared pieces of slab material must be glued, then additionally secured with dowel nails, taking into account the following requirements:
- the gap around the perimeter from the wall is 10 mm;
- seam width between sheets is 4 – 5 mm;
- displacement of transverse seams by 2/3 - 1/2 in adjacent rows.
Plywood layout diagram.
You can start gluing from any area, since you can walk on the rough plywood flooring right away.
Laying is carried out in rows, so before installing the first sheet, a line is drawn along its outer edge along the wall.
Then, using a notched trowel, glue is applied to the screed for one sheet of plywood or for a whole row, depending on the qualifications of the home craftsman.
Next, plywood is laid, the distance between its edge and the wall is 10 mm.
Installation of the first sheets.
Rows of holes are drilled for dowel-nails with a pitch of about 200 mm between them and between hardware in the rows. Under the fastener heads, a countersink is first performed to 1/4 of the thickness of the sheet material.
Fastening plywood with dowels and nails.
Less commonly used are self-tapping screws with a wide head and dowels without a flange at the top. This option is cheaper, but the labor intensity of the work increases.
The parallelism of the outer edge of all other slabs in the same row is controlled by the 2 - 3 m rule.
The heads of the self-tapping screws are recessed into the countersunk holes with a special punch.
Recessing nail heads into plywood.
Then the entire area of the room is filled with pieces of plywood of the same thickness using the same technology. The technique is described in more detail in the video below:
Putty of self-tapping screw heads
To smooth the base layer for laying block parquet, wood putty is used.
Two-component epoxy compounds are not economically viable for these purposes. And gypsum plaster and putty mixtures on wood are not used, in principle, as they conflict and are destroyed after just a week of use. You can mix small sawdust with PVA glue yourself to solve this problem.
Only the heads of the dowels and nails are sealed with putty, but not the longitudinal-transverse seams between the plywood slabs.
Sealing seams
On the one hand, the seams act as a compensation gap. That is, they cannot be filled with hard material - grouts, putties. On the other hand, leaving them empty is also a wrong decision. Since they will appear under the linoleum, after a couple of months, an uneven subfloor will cause accelerated wear of the carpet, laminate, and parquet.
Taking into account the seam spacing of 60 - 70 cm, the locks in the laminate will gradually break out, and individual planks in the parquet carpet will warp. Therefore, the seams are filled with inexpensive sealant. You can use a “liquid plug,” but this option costs at least two and a half times more.
Acrylic sealant for wood.
The cheapest is acrylic sealant, which is also considered the safest from the point of view of environmentalists. The composition is ideal for wood; it is usually used to seal the crowns of log houses. To reduce the consumption of sealant in the cracks, you can first lay a special cord for log houses.
You can use damper tape or sealant around the perimeter of the walls. In the first case, the tape must be secured to the walls before laying the first sheet.
