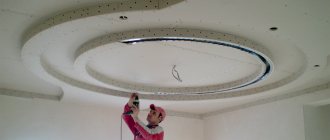
Drywall is a finishing material that makes it easy to achieve a smooth ceiling surface. GCR is used both in city apartments and in wooden houses, on different types of floors. Depending on the situation, use one or another method of fastening the sheets. In this article we will tell you what the choice depends on and give step-by-step instructions for installation using different methods.
Attaching drywall to the ceiling
Installing drywall on the ceiling is one of the most labor-intensive types of finishing work. Therefore, in order to eliminate errors and minimize the cost of materials and time, you should carefully mark the ceiling and prepare the necessary tools and materials. Immediately before attaching the drywall to the ceiling, check everything again, since errors made during the installation process are either very difficult or even impossible to eliminate.
Options for the supporting frame
Working with plasterboard slabs involves three options for attaching the slabs to the base:
- using adhesives;
- on a wooden frame;
- on a metal profile.
Each method has its own advantages, but is only suitable for certain conditions.
Installation with glue reduces the height of the room the least, but requires that the ceiling surface have high strength and evenness. Using glue, unevenness of no more than 1 - 1.5 cm is eliminated. It is impossible to install slabs on plastered ceilings using the adhesive method, since gypsum board has a decent weight and can come off along with the plaster. Also, with this installation it is impossible to install spotlights.
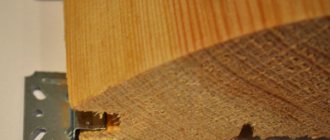
A wooden frame for attaching drywall to the ceiling is suitable only in rooms with a small area and constant temperature and low humidity. Wood changes its linear dimensions greatly with fluctuations in temperature and humidity, so with a high degree of probability the installed ceiling will become covered with cracks.
It is much better to attach plasterboard to the ceiling using special metal profiles, which allow you to create multi-level surfaces at any height from the ceiling. Strength, lightness and ease of fastening bring the metal profile to a leading position among materials for making load-bearing frames.
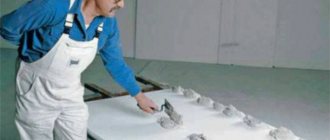
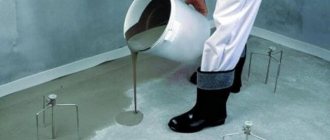
Glue mounting
Drywall is glued to the ceiling using mastic - a reliable and inexpensive adhesive material. You can buy special glue “Perlfix”.
- Creamy glue is applied to the surface of the sheet with a spatula.
- Drywall is applied to the ceiling and pressed. To create a tight connection, holders are used.
Important! The sheets are staggered so that adjacent seams do not coincide.
- The horizontality of the sheet surface is checked with a level; if necessary, the position of the drywall is corrected with a rubberized hammer.
Near windows and doors, glue is applied to the entire surface of the sheet.
You can glue any drywall; for rooms with high humidity, choose a moisture-resistant material. It is necessary to distinguish between ceiling and wall plasterboard: sheets for ceilings are thinner, they are lighter and more convenient to attach.
Materials and tools
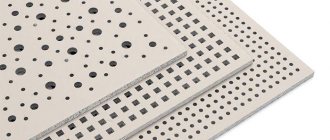
The main material for installing ceilings is 9.5 mm thick ceiling plasterboard. The thicker one has a lot of weight, and the thinner one is arched and has a small thickness. Both require the installation of additional profiles to reduce the load on the frame or reduce the likelihood of deflections.
The following materials will be needed:
- guide profile PNP or UD with dimensions 27×28 mm;
- supporting profile PP or CD with dimensions 7×60 mm;
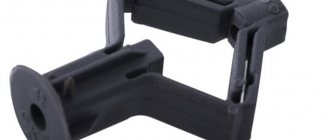
- hangers for attaching load-bearing profiles to the ceiling (butterflies);
- dowels or self-tapping screws for attaching the UD profile to the wall and suspensions to the ceiling (depending on the design of the walls and ceilings);
- cross-shaped connectors for joining transverse load-bearing profiles or for extending the profile for a long room;
- self-tapping screws for connecting profiles to each other, attaching to hangers or crabs (the so-called bugs or fleas);
- self-tapping screws for attaching gypsum boards to the frame, 20–25 mm long.
You will also need quite a lot of tools and equipment:
- a screwdriver or drill with variable speed control to screw the drywall to the ceiling;
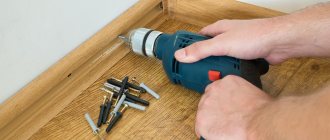
- a hammer drill or impact drill for drilling holes for dowels;
- water or laser level;
- marking cord;
- stepladder or platform;
- supports to hold the slabs during installation;
- Phillips screwdriver;
- metal scissors for cutting profiles;
- a long cord to control the evenness of the installation of supporting profiles.
Tips and tricks
To hang drywall yourself, you should consider some nuances:
- Everything needs to be thought through in detail; you can’t rush.
- The chosen tool is extremely light.
- The manufactured stops must be assembled rigidly, without loose parts.
- The main thing is to securely fasten the main part, since it bears the main weight.
- If fatigue occurs, work should be postponed, otherwise there is a high risk of not only damage to the material, but also health problems.
Although it is not easy to screw or glue gypsum boards alone, following the technology and recommendations makes it possible to achieve a high-quality result.
Marking and installation of the supporting frame
Marking for fastening the frame begins with determining the installation level of the guide profiles. To do this, on the walls, starting from any corner, using a water or laser level, marks are transferred to the remaining corners. Then, using a marking cord, mark a control line along the entire perimeter.
If it is not intended to install spotlights and it is necessary to reduce the height of the room to a minimum, then the supporting profiles can be mounted at a distance of about 30 mm from the lowest point of the ceiling. Most tips boil down to finding this lowest point and moving it to the nearest wall and then knocking the level off from there. But nowhere does it say how to do this.
It is much easier to mark a temporary horizontal line around the perimeter at a distance of 20 - 25 cm from the ceiling. By pulling the cord between any points on opposite walls, you can quickly find the lower level of the ceiling and move the temporary horizontal line to any value.
To attach the hangers, markings are also required. Here you need to proceed from the size of the slabs and the width of the walls. It may happen that you need to fasten a strip of sheet less than 20 - 25 cm wide. This is not advisable. It is better to cut plasterboard sheets symmetrically from opposite walls, ensuring that the minimum width of the attached strip is at least 25 cm.
The position of the profiles relative to the slabs may be different. It is most practical to lay the sheets so that the supporting profiles run across the gypsum board at a distance of 50 cm (for sheets 2.5 m long).
Manufacturers of plasterboard boards do not recommend attaching gypsum boards to the ceiling to guide profiles; therefore, for these purposes, load-bearing supports are laid next to the guide profiles at a distance of no more than 150 mm.
Between the laid profiles, jumpers are installed at a distance of half the width of the gypsum board. The connection of the jumpers is done using crabs.
Suspended ceiling manufacturing technique
A novice craftsman without experience who does the work with his own hands is recommended to carefully familiarize himself with each stage of decorating the ceiling space with sheets of plasterboard.
Marking
After preparing the room, markings are carried out:
- Using any type of level, draw a straight horizontal line on the wall below the ceiling. If everything is done correctly, then the lines will exactly meet at one point.
- Mark the grid on the ceiling. Work begins from the center of the building base, moving towards the walls. Draw squares measuring 0.5x0.5 or 0.6x0.6 m. Such a grid will allow you to correctly fix the profiles and avoid sagging of the drywall sheets.
- On the base, the places where utility lines will be laid are marked. Hatches are installed in these areas so that in the event of a breakdown the entire structure does not have to be dismantled.
- Focusing on the level line, mark the ceiling height. For a standard design, 50 mm is measured from the ceiling line. Markings are made along the entire perimeter of the room. Next, focusing on the level, draw a horizontal line so that the two markings run parallel to each other. You can ignore the marks on the wall. Installation of built-in lamps requires increasing the size of the suspended ceiling to 60-70 mm. If there are large communications, the ceiling is lowered to a level of 150-250 mm.
Frame installation
Before installing the frame, it is recommended to apply putty to the joints and seams. The gaps between the wall and the ceiling are sealed with sealant. After this, an antiseptic is applied to the building base. Such manipulations will prevent the emergence of an aggressive biological environment, and will also help get rid of existing mold and mildew. Next, install the frame:
- on the ceiling, according to the markings, make holes for dowels for suspensions and fix them with a hammer;
- hangers are mounted using self-tapping screws;
- Profiles are attached to the material and connected to each other with special crabs.
If the work is done correctly, the structure will be securely fixed to the ceiling. If some parts or the entire structure is wobbly, it is recommended to redo the frame.
Fixing drywall
It is very difficult to install drywall on the ceiling alone. To cope with this work, it is recommended to use the services of an assistant. If it is not possible to involve third parties in the installation of the material, you can use the following options:
- Buy a lift. This device lifts the sheets to the desired height, after which the material is manually fixed to the profiles. The advantage of this method is the ease of installation of drywall. The disadvantage is the high cost of the mechanism. It is not advisable to purchase the device for one-time use. The device is usually used by professional craftsmen. For one-time use, it is recommended to rent a lift.
- Build a T-shaped structure from wooden blocks, up to the height of the profiles. This design will securely hold the drywall sheets, which will facilitate installation. The disadvantage is that it is difficult to independently raise the material to the desired level.
Direct installation of drywall is done as follows:
- The sheet is placed with the short side along the short wall at a distance of 2 mm from the base. The long side is located in the middle of the central axial profile. After this, the material is fixed to the frame using self-tapping screws. The distance between the fastenings should be 15-20 cm. The sheet is fixed with self-tapping screws to both longitudinal and transverse jumpers. All screws should “sink” into the drywall by 1 mm.
- The next sheet with the short side is applied to the short side of the fixed material. After this, the drywall is also secured using self-tapping screws. The manipulation is carried out to the end of the ceiling so that the material is fixed on one network line. A piece of the required length is cut from the last sheet. The material is attached with the factory side to the installed drywall and the cut side to the wall.
- Fastening the next row begins from the opposite short wall of the room. This must be done so that the joining seams do not match. In other words, the design is performed in a checkerboard pattern.
Rough finish
Immediately after installing drywall, the surface is not decorated. Even such smooth material needs preparation for the finishing coating. Masking of joining seams and screw heads is required. Rough finishing is done like this:
- the fastener heads are sealed with putty - one stroke with a spatula is enough to hide imperfections;
- Serpyanka is fixed to the joining seams - for ease of work it is recommended to use tape with an adhesive surface;
- a thin layer of putty is applied to the reinforcing mesh;
- take a break to let the solution dry - the drying time of the composition is indicated on the packaging;
- the putty is treated with sandpaper to get rid of traces of the spatula;
- the surface is cleared of dust and treated with a primer - the primer is applied in two layers, taking a break between them to allow the composition to dry.
Installation of lamps
The design of the ceiling space will be incomplete without installing a lighting fixture. Traditionally, chandeliers are used in houses and apartments. They can be attached to a suspended ceiling using two methods. If the device weighs up to 20 kg, then proceed as follows:
- at the surface preparation stage, in the place where the chandelier will be located, fix a piece of round or square plywood, the thickness of which is at least 2 cm, and the dimensions are 250x250 mm;
- a hook with a thick screw thread is fixed on the prepared area;
- on the sheet of drywall on which the chandelier will be located, make a hole for the hook;
- the lighting device is fixed to the mount;
- if the chandelier is not hung on a hook, then it is screwed to the plywood using a self-tapping screw directly through a sheet of drywall; the main thing is to choose a fastener of the appropriate size.
Lighting fixtures weighing 20 kg or more are fixed directly to the concrete building base. If the height of the stretch ceiling exceeds 150 mm, then the area for fixing the chandelier is prepared in advance before installing the drywall. If the size is less than 150 mm, then the place for hanging the lighting fixture can be prepared after installation of the material.
A chandelier weighing more than 20 kg is suspended from the ceiling as follows:
- in the sheet of plasterboard where the chandelier will be placed, make a round hole with a diameter of 50 mm;
- using a hammer drill, drill a hole in the ceiling 80 mm deep;
- An expansion anchor is fixed to a hook with a diameter of 8 mm;
- the device is inserted into the hole, wrapped and driven in with a hammer to ensure secure fixation.
After the completed manipulations and decorative finishing, the chandelier is hung.
How to hang a chandelier on a concrete ceiling, mounting methods.
If a light chandelier is used to illuminate the room, then such complex actions need not be performed. The only device that is required in this case is an expanding anchor. A round hole is made in the place where the chandelier is attached to the drywall. Its diameter should not exceed 8 mm. Next, the anchor is healed and placed inside the structure through the hole made. After this, the device should open and the edges of the anchor rest on the sheet of drywall. Next, the nut is tightened and the lighting fixture is fixed, but only after decorating the surface.
Decorative works
After completing the rough finishing, they move on to decorating the drywall. Professionals recommend painting or wallpapering. You can also fix decorative PVC tiles, but this will further reduce the ceiling space. Professionals do not recommend using decorative plaster for application to drywall. The solution is prepared using water, which has a detrimental effect on the material. For this reason, it is recommended to refrain from using decorative plaster.
Installation of plasterboard boards
Attaching the slabs to the frame is best done by two people, but if you have supports and some experience, you can do it alone.
The slabs are laid so that the edges are in the middle of the profile and there is a gap of 3–4 mm between adjacent slabs. In adjacent rows, the sheets are placed staggered so that the seams do not end up on the same line. Along the long sides of the gypsum board there is usually a chamfer or thinning for easy sealing of seams. For the same purpose, you also need to chamfer the ends with a special plane or mounting knife. The chamfers are removed while the slabs are not yet secured.
The gypsum boards are fastened to the ceiling using self-tapping screws with a pitch of no more than 155 mm. The screws should be located at a distance of 20 mm from the edge of the sheet. The heads of the screws must be completely recessed into the surface, but must not break through the paper layer. If this happens, then the screw must be screwed into another, undamaged place. To avoid defects in work, you should not use the screwdriver at maximum speed. You need to experimentally determine the required friction clutch force, or it is better to use an attachment with a special skirt that does not allow the screw to be deepened beyond a certain value. The protrusions of the nozzle should be smooth, without wear. Otherwise, the self-tapping screw will not hold tightly and will often break off.
Before attaching plasterboard to the ceiling, be sure to check the correctness of the electrical wiring and mark the places where lamps will be installed in the future.
We glue gypsum plasterboard onto less even walls
Scheme for leveling a wall with plasterboard.
To glue drywall to a brick wall that is not level, you will need a thicker layer of adhesive. Note that the preparatory work will be the same as in the previous case, that is, the walls are grooved for wires, holes for sockets and switches are drilled, and the walls are primed.
In this case, you should use a different glue - Perlfix is most often used. In this case, the glue is applied in a different way. It should be applied using a regular trowel (or use a trowel) in slaps across the entire sheet of plasterboard with a distance of approximately 250mm between slats. In addition, glue can be applied not over the entire sheet, but along the perimeter and in the middle of the sheet, as in the previous case. In this case, the distance between the slats should be approximately 250 mm around the perimeter, and along the middle of the sheet it is advisable to make two rows of such slats with an interval of 500 mm from each other. The distance between the flip flops should be approximately 300 mm. Next, just as in the previous case, the sheet is placed on linings and leveled using a rule or level, and then pressed down. After the glue has hardened, the pads are removed.
Related article: Rubber, nitro, silver and hammer paint on metal for metal structures and interior work
Common Mistakes
The most common mistake when installing drywall is incorrect calculations and markings, when a section of several centimeters wide remains.
The second mistake is attaching the sheets directly to the guide profile. Firstly, the fastening is obtained at the very edge of the sheet, where it will crumble, and secondly, the rigid adhesion of the ceiling to the partitions and walls can lead to cracks due to temperature changes. It is better to attach gypsum boards to profiles that are laid in close proximity to the guides.
Source: mrgipsokarton.ru
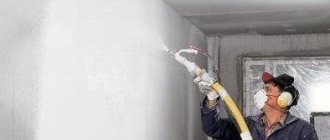
Instructions for fixing plaster
Frame method
This is the most popular way.
It is successfully used to level surfaces of various types, improve sound and insulate rooms, since an additional air cushion will appear between the frame and the wall, which is filled with insulation material.
A very big positive quality of this method is the absence of requirements for surface preparation. This makes it possible to save not only time, but also money.
As a frame, either a zinc profile or wooden slats are selected. The latter are inferior due to the tendency to deform under conditions of changes in moisture and temperature.
Metal profiles are available in the following options:
- Ceiling (PP, CD) size 60x27 mm;
- Ceiling guide (PN, UD) size 28x27 mm;
- Guide for racks (PN, UW) with dimensions 50x40, 75x40, 100x40 millimeters;
- Partition rack (PS, CW) sizes 50x50, 75x50, 100x50 mm.
For connecting profiles to each other along the length and at right angles, there are straight and adjustable hangers, corner-protecting profiles and crabs.
Important! The name “Profile for the ceiling” does not indicate the specialized focus of this material only for the ceiling surface. On the contrary, it is a very multifunctional option.
The ceiling guide (UD) and the ceiling carrier (CD) are very popular. They are used to make lathing on the surface of walls, arches and other frame systems.
Partitions in the middle of the room are usually built from a guide profile (UW) and a rack profile (CW). Their thickness is selected based on the desired thickness for the partition.
Assembling a metal frame
Installation of a frame made of metal profiles will require the following materials from you:
- screwdriver;
- perforator;
- scissors intended for cutting metal;
- spatula for puttying surfaces finished with plasterboard sheets;
- gypsum fiber sheets and iron profiles for them;
- hangers, self-drilling screws
, dowels and screws.
Framework development steps
- Measurements are taken and markings are made for the installation of hangers and the profile itself;
The guide profile is attached as follows: the top one is installed to the ceiling, the bottom one to the floor surface, the side ones to the wall. We purchase a frame along the perimeter of the surface to be coated;
- The load-bearing component is attached to the guide profile with increments of no more than 40cm. The fasteners are made to the wall using plumb lines in increments of 80 cm;
- The frame is attached to the ceiling and to the floor surface using self-tapping screws and dowels;
Don't forget to check the level of the structure.
When the frame is finished, you can begin insulation and sound insulation. Insulation material is placed in the grooves of the frame. The gypsum board is installed on the frame itself using screws no longer than 25 mm.
Self-drilling screws must enter 2 mm into the gypsum board .
All joints of the resulting structure are plastered. You can simply apply a not very large layer of putty and wait until it dries to remove the residue with sanding paper.
Frameless method of attaching plaster (without profiles)
This method is a little easier to use than the one described above.
But we use it in variants of a very flat surface - a base, without any damage from scratches, mold and without any coating (varnishes, paints, wallpaper).
Tools for the frameless method
- spatula and putty;
- gypsum-based dry mixture and gypsum fiber sheets themselves;
- jigsaw, construction knife, rubber hammer, level, thread or fishing line, tape measure and pencil.
Fastening method
- Take measurements of the prepared surface and, according to them, cut the gypsum fiber sheets into some parts.
The material is often cut with an ordinary construction knife. First, make a cut from the front side and, with effort, break the sheet along the cut line. But the curly parts will have to be cut out with a jigsaw.
This option allows seams between gypsum fiber sheets of 5-7 mm, a distance from the floor of 5 mm, and from the surface of the ceiling no more than 10 mm. All of them must be covered with plinth or putty.
Combined method of fastening gypsum boards
There are other mounting options; for example, a rather original way of fixing gypsum boards using polyurethane foam. In this way, you can glue drywall not only to the ceiling, but also to the walls. First the surface is leveled; Ideally, it would be a good idea to treat it with a primer. Next, the drywall is placed against the surface and holes are drilled through it at equal distances in about 10 places.
Now you need to remove the sheet and glue several strips of foam rubber onto it on the back side, approximately 10 cm from the drilled holes. The foam rubber will act as a spring for more convenient adjustment of the horizontality of the sheet. Next, the sheet must be screwed into place again, but through washers (so that the foam is not squeezed out). Next to each screw, you need to drill a hole with a diameter equal to the diameter of the nozzle tube of the spray can with mounting foam (5-6 mm). It needs to be pumped in so much that the contact spot is 10-15 cm in size. Now you can, if necessary, adjust the horizontality of the sheet. The next day you can unscrew the screws, remove the washers and screw the screws back in.
Tricks
For attaching plaster to the ceiling
When working with gypsum fiber sheets on the ceiling surface, it is better to have an assistant. It will be quite tiring to do it alone. You can, of course, make very small scraps of material, but at the end there will be a lot of seams that will need to be puttied and they still won’t add beauty.
Advice! An assistant can be equipped with a tool like a long mop, thanks to which he will hold the plasterboard
then you will screw it to the frame.
The key installer, being under the surface of the ceiling, takes one edge of the facing slab from the assistant. At the same time, the assistant begins to understand the edge of the slab until the mop fits between the sheet and the hammer and then, with the help of the latter, the entire sheet is pressed against the ceiling frame.
How to avoid cracks in seams
The main rule is: the edges of two adjacent sheets are first fixed in the same profile.
However, if the design involves the presence of joints at an angle, and not straight, then attaching two sheets to a common profile is unrealistic.
Here the appearance of cracks can be avoided only by strengthening.
For the construction of the partition
A lane for passing the partition is planned. Its perpendicularity is investigated. According to the set markings, a guide with a damper tape underneath is installed.
Advice! As a damper tape, you can also use cut strips of foam type polyethylene from 3 to 4 mm in thickness.
Racks that are 3-5 mm short relative to the height of the room are placed in the guides with the same pitch. Their strict verticality is examined once again.
The racks are fixed to the guides with screws. There should be two screws at each connection.
If the partition being built must have greater strength characteristics, select thicker parts for constructing the frame. From 75 to 100 mm. Also, placing wooden blocks with a cross section of 50x50 mm into the racks and connecting the U-shaped profiles of the racks in pairs will help improve reliability.
If there must be a door or other opening in the partition, then it must be provided at the stage of construction of the frame.
Drywall with Perlfix glue to the ceiling
Source: pos-art.ru
How to attach drywall to a wall without a profile quickly and securely
When carrying out modern renovations, you cannot do without the use of drywall. This material has a wide range of applications and a number of serious technical advantages.
It is used in installing suspended ceilings, installing interior partitions and leveling walls. And in the vast majority of cases, it is customary to strengthen plasterboard sheets onto the sheathing structure, which allows you to level the walls, lay insulation and sound insulation, and achieve structural reliability.
Fastening drywall without a profile is one of the main options for installing this material.
However, in some cases, the lathing simply cannot be installed, and then installation of drywall without profiles is used, which is a faster and more economical option for carrying out the work. We will talk about how to level a wall with plasterboard without a profile with your own hands in this article.
Fastening drywall
Drywall is one of the most popular materials of our time. It is a layer of gypsum located between two cardboard sheets. This structure allows this material to be strong, easy to use, durable and inexpensive, because the price/quality ratio in this case reaches a real balance.
How to attach drywall to the ceiling with your own hands?
In this article, we will pay attention to just one aspect of the use of gypsum boards and consider how to attach drywall to the ceiling, on a base made of a metal profile.
Although plasterboard sheets (GKL) were invented at the end of the 19th century, they began to be widely used in our country relatively recently. The advantage of this finishing material is that you can work with it at any temperature and get very impressive final results. The material is very easy to process and very multifunctional. The material is especially good for interior decoration of walls and ceilings. Ceiling structures made of gypsum plasterboard are distinguished by their regular shape and complex geometry.
Although, on a flat base, it is possible to install gypsum plasterboard coverings by directly gluing cardboard to the surface, the main method of fastening is frame-based, which involves creating a base of metal or wood.
Why drywall
Plasterboard ceilings have long been widespread in interior decoration due to the following advantages:
- used to create even and smooth surfaces;
- mask wiring and communications;
- have heat and sound insulation;
- suitable for finishing any room, regardless of operating conditions and humidity level. The main thing is to choose the appropriate gypsum board marking;
- mounted in different ways - on a frame base or special binders;
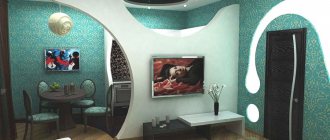
- with the help of drywall it will be possible to implement even the most complex design projects - multi-tiered structures, niches, arches, bends, any shapes, etc.
Ceiling markings
Even with very high-quality materials, the final result may not be very good if gross mistakes are made at the initial stage of the work. We are talking about correctly executed markings for mounting the frame. Errors that were made during marking are no longer possible or almost impossible to eliminate at the stage of attaching drywall to the ceiling. The solution in such a situation may be that the frame will have to be re-assembled. Therefore, if you do not want to waste time, effort and money, it is better to do everything right right away.
When marking, you will need to perform a number of steps:
- We make a decision regarding the installation of spotlights on the future structure. This moment significantly affects the height of the ceiling. If the installation of lamps is not planned, the coating can be mounted as close as possible to the base base;
- we determine the place that is most down, thus determining the lowest point of the surface. The level of this point is transferred to all corners and marked. Next, be sure to step back at least 3 cm from the level of the lowest point in order to leave room for the frame profile;
- We connect all corner marks with a solid line, applied using a chokeline (cord painted with blue or colored chalk), as a result a closed contour should be formed without differences in the height of the marking lines. A mismatch of lines is unacceptable, as this will lead to skew of the entire structure. The line on the wall indicates the location of the plane level of the future plasterboard structure;
- on two opposite sides we place marks at a distance of 40 or 60 cm. They must be symmetrical. Next, a solid line is struck between the marks with a chockline, along which metal hangers will later be placed to secure the load-bearing elements of the structure.
Installation of a frame structure made of metal profiles
Work on the manufacture of the frame begins with attaching the UD guide profile to the walls along the entire perimeter of the room, which must be located exactly above the marking line. Let's list what will need to be done to create a full-fledged frame base:
- We mount the UD profile in increments of approximately 50-60 cm. For this purpose, you will need plastic dowels and screws no shorter than 40 mm. If the walls are loose, the length of dowels and screws can reach 60-100 mm.
- We attach metal hangers along the ceiling marking line. To avoid sagging of the structure, it is advisable to use internal holes for attaching hangers, and not those located on the ears. Each suspension is fixed with two self-tapping screws.
- We cut the wall profile to the required length and insert it inside the CD supporting profile. The middle of the profile should be located exactly below the marking line. All inserted CD profiles can be slightly raised above the marking line and temporarily secured in this position with hangers bent down. This step will avoid the pressure of individual profiles on the thread, which is stretched across.
- If the length of the room is significant, it is better to pull the transverse thread in 2-3 places, at the same distance, thereby avoiding mistakes when fixing the load-bearing elements.
- We bend the hangers down and one by one, exactly above the thread, fasten the CD profile to the hangers, using at least 2 “bug” (“flea”) screws on each side.
- If the installation of lamps is planned, then the electrical wires are laid out to the places where they exit from the ceiling.
Attaching drywall to the ceiling
The work of attaching plasterboard sheets requires serious physical effort, so it would be a good idea to think about how to lift the material to the ceiling with the least amount of effort and, if possible, enlist the help of at least one worker.
Even without experience in installation work, it is not so difficult to understand how to attach gypsum boards. It is more difficult to understand some of the intricacies of the installation process. In the process of fastening drywall, you will need to take into account some tips and perform the following operations:
- To mount one gypsum board, at least 60 metal screws with a length of at least 25 mm are required. The screw fastening pitch is 15-20 cm;
- To perform technologically correct work on fastening gypsum boards, you need to use a limiter equipped with an attachment that does not allow screws to be screwed too deeply into the slab, which weakens the strength of the fastening;
- It is most convenient to start attaching sheets from the corners of the room;
- the sheets must be spaced apart;
- there is no need to achieve very tight joining of the gypsum boards with each other. Small gaps between the canvases will later be filled with a special putty mixture of increased strength;
- Before attaching the cardboard to the ceiling, you need to figure out where the front side of the sheet is. It is usually lighter in color and has special recesses along the edges for applying putty;
- Also, before screwing the covering to the ceiling, it is advisable to chamfer the short sides of the sheets that do not have special recesses. The chamfer angle should be approximately 45°. If this procedure is not done in advance, then after installation is completed it will be much more difficult to do;
- To attach the gypsum boards, you will need to cut out special inserts from the CD profile along the short sides and place them between the load-bearing elements on the side surface of the slabs. To do this, you can use special connecting elements - “crabs”, which provide a strong joint. The insert is installed parallel to the side of the sheet and is inserted halfway under the sheet, and the second half of the profile will be used to install the next sheet.
The main stages of finishing a plasterboard ceiling
Having figured out how the drywall is attached to the ceiling, you need to move on to the next, no less important stage of work - finishing. How to make a plasterboard ceiling? Finishing work begins with the surface of the installed slabs being thoroughly primed. All self-tapping screws are also checked for quality of screwing. If you find self-tapping screws protruding above the surface of the plasterboard, they need to be tightened, either with a screwdriver or a Phillips screwdriver.
The screw caps must be filled in advance with strong putty. Next, you can seal the tile joints using a serpyanka mesh, placed along the entire seam directly on a fresh layer of putty and carefully smooth it on top with a spatula, so that the layer of putty does not protrude below the level of the slabs.
Note: After the seams have hardened, you can apply another layer of the mixture to completely level out all minor defects.
Now you can start filling the entire surface of the ceiling with putty that is ready for use. It is advisable to apply it in two layers with a break for the first to dry.
These are, perhaps, all the main points that allow you to understand how to secure the material to the coating in the best way. Let us emphasize once again that mounting gypsum boards on a frame is much more reliable than simply gluing cardboard to the surface. When gluing, you will not know how the base will behave over time and what to do if cracks appear. Solving issues related to the operation of a suspended structure is much easier, since it is not fully connected to the base.
Find out in more detail about how you can attach drywall from materials posted on the Internet or by watching the progress of the work of master finishers in the video below.
What is the best drywall adhesive to use?
Among the many building materials intended for wall finishing, plasterboard is the most widely used. It is environmentally friendly, as it consists of natural ingredients (gypsum and cardboard). In addition, gypsum boards allow you to achieve a finish that was previously beyond the capabilities of even the most qualified specialists. After installing the sheets, the surface becomes perfectly flat and ready for further work without first eliminating height differences. The material is in good contact with various types of finishes. But to do this, you need to choose the right adhesive for drywall, which will ensure maximum adhesion of the surface to the finishing components.