"Ceiling plinth"
Ceiling plinth is a wonderful finishing material that masks all errors and irregularities at the ceiling-wall boundary. It is also called a cornice, baguette, border or fillet. Most often, skirting boards are made of polyurethane, polystyrene foam and polystyrene foam.
The installation of these elements is the final, final note in your work. You don't know how to fix the ceiling plinth? No problem! Please read these instructions carefully and repeat each step yourself.
Master class: DIY plinth installation
Let's look in detail at how to properly glue ceiling plinths - plastic and foam.
How to attach foam ceiling plinth
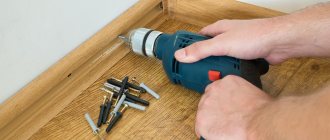
Prime the area on the ceiling to which the fillet will be attached with a strip slightly larger than its width. To do this, it is recommended to make markings using a measure corresponding to the size of the fillet. Marking lines are drawn in increments of 30 cm.
How to get a mark on the ceiling surface
Next, adjust the internal corners. Place the plinth in a corner and draw a 6–7 cm line along it on the ceiling. The same is repeated on the other side of the corner. Applying two plinths at the same time, mark the intersection point on them.
Adjusting corners: marks on the baseboard
Lay the plank with the side adjacent to the ceiling on a flat surface and cut it along a conventional line.
Trimming the baseboard
Acrylic sealant works well for gluing. It is applied to the fillet using a gun and pressed for gluing to the main surface, following the previously made marks.
The plinth is installed when gluing according to the marks made
After installation, excess squeezed out adhesive can be easily removed with a damp cloth or just your finger.
Transverse joints must be puttied. Seams can be sealed with acrylic putty. It is applied using a rubber spatula in three layers, after which it is sanded.
Preparing for painting after installing the cornice
The work is completed by decorating the foam baguettes, for example, by painting them in the appropriate color.
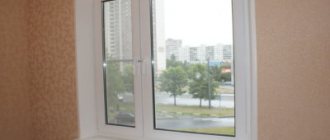
How to attach PVC ceiling plinth
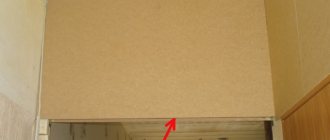
Today, plastic hanging panels are very popular, and, as a rule, the joints of walls and ceilings are decorated with plastic skirting boards.
Joint location after installation of PVC panels
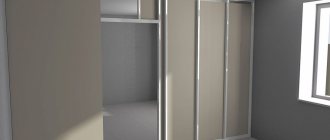
The edges of the sheathing on which the panels were attached are secured to prevent them from sagging under the weight of the fillet and their own weight after installation. The plinth is attached to the last of them.
Fastening the sheathing
Baguettes must be trimmed at 45 degrees in advance. Plastic cuts easily, so trimming can be done with a hacksaw, knife or scissors.
Methods for cutting PVC skirting boards
The edge of the panel is inserted into the groove of the baguette and adjusted using tapping movements.
Installation of skirting boards
In the corners, the fillets fit tightly to each other.
Panel fitting
The joints in the corners can be decorated with special plastic corners or simply treated with silicone.
Beautiful frame of a plastic suspended ceiling
"Types of skirting boards"
It is necessary to take into account that in a large room with high ceilings, the use of a small plinth may not look very beautiful, and the element itself may simply “dissolve” in the interior of the room. To ensure a certain harmony, use the ratios suggested in the table.
| Approximate proportional matching table height of the ceiling plinth and room dimensions | |||
| Room area | Room height | ||
| 2.5 m | 2.7 m | 3.0 m | |
| up to 15 sq. m. | up to 9cm | up to 10 cm | 10-15 cm |
| 15-23 sq. m. | up to 9cm | 9-14 cm | 15-21 cm |
| from 23 sq. m. | up to 9cm | 15-21 cm | 15-21 cm |
For example. For a room with a height of 2.7 m and an area of 20 sq.
m. The recommended height of the plinth is 9-14 cm. You can take a value of 12 cm.
How to choose a plinth
Before you go to the store for fillets, you need to decide what exactly we need, what quality and what material. You also need to calculate the number of fillets. Remember that you need to add 1 - 2 linear meters just in case, which you will need to take with a reserve, so that later you don’t have to go to the store to buy more if there is not enough.
To purchase a ceiling plinth you need to know:
- The width of the plinth, which must be selected to match the height of your ceiling. The standard width should be on average 45 mm.
- If you don’t want to constantly clean the baseboards from dust and dirt, then buy less textured ones.
- You need to buy fillets made of foamed PVC or polyvinyl chloride. They are a little more expensive, but they retain their shape and do not turn yellow, unlike polystyrene baseboards.
“Cutting skirting boards using a miter box and a hacksaw”
Cut off the baseboard. Cut off the front part if the corner to be pasted is internal.
Cut off the back of the fillet if the corner is external. What to do if the angles are not right? Set the miter box aside; you won't need it.
First, place the first baseboard against the wall on one side of the corner. Draw pencil lines along the sides all the way to the corner.
We got two straight lines. Take the second baseboard and attach it to the adjacent wall. Draw two more straight lines along the sides with a pencil.
How to attach a ceiling plinth: instructions for self-installation
Without finishing the ceiling with plinth, any wallpaper, even the most expensive, will lose its intended effect, and the wall will look unfinished. If the design elements are not secured carefully, then the entire design of the room will be ruined - this is immediately noticeable. Therefore, you need to know how to attach the ceiling plinth correctly.
How to attach a ceiling plinth
Few people are aware that there are not only rigid skirting boards of various sizes, relief and section shapes, but also flexible ones, which cannot be avoided when decorating columns or rounded ceiling shapes, especially if a multi-level suspended structure is created.
Types of ceiling plinths
This interior design element can be made of different materials, such as polystyrene foam, plaster and polyurethane.
Ceiling plinths made of natural gypsum are heavy and even pose a certain danger
- Once upon a time, gypsum was probably the only material for making ceiling stucco. With all its advantages, when it hardens, it becomes quite heavy, but at the same time, fragile, and can easily break if dropped even from a small height. In addition, a poorly secured gypsum ceiling plinth becomes simply dangerous for the residents of the house. Therefore, recently it has been used extremely rarely and is installed only by qualified craftsmen using special gypsum-based glue.
Expanded polystyrene skirting boards are available for sale in a wide variety
- At first glance, skirting boards made from expanded polystyrene cannot even be distinguished from gypsum elements. And the advantages are obvious: the material from which they are made is lightweight, which greatly simplifies installation and makes these decorative elements absolutely safe. Expanded polystyrene is easy to glue and holds securely on the ceiling. The variety of relief patterns, widths and thicknesses of decorative skirting boards allows you to choose them to suit any interior.
Foam plastic is not a sufficiently plastic material, so installation of such skirting boards can only be carried out on a perfectly flat surface of the wall and ceiling. If the plane is uneven, the plinth may stick at first, but over time it will lag behind the surface and sag. Therefore, in this case it is better to use a flexible polyurethane baseboard.
When purchasing such material, you need to carefully select the adhesive according to its components, since some components contained in the adhesive mass can melt the foam.
Flexible polyurethane skirting boards will help you design a ceiling with complex configurations
- Flexible skirting boards are perfect for decorating shaped surfaces, and also, due to their elasticity, fit well on surfaces with slight curvature.
The flexible plinth is lightweight and quite easy to install. It looks very neat on the walls and ceiling. It is also very difficult to distinguish it from natural gypsum stucco.
This material is produced in various variations, it can have a relief pattern or be absolutely smooth, so it can be chosen to decorate a room made in any design style.
Externally, they will not differ in any way from plaster
Polyurethane adheres well to glue, but is more difficult to cut. To cut the required angle, you need a very sharp construction knife or a good hacksaw. Polyurethane-based adhesives, for example, “liquid nails,” are well suited for gluing skirting boards made of this material.
Calculation of the required amount of material
Having chosen the type of plinth required for decorative purposes, you need to calculate the required amount of material so that during installation it does not turn out that there is not enough of it or that too much has been purchased.
It is necessary to take careful measurements of the perimeter, especially if it has curved sides
To accurately calculate, you need to know the length of the perimeter of the room. If the shape of the room has projections or niches, then each distance from the outer to the inner corner is measured separately and then added to the total. The result obtained is divided by the length of the plinth strip - this can be done in the store when choosing a material, since the strips can be of different lengths - 1.5 or 2 meters. It would be best to purchase one additional strip, in case of damage or other unforeseen circumstances.
Required materials and tools
Tools for installing ceiling plinths
In addition to the plinths themselves, for their installation you need to have certain tools and auxiliary materials: So, for the work you will need:
- Miter box - this tool will help you accurately adjust the corners to the desired size and with smooth inner edges.
Without a special device - a miter box, it will not be easy to carry out high-quality installation
- Construction knife and hacksaw.
- Tape measure, ruler, right angle and 45 degree angles, you may also need a protractor.
- A simple pencil for marking.
- Spatulas - rubber and narrow metal.
- Construction gun for feeding adhesive mass from tubes.
- Container for mixing putty mass.
- Finishing putty.
- White acrylic based sealant.
- Assembly adhesive.
- Water-based emulsion paint.
Prices for ceiling skirting boards
Ceiling skirting boards
Marking at the installation site
To ensure that the installation itself does not present any difficulties, and that the plinth looks neat, it is necessary to carefully mark the ceiling and walls.
- To do this, you need to take one of the plinth strips and attach it to the wall and ceiling, press it well in both planes, and then mark it with a pencil, without pressing it too hard.
Tapping reference lines for mounting plinths
- When applying the plank to the ceiling, irregularities may appear and the plank will not lie flat on the plane. In this case, you can try to move the plank a little to the side, and place the joint between it and the next plank on an uneven place.
- It is better to check in advance the evenness of the ceiling and wall in the places where they are glued and try to eliminate the defects using putty. Installing the skirting board on a flat surface will be quick and easy.
If a regular ceiling is being designed, then the plinth should be pressed tightly against two planes
- It is very important to make the correct marks on the internal and external corners, as they are the most difficult parts when installing skirting boards.
Cutting ceiling skirting boards
In order for the two planks at the corners to perfectly coincide and form an even angle without cracks or gaps, you need to slowly cut off the edge of the plinth at the desired angle. A miter box will help in this process.
Adjusting the corners of the plinth in a miter box
This is a special tool that has slots at different angles. The plinth is placed between the two sides of the miter box, and the excess fragment is cut off through the required slots at an angle of 45 degrees. The same is done with the other strip of the skirting board to connect them at the protruding corner. Be sure to carefully check the correct direction of the cut - I often make mistakes here, which leads to unnecessary waste of material.
Approximate diagram of fitting right angles
- When well-fitted corners are combined, a correct right angle is formed. But you need to know that this is not an easy task, and it is rare that you get perfect evenness the first time. Therefore, before you start cutting, you need to measure everything well and make markings.
- If you have to cut a plank in half or one-third, you don’t need to throw away the resulting piece - it can be used for mounting on another wall.
- The miter box will help to cut the plinth strip not only for mounting the corner, but also evenly, if necessary, since it has guide slots for this purpose, located at right angles.
- To ensure that the corner is positioned correctly, the plinth strip is laid to the bottom and wall of the miter box with the side on which the glue will be applied.
- When the two planks are ready, you need to try to align them in a corner; if there is a small gap of 1.5 ÷ 2 mm, then there is nothing particularly terrible about it - this can be repaired later with putty.
With perpendicular walls there should be no problems - you get a neat angle
- If suddenly, when combining the planks, a right angle does not work out, then there is no need to try to align the resulting angles. It is better to cut off the damaged piece at a right angle, and again install the plinth in the miter box, and again cut through the gap located at an angle of 45 degrees.
- If the walls in the room are not perpendicular, then the baseboard will have to be adjusted to the existing angle size without resorting to a miter box. Usually for this purpose additional marking is carried out and a template is made. It is for such purposes that a protractor may be needed.
Video: adjusting the corners of the ceiling plinth
Gluing ceiling skirting boards
Skirting strips (otherwise called fillets) are glued to wallpaper, plastered or painted surfaces in different ways.
1. If the installation of the plinth is carried out on a plastered wall, then it must be prepared - leveled as much as possible and covered with soil. Only when the primer has completely dried can you begin installing the plinth.
“Liquid nails” are well suited for gluing ceiling plinths to unfinished walls and ceilings.
- Liquid nails-type glue is applied pointwise to the plank using a construction gun, on two sides that will be glued to the ceiling and wall.
- Next, the glue should set, i.e. the baseboard with glue needs to lie down for about a minute, and only after that it is applied and pressed to the wall and ceiling. It is best to apply pressure using a clean cloth.
Gluing the baseboard to the intended location
- If excess glue appears on the sides, it must be carefully removed immediately, being careful not to smear it over the surfaces.
- When the installation of the skirting boards is completed, you should carefully cover all the gaps and cracks. If large enough gaps have formed between the baseboard and the ceiling or wall, they can be sealed with a sealant after the glue has dried.
The remaining cracks are carefully sealed with putty or sealant.
- To ensure that the sealed areas are smooth and do not stand out on the baseboard, the sealant can be smoothed with your finger by dipping it in water. A rubber glove should be worn on your hand.
- Gaps at the corner joints are carefully sealed with putty. The work is carried out with a narrow spatula, the excess is wiped off with a soft sponge or removed with a spatula, so as not to damage the surface of the baguette.
Removing excess putty or sealant
- Often diluted gypsum finishing putty is used as glue to attach polystyrene foam ceiling plinths. It copes well with this function, but only if the walls and ceiling are not painted or covered with wallpaper - the putty will only lie securely on primed surfaces. The advantage of this approach is that all possible cracks are immediately filled with putty.
Prices for glue for ceiling skirting boards
Adhesive for ceiling skirting boards
Video: master class on gluing ceiling plinths
2. When installing skirting boards on wallpaper, the surface does not require special preparation, but in this case polymer-based adhesives are used for gluing. Glue is also applied to the bottom surface of the fillet, left to set, and then the baseboard is pressed against the surface of the ceiling and wall.
Polymer-based adhesive such as “Titanium” or “Dragon”
Sealing cracks and gaps is done in the same way as in the case of gluing decorative elements onto a plastered or putty primed surface.
3. Recently, suspended ceilings are appearing more and more often in apartments. Many people refuse plinths, not knowing how to solve the problem of attaching them to this type of ceiling. But this problem can also be solved, and the ceiling of the room will become the crown of interior design.
- In this case, the lightest-weight skirting boards should be selected, having a wide vertical platform, which is glued to the wall, since the top edge will not be fixed to the stretch ceiling.
- To ensure that the baseboard is more securely attached to the wall, it is better to glue it before decorating the walls with wallpaper. To glue fillets in this case, you need to adhere to the technology that is used for attaching to a plastered surface.
- Next, the cracks and gaps are sealed, and after they dry, the baseboard can be painted or puttied, making an imitation of a plaster version.
The installed baseboard can be decorated with water-based paint
- If you plan to apply paint to glued baseboards, then you should not use sealant to seal defects; in this case, you only need to use putty. But there is no need to particularly weigh down the elements with additional materials, since it will only be attached to the wall.
Video: one of the interesting ways to attach a plinth to a suspended ceiling
By deciding to decorate the ceiling with plinth yourself, you can save a lot. Such work, performed by an invited master, will cost no less than the cost of the material itself. If you carefully take all measurements and markings and approach the work with great care, then the installation will definitely be a success.
Ceiling baguette installation technology
The method of installing the ceiling plinth will depend on its type.
Overlay plinth
The decorative fillet, as mentioned, is glued to the wall on already installed panels. The fastening algorithm is as follows:
- Cut the edge of the plinth strictly at an angle of 45° relative to the front side.
- Apply glue evenly to internal surfaces.
- Glue to the wall, starting from the far corner of the room.
- Press carefully along the entire length.
- Carefully remove excess glue with a damp cloth.
- Give time to dry.
- Cover the remaining cracks with putty or silicone sealant.
PVC skirting board
The work begins with installing the frame on the entire wall. Wood slats or metal profiles are used for it. The bars are attached to the surface perpendicular to the direction of the plastic panels in increments of 40–50 cm.
On smooth walls, profiles can be fixed with dowels, but such surfaces are rare, so more often the product is fastened with screws, leveled using a level. In the collapsed areas, gaskets are made or wedges are hammered in to ensure strength to the frame.
The extreme slats adjacent to the corner joints will be the basis for attaching the ceiling plinth. By the time of gluing, one of the surfaces (wall or ceiling) must be finished.
The plinth for PVC panels is secured with self-tapping screws or construction staples. At the joints - in the internal and external corners - special inserts are placed on the glue, which greatly simplifies installation, making it more accurate.
Further installation of the panels will not be difficult: the guide groove of the plinth will not allow them to move to the side.
The main purpose of flexible ceiling skirting boards, cornices, baguettes and moldings
As is the case with conventional, straight cornices used in finishing work on ceilings, flexible ceiling plinths perform two functions: technological and aesthetic. First of all, due to the use of skirting boards or baguettes at the final stage of work on ceilings, it is possible to hide all kinds of technological flaws and defects made during the finishing work. As a rule, the junctions between walls and ceilings look unsightly. Spending time sealing seams and joints with putty and subsequent leveling is a labor-intensive and ineffective task. It is much more convenient for these purposes to use baguettes, cornices or plinths mounted at joints indoors.
Today the situation in this regard looks much more comfortable and harmonious. Using plastic, foam or polyurethane consumables for these purposes, the problem can be solved much faster. The quality of ceiling finishing and the level of design are changing dramatically for the better. Here we should dwell on the aesthetic content that such consumables carry.
Especially if you focus on the role that flexible polyurethane baguettes, cornices or ceiling plinths play in apartment design
How is high quality workmanship achieved when working with flexible skirting boards? The answer is simple and lies in the characteristics of polyurethane - the main, base material that is used to manufacture products for working with ceilings. Flexibility is the main property that such products have. Thanks to their use, it has become possible to implement any type of ceiling design in a practical way. A flexible cornice allows you to install complex suspended structures of spherical and radial shapes on the ceilings, giving the interior a final, presentable look.
Plastic cornices, baseboards and moldings made of foam or wood are of little use for such purposes. At large bending angles, these materials cannot withstand the stress and begin to break. For example, if ceiling work is carried out in a room where there are bay windows, columns and other complex architectural forms, it is impossible to do without creating arcs of different radii in the ceiling part. Flexible cornices are an excellent technical solution to the problem in this regard, which is why they are widely used to decorate ceilings with curved surfaces.
Advantages of PVC skirting boards
The advantages of such PVC products include:
- Easy to install. Even a novice master can cope with such work. When you want to change the design, you just need to dismantle the old panels and attach new ones to the old frame on the wall.
- The service life is limited only by mechanical damage. Plastic is unaffected by temperatures, water and light.
- Plastic is easy to clean. It does not absorb dirt, so a soap solution and a sponge are enough for washing.
- The material from which the plinths are made is environmentally friendly. It can be used to decorate the walls of children's rooms.
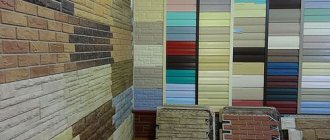
- The choice of colors and textures is huge. You can choose a palette for any stylistic decision.
- The speed of repair and construction when using PVC skirting boards and panels increases significantly. The amount of garbage collection work decreases proportionally.
USEFUL INFORMATION: How to properly make a doorway in a brick wall?
In conclusion, we can add that repairs made using PVC panels and skirting boards will save a lot of time for other, more interesting things. And since plastic lasts a very long time, the next change in the decor of the walls and ceiling will depend only on your desire.
Methods for installing baguettes in a room
There are two options for mounting the plinth: on wallpaper or on a fine finish (a leveled wall or a wall coated with paint). In the first case, you can avoid subsequent peeling of wallpaper that was not pressed with a baguette. In the second, the work is easier, due to the absence of increased requirements for accuracy of execution: putty residues are easier to remove from a clean wall than from figured wallpaper.
Convenient installation of ceiling plinths after finishing or on pre-painted walls takes a minimum of time. Therefore, it is ideal for doing it yourself. To carry out the work, you will need to prepare any high-quality finishing putty, the required number of baguettes, and a couple of spatulas. The performer will also need a miter box and a hacksaw, which will be used to trim the baseboards.
Advantages of flexible plinth
Flexible polyurethane plinth for ceiling
Firstly, this material is excellent for creating shaped surfaces. Due to its elasticity, a flexible plinth can be mounted even on a surface with slight curvature.
Secondly, polyurethane is lightweight and easy to install. It is not difficult to place this material on glue. It is enough to use so-called liquid nails - an adhesive mass based on polyurethane.
Important! It's difficult to cut. A good hacksaw is used to cut out a certain angle. You can use a construction knife, but first you need to sharpen it thoroughly.
Thirdly, the material looks attractive both on the ceiling and on the walls.
What you need to install skirting boards on walls
Before you start working with the ceiling and walls, you should calculate how much and what you will need. And you will need the following:
- baseboard;
- components for it;
- glue;
- hardware.
Using a tape measure, measure the length of the sections where the plinth will be laid on the wall. Its standard length is 3 or 6 meters. The resulting measurements are divided by the length of the selected frieze (3 or 6), and the result is rounded up. This figure will indicate the required number of pieces.
It is quite difficult to accurately connect the fillet at the joining point, so it is worth purchasing additional plastic corners and inserts. With their help, it is easier to connect the plinth in the internal and external corners of the walls or increase the length.
To attach a baguette to a wall, polymer glue (“Moment”, “Eco-naset”, “Titan”), “liquid nails”, and putty are often used.
Advice: it is better to check the type of glue required for attaching the baseboard at the hardware store where you will buy it.
Characteristics of suitable adhesive compositions:
- Glue "Moment". It sets quickly, but when it gets on the front surface it causes irreparable defects.
- "Eco-naset", "Titan". It hardens more slowly and does not require additional ventilation.
- "Liquid Nails". The composition is based on an organic solvent, hardens instantly, but requires careful ventilation of the room after use. It is used in rooms with high humidity and is not afraid of high/low temperatures.
- Acrylic “Liquid nails”. This glue is environmentally friendly, dries slowly and does not tolerate freezing.
- Special putty. Used as an adhesive base for overlay plinths.
You can prepare the putty yourself by adding PVA glue (4:1) to the finishing mixture.
To fasten polyvinyl chloride fillets, screws or construction staples are used, since the load on them is much higher.
USEFUL INFORMATION: Types of putty for walls: materials for interior work