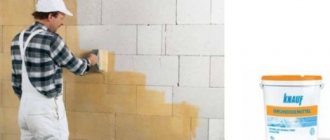
Primer is a special composition for preliminary preparation of the surface before finishing. Primer solutions are used to obtain stable adhesion of the base to the finish, protecting the coating from negative external factors. The primer is used on different types of surfaces, including brick foundations.
Treating the brick surface with a primer helps improve the quality of repair and finishing work in general. Application of primer will ensure strong adhesion of the finishing coating to the base, increase the strength of the layer as a whole, increase its resistance to moisture, temperature changes, and protect against fungus and mold.
The use of mixtures on brick surfaces is also useful in that it contributes to more economical consumption of finishing materials.
Why do you need a primer before plastering?
The primer solution is applied under the plaster and selected individually. It all depends on the condition of the surface. Treating the wall before plastering allows you to achieve the following effect:
- the degree of adhesion of the plaster to the surface itself increases, thus improving the quality of the finish;
- old foundations are strengthened if a deep penetration primer is used;
- ensures water resistance of the brick;
- the consumption of materials used is reduced.
The mixture, to which antifungal substances have been added, will protect the walls from mold and fungi;
What does priming the base do?
The quality of construction and finishing work depends on the correctly selected primer, depending on the condition of the brick wall and subsequent decorative design. Wall primer provides:
- Adhesion (sticking) of finishing material to the base.
- Strength (when using deep penetration strengthening mixtures), which is very important when strengthening old or crumbling walls.
- Water resistance – additional protection of bricks from precipitation or in rooms with high humidity.
- Protection. Primers with antiseptic additives reliably prevent the development of fungi and mold.
- Economical. After using primer mixtures, the subsequent consumption of paint or tile adhesive is greatly reduced.
- Quality finish. On a primed brick wall, the paint will lie smoothly, the plaster will not crack, and tile adhesive, with moderate consumption, will ensure reliable adhesion of the decorative tiles to the base.
Types of primers for bricks
To prepare the surface before painting or before applying the plaster mixture, the following factors must be considered:
- plaster composition;
- type and condition of the base;
- ability to absorb moisture.
To choose the right soil mixture, it is important to consider what the wall is made of. Primers can be divided into the following types:
- Composition: Mineral. Used to level brick, concrete or already plastered walls. Cement is used as a binder.
- Acrylic. Used when working with the following substrates: wood, cement, concrete, drywall, which are coated with acrylic or alkyd paints. The substance does not have an unpleasant odor and dries within 2-5 hours after application.
- Alkyd. Mainly used when working with wooden surfaces, less often for processing tiles and galvanized steel. The mixture dries for 10-15 hours. This mixture may contain chromium, zinc phosphate, and others.
- Glypthal. Use in dry rooms and only on metal surfaces. Before priming the surface, you need to protect it from oxidation and rust. Dries in 1 day.
- Perchlorovinyl. It is used when priming metal, concrete, and plastered surfaces. At a temperature of 20 degrees, this mixture dries in 1 hour.
- Regular primers.
- universal;
Characteristics and composition
When choosing primer mixtures for a brick base, it is also important to take into account the composition and characteristics of the soil. It is recommended to use the following types of soil solutions when working with brick bases:
- Water-soluble acrylic or silicone-based mixtures are perfect for treating any type of brick base. The material is environmentally friendly, dries quickly, and does not have a specific unpleasant odor. Silicone primer mixtures can also be praised for their excellent moisture protection of surfaces;
- Water-dispersed soils are most often deep-penetrating mixtures that provide high-quality adhesion of layers and strengthen the surface;
- Alkyd primer solutions are used for treating wooden surfaces, but it is acceptable to use brick-based compounds before any type of work: wallpapering walls, painting;
Alkyd primers should not be used before plastering surfaces, since some types of plaster mixtures react with the components of the alkyd composition and this can lead to swelling of the finishing layer and the formation of noticeable roughness.
- Mineral primers based on gypsum, lime or cement are also suitable for application to any brick, while providing high-quality adhesion and reliable protection of the surface from negative external factors. Valued by professionals for their environmental friendliness, non-toxicity, and the ability to use both internal and external works;
- To work with a brick base, you can purchase perchlorovinyl primer. Primer mixtures of this type are easy to apply and dry quickly even at low temperatures, but you should know that the mixtures are toxic and therefore cannot be used for interior work.
For priming brick surfaces, universal or specialized mixtures created specifically for processing brick bases are also suitable.
How to prepare a brick wall for plaster?
To properly prepare the brickwork for applying the mortar, you must:
- clean the surface of old paint and dirt using a spatula;
- provide protection for the floor if it is wooden and already varnished;
- treat the base with special means if there is fungus on it;
- fill large gaps with putty;
- Rinse the walls with water and dry well (1 week).
Application of material
Brushes for priming work.
For priming work, you must have the following tools:
- maklovitsa. (large wide brush);
- small paint brush;
- roller with a long handle;
- protective glasses;
- protective gloves.
The priming process is similar to painting:
- You should work in a protective mask and gloves.
- The surface should be cleaned of dust and dirt before application.
- The primer is applied with a brush or roller. In narrow places and corners it should be applied with a brush. When the wall has a very large area, it is primed in two stages: divided horizontally, and first the upper part is processed, and then the lower.
- Porous walls are coated in two layers. The second layer should be applied only after the first has completely dried.
- The consumption of primer mixtures is indicated on the packaging. Therefore, when purchasing, you should remember how much wall area is intended for plastering.
You should not forget about a hat; it will protect the hair on your head from foreign objects getting on it. Good luck!
How to prime a brick?
For brickwork, a deep penetration primer is best. This mixture must be selected taking into account the composition of the brick. If the wall is made of sand-lime brick, then it is better to choose a mineral mixture. Under the ground you need to choose the right tool. You can use the following devices:
- Brush. Used as an additional tool that can be used to treat small, hard-to-reach places.
- Roller. With its help, the mixture is applied quickly and efficiently to large areas.
- Spray gun. Distributes the mixture evenly over a large area.
A thin layer of primer is applied to the brick wall: both regular and deep penetration. It should dry out in 2-3 hours. If necessary, the procedure can be repeated. After this, subsequent materials are applied to the soil. When working, do not neglect a protective mask, gloves and headgear.
Why do you need to prime?
The main function of primer mixtures is to strengthen the bond between layers of plaster and the wall it is applied to. In this way, the walls are prepared for plastering. But there are several more functions:
- The primer composition increases the strength of the outer layer of the plaster composition.
- When used, interlayer adhesion improves.
- The coating eliminates fungi and mold between layers of the plastered surface.
- The primer promotes waterproofing and protection against corrosion in preparation for plastering.
Primer application process
When priming walls before plastering, you should understand that the typical work procedure includes only a basic set of operations and can change depending on the situation.
- Mechanical preparation. Wallpaper, nails, fasteners are removed and the old finish is removed.
- Alignment. All cracks, chips and protrusions must be removed. Before treating the walls before plastering, you should wait until it is completely dry.
- Applying the first layer.
- Drying out.
- Applying the second layer. A mandatory step to smooth out the heterogeneity of the material and achieve uniform distribution of the composition.
Applying a second layer is a mandatory step to smooth out the heterogeneity of the material and achieve uniform distribution of the composition.
Mistake #2: Working without a primer
Before plastering, a primer must be applied to the surface. Sometimes craftsmen say that with a primer the surface does not absorb moisture well. However, this only means that such walls require special soil.
Aerated concrete, silicate and ceramic bricks, and ceramic foam blocks absorb moisture well. If they are not primed, then a large amount of water from the plaster mixture will immediately go into the base and the chemical reaction that should result in the formation of gypsum crystals will not occur. Because of this, the adhesion (adhesion of substances. - Ed.) and strength of the plaster will be much lower than declared, and cracks may appear during the drying process.
dgmphoto/Fotolia
On surfaces that do not absorb moisture well or do not absorb it at all (these include concrete, cement plaster, expanded polystyrene), a primer with special properties must be applied: one that improves adhesion and inhibits efflorescence. The fact is that “young” concrete, up to three or four years old, when the water dries, removes salts that are deposited on the surface. Over time, salt deposits literally tear the plaster away from the base and destroy it.
How to calculate the consumption of materials for repairs?
10 tips on how to save on repairs
There is also an “old-fashioned” method of priming - moisten the base with water (in order to saturate the wall with moisture). But such an economical approach only adds dust to the surface. For example, if the masonry is made of foam or aerated concrete, then in order to saturate it with moisture, it will have to be watered with a hose for a long time. Now remember which rag absorbs water better, wet or dry? Thus, you will not just “water” the wall with water, but also increase its “thirst”, which will be “quenched” by the water from the mortar mixture. The result is cracks.
flairimages/Fotolia
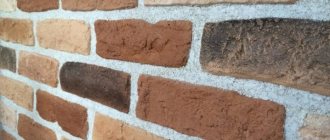
How to treat brickwork in the interior
There are many ideas for decorating an apartment or house. Nowadays, a variety of ideas and approaches are used in the interior, distinguished by their originality of design ideas. One of these options is naturalness, which consists in the form of brick. No matter how banal it may sound, it was the simplicity and appearance of this material that turned out to be a very interesting and specific solution in the interior of one’s home. Although this finishing method is quite young for modern construction.
Nuances of technology, or how to paint a brick wall correctly
If you are faced with the question of how to paint a brick wall beautifully, and most importantly, correctly, then you need to know a few features that will help you do everything correctly and accurately. When working with fresh masonry, make sure that it is completely dry and ready for further decoration.
Haste can lead to various defects. Most often, painting begins a year after the construction of a brick wall. The long waiting period is due to the characteristics of this building material.
Brick has a porous structure and an uneven surface, so once it has been painted, it is very difficult to remove the annoying coating quickly and without hassle. Unfortunately, it is no longer possible to restore the base shade: paint particles get clogged into all the veins and cracks, changing the original color.
A brick wall requires constant updating. After a few years, the paint may fade and even chip in vulnerable areas. But don't be afraid of these features. They are more than offset by undeniable advantages.
Firstly, you can change the color to the desired one that suits your interior style. And, secondly, you have a chance to hide the flaws of dilapidated masonry.
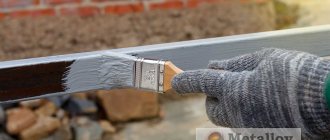
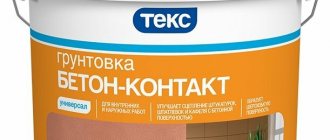
How to apply concrete contact
In order for the primer to perform its functions, you must adhere to the rules for its application.
There are always instructions for use on the packaging. You must read it carefully and adhere to these rules. The properties and methods of applying primers of different types from different manufacturers may differ, for example, some types of concrete contact can only be applied with a brush, while others are designed specifically for application by roller. These nuances must be taken into account.
Preparatory work
Before applying the primer, it is necessary to remove debris and excess dust; if there is old paint or plaster that does not adhere well, it must be knocked down and cleaned with metal brushes; Wash dirty surfaces with soapy water or soda solution and dry thoroughly.
When storing the material, sand settles to the bottom, so before work it is necessary to thoroughly stir the primer so that the sand is distributed evenly.
It is the sand that is part of the concrete contact that makes it possible to give the surfaces a roughness that ensures adhesion.
Applying primer
There are two main ways to apply primer:
- with a brush or roller;
- spray gun.
Applying concrete contact with a brush or roller is a rather slow and labor-intensive process.
It is necessary to apply it so that the sand is distributed evenly over the surface of the base.
It is much more productive to apply the primer with a spray gun. In this case, the air flow beats the residual dust and distributes the sand evenly over the surface.
In addition, the spray gun allows you to significantly save time.
Sometimes it is recommended to apply concrete contact using a roller, which is certainly faster and more convenient than applying it with a brush.
To do this, the primer will have to be diluted with water, but adding water will weaken the adhesive composition. As a result, the sand will not adhere well, which is noticeable even when applying the primer: the sand crumbles directly onto your hands. In addition, the fleecy surface of the roller absorbs large amounts of sand. The primed surface acquires an uneven, bald, crumbling texture.
There are types of concrete contact that are designed specifically to be applied with a roller. Such primers have a more liquid consistency, which allows you to use material more economically, while they provide surfaces with increased adhesion.
Concrete contact is applied to the base in one or two layers. After drying, a durable film appears on the surface of the base, resembling sandpaper to the touch. It is this structure that allows you to reliably hold finishing materials.
After working with the primer, the instrument must be immediately thoroughly washed with water, since the composition dries quickly, and after that it can only be washed off with a solvent.
Features of applying concrete contact for outdoor work
Concrete contact can be used at ambient temperatures from +5 to +25°C. When performing finishing work in the cold season, you need to use special frost-resistant types of primer intended for outdoor work.
Priming walls before plastering - step-by-step technology
When planning a renovation, it is important how long it takes for the primer to dry on the walls. The polymerization period of the impregnation depends on the type of polymer components and drying conditions.
The times indicated by the manufacturer are approximate, since the speed of the polymerization process also depends on:
- type of solvent (acrylic - 3-4 hours, glyphthalic, oil - about a day);
- thickness of the applied layer;
- the condition of the substrate (dry, porous allows the impregnation to set faster, a recently laid coating slows down drying);
- In dry, warm air, polymerization proceeds faster.
The timing depends on the composition:
- glyphthalic impregnations take a day or more to dry;
- alkyds require ~20 hours;
- acrylic – after application from 300 minutes.
To begin with, the primer concentrate is diluted with clean water as specified by the manufacturer. The finished soil is not diluted, but mixed, “churning” in the canister. If you choose a roller for application, it is better to use a plastic tray.
How is the wall primed before plastering? There are two main methods of priming - manual and mechanical application. For the first, brushes and rollers are used. For mechanical application, various sprayers or spray guns are used.
Surface preparation
To perform a primer before plastering the walls, preparatory steps are necessary. The old coating is removed from the walls, cracks and large chips are repaired. Cracks and masonry seams are opened. Remove stains of rust, efflorescence, and various oils. Neutralize and clean areas of rot, fungal and mold colonies. Metal parts are insulated (coated with an anti-corrosion agent). The concrete is covered with notches. The walls are dusted and dried. The wiring is disconnected from the current.
Tools for work
The main tools for manual priming are:
- brushes (for treating small areas or places where access is difficult);
- rollers.
To prime the ceiling, it is convenient to place the roller on a long handle (extension handle) and work from the floor (without scaffolding).
Priming Tools
To wet the roller, use a special plastic bath with a ribbed bottom. You will also need a container for diluting the concentrate and a measuring container for measuring water. Film and masking tape are used to protect windows, door frames, door panels and floors. You will also need clean rags and protective equipment.
If the primer gets on the glass, it must be cleaned immediately, otherwise, after drying, you will need a scraper to clean it.
Applying primer to the wall
The procedure for priming:
- Prepare the necessary primers and tools.
- Clear the room of furniture. Cover or cover windows, doors and floors with film.
- Remove the old coating and properly prepare the surface of the walls for plaster.
- The concentrate is diluted.
- Prime the ceiling. The roller (in the first pass) is carried out parallel to the wall with window openings, and the second time it is applied towards it.
- Prime the walls without leaving any unprimed areas. The resulting drips are smeared so that unevenness does not form (when priming for finishing). The direction of movement of the roller/brush (for two-layer application) is vertical.
- The wall should dry for the time specified in the instructions.
- Reapply a layer of primer. The roller is moved across the previous application movement.
- Dry the primed surfaces.
The information presented will help you decide whether priming of room surfaces is necessary, as well as selecting a primer suitable for your room. Priming the walls before plastering is an easy job. The main difficulty is the right choice, which determines the strength of the new finish.
Review of the best water repellents for bricks
Often, after the construction of a house, typical difficulties arise - the material from which the walls are built strongly absorbs moisture, and as a result of frost, the surface is destroyed. A water repellent for bricks will help solve this problem. This is one of the options for processing building materials that can increase the degree of frost resistance, water resistance and improve thermodynamics. In general, the product allows you to increase the service life of building materials several times.
Tools and equipment
To perform plastering work, you need to stock up on the following tools:
- a trowel and a plaster trowel for applying the mortar;
- falcon for feeding the mixture;
- a rule and a trowel to level the solution;
- trowel for grouting plaster;
- container for mixing the solution;
- a construction mixer or drill for mixing the components.
- with a wide brush or roller for applying primer;
- level, plumb line and level for marking and control.
Figure 2. Tools used for plastering.
It is important to keep tools clean and wash them after completing each stage of work.
Primer. Types, properties, application.
What is primer used for?
Primer or primer is a liquid building material used to prepare the surface and improve the connection of subsequent layers to the base. It consists of a mixture of fillers in a main binder polymer adhesive composition. In this article we will tell you how to choose and use this material correctly.
In principle, for these purposes you can take paint or PVA glue diluted in water. But their use of such a primer justifies itself only in the simplest cases - for coating on flat surfaces with normal porosity. In other cases, it is recommended to use special primer mixtures with complex contents.
All coating compositions can be divided into special, impregnating, fixing or penetrators and primers - primers that are used for primary finishing.
The purpose of primer compositions is to increase adhesion between the base and the finishing coating. These are classic, widely used primers without special additives.
Impregnating compositions are used on highly porous and highly liquid-absorbing substrates. They are very economical, as they clog pores and do not allow finishing materials to penetrate far into the material. Sometimes penetrators are used as impregnation.
Primers for walls in Moscow
Wall primers and other products can be purchased at Leroy Merlin in Moscow at low prices. Select the product you are interested in on the website and buy it in our online store. The range of products presented in the catalog is extremely wide. Among them there will certainly be a position suitable in all respects.
All products presented in the “Primers for Walls” section are produced by well-known companies that have proven themselves to be of high quality for their products.
You can always place an order and pay for it online on the official website of Leroy Merlin in Russia. For residents of the Moscow region, we not only have low prices for products in the “Wall Primers” category, but also fast delivery to cities such as Moscow, Balashikha, Podolsk, Khimki, Korolev, Mytishchi, Lyubertsy, Krasnogorsk, Elektrostal, Kolomna, Odintsovo, Domodedovo, Serpukhov, Shchelkovo, Orekhovo-Zuevo, Ramenskoye, Dolgoprudny, Pushkino, Reutov, Sergiev Posad, Voskresensk, Lobnya, Ivanteevka, Dubna, Yegoryevsk, Chekhov, Dmitrov, Vidnoye, Stupino, Pavlovsky Posad, Naro-Fominsk, Fryazino, Lytkarino, Dzerzhinsky, Solnechnogorsk, Istra and Zhukovsky.
For what surfaces is plaster primer used?
Sometimes priming the walls before plastering may not be necessary if the base is sufficiently smooth and hard. However, during typical repairs, most surfaces do not meet these conditions.
Special processing is required for:
- Porous surface. For example, concrete or brick;
- Plastered wall. This is also true for asbestos-cement bases;
- Wooden structure. Typically, the primer for plastering wooden walls contains special additives that prevent the appearance of mold;
- Plastic or other inorganic material with similar properties;
- Metal. The soil contains special components that prevent corrosion.
Typically, primers for plastering wooden walls contain special additives that prevent the formation of mold.