How to restore the varnish coating of old furniture yourself
Old pieces of furniture, despite the fact that they are many years old, often have a quite decent appearance. But any item wears out over time and requires attention, this also applies to old varnish coatings.
If varnishing is done correctly, such a product will be no different from new. However, not everyone knows how to do this, and having turned to qualified craftsmen, horrified by the prices, they abandon such an idea. But there is a way out, it is accessible and quite simple - this is restoring the varnish coating on your own.
There are several possible methods. Each of which is effective, simple and practically inexpensive.
How to avoid mistakes
Any mistake can deteriorate the quality of the entire work and ruin the appearance of the furniture. To avoid this, follow a few simple rules:
- Do not leave old coating on a wooden surface. If you fail to partially remove the old varnish, it may bleed or crack over time. Combine methods for removing old paint layers. If the metal brush did not work and left traces of old varnish in some places, try the heat method with a hairdryer or blowtorch on this area.
- Read the instructions before thinning paint or varnish. Failure to comply with the proportions or drying time can lead to the formation of drips or rapid chipping.
- Don't skip the furniture preparation step. Putty and sand the surface, eliminate all possible defects. Prepare the ideal surface for varnishing and painting.
You should strictly adhere to the instructions and tips for finishing work.
Furniture restoration is a creative and exciting process. In order for it to bring joy and pleasure, and for interior items to delight you with their novelty for a long time, it is enough to follow simple rules in work and prepare in advance.
Restoring the presentable appearance of lacquered furniture if its surface is covered with scratches or cracks is the best option.
Removing minor scratches
If a scratch appears on a varnished piece of furniture, you can easily get rid of it. To do this you need to purchase:
- matching varnish,
- grout for the old one.
The algorithm of actions is quite simple:
- the damaged area is sanded,
- a new layer of varnish is applied to it.
After drying, the coating will merge with the old one and it will be indistinguishable that any work was done on the surface.
In a similar way, you can deal with darkening of color if they are minor. If you lose shine and color in general, the following method will help restore them.
What tools and materials are needed?
To restore lacquered furniture, you should have the following tools at hand:
- Brushes, rollers. It is better to take several brushes of different widths. This is necessary for convenience when painting hard-to-reach places. A roller is useful for applying paint and varnish material on flat areas.
- Sanding sheets. Necessary for removing varnish and treating surfaces after removing paint and varnish material. Sandpaper makes the surface rough, which improves paint application and increases adhesion to wood.
- Wire brush. This is useful if you don’t have a grinding machine at hand to remove the decorative layer. Working with a metal brush is convenient, but the surface treatment time increases.
- Putty. Necessary material for furniture repair. Scratches and chips are filled with putty and the surface is leveled.
- Primer. Levels the surface, improves the adhesion of varnish and paint to the surface.
- Degreaser. Any will do, you can take regular acetone, which is also convenient for removing stains after finishing the staining.
- Varnish, paint, materials for decoration. The choice depends on the expected result - do you want a varnish or matte surface.
For DIY repairs, you can also prepare a hair dryer, a small spatula, a grinder, and a remover. But in most cases, the tools listed are sufficient to restore varnished items.
Application of special products
If the furniture has been in use for many years, and the owner wants to return it to its former beauty, then you can purchase special coatings, which will give the product a second life. Let's look at the best of these.
Varnish
This product is made from shellac polish and perfectly restores the shine of varnish coatings. It gives them additional:
- grace,
- new original shade.
Having bought yourself a jar of such a solution, you can begin processing. As a rule, it requires about 40-50 layers. In this case, you will be able to achieve all of the above effects.
Nitrocellulose based varnish
The solution is well suited for restoring large areas of damaged old varnish. Despite its availability, the disadvantage of this product is the need to use a special sprayer to work with it.
Alternatively, you can buy such a tool for yourself or ask to rent it from the appropriate workshop.
Pentaphthalic varnish
Almost ideal for restoration. It is easy to use; applying it to coatings does not require any special knowledge or skills. The varnish dries quickly, which gives it another significant advantage.
Chipboard furniture
The video shows how to paint old wooden furniture:
Painting furniture made of chipboard is a very labor-intensive process. First you need to prepare the surface for painting. It is necessary to carefully remove paint or varnish from chipboard furniture. The surface can be treated with special chemical removers, but to do this you need to know what the furniture was painted with before. Safety precautions should be observed when working with chemical removers. Avoid contact with eyes or skin. Chipboard furniture can also be treated with hot steam, but this requires a hair dryer. A hot air stream is directed to the surface of the furniture, and the top layer becomes soft. Then you can use a scraper to remove the old paint or varnish. Then the surface should be primed, puttied and cleaned with fine sandpaper. Now you can start painting the furniture. Chipboard furniture can be painted with acrylic, alkyd, and oil paints. But we must not forget that the second layer is applied only after the first layer has dried.
Painting children's furniture
Children's furniture made of solid wood is an environmentally friendly material. It does not contain glue, varnishes or various chemical impurities that could cause allergies, poisoning or irritation to a child. Children's furniture is mainly made from solid pine. Pine is considered a medicinal wood; it purifies and disinfects indoor air. This is another reason to have solid pine furniture in the children's room. It is also worth painting children's furniture with environmentally friendly paints; water-based acrylic paint is best. The technology for painting children's furniture is the same as painting wooden furniture.
Processing old furniture
Once you are fully prepared, you can begin restoring your furniture. It consists of the following manipulations:
- The surface is thoroughly washed with Maalipesu solution;
- you need to get rid of the old varnish with a scraper;
- the surface is polished with sandpaper until a matte state is achieved;
- Use a rag to remove any remaining dirt.
You can start applying the purchased product in a certain sequence:
- Several layers of the selected varnish are applied (on average 2-3). After each application, you need to wait until the layer dries and only then start with a new one;
- The dried surface is cleaned with a brush to remove any dust that has fallen on it.
Acrylic base
If an acrylic-based solution was chosen, the technique changes slightly:
- the varnish is diluted with a white spirit solution;
- The resulting mixture is used to prime the previously cleaned surface;
- the field of the first application of varnish, the area needs to be sanded a little;
- Next comes the turn of covering the furniture with undiluted varnish, sanding each layer after it dries.
Thus, it is very easy to renew your old furniture, and it will delight the owners with its quality and attractive appearance for the same number of years, or even more.
Repair of cabinet furniture - tips
However, sometimes repair work is not limited to restoring the appearance of furniture. Then you have to take the repair of old furniture seriously - especially since in most cases you can do such work:
- Quite often, cabinet doors either open with great difficulty, or, conversely, tend to open spontaneously. This is often due to the fact that the cabinet has become warped over time and is not completely horizontal. To eliminate this, we place a thin wooden plate on one of the cabinet legs, selecting its thickness using a level.
- If the cabinet has impressive dimensions, then the floor may sag under its pressure. In this case, we hammer two spacers (wooden rollers) under the bottom of the cabinet so that they are not visible from the front.
- However, cabinet doors can also become capricious due to weakened hinges. In this case, we either tighten the hinges or replace the mounting screws with longer ones (as far as the thickness of the cabinet walls allows). We fill the holes in the fastening screws that have become damaged over time with wood putty or a mixture of such putty and sawdust.
- Very often, repairing kitchen furniture with your own hands requires removing jams from numerous pull-out cabinets. You can fix the problem by rubbing the runners of such drawers with paraffin or candle wax, and if they swell over time with kitchen moisture, then grind off the rubbing surface of the guide strip with sandpaper.
Applying glue to a chair leg
We disassemble dry and loose chairs and armchairs and clean off any remaining glue from the joints. Then we apply wood glue to the parts to be joined and fix them, pressing firmly on the gluing area. Drops of glue flowing from the joint must be removed immediately - otherwise an unpleasant stain may remain on the surface of the furniture. A day after gluing, the chair can already be used!
With these simple manipulations, you can significantly extend the life of your furniture, which means you will also save the money you need to buy new ones. And if you master all the intricacies, then repairing furniture with your own hands can turn into a hobby that brings your family a good income.
How to restore lacquered furniture with your own hands?
Today lacquered furniture is very popular. Such products look beautiful and add solidity to the interior. At the same time, such furniture has one significant drawback - it scratches quite easily. Therefore, in order not to purchase new furniture, you can try to restore the old one.
Today restoration is offered by many companies and private craftsmen. In addition, you can update the furniture yourself by following certain recommendations.
How to repair an old table
Over the years, your favorite wooden table begins to become loose and its top is covered in scratches. However, you love it so much that you don’t want to throw it away. The question arises, how to update the table. The repair and renovation process is best done in winter, when the heating is on and the furniture is perfectly dry. Newly created fastening connections will serve for a very long time and will not become loose.
Scheme of a wooden table.
Before starting the repair, you need to look at how the table parts are connected. Wooden parts are usually secured using metal brackets or tenons.
If the legs are connected by metal parts, they will need to be tightened. If tightening fails and the table continues to wobble, you need to unscrew all the fasteners. If there is damage to the thread, the fastener must be replaced.
Before installing new fasteners, you need to carefully inspect the holes. It is possible that their surfaces are crumbling. You cannot immediately screw screws into such wood. It is necessary to first strengthen such places.
Damaged areas must be drilled with holes of a different size. A wooden plug of the appropriate size must be lubricated with wood glue. Then hammer the plug into the drilled hole and dry thoroughly.
A new hole is made in the plug into which a self-tapping screw will be screwed. All that remains is to reassemble the table using new metal brackets.
{advertisement2}
The old table, which is held together with wooden spikes, needs to be disassembled into small components. In order to avoid leaving dents, the parts must be knocked out using a rubber hammer.
Principles of restoration
Restoring lacquered furniture is an excellent way to restore interior items, giving them an attractive appearance. As a rule, to eliminate a scratch, it is enough to wipe off the varnish from the damaged area and re-varnish it. This method allows you to remove any external scratches from lacquered furniture.
However, often the matter is not limited to just minor scratches. Any varnish can darken over time. Therefore, prolonged use of furniture leads to the fact that its varnished coating begins to become cloudy. As a result, interior items lose their presentable appearance.
If your problem concerns the darkening of the varnish, then restoring the furniture will also involve erasing the old varnish coating and applying a new one. You can do all these procedures yourself.
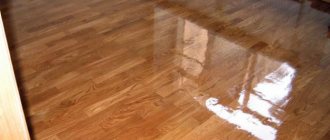
Lacquered table before and after restoration
Repair and restoration of furniture structures
The exciting and creative process of remaking furniture, or repairing and restoring it, can be an excellent hobby for those who love manual labor.
Even a novice craftsman can master simple techniques, such as painting and sewing covers for upholstery, applying paint and varnish and replacing individual elements.
High-quality reupholstery of furniture with your own hands or restoration of varnished coating allows you to save your family budget.
The owner of old chairs and a table will not have to spend money on new furniture; it is enough to update the finish and decorate the set in a single style that matches the interior design of the home.
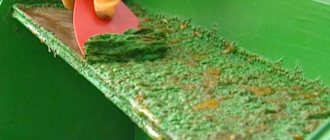
Remove old varnish
The surest and easiest way to remove old varnish is to use a special composition, which can be used as a variety of professional products. For example, “Prestige” wash or “Technolog” gel. The “universal solvents” familiar to many - denatured alcohol or acetone - are also suitable.
Using a paint brush, the remover is applied to the deteriorated coating. For better effect, the product is covered with plastic wrap for a day. During this time, the product penetrates deeply into the structure of the varnish coating, and it becomes so pliable that it can be scraped off with a regular spatula without any problems. After the damaged varnish coating has been removed, the work surface must be wiped with a damp sponge. After a day, when the surface has dried, it should be treated with fine-grained sandpaper and begin applying a fresh layer of varnish.
Which varnish should I choose?
When choosing a varnish , you need to focus on personal preferences and experience. For children's furniture, it is better to use water-based varnishes - they do not smell and will not cause allergies. But when dry, this coating will take on a matte tint, which is not everyone’s cup of tea.
For those who are little familiar with varnishing , craftsmen offer alkyd compositions - firstly, they are inexpensive, easy to apply to any surface, and secondly, they are also easy to remove. Polyurethane varnishes are a little more difficult to apply. To apply them evenly, it is recommended to use a spray bottle. However, they are more durable, and they are often preferred by professionals to work with.
Connoisseurs of expensive antique furniture use exclusively furniture oils. This type of coating requires handmade jewelry using a tampon.
How to apply new varnish?
Before applying a fresh coating, the wood is checked for roughness - we slowly run our fingers over the treated surface. If your fingers glide easily without catching, then you can safely start varnishing. It is recommended to prepare a new brush in advance, even two, since after the first wash the brush will lose its softness and you will no longer be able to use it by hand.
After diluting the varnish by 10% with white spirit, apply the first layer evenly. After drying (10-12 hours), the coating is sanded with sandpaper with a grain size of 120-180. The surface is wiped with a soft cloth and a second layer is applied. Moreover, the second layer is applied with undiluted varnish. For better distribution over the entire surface, it is first applied along the wood grain, and then across it. But in no case is it the other way around. After about 10-12 minutes the varnish will begin to dry, so you should hurry.
After the coating has completely dried, let’s see what happened. If the result is satisfactory, we will consider that the work is done. If not, repeat the application procedure again.
How to remove scratches from lacquered furniture
The appearance of minor mechanical scratches on wooden furniture is not a reason to re-varnish the entire surface. You can try restoring varnish coatings.
Scuffs and minor scratches can be eliminated using modern wood treatment .
For example, light rubbing can be easily covered with stain or a tinting felt-tip pen. To do this, you should use a soft cotton cloth, wrap it around your index finger and moisten the tip with a drop of dye.
Minor scratches can be easily retouched with transparent furniture wax melted in an electric melter. Using the same method, only with the help of already tinted wax, it will not be difficult to paint over corner chips.
Removing scratches from gloss
To remove scratches from glossy coatings, it is recommended to use a varnish felt-tip pen brush. The painted surface should dry within 2-3 hours. After this it is thoroughly polished.
All the products necessary for the restoration of glossy coatings are presented in a large assortment in specialized stores. But sometimes you can get by with what everyone has on hand . For example, regular iodine, colored crayons (they contain wax) and even an eyebrow pencil. When restoring glossy lacquer coatings, it is important to choose a material that is similar in color to the product. To restore the shine of the surface, it makes sense to use polish.
This is where I’ll probably end the article about restoring varnish coatings. If you share this article with your friends, I think they will be grateful to you. That's all for now, until we meet again.
Tools and materials
To carry out restoration work, you will first need to not only select a varnish, but also prepare some necessary materials and tools.
Of the main consumables you need to take:
- nail polish remover (solution);
- masking tape;
- tassels;
- sandpaper of different grain sizes;
- metal scraper;
- spatulas;
- wood putty;
- rags and brushes for cleaning dirt;
- soft sponges;
- cardboard or film to protect adjacent surfaces;
- regular solvent such as White Spirit.
All work is divided into several stages. This includes preparation, application and sanding.
Restoring a varnished wooden table yourself
Furniture that is varnished comes back into use. After all, lacquered products look rich and add originality and solidity to the interior. Although, to be honest, its surface is quite problematic. It can be easily damaged. A very common defect is scratches. You should not immediately get rid of the damaged table, but should try to restore it. You can entrust this process to master restorers or try to restore a lacquered table with your own hands.
Master class on table renovation
Anyone who has decided to breathe a second life into an old table should know that the whole process takes place in several stages:
- Table inspection and repair. It is necessary to carefully examine all the parts and fasteners and evaluate the wear of the tabletop. At a round table it sag very often. If this happens, it will have to be changed. It can only be leveled under pressure, but the old material will not withstand this. The legs are also replaced if they are worn out, or if you want to install figured balusters. When the table is simply loose, it is enough to tighten the fastenings. In some cases, it has to be completely disassembled for repairs. It is necessary to glue the parts or place them on screws. It is advisable to mark the location of each part to facilitate the subsequent assembly process.
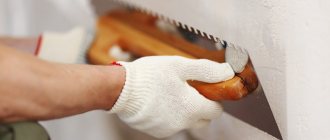
- Removing old coating. For this procedure you will need coarse and fine sandpaper, glasses, gloves and a respirator. Removing old varnish or paint is not an easy task. You will have to stock up on time and patience. Using a sander can significantly speed up this stage.
- Puttying chips and cracks. After sanding, the table must be cleaned of dust. Next, carefully inspect the entire surface. The slightest missed defect can play a cruel joke on you: after painting, cracks will appear outward, and when pasting with tiles or film, sagging will occur. To prevent this from happening, carefully repair all chips and cracks with wood putty. After drying, sand the table again with medium-grain sandpaper.
- Padding. Now the table needs to not only be cleaned, but also degreased. Acetone, vodka or vinegar are suitable for this. We wet a soft cloth or sponge with it and wipe the entire surface. Next we apply the primer. It is necessary to ensure that further painting or varnishing is uniform and lasts as long as possible. An alkyd primer is suitable for these purposes. It must be applied with a roller in 2 layers. Before applying the second, the first layer must dry well. And again we sand the surface with medium-grain sandpaper.
- Finishing the product. The primed and sanded product is completely ready for the decorating process. It is at this stage that your design abilities are fully demonstrated. Using masking tape, a brush and paints, you can apply various designs to the surface of the table. And by painting it in soft, pastel colors, you will get something in the Provence style. You can apply a thick layer of glue to the tabletop or part of it and carefully, using tweezers, place coins, shells, decoupage napkins and much more on it. The whole thing needs to be covered with two or three layers of varnish. A desk decorated in this way will become a real highlight of a little student’s room. If you decide to apply self-adhesive film to the table, do not forget to degrease the surface before doing so. In this case, the adhesion of the glue to the tabletop will be stronger.
After the repair is completed, the table should be left for several days. This is necessary so that all parts dry out and acquire the expected performance properties.
Restoration technique
Let's figure out how to restore a varnished table using the restoration method. This is one of the best ways to restore a decent appearance to a lacquered table. For example, to eliminate scratches, it is necessary to remove a layer of varnish on the defective areas, and then apply a new one. This method is quite effective and allows you to get rid of any scratches. But not only scratches are a problem for lacquered furniture. The next drawback that may appear over time is the darkening of the varnished surface. As a result of clouding of the surface of the tabletop, the appearance of the table begins to lose significantly in relation to other furniture. This defect can be corrected in a similar way: removing the old layer of varnish and reapplying a new one. This method is quite simple, and it is quite possible to varnish an old table with your own hands.
An alternative to an expensive purchase: furniture repair
Practical and cost-effective repair of old furniture with your own hands can significantly save your family budget.
Simple procedures are selected based on the complexity of the damage and the necessary measures to restore the appearance of the structure; the following technologies can be applied to cabinet and upholstered furniture:
- replacement of upholstery, internal filling and springs;
- installation of updated countertops or facades;
- painting surfaces, treating them with varnish;
- decorating wood with drawings or decoupage;
- restoration of functionality by replacing fittings.
Each option allows you to restore the functionality or aesthetics of the design, they can be mixed and matched to achieve the desired result.
Using simple techniques and methods, you can make a real masterpiece worthy of interior design from an old cabinet or chair, sofa or nightstand.
Sequence of restoration work
You can update an old varnished table in several stages. But first you should prepare some tools and materials and think about your safety. So, let’s get acquainted in detail with the algorithm for performing work on restoring a varnished table.
Determining the degree of wear
Before restoring the varnish on the table, you should first assess the extent of the resulting defects.
- Visual aging of the table surface. Defects that belong to this type are the formation of darkening in the threads and the formation of a mesh on the surface. Although one should take into account the fact that minor manifestations of such violations do not spoil the furniture, but, on the contrary, give it value.
- The appearance of more serious defects requires intervention and restoration. The main thing is to carry out the work in such a way as not to damage it completely. For example, many simply apply paint, thereby painting over all the beauty and attractiveness of the varnished surface.
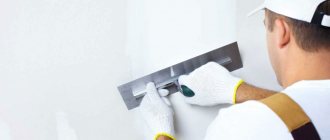
First, we clean the table surface with abrasive.
Thoroughly wipe the surface of the table
We paint the table
Choosing material
The question arises, how to remove varnish from the table. To ensure the quality of the restoration, the materials must be selected correctly. Many people believe that problem areas can be removed with alcohol. In some cases, minor defects can indeed be applied with alcohol, but unforeseen consequences may occur, such as roughness, light areas, etc. Therefore, we will focus on specialized materials that will become good helpers for beginning craftsmen.
- Shellac polish. Such material not only helps restore the surface, but emphasizes its originality. This is one of the oldest and most proven materials. The consistency of the polish is more like a liquid rather than a varnish. To achieve a high-quality result, this composition is applied in about 50 - 60 layers. It is because of this that the original deep color is achieved. This is a very good option that will remove scratches on a varnished table.
- Nitrocellulose varnish. This solution is used to restore large table surfaces. To apply it, sprayers are used, which provide very fast and uniform spraying. At a lower speed, the solution droplets begin to solidify, and the desired effect of a smooth and uniform surface will be quite difficult to achieve. That is why it is not recommended to use standard spray bottles, which additionally form air bubbles that are almost impossible to get rid of.
- Pentaphthalic varnish. This is an ideal material for table restoration, as it is quite easy to work with. It does not require special devices for application and dries quite quickly. Apply it in at least 4 layers. You can eliminate the purchase of primer solutions, since the first layer of pentaphthalic varnish will act as a primer. After applying the composition and drying it completely, sanding should be done.
Once you have decided on the choice of restoration composition, you need to pay attention to such a moment as the determination of color. You can use a colorless varnish, or you can purchase a varnish that imitates the color of any wood. In the second case, it is necessary to correctly determine the tone of the varnish.
Step-by-step instruction
Here are detailed instructions that will answer the question of how to properly varnish a wooden table. It consists of several stages:
- The preparatory stage consists of the following aspects:
- the surface of the table is thoroughly cleaned using a specialized composition or using ordinary warm water;
- remove the damaged layer using a scraper;
- We begin to sand the surface with sandpaper until it becomes matte;
- clean the surface from dust.
- Application of water-based varnish:
- the surface is covered with several layers of water-based varnish;
- each subsequent layer is applied after the previous one has completely dried;
- after the last layer has completely dried, we sand the surface;
- clean the surface from dust.
- Carrying out work using acrylic-based varnish:
- initially we select a varnish that matches the table surface in shade and gloss;
- Having diluted the varnish by 15% with white spirit, we prime the surface;
- after the primer layer has dried, we perform intermediate sanding;
- cover the surface of the table with undiluted varnish in several layers, allowing the previous layer to dry first;
- We perform final surface grinding.
- Please note that after applying all layers, the surface should be sanded to give the surface a glossy shine.
By following all the recommendations, you can get a very high-quality varnished surface. It is clear that in order to get decent quality you should use a spray gun. Below is a video on varnishing a table and useful tips on restoration.
Technology of restoration work
Determining the wear of lacquered furniture
The first step is to determine the condition of the surface you plan to restore. The first sign of worn-out and old furniture that has been in use for a long time is its visual aging. In particular, furniture may exhibit darkening in the carving area. In addition, a common sign of aging is the presence of fine mesh directly on the varnished surface.
Of course, if such changes are not significant, then they may not spoil the overall picture, but on the contrary make the furniture more valuable. However, if there is significant damage, there is a need for restoration, which can be entrusted to an experienced craftsman or done with your own hands. At the same time, you can update the furniture without harming its cultural or antique value. In extreme cases, the table can be painted, but the structure of the wood will be hidden under a layer of paint and the furniture will not have such an attractive appearance.
Choosing a material for restoring lacquered furniture
Many people think that they can renew lacquered furniture simply with a swab moistened with alcohol. Of course, an alcohol solution can dissolve the outer decorative layer and eliminate the defect. However, such a procedure may leave an indelible mark. Therefore, it is better to choose high-quality recommended materials, which include:
Shellac polish
This material allows you to beautifully highlight the elegant wood texture, giving it an original shade. Polish is one of the oldest materials for restoring lacquered furniture. In its structure, shellac polish is a special varnish that has the consistency of water. To restore wooden surfaces, it is applied in 40-60 layers. Thanks to this, it is possible to obtain a unique depth of color.
Nitrocellulose varnish
The material is used to restore large areas covered with varnish. The product is applied using a special sprayer, which distributes it over the surface at high speed. If the speed were lower, the droplets would begin to solidify individually. Therefore, it is not advisable to use conventional sprayers to apply nitrocellulose varnish, as they will leave fragments covered with bubbles. Accordingly, it is recommended to apply this material only in a specialized workshop.
Furniture decoupage master classes
Decoupage of furniture with your own hands can be done either in parts or completely. In the first version, the object is decorated with only one picture, in the other (this is called “decopatch”) - the surface is completely covered with special paper.
Modern stores sell a variety of decoupage materials for every taste. In practice, it is permissible to use any thin paper, including newspaper. This may also look original.
Let's try to find out what do-it-yourself furniture decoupage is using the example of several master classes.
Master class 1. Retro style chest of drawers
Retro style chest of drawers
Let's take a chest of drawers that does not need to be cleaned of varnish and paint. Such furniture can be purchased specifically for decoration.
Prepare materials and tools:
- cut paper for application;
- good sandpaper;
- alcohol;
- rags;
- sealant for filling holes;
- decoupage glue;
- sponge or brush;
- polyurethane-based varnish;
- strips of leather for new handles.
Decoupage process:
Step 1.
Unscrew the handles and fill the holes from them with sealant (if you decide to replace them). Thoroughly sand the surface with fine sandpaper, clean with a cloth soaked in alcohol, and then wipe it with a dry cloth.
Furniture pieces without unnecessary processing are ideal for decoupage
Step 2.
Using a sponge or brush, apply decoupage glue to the surface of the chest of drawers. Newspapers need to be well moistened with water so that they are damp, placed on the surface of the chest of drawers and smoothed, directing wet hands from the glued elements to the edges, then expel excess air from the newspaper with a sponge. This coating should dry thoroughly overnight.
Newspaper is applied to the surface of the chest of drawers using special glue
Step 3.
To further decoupage furniture with your own hands, after the newspapers have dried, take varnish and cover the surface with it in 4-5 layers. An hour should pass between each application. When the varnish is completely dry, you can make handles by attaching them to the edge of each drawer.
Making such a retro chest of drawers with your own hands is not at all difficult
The original retro chest of drawers is ready!
Master class 2. Decor of a garden chair
Do-it-yourself furniture decouage can be done not only for blanks, but also for finished furniture, which has long been sent into “exile” to the dacha as unnecessary.
Let's try to make a similar “reincarnation” of a garden chair, but we will not decouple it completely (as was the case in the first master class), but partially. The whole process is shown on boards, but it’s not difficult to repeat it all on the back of a chair.
Garden chair decorated using decoupage technique
Prepare materials and tools:
- floral napkins or stickers;
- decoupage glue;
- acrylic paints;
- several brushes.
- Decoupage process
Decoration materials
Step 1.
After removing the old paint and other preparatory steps, apply white acrylic paint to the back. Then sand it a little to create a slightly vintage effect. Where you intend to place the design, apply a small amount of brown paint to highlight the image, and dry brush these areas.
Step 2.
After the surface has completely dried, apply decoupage glue, then flowers cut out from napkins, smooth with a cloth to expel air, and dry the design again. The top of the back can be covered with several layers of varnish, as was suggested in the master class on decorating a chest of drawers.
Master class on decorating a garden chair
Do-it-yourself furniture decoupage can save you from pointless spending aimed at updating your decor; it will help you show your imagination and bring some of your soul’s creativity into your home. And it's not that difficult to do!
Comfort to your home!
If you liked the article, share it with your friends by clicking on your social network icon. Thank you!
Join the discussion! We would be interested to know your point of view, leave your opinion
How to remove scratches
Detected defects can be removed using improvised or specialized means. If there is serious damage, it is possible to combine several methods.
Special marker
A marker has been created for processing a polished surface, which allows you to restore the attractive appearance of the product. The principle of operation of the marker is the penetration of microparticles into cracks and subsequent filling of the scratch. The marker is colorless and has a consistency similar to paints and varnishes. The applied substance on the surface is not washed off with water and creates protection against new scratches.
Furniture wax is a universal remedy for removing scratches on wooden products. Wax can be used on laminated and varnished surfaces.
Soft
Soft wax makes the wooden surface smoother and gives the necessary shade to the wood structure. The product does not require pre-mixing and is offered in a ready-to-use state. It is enough to apply wax to the damaged area, remove excess and after 15-20 minutes finish polishing with cotton material.
Solid
The hard type of wax is suitable for restoring wooden furniture with large defects. Unlike soft wax, hard wax is thicker and is applied to material previously melted with a soldering iron. After application, excess material is removed with a spatula, and the coating is thoroughly polished.
Shoe polish
Minor scratches on tables and other furniture can be hidden using shoe polish. It is important to choose a cream that matches the shade of the surface being treated. This method is suitable as a temporary solution to the problem, since after a few wet cleanings the scratches will be visible again.
Brewing black tea
Shallow damage can be masked with an infusion of black tea. Soak a cotton pad in a rich-colored liquid and wipe the damaged areas. The method of removing scratches by welding is suitable for processing dark-colored products.
"Stroke" furniture
A specialized product called “Stroke” was created for application to wood and laminated surfaces. To hide a defect on the surface of a countertop made of plywood, MDF and other materials, you need to select a “Stroke” of the desired shade. The usage process is as follows:
- the coating is pre-cleaned from dust and dirt;
- The product is thoroughly shaken and applied to the surface in several layers;
- 15 minutes after application, wipe the surface with a damp cloth.
Iodine or machine oil
Scratches on dark wood furniture can be removed with iodine or machine oil. It is enough to dip a cotton swab in one of the substances and walk over the defect. When working, you should use rubber gloves to protect the skin of your hands.