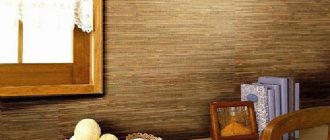
New wallpaper is always a joy and a pleasant update to the interior. However, so that this joy does not begin to disappear with the start of the heating season and the appearance of the first exfoliated fragments, you need to take the process of preparing the wall surface extremely seriously. That is why the answer to the question of whether it is necessary to prime the walls before wallpapering can only sound in the affirmative. We talk about all the specifics of priming walls and the basic procedure in today’s material.
- 4 reasons for mandatory priming of walls;
- Types of primers and specifics of their use;
- What you will need;
- Prepare the surface;
- Basic rules of priming;
- Conclusion.
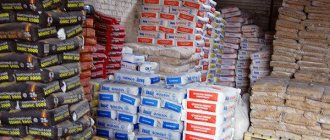
Types of primers and specifics of their use
If you think that buying a primer is the same as going to the store for cigarettes, then you are deeply mistaken. The choice of primer should be based on the type of base surface
, with which you are dealing.
Today there are
4 most common types
.
Perchlorovinyl
- used exclusively for outdoor work.
Do not purchase this type of primer under any circumstances - it definitely cannot be used under wallpaper. More precisely, it will work out quite well, but it will be of little use. The main purpose of this type is to prime external surfaces to fully protect them from moisture and cold. It dries very quickly.
Alkyd
- goes well with chipboard, fibreboard, wood;
- Not recommended for use on plastered walls.
You should also not use this type of primer under wallpaper - after all, the wall will be plastered in any case, and completely different primer mixtures work well with plaster. They dry in about 15 hours.
Glyphthalic
- perfect for both wood and plastered surfaces;
- takes a very long time to dry.
This primer option is much closer and can be called universal, but the only drawback - the long drying time - makes many craftsmen lean towards a different choice. Let's note the popular mixtures: GF-021, Ecol
.
Acrylic
- 100% universal;
- dries very quickly;
- Ideal to fit under wallpaper.
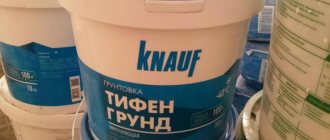
In any unclear situation, buy an acrylic primer. This is, of course, a joke, but there is a lot of truth in it: it is suitable for any surface, and it will dry even faster than you can choose the most beautiful wallpaper for your interior. Focus on the following names: Ceresit, Snezhka, Pufas, Forman
- quite high-quality solutions at a reasonable price.
Priming the wall for wallpapering - is it necessary to do it, when can you refuse?
Primer for walls under wallpaper is a product used to provide increased adhesion in the layers of building material with which the walls are covered. This is done in order to subsequently create the necessary connection between the surface and the wallpaper, regardless of the type - paper, non-woven or any other.
As a rule, the mixture has a light or white tint. The liquid has no distinct odor (except for the type of primer with organic components). Among the main ingredients there may be synthetic components and components of natural origin. More often they are represented by drying oil, resins, dyes, polymers, and water. The water base allows the mixtures to penetrate into the inner layers of building materials and provide the necessary level of adhesion in the future.
When the question arises whether it is necessary to prime the walls before wallpapering, experts suggest not carrying out the manipulation in the following cases:
- Wallpapering is done for up to 4 years;
- If you need to glue thin paper wallpaper. The rule does not apply to thick paper products that are thick enough;
- If you need to decorate non-residential premises with wallpaper.
In other cases, impregnation of the walls is a mandatory technological step to create a reliable adhesion and ensure tight adhesion of the wallpaper to the wall. If you perform priming, the seams of the wallpaper will not separate or sag, and the room will maintain an attractive and neat appearance during its service life.
Primer for walls under wallpaper is a product used to provide increased adhesion in the layers of building material with which the walls are covered.
Why is wall priming done?
Priming the walls before wallpapering provides the following effects:
- Provides gluing of particles of building mixtures that were used to cover the top of the wall at the stage of construction or finishing work. This compacts the surface, preventing its mechanical destruction and damage in the future. It is less likely to develop cracks, chips, or parallel layers to lag behind each other;
- Using a primer, you can eliminate some defects - smooth out slight unevenness, hide small cracks;
- Bind the dust particles that are on the surface;
- If you treat it with primer, the tone of the wall is evened out - it acquires color uniformity, and some not too contrasting spots are leveled out;
- If you carry out such a manipulation, you can prevent the spread of fungi.
Using a primer, you can eliminate some defects - smooth out slight unevenness, hide small cracks.
What you will need
- roller;
- brush;
- gloves;
- respirator;
- spray gun or sprayer.
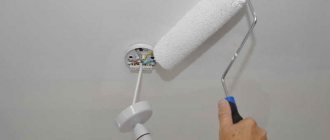
The last item on the list is, of course, a wish, because in this case the work will go much faster. However, a roller and brush will do just fine to distribute the primer efficiently and evenly over the entire wall surface. But there are some nuances in working with these tools:
- the roller helps to distribute the primer evenly over the wall, but not deeply; the brush promotes deeper penetration of the composition into the wall and, as a result, better protection against bacteria and fungus.
Can I prime with glue?
Despite the wide range of primer compositions, some users prefer to prime surfaces with glue. For these purposes, ordinary wallpaper glue is suitable, which is diluted to a liquid consistency and applied to the walls.
There are some recommendations for choosing adhesive for priming surfaces:
- the material is selected according to the selected type of wallpaper
- preference is given to formulations containing antiseptic additives. This reduces the likelihood of mold and mildew forming on walls and ceilings
- material consumption is taken into account. This information is written by the manufacturer on the packaging.
- Pay attention to the color indicator. If the glue takes on a pink tint when diluted, it is much easier to control its application to the surface.
- It is recommended to study information from the manufacturer to determine whether the adhesive composition is suitable for priming walls
When priming surfaces with an adhesive composition, it is recommended to purchase products that were produced no more than a few months ago and packaged in a cardboard box rather than in a sealed bag.
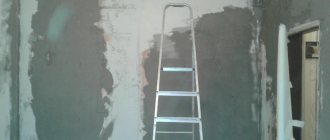
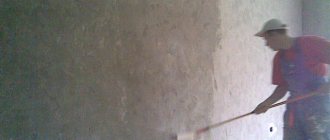
Preparing the surface
In order for the walls to begin to be treated with a primer mixture, they must first be prepared.
- carry out complete dismantling of the old material;
- remove all dust, debris, scraps;
- Fill all defects with putty.
You can also read the step-by-step instructions for preparing walls for wallpapering.
Please note that complex wall treatment may include primer treatment at several stages:- directly during sealing of cracks and crevices;
- right before gluing.
A few recommendations
When preparing to prime and wallpaper your walls, use the following tips.
- Not everyone knows how many times to prime walls. It is enough to apply a high-quality primer once to a well-prepared surface. On porous, heavily crumbling and moisture-absorbing substrates, primer should be applied in 2 layers.
USEFUL INFORMATION: Puttying wall corners
You can check the absorbency of the wall like this: apply the primer in one layer and wait half an hour. If the appearance of the surface has not changed, it means that all the primer has been absorbed and an additional layer is needed.
- The next layer is applied evenly over the entire surface only after the previous one has completely dried.
- Dry primer is cheaper than ready-made liquid primer.
- The soil mixture must be diluted strictly according to the instructions indicated on the package. The result should be a homogeneous mass composition.
- Be sure to follow safety precautions by protecting your body and eyes from contact with the primer.
- If you do not have the opportunity to buy a primer, you can apply diluted wallpaper glue to the wall before gluing.
Basic priming rules
The priming process itself, like plastering, does not represent any technological complexity and is accessible to anyone who knows how to handle a brush and roller (read the article for instructions on plastering walls with your own hands). However, we still consider it necessary to pay attention to some rules, especially since some of them are related to your health:
- be sure to wear gloves when working; it is advisable to wear a respirator on your face - this is due to the fact that many mixtures smell very unpleasant and can cause irritation of the respiratory tract;
- if you value your floor covering, then take care of it in advance and cover it with something - the solution will certainly drip all over the floor, and you can wipe it off without consequences only immediately, when it has not yet hardened;
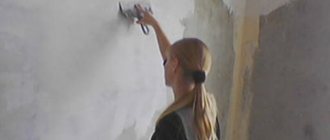
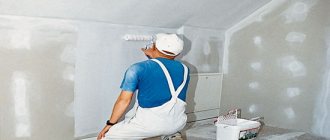
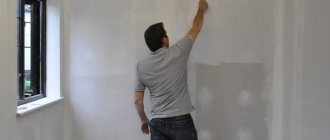
- the primer should be applied in a top-down direction;
- large areas can be treated with a roller, and for those where it is difficult to reach with this tool, use a brush;
- if you notice that some areas on the surface absorb the mixture too quickly and actively, then be sure to go through them again - until a kind of “soap film” is established on the surface;
- the optimal number of applied layers is 2, and the second layer should not begin to be applied until the first has dried; after you have successfully applied the second layer, give the wall time to dry - the packaging of the mixture always indicates the minimum required time for this.
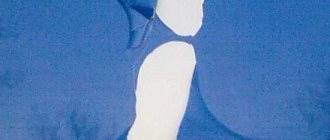
A reasonable question arises: how can you check that the wall has actually been processed according to all the rules? The answer is simple: after the treated wall has dried, simply run your hand over it. Does your palm slide freely over the entire surface? Congratulations, everything worked out! Does it cling to certain areas? It looks like you gave up some slack here and there and didn't process the surface well. In this case, you can process the wall again, paying attention precisely to those areas where the palm met desperate resistance from the relief.
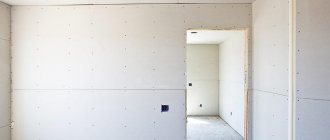
Proper preparation of joints, sheet fastening points and corners
Further processing of plasterboard walls for wallpaper begins with sealing the seams. This process uses reinforcing tape and comes down to a series of steps:
- the joints are expanded as necessary so that the solution penetrates between them;
- mix the putty in a small volume so that it does not dry out;
- using a small spatula, cover the seams, which should be covered to a width of 5 to 7 cm;
- the laid material is allowed to dry, after which the defects are removed;
- the joint is lubricated with glue (PVA is suitable), onto which fiberglass tape is applied (for reliability, it can be lubricated again on top);
- when the serpyanka dries, apply a 2nd layer of putty mixture about 10 cm wide;
- Uneven surfaces are removed from the dried surface with a spatula.
Work on finishing the outer corners of a room is the most labor-intensive. This is primarily due to the low strength of these areas.
The way out of the situation is reinforcement, which is performed using perforated plastic or aluminum corners.
The whole process goes like this:
- check the flatness of the end part with a level;
- begin to prime the drywall after wetting the corner with water;
- the inner part of the corner cut to size is treated with an adhesive composition and given time to dry (from 20 to 40 seconds);
- after this, the perforated material is glued and puttyed after 30 minutes;
- it is allowed to attach the corners to a layer of putty, pressing them into the solution; after which the protruding excess is leveled, the position is checked with a level or rule.
If the applied glue has dried out on the corner, you can add a new one. There is a method of securing with staples from a construction stapler and then sealing with the prepared mixture.
When using plastic material with a rounded shape, then up to 2 cm is cut from the corner of the plasterboard. It is placed on the solution, the squeezed-out excess of which is wiped off the rounded part with a damp rag or sponge.
To prepare internal corners for wallpapering, it is enough to use only reinforcing tape. It is set up with putty. Then smooth it into the shape of the corner with a trowel or spatula, giving it the desired shape.
Choice of putty
There are several types of putty compositions:
- Polymer putty gives the best result. It lays on the walls in an even layer, adheres to any wall materials, does not crack or shrink. The polymer composition has one drawback - high cost.
- Gypsum mixture also works well on any surface. Its big advantage is the absence of shrinkage and rapid polymerization. However, gypsum cannot be used in damp rooms, which means that gypsum putty is not suitable for wallpaper for painting.
- The cement composition is the most affordable in terms of price. But you should not use such putty under wallpaper - it often cracks and crumbles.
In addition to the various components, putties differ in the way they are packaged:
- it can be a ready-made mixture in diluted form;
- or dry powder, which must be diluted with water according to the instructions.
Important! Of course, it is more convenient to use a ready-made mixture, but it costs more and is no different in quality from dry mixture.
Flow calculation
Primer consumption when treating surfaces depends on many factors, namely:
- surfaces. If it is porous or loose, material consumption will increase. For such surfaces, deep penetration acrylic primers are selected
- number of layers applied. As a rule, the primer is applied in several layers to the surface. The manufacturer's packaging provides information on how many layers need to be applied to a particular surface, depending on its materials of manufacture. If the material is used to process sheets of plasterboard or rough concrete, the primer consumption will increase
- option for applying the mixture. A brush uses less primer than a roller (since it absorbs the mixture strongly). The most economical option is to use a spray bottle
According to manufacturers' information, 1 liter of universal primer is enough to treat 10-12 square meters. m, if the surface is smooth and not too porous. But as practice shows, this figure is two times less
Which is better for non-woven vinyl wallpaper?
Vinyl wallpaper amazes with its variety, color range and abundance of patterned compositions. It is very difficult to choose the appropriate option, especially since the wallpapers differ in the structure of the bottom layer. On sale you can find vinyl on a paper base and non-woven backing. In order for the wallpaper to stick firmly to the wall, you should understand the priming features of different types of vinyl wallpaper.
According to experts, the best result when preparing a surface for gluing vinyl wallpaper on a non-woven base is obtained by a deep-penetrating acrylic primer with antiseptic components.
Under paper wallpaper
Paper-based vinyl wallpaper is a type of two-layer finishing materials. The paper base is characterized by a high level of breathability and therefore a special favorable microclimate is created in a room covered with such wallpaper. There is one feature that is important to consider when gluing vinyl wallpaper with a paper backing - the glue must be applied directly to the underside of the paper backing. And if the surface of the base is poorly prepared and not treated with a special primer, then the adhesive solution can simply “tear off” the surface layer of putty or plaster layer. To prevent this from happening, the walls must be primed twice with universal-purpose acrylic primer.
When can you start wallpapering?
You can glue wallpaper onto primed surfaces after the second layer has completely dried. To do this, just run your hand along the walls. They should be even and smooth. If your palm slides along the wall as if it were glass, then everything was done correctly, and you can safely begin gluing any type of wallpaper (vinyl, paper, non-woven).