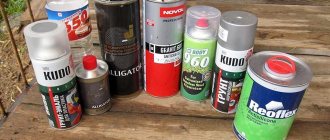
Processing walls during repairs consists of many stages, especially when the walls come across problematic ones. But if processes such as plastering, painting or puttying are mandatory, then many people forget about the primer or believe that it is quite possible to do without it. Meanwhile, priming the walls before puttying is a very important process, which will not only greatly facilitate subsequent work, but will also preserve the beauty of the repaired walls for a long time. Why do you need to prime the walls and how to do it yourself?
Why is this necessary?
Experienced specialists clearly state that priming walls before puttying is a necessary procedure that has a direct impact on the quality characteristics of the final finish. You can decide whether to prime the walls or not after studying the main advantages of this process:
- The leveling mixture adheres better to a base coated with a primer. This is the main reason why you should prime your walls. The putty will not crumble or crumble for a long time.
- Using a primer with antiseptic or moisture-proof properties helps protect the wall from mold, fungus and other formations, which is especially important in damp rooms.
- Priming also allows you to use material more economically and distribute it optimally over the surface.
- If you putty a wall coated with a primer, the finishing layer will always look perfect. This rule should not be neglected, since the aesthetic qualities of the finish depend on it.
- When dry, the primer covers the wall with a layer that protects against the appearance of stains on the final coating.
After reviewing the listed points indicating the advantages of priming, every novice master will give a positive answer to the question of whether it is necessary to prime the walls before puttying.
Why treat the surface before puttying?
Priming is the coating of surfaces with a composition intended for primary treatment.
- helps fix finishing materials;
- fills small cracks and irregularities, creating protective layers. This saves materials intended for final finishing. Otherwise, a surface that endlessly absorbs paint or glue will make repairs more expensive;
- acts as a kind of antiseptic, preventing the formation of fungus.
The primer will “cover” minor wall defects
Materials and tools
To get a high-quality surface and avoid difficulties during the process itself, you need to make sure you have the following tools in advance:
- roller (choose the right size taking into account the surface area), brush, paint brush (an alternative is a roller with a long handle);
- comfortable and spacious, but not very large capacity;
- spatula to remove dirt and remnants of old materials;
- a stable table or stepladder.
You will also need the primer itself and water (if you purchased a dry mixture or concentrate). The average consumption is indicated by the manufacturer on the packaging container. To avoid shortages, it is better to take it with a reserve of 10-15%.
If the composition remains, it can be used for the ceiling surface, as well as for priming cement screed.
The meaning of priming
Man began priming surfaces at the beginning of his historical journey. Artists were the first to do this - without a special primer it is impossible to put paint on canvas. The primed surface not only held the paint firmly, but also allowed the master to work comfortably - the base of the painting became dense and uniform in roughness. The same functions are inherent in modern primers. Padding:
- saturates the wall surface with moisture before applying plaster, which prevents it from taking water from the solution;
- creates a film with deep penetration into the wall (up to 1 cm), which significantly improves adhesion between its surface and the plaster;
- removes dust, including in places inaccessible to a brush or vacuum cleaner;
- muffles color spots on the wall (but not a transparent primer), turning its surface into a more monochromatic one, which is very important when wallpapering concrete;
- creates a smooth, easy-to-finish surface.
Before plastering
When redecorating an apartment or house, you should not miss one important nuance: the walls must be treated with a primer before plastering.
And let some experts prove that previous generations did not prime, and the plaster lasted for decades. One cannot agree with them for one reason: in the past, walls were reinforced with plaster mesh (metal), which rusted, and traces of rust very often made their way through the decorative coating of the walls.
Today, even concrete can be plastered without reinforcement thanks to a properly selected primer. Priming walls allows you to:
- Saturate the walls with moisture, as a result of which the chemical reactions of hydration of cement or gypsum are not interrupted due to lack of water (as is known, a number of wall materials - concrete, aerated concrete, brick, etc. - have the property of capillary suction of water molecules from the solution);
- Increase the strength of the wall surface while simultaneously creating good adhesion with the plaster solution. Deep penetration primers are absorbed into the wall material up to 1 cm, leaving a continuous film on the surface. When applying plaster, the film adheres to particles of cement or gypsum, providing a strong connection between the wall and the plaster;
- Bind dust, which actively counteracts any connecting processes;
- Achieve savings in the family budget. A wall treated with a primer has a smoother surface and good adhesion, which allows layers of plaster to be applied evenly. Therefore, it will be required less when compared with the consumption of a wall not treated with primer.
When plastering concrete, you need to be very careful when choosing a primer. They have their own primers on sale here. So, under gypsum solutions you need to use only a “concrete contact” primer, which binds dust, saturates the wall with moisture, and forms a film with high adhesive properties (due to the presence of quartz sand).
For information: a primer with “concrete contact” properties can also be used when laying plasterboard with ceramic tiles; during plastering work on polystyrene foam; when leveling walls with plasterboard using gypsum-based glue.
It is not recommended to use “concrete contact” under cement mortars.
Stages of work
Novice finishers ask experienced craftsmen: how to properly prime the walls before puttying? The whole process consists of several steps that must be completed in the established sequence:
Preparing the base
At the first stage, you need to start preparing the walls: completely remove dust, dirt, elements of old materials, etc. Some people doubt whether it is necessary to wet the wall. Professionals say that only dry and cleaned surfaces should be primed, and if this requirement is neglected, it is unlikely that the desired effect will be achieved. Therefore, if the wall is too wet, it is better to dry it.
Diluting the primer
If a ready-made mixture is available, there is, of course, no need to dilute anything. The dry or concentrated composition should be brought to the required consistency as indicated in the instructions. This is not difficult to do, the main thing is to achieve homogeneity by thoroughly mixing the mass. You need to dilute it immediately in a convenient container suitable in size for a roller or other tool with which the mixture will be applied.
Application of the composition
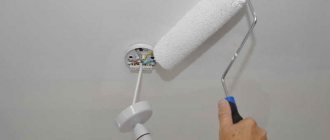
Primer is the most successful type of material that can be used to treat walls before puttying. But here it is important to consider some points. A roller or brush is suitable as a working tool. It is more convenient and faster to work with a roller, but a brush helps to distribute the composition in hard-to-reach places.
The composition is applied in layers. How many times to prime depends on the condition of the walls. The first layer must be applied to the entire area, the second and subsequent ones are allowed to cover only problem areas. It is important to ensure the uniformity of the coating, avoiding smudges and drops. Any unevenness must be removed or smoothed out immediately. Subsequent layers of primer are applied only after the previous ones have completely dried.
Types of primer
It is necessary to apply a primer before plastering the walls, we have already found that out. Which one to choose depends on the characteristics of the surface. Let's consider the common types of compositions:
- Acrylic - can be applied to most types of material, being a universal option.
- Phenolic – suitable for wood and metal
- Perchlorovinyl and polystyrene composition - used for external treatment of brick walls.
- Alkyd - intended for putty plasterboard and stone.
- Glyphthalic - this material is quite toxic, so it can only be used for exterior decoration. This composition can be used to coat structures made of metal or wood.
It is important to make the right choice regarding which compound to use before applying the putty. This affects not only the visual, but also the quality characteristics of the finish.
Validity of priming gypsum boards
Gypsum is a hygroscopic material, and it breaks down under the influence of moisture. Even moisture-resistant drywall (GKLV), although treated with a hydrophobic compound during manufacture, is not designed for use in rooms with humidity above 85% and, especially, for regular direct contact with water.
Applying a primer composition to the gypsum board is advisable even without subsequent puttying - the primer will increase the moisture resistance of the cardboard shell of the sheet and compact the gypsum underneath.
In addition, drywall mounted in any way requires sealing of joints and screw heads, which is done with gypsum putty. In this case, the gypsum board seams need to be primed for better adhesion of the mixture to the sheet ends.
Drywall joints also require an external primer - sickle tape is laid along them on a layer of putty.
Which one to choose?
Many mixtures are universal and can be used for different surface materials. However, it is still advisable to take into account the characteristics of the base and select the most suitable composition taking this factor into account.
For wood
Wood is a safe and durable building material. But if the structure is not treated appropriately, its service life will be short-lived. Priming will help extend the life of the material and improve the appearance of the final finish.
The wood must be primed before applying putty according to the following algorithm:
- Degreasing.
- Antiseptic treatment.
- Elimination of defects.
- Padding.
If the walls are wooden, it is better to choose an alkyd type of primer for the layer preceding the putty. It is highly durable, has good performance properties and is designed to work at sub-zero air temperatures. The alkyd mixture also has disadvantages: long drying time, the need to use White Spirit, a rather toxic substance.
For concrete walls
To create a high-quality finish on concrete walls, priming may be required. Since concrete is prone to rapid deformation, being sensitive to negative external and internal factors, a primer selected taking into account the characteristics of the surface will help achieve the following results:
- Uniformity of the applied layer and, as a result, smooth walls ready for puttying.
- Protection from destructive external influences.
- Ensuring coating strength and long service life.
- Economical consumption of putty when creating the next layer.
Primer for concrete walls under putty can be alkyd, polystyrene, polyvinyl acetate.
From plasterboard
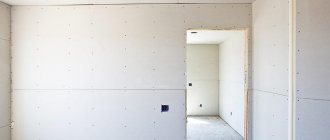
The question of whether it is necessary to prime plasterboard walls before puttingty is quite controversial, since here it is necessary to take into account the quality of the surface itself. If the drywall is clean and smooth, this is not necessary. And if there are uneven surfaces and there are visible seams between the individual sheets, using a primer will still be a necessary step.
Any type of primer is suitable for drywall. The main thing is that it is intended for indoor work and is of high quality.
Rules, tips, recommendations
Having decided whether it is necessary to prime the walls before puttying, and also having read the recommendations for choosing a primer, you can begin the priming process itself. But you should consider a number of professional tips that may be useful:
- Before priming, plasterboard walls should be treated with an acrylic compound, which reduces the absorption of the primer by the surface.
- The drywall fasteners are first treated with an anti-corrosion agent, and only after that the walls are primed.
- To save money, a spray bottle can be used as a tool, but then it is necessary to completely clean the surface of dirt and dust.
- Compositions of the same type, but of different brands, cannot be mixed with each other. Even if they look the same, their components and some properties may differ.
- If the master has doubts about whether the wall needs to be primed before finishing putty, it is better to resolve this issue in a positive way. Priming will provide high strength and extend the service life of the coating.
- When treating wooden buildings, it is better to choose a primer with waterproofing properties.
- The putty must be applied in multiple layers; it is advisable to treat each layer with a primer, remembering to let it dry.
- By priming the finishing layer of putty, a uniform color shade is obtained when painting.
Familiarization with the above information will help you understand whether it is possible to putty walls without a primer, why different types of compounds are needed and what is the sequence of work. Even a novice master can cope with this task, the main thing is desire and theoretical preparation.
