General procedure of the technological process
If you decide to make plaster panels on the wall with your own hands, you should know that finishing work requires a certain skill in handling tools and an understanding of the properties of materials. Wall surfaces must be carefully prepared during repairs:
- tear off old wallpaper;
- remove the damaged finishing layer;
- treat with a primer;
- cover with new putty.
The solutions must be diluted by pouring dry powder into water, and not vice versa, stirring twice to the desired consistency, and quickly applying to primed surfaces. Any delay will turn the mixture into a hardened mass that can no longer be restored. When leveling the walls, hold the spatula at the desired angle, change turns in the required direction, getting rid of excess mortar.
Even an unusually beautiful design in a panel made of decorative plaster will not look original if it is painted on a sloppy surface, peeled off by putty over time. An artificial picture does not cover blemishes, cracks and holes, does not serve as an alternative to repair, but is a finishing touch to the finishing touches.
the work of a master.
Methods for creating panels
To create a visual effect using decorative plaster, there are several surface treatment methods. When making a wall panel, three main types of drawing techniques are used.
- The stencil panel can be called the easiest to perform. Even if you have never encountered such work before, you can easily reproduce the work yourself. To do this, you need to prepare a stencil of the design in advance, according to which the painting will be applied to the walls. This technique is often used to apply the same motif to a surface. The work can be done on a surface that has already been treated with plaster mixture. Sometimes panels are first applied to a piece of drywall or plywood. Textured plaster is applied through a prepared stencil. After creating the image, it is decorated with special paints;
- Relief graphics are more often used by people who have artistic taste and are not afraid to improvise. This type of wall decoration is applied directly to fresh plaster. The procedure is carried out using special sticks pointed at the end. Moreover, the drawing must be created before the solution hardens. After this, the masterpiece is painted with colors as your imagination tells you;
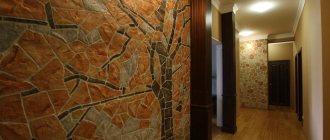
- Modeling from decorative plaster allows you to create an imitation of a wall made of stone or brick. You can also reproduce complex objects such as the convex parts of people or animals. Sometimes entire works are created, as shown in the photo.
There are combined panels created from a decorative mixture. In this case, several application technologies are used. Such paintings are decorated not only with paints, but also with natural minerals.
Required materials and tools
The dry composition of building materials is sold in bags; the packaging states:
- instructions for diluting the powder;
- hardening time in a bucket of the finished mixture;
- purpose for a specific job - primary, finishing or textured layer.
When purchasing, you need to pay attention to what operation the material is suitable for. Application of a primer to the surface is mandatory. This liquid not only wets the place where the master plans to apply plaster panels to the wall, but also provides a strong grip and adhesive effect. Simultaneously:
- removes dust;
- penetrates into cracks invisible to the eye;
- reduces construction materials costs.
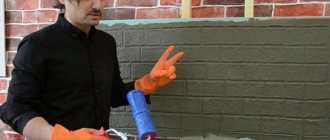
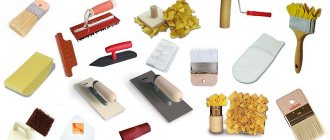
Primers have a number of positive properties due to the components included in the composition. The relief artist needs to prepare a set of tools in advance:
- spatulas of different sizes, the choice depends on the preferences of the master, but there must be small and large;
- grinding plate and fastening device;
- masking tape;
- acrylic paint;
- rollers;
- brushes;
- template or stencil;
- palette knife.
All necessary items are collected in advance so as not to be interrupted during the process of performing specific actions. You should always remember that the liquid solution is designed for a certain time; it is diluted enough to have time to apply to the surface, otherwise the rest will have to be thrown away.
What is a relief panel and what can it be made from?
A relief panel is a decorated part of a wall in the form of a picture, which with its convexity creates the effect of presence, thus being the compositional center in the room. At the same time, illumination of such a relief helps to additionally display its depth. A relief panel is a type of bas-relief.
Unlike bas-relief, which is more close to a sculptural theme, a relief panel can carry a variety of themes, and occupies limited space on the surface, enclosing the drawing within clear boundaries (frame).
The highlight of the relief decoration of part of the wall is that a fragment of the pattern stands out against the background of the plane and at the same time harmoniously combines with it.
The panel with relief fits seamlessly into modern minimalism, modern and deco styles. Such a piece of decor can be decorated with its convex texture, for example, part of the wall in the bedroom above the bed, a fireplace or stove. The relief is created directly in the part of the room where they want to place it. But, sometimes a relief panel can be created on a separate part of the surface in the artist’s studio and then mounted on the wall. This method of creating relief is popular in cafe interiors.
The central element, which attracts the attention of people entering, can most often be seen from a material such as plaster. Such stucco can be made of clay, ceramics, wood, stone and even metal. But the plaster option is a more common design solution. The complexity and duration of the work depends on the choice of decoration, its color scheme and thickness of the relief, as well as on the insertion of various elements such as beads or glass. In general, decoration takes from one week to a month.
The relief composition can be made in any color and using different depths of the convexity. The composition can carry a storyline or appear as an abstraction. Sample drawings can be taken from different sources and combined together.
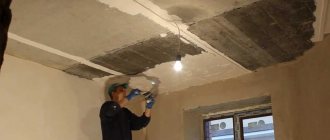
Preparing the wall
Many people think that decorative plaster, which is used to create panels, does not require additional preparation of the entire surface. This is fundamentally wrong; it is difficult to correct irregularities after applying the drawing, and they spoil the picture. The wall will be completed in its entirety:
- clear;
- coat with primer;
- plaster;
- let dry;
- prime again.
It is possible that those places that are not occupied by the relief installation will have to be puttied and sanded, but it is better to treat the entire area; the adhesion of building materials of different compositions will be ensured by a primer. The surface must be dry and clean.
What it is?
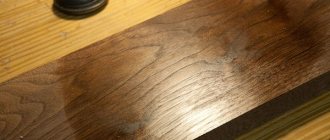
Relief decorative plaster is a finishing material for finishing surfaces. It is based on a binder, to which auxiliary additives are added: various resins, stone chips, lime, and mineral components. It is their quantity and composition that determine the texture and appearance of the future relief plaster.
The use of relief plaster of this type helps to create patterns whose structure resembles wood, granite, orange peel, plants, as well as a bark beetle-style surface (imitation of a wall eaten away by insects). It can be an abstract pattern or a finished painting. In this way, you can treat areas that are located inside, as well as external facades. Don’t let all these patterns and abstractions scare you; applying relief plaster with your own hands will turn out just like any master. You just need to do a little research. Such activities can be classified as art, just like painting on plaster.
And most importantly, you can decorate the walls or ceilings in your apartment using relief plaster with your own hands, without resorting to the services of craftsmen. To do this, it is enough to study some of the nuances associated with the composition of working solutions, as well as how to work with it correctly.
It makes sense to practice on small areas where you can make such plaster. If you do not master the application skill well, then small defects will be visible on the finish coat.
Applying plaster
The application of the decorative layer depends on the type of mixture, but it is done in several layers, the thickness is chosen in accordance with the base - concrete, wood or brick. The structure of the entire wall can be:
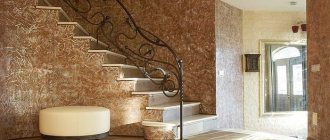
- Smooth - with imitation of marble, granite, any natural stone. This type is created by components in the composition of the powder or ready-made solution. Apply it with a simple spatula in 2 layers, first the starting mixture, then the finishing or universal mixture. After which they sand, but after each stage they prime and wait for drying.
- Textured - the entire area is artistically intersected with fragmentary elements. They consist of stone chips and sand. During manufacturing, the manufacturer adds large or small particles to the composition. Work with rubber, metal or plastic spatulas.
- Relief, when using a painting tool, a special roller with grooves and additives, bulges and depressions are created in the building material.
They choose any finishing method they like, but this is not the final process, but only the basis for creating a panel.
Preparatory work
First, we select a place on the wall where the panel will be created. Here you need to make markings in advance. Before you begin creative work, you need to carefully inspect the wall and prepare it for the further process.
The base must be clean, smooth and without any defects. It is better to remove paint or old wallpaper that almost no longer sticks to the wall using a spatula or other sharp tool.
After this, a thin layer of primer can be applied to the cleaned surface using a spatula for this purpose. When the putty is completely dry, it is better to clean the problem areas with sandpaper. Now you need to treat the area intended for the panel with deep penetration primer for better adhesion of the materials used.
How to create a pattern?
Until the finishing material has set on the wall to stone strength, you can draw any pattern on it. If the panel is in a limited area, use masking tape around it to prevent it from contaminating the rest of the wall and to mark clear edges.
It is better to have the sketch diagram before your eyes and gradually transfer it to the surface of the indentation with a wooden stick or the handle of a narrow brush. The convex parts are added separately, with a small spatula. A palette knife spatula will allow you to create the desired model with the smallest details - petals, flower stem without using a stencil. This procedure is performed in stages until a complete picture is obtained. Excess fragments are cut off with a knife after complete drying, and the work is corrected while still fresh, when the solution is plastic and amenable to correction and falls into the desired position. A damp brush corrects the lines well, it makes them smooth and smoothes out the corners.
When using a stencil:
- it is attached to the wall;
- filled with solution;
- As soon as the mixture sets a little, carefully remove the frame.
Working with a template is easier; you don’t need to think about transferring the drawing, it has already been created in finished form. After detaching from the surface, parts that are not clearly reflected are corrected.
There are rollers on sale that are specially designed for working with decorative plasters. With this tool it is better to apply the design not on a separate panel, but completely on the wall.
Painting work cannot be rushed. Each procedure requires time and endurance. Speed is important for the solution, so it is necessary to clearly calculate the volume of the mixture in order to have time to process it.
How to apply relief plaster correctly.
You apply relief plaster to the base with your own hands, in two ways - using a ready-made decorative composition or with the independent formation of the finishing pattern (improvisation with texture and shades). Let's look at both of them.
Finished plaster. Work algorithm:
- applying the first layer, which acts as a leveling base. If after preliminary preparation there are still minor defects, they are removed at this stage. The seams between the slabs, corners, irregularities and differences should be treated with special care. All actions are performed using a spatula of the required length. The result of this stage is a perfectly flat surface (without depressions, seams, chips or cracks);
- applying bas-relief plaster with your own hands. Now you can approach the process creatively and choose the number of layers and technique for laying the finished mixture (based on personal preferences). Another option is to strictly follow the instructions on the material packaging. In any case, the solution will acquire an original pattern due to its special composition;
- finishing. Includes polishing and painting (if necessary). You can move to this stage only after the material has completely hardened; this usually takes about a day (manufacturers indicate on the packages of the mixtures the exact time during which it dries). To polish the surface to a glossy shine, wax is most often used, as well as other means. Surface painting is not always required, since many ready-made plaster mixtures already contain dyes. If the base is colorless, then select the required shade of paint and apply it in a thin, even layer.
Relief plaster with a structure that can be done independently. Tips for carrying out the work:
- preparatory processes and installation stages are carried out according to the same algorithm as with finished plaster;
- if a combined composition of different shades and textures is intended to be applied, then each layer is prepared and tinted immediately before application, as the process progresses;
- Each subsequent layer of material is laid only after the previous one has completely dried. This rule especially applies to relief paintings made of plaster, formed with your own hands, since it will prevent mixing of colors and smearing of the pattern;
- you need to take into account that the shade obtained when preparing the composition will become 2-3 tones lighter after application and drying;
- as already mentioned, to apply the finished solution to the wall, you can use any available item such as washcloths, brushes, crumpled cellophane, fingers - the options are limited only by your own imagination. If you want a clearer pattern, it is better to use a special roller or stencil;
- relief plaster is formed no later than half an hour after application, since subsequently it will begin to harden and finally lose its plasticity;
- the instruments must be perfectly clean. This will help avoid disruption of the patterned lines and the appearance of foreign color inclusions.
It is worth deciding in advance on the number of layers and application technique. If this is done during the application process, various transitions and inhomogeneities will be visible.
Grinding process
At each stage, different cleaning elements are used. To sand surfaces, it is convenient to use a sanding block. It has holders installed at the ends; sandpaper or an abrasive mesh is placed on top of the device and secured.
Any of these materials has different cell or grain sizes. The number is chosen depending on the required grinding accuracy. For best results, the finish should be completely dry and the nozzle moistened with water. As the process progresses, the pressure is reduced or increased, and the drawings are painted on according to the shape of the texture.
Style solutions
The style of the panel is selected in accordance with the entire interior of the room. This condition is suitable when choosing the color used to cover the finish, highlighting the relief pattern and when forming structural lines. Eg:
- Pastel colors are considered modern. There are no bright, provocative colors here, and the forms, curved and intertwined, are painted in beige, brown, and gray colors.
- The classic interior contains features of clear symmetry. Pink, blue, matte shades are allowed. The panels are limited to baguettes and stucco is used.
- The French style of performance is considered a bourgeois direction. For the art deco style, metallic colors complemented by silver and beige are acceptable.
- High-tech style requires adherence to strict geometry in lines and patterns. There are no motifs from the plant world, no shapeless overflows. The design adheres to monotony, modest contrast - white with gray, red with brown.
Relief decoration with panels and bas-reliefs is gaining momentum not only inside buildings, but also on facades.
Useful tips
You shouldn’t believe that you can pick up a spatula and immediately get an even layer without flaws. Painters achieve quality with many years of experience and a large volume of work. Therefore, they have long been called not workers, but craftsmen. But after studying the recommendations and advice, you can cope with the task yourself.
- If you carefully read the instructions for diluting solutions on the surface of the package, the material will not have to be thrown into a landfill.
- There are many mixtures that you can work with for several hours, they do not harden, you have time to learn how to apply even layers without scratches. Sanding and stencils will help you create a beautiful design yourself.
It is better to take the first steps in mastering the skill of repair work under the supervision of a finisher; he will position his hand correctly and tell you how to beautifully decorate the panel.