Stages of the finishing process
The whole process can be divided into main parts, and the technique of applying decorative plaster does not play a big role here. Each stage is very important, without following this sequence at the end of the repair you will not get an ideal result. But if you approach the matter with all responsibility, then you can complete the work even without special construction knowledge . When decorating, you must follow the following sequence of actions:
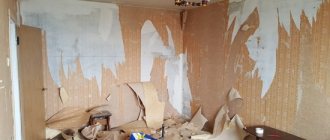
- The walls are leveled. Particular attention should be paid to this stage if you subsequently plan to apply a composition with a fine-grained structure (Venetian plaster, liquid wallpaper). And ordinary finishing gypsum putty will be sufficient in the case of applying textured mixtures with large inclusions (“rain”, “bark beetle”, “travertine”).
- This is followed by the application of a primer coat to strengthen the alignment and increase the adhesion of the decorative composition. The coating will be durable and resistant to external influences.
- Then comes the work with the decorative composition itself, it is performed in one or three steps. It all depends on the chosen method of applying decorative plaster. Sometimes you need to apply two layers to get a volume effect. The simplest option is to apply the plaster solution in one layer.
Decorative plaster as a popular finishing method
Decorating rooms with woven materials came to us from ancient times. The walls of the houses of wealthy homeowners were decorated with this practical method of decoration. In modern times, this method of giving rooms individuality has remained, but now it is much more diverse, thanks to the advent of modern technologies that make it possible to realize the most stylish fantasies. Rooms decorated with plaster today are fundamentally different from the works of ancient times, but they have not become less popular; every year decorative plaster is becoming more and more popular among the popular methods of home decoration.
This method of finishing, with a variety of styles and techniques, makes it possible to create exclusive options and adds sophistication to every interior. This is exactly the case where for the best result you need to experiment and try. Experience in plastering work or skills in finishing are not of decisive importance in this situation. If you plan to get your own unique interior and style after renovation, you need to make up your mind and get down to business.
Materials for work
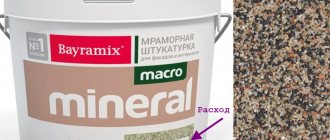
Of course, the first thing you need is the plaster mixture itself . It may contain small or large inclusions: powder, marble chips, silk fibers, quartz sand of various fractions, gold grains, sparkles. Due to this, the texture can be varied.
Less numerous binders make it possible to form a continuous layer of plaster, holding it on the wall. Most types of mixtures are made on the basis of lime or gypsum; white cement is suitable for external repairs or use in rooms with high humidity. Acrylic is a more modern base material. The composition may contain additional additives to make the solution more plastic.
Simple types of finishing can be done with ordinary gypsum putty. It is worth remembering about the necessary materials when choosing decorative plaster. The types of textures and methods of application do not particularly affect the required set of tools; it remains practically unchanged:
- metal, construction spatula;
- sandpaper;
- trowel;
- paint and texture rollers;
- medium size brush.
If you intend to create a colored coating, then you need to buy a color scheme, since mixtures on sale can only be found without coloring. When applied they turn white. You can immediately buy primer, wax or varnish at a hardware store if necessary. Special stamps may be required if an imitation snake skin is to be created on the wall.
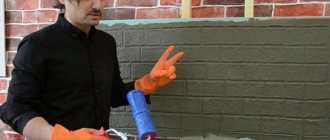
By the way, if the question arises of how to apply decorative plaster on walls, it is worth finding out that improvised materials are also suitable for decorating the surface. They can be polyethylene and a wet cloth, a round plastic sponge, a cord, a thick rope, or a foam sponge. And some people prefer to apply decor simply with their hands, wearing rubber gloves - this also produces a very interesting effect.
Technology of applying decorative plaster
Now that the surface is prepared, we proceed to the actual application of the material. There are several application methods, and they depend on the types of plaster and its consistency. Therefore, the following factors should be taken into account:
- liquid plaster is not very convenient to work with, since it is completely ready for use and cannot be diluted;
- if the plaster has a large filler, for example, crumbs, then it can only be applied by hand;
- multi-fraction crumbs in the composition further complicate manual application;
- plaster mixtures that dissolve with water have less toxicity, but are more susceptible to external influences.
There are a few other important points to remember. These include the following:
- On porous concrete or plaster, the applied decorative composition will dry much faster than on oil paint, plastic or polyurethane foam;
- Water-based decorative coating can deform the surface of wood, plywood, chipboard and OSB during operation;
- To cover the base surface with defects, more plaster will be needed, since the layer must be thicker than usual;
- If you are applying a water-based coating to ferrous metal, be aware that rust marks may appear after curing.
Almost all types of decorative art plasters harden at the same time. Setting occurs in 3-5 hours, drying in 1.5 days, final hardening of the layer in about 9 days.
Let's start applying the plaster. First, cover all adjacent surfaces with masking tape: baseboards, wallpaper, paint. Decorative plaster should be applied from one corner towards the other. If the wall surface has significant deviations, then you will need to make plaster along the beacons.
Creating a textured coating
You need to know not only how to apply decorative plaster, but also how to make a textured surface from it . The application method will depend on the effect you want to achieve. With gypsum putty it is easy to imitate leather and finishing stone and create a relief pattern. Finishing mixtures are best suited, but you can mix them with starting mixtures in equal proportions. The solution is mixed strictly according to the manufacturer's instructions.
To create a base, a thin layer of putty is applied to the primed surface. The thickness of the coating will be no more than five millimeters. The work starts from the bottom, the mortar is spread in long strokes along the wall. Having applied the composition to two square meters, you need to immediately proceed to applying the relief, otherwise it will no longer be possible to remove anything from the set mixture.
The simplest working tool can be called a wad of rag, which is wrapped in plastic film. The created tool is applied to the wall, after which you need to make a rotational movement with your hand to tear the film off the composition. You will get a spiral curl. These prints can be arranged in any order. The wall will be covered with patterns reminiscent of peonies or roses. After treating the entire surface, you need to wait a day.
Then the wall is covered with a layer of water-based or acrylic paint and left for three hours. Next, polishing is done with a metal spatula to smooth out strongly protruding peaks. Some of the paint is also removed, exposing the base light layer. The result is a vibrant floral pattern.
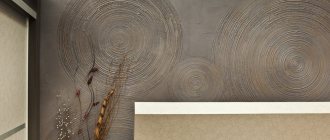
You can make wavy patterns of lines with your own fingers. You can leave ring-shaped marks with a round plastic washcloth; use a sponge with large holes to form a surface that will resemble shagreen leather . Sometimes reliefs are applied with a regular roller, which is first wrapped with a thick cord - the effect of bamboo stems is obtained.
Special stamps and roller attachments are required to create imitation reptile skin. A snake scale or crocodile skin pattern needs to be painted over twice after drying to highlight the depth of the pattern. The layers of paint will differ slightly in tone, the top layer is applied extremely carefully: you only need to paint over the protruding parts of the “scales”. You can apply glitter or gilding with a soft sponge.
Algorithm for working with a variety of decorative plaster
Careful processing of selected surfaces is the basic rule. Initially, defects in surface elements are removed by choosing various compositions, including the popular gypsum or cement. The next step is to coat it with primer once. It is important that this product is applied only when the surface is completely dry. Further processes are determined based on the intended methods of applying interior plaster.
Thin coatings in one layer
The use of woven materials adds sophistication to surfaces. These coatings, due to their few layers, are subject to high-quality preparation of surface elements. To do this, it is recommended to use a brush. The expected effect can be achieved by making vertical, horizontal, and circular movements with the tool.
The structure of this solution mainly consists of glass, fine quartz sand or special metallized powder.
Applying a fur coat
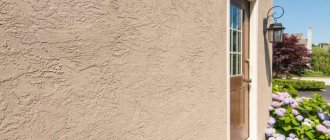
This type of coating is easy to install and is one of the most practical. It gives the surface texture a certain roughness. The shade is acquired by adding pigment, or tinting with a roller at the end of the work.
Typically, the technology for using this technique of decorative plaster involves making a creamy mortar by throwing it onto the surface to be decorated. In addition, to level, use special spatulas or graters made of steel.
To indicate texture, use a brush or a piece of faux fur. Application must be done on a new surface. To protect the surface element, it is varnished with acrylic or special wax.
Versailles plaster
Even a novice master can create the luxurious grandeur of Parisian palaces at home. The technology for applying “Versailles” is quite simple. You will need gypsum putty, and the finishing and starting marks are mixed in equal quantities. The composition is applied after the primer has dried, the sequence of actions looks like this:
- The solution is applied to the walls in chaotic short strokes. The plaster layer is about 3 mm. It is better to start from the joints and corners of the wall.
- Next, using a trowel or a large trowel, the relief is applied in wave-like movements. When moving and tearing off the trowel, chaotic streaks are obtained.
- When moving to the next section, an overlap is made; for the continuity of the pattern, the solution is slightly stretched onto the previous layer.
- It will take about two days to dry the wall.
- Then the surface is polished with a metal spatula to remove sharp parts of the relief, making the texture more even. Then polishing is carried out with sandpaper.
- All generated dust is removed, the wall is primed with a composition that is suitable for acrylic paints.
- The surface is painted with a roller and dried for a couple of hours.
- Powder for silvering or gilding (also sold in hardware stores) is diluted in primer or acrylic varnish. Apply with a foam roller. Gilding is usually applied only to the protruding parts. Then a layer of varnish is applied with the addition of glitter, which will give the surface a special shine and protect it from moisture.
A wall decorated in this way can be easily washed with damp cloths.
The Versailles technique has another variation : imitation of limestone slabs. After applying the base, you need to force the wet plaster to form numerous peaks. To do this, the trowel is pressed with its entire plane against the mass, then it is torn off perpendicular to the wall. The peaks are smoothed out, leaving a texture in the depths in the form of recesses and depressions.
Unsuccessful areas can be redone: just smooth out the ugly piece, create new peaks and process their tops. The dried wall is painted by hand, using a sponge to rub in the acrylic paint. To enhance the effect, you can apply a lighter shade of paint only to the convex parts.
Technique: how to apply it yourself?
Preparation of composition and base
Thorough surface preparation is necessary to obtain a higher-quality coating and ensure its durability and strength. The preparation stages are as follows:
- The surface is cleaned. To do this, use a damp cloth or vacuum cleaner. All dust, dirt, mold or mildew accumulation must be removed.
- The wall is being treated with an antiseptic.
- Alignment. In case of strong cracks, noticeable flaws, or bumps, grouting and puttying are performed. The bark beetle cannot correct the defects on its own, so preliminary work is required to prepare a flat surface.
- Padding. To increase the adhesion of the wall to the plaster, you need to select a primer to match the type of mixture. A large fraction of the putty requires the application of a larger amount of primer, and vice versa: smaller particles in the solution adhere better to the base with only one layer of primer applied.
We invite you to watch a video about the preliminary preparation of walls before applying the bark beetle:
Process
Decorative bark beetle plaster is applied with a simple spatula or trowel. It is best to combine these tools. The professional approach is to dip the spatula into the container and remove a certain amount of the mixture, and then transfer it to the trowel. First, tangential movements are made with the trowel from bottom to top. The spatula is held at an angle of 60 degrees.
Depending on the size of the grain fraction in the mixture, the thickness of the applied layer will be selected. The excess is then removed and the final design is applied with a spatula. This is done with progressive movements after the base layer has dried a little.
It is convenient to apply the pattern with a polyurethane float, lightly pressing it onto the mixture. Movements must be performed strictly in the direction of the drawing. When applied vertically - from bottom to top, when applied in a circular manner - in a circular, chaotic manner. The cross pattern is applied alternately with vertical and horizontal movements.
Formation of texture
Any pattern is obtained by rolling grains between a grater and a base. The moving grains leave grooves that can be rolled in different directions, depending on the pattern. The direction of the grooves and the type of pattern depend on the final goal of the façade design.
A plastic grater can be rolled over the surface in several directions:
- vertically , if the goal is to obtain a pattern in the form of rain;
- chaotic - to give the image heterogeneity and the effect of antiquity;
- alternating right/left - to obtain a pattern for visualizing the carpet;
- spiral and circular rotations - to recreate the imitation of a lamb.
Any drawing is performed in two stages:
- The first is the formation of grooves. It is necessary to achieve uniformity of their appearance and concentration around the perimeter. After 30 minutes of waiting, when the fractional elements are tightly fixed to the base, smoothing is carried out again with a trowel.
- The second stage allows you to obtain areas with even grooves and a smooth texture of the pattern. If you plan to take a break, apply masking tape and make a clear boundary of the layer. After applying the border area of the layer and decorating it, the tape is removed. And before starting work on the adjacent area, the edge of the dried layer is sealed with tape.
We invite you to watch a video about applying Bark Beetle plaster and forming a vertical pattern:
Finishing
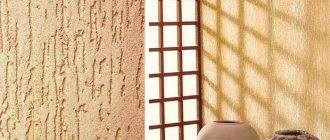
The finished Bark Beetle coating must be covered with a layer of varnish in the final version. Acrylic and water-based paints are used for interior work. Facade decorative plaster Bark beetle is painted with water-dispersed paint: silicate, acrylic or silicone.
Attention
It is best to use paint from the same manufacturer as the bark beetle plaster mixture used. Externally, the plaster coating with grooves is closer to stone. When choosing colors, consider their combination with the tones of natural stone.
Facade coverings are painted in one color using massive rollers with a hard handle. Interior decoration often requires painting in two colors. This interesting mix throughout the space gives it variety.
For finishing, you can use acrylic varnish, which will be slightly colored. Use a sponge to carefully rub in this composition so that some of it settles deep in the grooves. There should be much less paint left on the top than on the inside. After the paint coating has dried, the surface is also covered with wax. This gives a finished look to the finish, uniform shine in any light reflection.
Grotto application method
The “rain” and “bark beetle” techniques are based on the effect of scratching a substance with hard grains of quartz or marble. The fine-grained mixture produces a beautiful texture called “grotto.” You will need plaster paste with dolomite or marble chips and a small amount of Venetian mixture. It is better to glaze the coating with special wax, which will give the decor the shine of polished stone.
If you follow the algorithm of actions , then a novice master will cope with the task:
- A very thin layer of colored textured plaster paste is applied to the primed surface. When applying it, you need to stretch it with a trowel.
- The second layer is applied after the first has completely dried. To do this, apply a little model mass to the trowel, the tool is pressed against the surface, creating peculiar islands from the protruding particles of the mass. Their location can be chaotic. Trimming is done in small sections.
- The protruding areas are smoothed out again with a wide spatula - smooth islands are formed.
- Wait five minutes, then the surface is smoothed again with a trowel or trowel. Polishing is carried out until the convex areas have a slight gloss.
- Using a roller, apply the Venetian mixture in a layer of no more than a millimeter. The shade of the layer may differ slightly from the main textured surface.
- A thin layer is dried and polished to a gloss with a trowel or smoother.
- Glazing can be done after a day of drying. The wax is distributed with a sponge and rubbed into the recesses. After fifteen minutes, polish the wall with a dry cloth in a circular motion.
The result is a coating reminiscent of granite or polished quartzite - it all depends on the color of the plaster mass.
An imitation of travertine can be obtained if you choose a larger size filler in the paste. This option will differ in that after applying the second layer of model mass, the wall must be ironed with a trowel until it shines. According to builders' standards, the thickness of the decorative coating should not be more than six millimeters. Thin layers of relief mass acquire their charm through polishing and tinting.
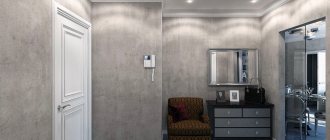
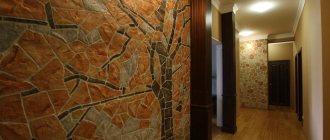
There is no doubt that an interior with such finishing material will attract admiring glances. A creative approach to creating a textured coating will definitely bear fruit. The main thing is to carry out the finishing with soul and with utmost care, then the room will always have an atmosphere of comfort and warmth.
Various plaster application technologies
There are several different types of decorative plaster, and their application technologies, as well as tools, allow you to achieve different textures. For this, a brush, a relief roller, a spatula, a trowel or a spatula will be useful. Lime and sand plaster will allow you to achieve a wide variety of fancy textures.
- Wave. Make notches on the pre-troweled, fresh plaster, moisten it with water and apply a layer of mortar in stripes, either straight or curved - as your desire dictates. Use a spatula to make the surface wavy.
- Boulders. Apply a colored solution to the soil (make sure it is sufficiently flexible). Using a trowel, smooth it out and trim the surface with a hard brush. It is correct to hold the brush relative to the wall at an angle of 90 degrees.
- Travertine. A thin layer of tinted mortar is applied to the pre-plastered surface, in throws, after which it is smoothed with a trowel or spatula.
- Furrows. To create such a texture, you will need a trowel with semicircular, well-sharpened teeth, 3 cm wide and an intermediate step of 1.5 cm. Apply thick plaster to the primer and immediately smooth it with a polisher. Apply the rule and form furrows with a small spoon, holding it at an angle of 45 degrees.
- Fur coat. There are many ways to achieve this effect: throwing it through a net, spraying it, shaking it off with a brush. Let's say you are using a grid. The cross-section of its cells should be 1 cm. Stretch the net over a frame measuring 1 x 1 meter, lean it against the ground and throw the plaster through it with a spatula. To obtain a uniform coating, apply the solution with equal force. It’s even easier to spray a fur coat: take the solution on a broom, and hitting it on a stick, spray it over the surface of the wall. Don't forget to stir the solution.
- Flakes. This texture is obtained by spraying liquid plastic plaster.
