Today, decorative plaster is becoming increasingly popular among professional and amateur plasterers when repairing and finishing residential and public premises. With its help, it is easy to add sophistication and individuality to the interior of a room without spending huge sums on its decoration.
The advantages of decorative plaster are protecting the wall from mechanical damage and shaping the interior of the room.
Made from environmentally friendly, natural materials, this plaster retains its shape for a long time, it can be easily cleaned and even washed from dirt.
What is decorative plaster
Decorative plaster is a finishing material used for finishing coating of vertical and horizontal surfaces indoors and outdoors. These mixtures allow you to create unique designs, colored patterns with curly textures and textures. Due to the properties of the composition, it is possible to make an imitation of tree bark, sandstone, marble, gabbro, and crocodile skin.
When finished, the mixture resembles medium-fat sour cream with inclusions of small stones, and the color may vary depending on the type of plaster. This decor has the following advantages:
- compressive strength more than 5 MPa;
- possibility of application on a deformed base;
- resistance to temperature changes;
- moisture resistance;
- high vapor permeability;
- unique design look;
- ease of application.
Mixtures of this type appeared on the Russian market not so long ago, but have already managed to arouse the interest of buyers.
Differences between decorative and ordinary plaster
For an inexperienced person, interior plaster is no different from ordinary plaster. But in fact, they differ radically due to several factors:
| Regular | Decorative | |
| Application | It is used to level walls and ceilings, and can be applied in a layer of up to 5 cm in one pass. | It is used to create the interior of rooms, with a maximum layer of up to 5 mm. |
| Compound | Includes a binder, coarse filler, for example, sand with a fraction of up to 1.25 mm and plasticizers that make application soft. | It consists of a fine fraction of binder and filler with the inclusion of natural stone with a particle size of up to 4 mm to create texture. |
| Application | It is thrown in two ways - mechanized or by hand. In this case, the rule and spatulas of different widths are used. | It is carefully smoothed only by hand using more tools, which may vary depending on the type of plaster. |
If you look at the physical properties of mixtures, they are often similar.
When purchasing material, you need to mention that you are interested in decorative plaster, so as not to mislead the seller.
Varieties of rollers to create exquisite surface relief
A special tool is used to apply decorative plaster. In particular, rollers are used to create original designs. This tool can be divided into two categories:
- Textured - used to imitate any natural surface: marble, wood, brick, natural stone and even moss.
- Structural - indispensable for creating a complex, often repeating pattern. Such rollers are rolled over the already applied plaster.
In addition, rollers for decorative plaster differ in the material used to make the working surface. For example:
- Tree.
- Rubber.
- Leather.
- Plastic.
- Pile.
The width of the working surface also differs, dividing the tool into short, medium and long models.
Types of decorative plaster in the interior
Based on their various properties, decorative mixtures are classified according to two criteria:
- by binder;
- according to the texture of the coating.
Based on the first feature, the following types are distinguished:
- Mineral plaster is a dry construction mixture made from white or gray cement, lime, less often gypsum and sand aggregate. Often requires mixing in water to work. It is characterized by high strength, vapor permeability and versatility of use. Apply to smooth concrete, plastered surfaces or brick.
- Acrylic - ready-mixed. It stands out for its average price, the possibility of tinting, moisture resistance, and good adhesion to mineral and wooden substrates. To increase bending strength and better hiding power, latex is sometimes added.
- Silicone – ready-made composition based on silicone. It applies well to any substrate, can be tinted in different colors, breathes well, and can withstand humidity conditions of more than 60%.
- Silicate - a ready-made mixture of potassium glass. Used for finishing facades.
Silicate mixtures consist of caustic alkalis, and therefore require special gloves with a respirator and protection of mucous tissues.
The main characteristics of the compositions are presented in the table.
| Characteristic | Mineral | Acrylic | Silicone | Silicate |
| Price | low | average | high | high |
| Vapor permeability | average | low | average | high |
| Moisture resistance | average | average | high | high |
| Abrasion | high | average | low | low |
| Life time | up to 25 years | Over 25 years | up to 50 years | up to 50 years |
According to the pattern, the mixtures are divided:
- Textured - ready-made or dry solutions intended for interior work, characterized by increased plasticity. Textured plaster for interior wall decoration allows you to create different designs, for example, panels or bas-relief.
- Structural - mixtures are similar to textured ones, but include a special crumb that creates the desired pattern during application. A common type of plaster that creates fur coat, bark beetle or lamb patterns.
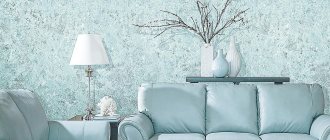
- Venetian is a type of artistic plaster created from a combination of several solutions (gypsum, lime, marble chips). Apply in several layers. Each new finished surface will be different from the previous one. Requires certain skills and a creative approach from the master. Creates fabric surfaces such as gray silk, stone concrete or imitation natural stone.
- Stone chips are a finishing material called mosaic. It consists of stone chips of large or small fractions, glued to the surface with a special polymer.
- Flocking is a modern type of decor that resembles shards of smooth colored glass glued to the wall. Can create scaly skin and velor effects.
- Solutions that create the effect of an orange peel are used more often in light colors in combination with other types of decor.
Where is decorative plaster suitable?
The use of decorative relief plaster emphasizes the wealth of the apartment’s residents, so the finishing material is not suitable for minimalism. The most common styles where interior mixtures can be used are:
- High-tech dictates the simplicity of the room, so cladding with bark beetle, small lamb, orange peel, and mosaic is suitable for wall decoration.
- Avant-garde is a modern, rich style. When filling your interior with it, you need to use the most fashionable materials, for example, flock or Venetian.
- Classic - the interior shows an abundance of natural materials and fabrics. In this case, it is better to use a fabric effect or a beautiful texture.
Selection of decorative plaster
The beautiful decor of the room and the durability of the walls completely depend on decorative plaster for interior wall decoration. Therefore, there are several criteria by which a suitable building composition is determined:
- room humidity level;
- the material from which the walls are made;
- successful combination of shades;
- required vapor permeability;
- vibrations of the base.
At the same time, if the room has freezing walls, it is better to choose frost-resistant materials.
Do-it-yourself plastering of walls
With the exception of certain cases (applying Venetian coating), plastering work is performed quite simply and any developer, if he has the time and desire, strives to carry out this work himself. The desire is completely justified and understandable, but a number of circumstances must be taken into account, which are outlined below:
- You need to carefully consider the selection of material. Here, consultation with an experienced specialist is not only desirable, but also mandatory. And it would be better if this was not a store manager responsible for sales volume, but an uninterested person from the outside. Ideally, it is better to see a sample of a particular interior. Calculating the amount of material based on the manufacturer’s recommendations is not always correct. In an effort to assure the buyer of economic efficiency, he shows the minimum consumption, which is not always achievable in real terms. Therefore, it is better to purchase the quantity of material with a small margin.
- If there are no gross defects on the surface to be coated, finishing can be neglected. Only rough chips and cracks should be repaired. The rest will be effectively removed with a layer of plaster, which is what it was originally intended for. But applying a primer is mandatory - it significantly improves the adhesion of the plaster composition to the wall surface. It is generally accepted that the finer the structure of additional inclusions, the higher the surface quality should be.
- After the primer has completely dried, and it needs at least half a day for this, you can begin plastering work. If you have a complete lack of experience, no instructions, including videos, will help. But it won’t take much time to master the profession. You just need to start work from the least critical place, for example, where the furniture will subsequently stand. It is also useful to practice on foreign material from waste construction materials.
- After applying the plaster, you can give it additional charm by adding additional relief, which will require additional tools. The unpainted surface can be additionally painted by choosing the paint to your liking. This method is used to ensure uniform tone throughout the entire room, which is often impossible with the inevitable frequent mixing of the plaster composition.
See also: How to plaster walls with your own hands
Plaster is generally a waterproof coating. Therefore, it can be washed without fear. In this case, you should refrain from using aggressive detergents. A mild detergent is used with elastic sponges; hard brushes and products containing abrasives are not suitable for caring for such a coating - the surface quickly loses its appearance and becomes dull due to a large number of scratches. As additional protection, the surface is covered with a thin layer of wax, which protects it from moisture, but not from mechanical damage.
If you want to change the interior, the walls can be repainted, and if you plan to use wallpaper, the walls can be additionally plastered.
Features of the decorative finishing process
At first glance, working with these building compounds is easy, because they are sold ready for use. But in reality there are many subtleties.
Tools for getting the job done
Before performing work, you need to prepare the following tools:
- maklovitsa;
- metal spatula 5-10 cm and 20-40 cm wide;
- for mosaic, rectangular spatula;
- for lamb, bark beetle, foam spatula-stroker;
- 2 containers 12 l;
- drill with mixer or trowel attachment;
- work gloves.
Preparing the walls
For high-quality application of interior plaster, the surface must be perfectly flat. If the start has differences after drying, then it must be leveled with the finish.
At the next stage, the surface is wiped from dust. An adhesive primer, called primer-paint, is applied to it. In this case, for mineral and acrylic compositions, a primer based on acrylate or a universal polymer is used, and for silicate and silicone compositions, a primer based on silicone is used.
The emulsion must dry within 6 hours. It is better to carry out the work before going to bed, so that the next day you can confidently begin another stage of work.
It is prohibited to use a regular primer without quartz sand, because it does not properly equalize the water absorption of the base and will not create the necessary conditions for the adhesion of the next layer.
Execution of work
Before starting work with mineral mixtures, you need to mix them with water. To do this, a regulated amount of water is poured into the container. Usually this is 4-5 liters per 25 kg of mixture, depending on the manufacturer. After this, the dry composition from the bag is poured. Mix with a mixer for 5 minutes. When the mixture takes on a homogeneous appearance, it is set aside for 6-7 minutes. Next, you need to mix it again. Violation of this process leads to the fact that not all plasticizers dissolve. As a result, the plaster will not achieve its characteristics.
The prepared solutions are mixed in a bucket for 5 minutes. This is necessary so that the stone that settles to the bottom is evenly distributed throughout the substance.
When the solution is ready, place a small spatula in your left hand and a large one in your right hand. Take a small volume of mass and apply it to a long one. Using the second tool, the mixture is stretched along the wall. This operation is repeated until the entire surface is covered. In this case, the decor should be applied in an even layer without any blemishes.
After 30 minutes the solution begins to set. At this moment you need to take a grater in your working hand. Using a tool with light pressure, circular movements are made over the entire area. The worker should feel the stone rolling under the spatula.
The result is decor or lamb.
Before starting work, you need to calculate the working area. From a bag you can wipe from 6 to 12 square meters. m. depending on the grain size. In addition, the mineral solution begins to harden in the bucket after 1 hour. This must be taken into account to prevent overspending.
Plasters such as textured, structural, stone chips are applied in a similar way with minor differences. Only Venetian plaster and flock stand out. Working with them is individual for each master. It is not recommended for an inexperienced person to do this.
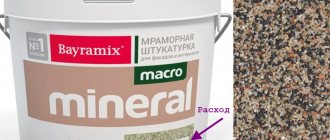
Plaster consumption per square meter
And so, my dears, today, as you already understand, we will talk about the consumption of plaster, and more specifically about the consumption of plaster or plaster mixture per square meter (1m2).
Plaster consumption per square meter:
- consumption of cement-sand plaster;
- bark beetle plaster;
- Rotband;
- gypsum plaster type Knauf;
- Volma plasters;
- dry plaster mixture, etc.
Before you start calculating something and finding out the consumption, in this case it is the consumption of plaster, it is worth knowing how it all is calculated and the final result of the consumption is displayed!
The first step is to measure the area of the intended finishing, the walls there, the ceiling, beacons must be placed along which the plastering will be done. When all this is done, it is worth measuring the smallest thickness of the plaster, the average (approximately), then the largest thickness of the plaster and calculate the average thickness between them.
This is done like this - we take the depth of the plastered plane in three places, add to each other and divide by three. This will be the average thickness of the plaster mortar for the entire square footage of your room.
After we have obtained the average thickness of the plaster solution on the plane of interest to us, we can calculate the consumption of plaster per 1 m2, but also for the entire room combined, with a difference of ten kilograms! But in this regard, we will also play it safe and take an additional 20% to the result obtained.
We take the resulting thickness of the plaster, denote it with the Latin letter d and the height of the room with the total length, without deductions for doors and windows, where the height of the plastered surface is L, and the width is h, and multiply them together.
The result obtained will be the same consumption of plaster per 1 m2 in a liquid state. All that remains is to take away 20% of the water. We did not exclude windows and doors from the calculation in order to get 20% of the reinsurance of calculations.
It is also important to know that the consumption of plaster, especially 1 m2, is influenced by its mixing proportion: water and the plaster itself. Everything must be observed and adhere to the standards in accordance with GOST. Then these calculations will be correct and the plaster* will not shrink, will not be too liquid and will not crack.
Well, let's move directly to the consumption of different plaster.
- Gypsum plaster - consumption per square meter is 9 kg, taking into account that the layer thickness will be 10 mm.
- Rotband plaster – consumed more than 8 kg per 1 m2 with a plaster layer thickness of 50 mm.
- The average consumption of decorative plaster per 1 m2 is 9.5 kg, but depending on the type of plaster.
- Dry plaster - approximately 1-1.5 kg is consumed per 1 m2.
- The consumption of cement plaster (cement, sand) can be 16-18 kg with a layer thickness of 10 mm.
- Bark beetle plaster - consumption per 1 m2 will average 2.5-3 kg, creating a layer of 1 mm.
- The consumption of Volma plaster will be at least per 1 m2 when applying a layer with a thickness of 10 to 11.5 kg.
- The consumption of Venetian plaster in our case is from 80 to 200 g per square meter and again, it all depends on the thickness of the layer.
- Consumption of textured plaster with a minimum application layer of 1.3 kg. per 1 meter square.
- Vetonit plaster, consumption per 1 m2 will be 1.5 kg with a layer thickness of 1 mm.
- Consumption of Teplon plaster is 1.8-2 kilograms, with a layer thickness of 1 mm.
- Optimist plaster has a consumption of 1 m2 - 1 kg. dry mixture.
- Lime plaster - consumption per 1m2, taking into account the application of a 1mm layer, will be 1.5 kg.
Source: umnyestroiteli.ru/otdelochnye-raboty/shtykatyrka/355-rashod-shtukaturki-na-odin-metr-kvadratnyy.html
Do I need to paint?
Ready-made plasters are tinted in advance and do not require additional painting. This may be necessary for cement mixtures. It is almost impossible to tint them in volume. This results in a different shade on the wall with each painting.
For better protection and increased service life, manufacturers recommend painting mineral plaster 2-3 days after work. For this purpose, use any paint suitable for mineral bases. If the room is not damp, then you can paint it with non-washable paint with abrasion class 3. In kitchens, bathrooms and balconies, humidity exceeds 60%, so washable paintwork with class 1 is used.