In private households and dachas that want to be habitable all year round, but there is no possibility of central heating, stoves are installed. Modern developments make it possible to create stoves not only for wood heating. But the main material, even now, is brick.
Often such an object occupies a fairly significant area of the house. Accordingly, you want everything to look as attractive as possible. Therefore, a logical question arises: how to reliably line a brick stove? This is not an idle situation that requires a balanced and serious approach.
Furnace lining and its purpose
Furnace cladding is a process of changing its appearance. At the same time, the stove itself and the lining can be made from different materials.
Facing allows you to solve the following problems:
- decorative;
- functional.
The decor of the stove can be completely different, it depends on the materials used and on the designers’ ideas. As for the functionality of the cladding, they should definitely be taken into account when carrying out the work yourself.
It is very important that after changing the appearance of the stove, its ability to perform its main task - to heat the room efficiently - is not lost. With proper lining, the heat output of the stove increases. The possibility of penetration of flammable materials from the firebox into the living space is eliminated, because when lining the stove masters do not leave any gaps or cracks in the stove structure. Some flaws (for example, cracks that have appeared) can be corrected by performing high-quality cladding.
A stove device without lining becomes a source of dust accumulation. The “pristine” surface of this heating device is much more difficult to maintain, and the lined stove can be wiped down and any dirt can be removed. This allows you not only to monitor its appearance, but also relieve allergy sufferers from problems.
The beauty of facing materials can significantly change the appearance of your stove
Metal furnaces
Be sure to keep in mind that metal stoves should not be lined with ceramic tiles due to the difference in heating coefficients of these materials. Different times for heating and cooling of metal and ceramics will lead to the fact that the outer ceramic layer of the stove will become unusable - cracks, crevices, etc. will appear. The only way out in this case is to create a movable connection between the tile and the metal stove. For such stove structures, professionals use the technology of using clasps.
Brick is a suitable material for the outer lining of a metal furnace
Brick kilns
Double-circuit brick stoves are most often lined with ceramic tiles. On the outer contour of this design, the tiles hold up very well and do not need to be replaced with different brands. All work can be done with one material.
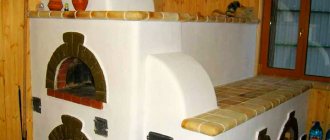
Single-circuit brick (“bath”) stoves are lined using different solutions, adjusting both materials and fastening mixtures to different areas of the stove, paying special attention to local areas of high heating. The best porous, durable material for “sauna” stoves is porcelain stoneware, as it is most suitable for rooms with frequent changes in temperature and humidity.
Ceramic tiles of various designs will help improve your brick oven
Tile - man-made beauty
This is a beauty created from different types of clay.
The manufacturing technology came from ancient Babylon and has survived to this day. The tile is a box shape, thanks to which heat retention increases significantly.
This is a piece and expensive finishing material. In past centuries, only very wealthy people could cover a stove with tiles.
Beautiful boxes, each with an individual design, were incredibly expensive, but were in great demand.
Nowadays, tiles are also popular.
Types of cladding for furnace devices
Before carrying out work on lining the furnace, you should very carefully select the material to change the appearance of the furnace device. Properties to consider when choosing materials:
- high temperature resistance;
- good heat dissipation;
- mechanical reliability, practicality;
- strength of adhesion to the solution;
- aesthetic appeal.
Most often, materials with a thickness of at least 6 mm with a low-porosity structure are used for lining the furnace.
Since ancient times, brick, natural stone, tiled material, and ceramic tiles have been used to change the appearance of the stove. Modern industry offers artificial stone, as well as soapstone, for such work.
Application of bricks
Brick cladding can be done simultaneously with the laying of the furnace itself. It can compete in beauty with such expensive materials as granite and marble.
For better adhesion, one of the surfaces of the brick should be rough; the outer side, on the contrary, should be smooth to look most aesthetically pleasing. Of course, refractory bricks should be used for such work. This material is also used to decorate a metal stove. To “smooth out” the different heating characteristics of metal and brick surfaces, a layer of ballast made of dry sand of fine consistency is laid between them. This step will prevent deformation of the decorating layer when the heated metal expands and increase heat transfer.
Brick cladding drives the stove to the form that is most familiar to perception
Using ceramic tiles
Glazed ceramic tiles are suitable for lining space heating devices, but have limitations on their use. This is due to the fact that it will not be able to withstand temperature deformations, since it is not equipped with special hooks and locking connections. Some craftsmen combine brickwork and ceramic fragments when facing a stove. The juxtaposition of these materials looks good and is a practical way to improve the appearance of the stove.
By combining materials such as brick and ceramics, you can achieve a unique appearance of the stove
There are several types of ceramic tiles that can be safely used to decorate a stove:
- terracotta;
- clinker;
- majolica;
- porcelain stoneware
Terracotta tiles
Terracotta tiles are famous for their ability to withstand super-high temperatures (up to 1000°C). This tile is environmentally friendly, because no chemicals are used in its production, even as dyes. Natural shades of different clays provide a color that is pleasing to the human eye. By using it, you can achieve optimal thermal conditions, since this material has a porous structure that retains heat well.
Terracotta tiles are very suitable for stove lining due to their heat resistance and beauty
A long service life and a relatively low price are the properties of this material that make it attractive to use for lining stoves and fireplaces.
Clinker tiles
Clinker tiles do not have such high heat transfer rates as the terracotta type. But stove masters also use it for cladding. The undoubted advantage of this material is its long-term heat retention, although there is also a significant disadvantage - slow heating. A kiln lined with clinker tiles can heat up to 1300°C.
The stove with clinker tile finish looks modern and stylish
Majolica
It is named after the island of Mallorca, from where this material was imported to Russia. Very expensive decoration of fireplaces and stoves with these tiles indicated the high wealth of the owners. The production technology is similar to the terracotta variety of tiles, except that a decorating layer of different colors and patterns is applied on top of the clay base. This fact significantly increases the cost of the material.
Only wealthy people can afford to line the stove with majolica
Porcelain tiles
Porcelain stoneware is a durable material with good moisture resistance and strength characteristics. Porcelain tile coating is resistant to various chemicals, so this coating can be washed with modern detergents.
Tiles
Furnace masters have been struggling for a long time to create a universal material that is resistant to temperature changes, and therefore to temperature deformations. Tiles provide significant assistance to stove makers, since their special configuration made it possible to practically use clay tiles for lining stoves.
The beauty of tiled stoves makes them the center of attention
The back side of the tiles was equipped with special projections (rumps), which made it possible to reliably connect the array of masonry and tiles.
Thanks to the special design of the back side, the tiles adhere well to the stove
Special hook brackets are used to connect the tiles to each other, and mortar placed in the space between the tiles and rums is also used for the same purpose.
Real masters of this business have knowledge of the correct lining of stoves with tiles.
Working with tiles requires certain skills, so for cladding with these materials it is best to contact qualified specialists.
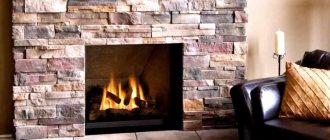
Cladding a home stove with stone
For the external decoration of the stove, you can use both natural stone and its artificial imitation. Environmental friendliness, strength, durability, compliance with all the requirements of a stove device - these are the main characteristics that allow the use of natural stone for cladding stoves and fireplaces. This decor looks beautiful, elegant, luxurious. Of course, the cost of natural stone is quite high, so not all stove owners can afford such finishing.
Beautiful and expensive fireplace decoration with real stone - expensive, but impressive
In the case of a budget option, you can use artificial stone, which in appearance is not inferior to its natural “brother”. The production of artificial stone is less expensive, so the price of this material becomes much lower. At the same time, many properties of the natural material are preserved - a beautiful exterior, a wide range of colors and textures.
Externally, artificial stone is almost no different from natural stone
Soapstone chlorite
This modern finishing material is a volcanic rock with excellent qualities suitable for lining a stove:
- heat resistance;
- strength.
Its cost is high, most often due to skillful marketing. There are more economical and practical materials that can be used to improve the appearance of the stove.
The facing material soapstone fits perfectly into a modern interior
Tree
Some wooden inserts are also suitable for facade decoration, but nothing more. Such cladding conducts heat poorly and is fire resistant. It is best to use wood for cladding the stove in fragments, making elements adjacent to the stove from this material: shelves, benches, corners. It is best to use wood for cladding the stove in fragments, making elements adjacent to the stove from this material: shelves, benches, corners.
Wood looks great as a decoration when decorating a stove
Video: how to line a Russian stove with tiles
Porcelain tiles
Its creation dates back to the 80s of the last century.
Porcelain stoneware is intended not only for finishing stoves, but is also widely used in construction. To produce it, several types of special clay are required with the addition of quartz sand, various types of natural dyes and a fine fraction of marble or granite.
The whole mass is well kneaded and pressed at fairly high temperatures under pressure. The result is a durable product that is not afraid of strong impacts and high temperatures, and retains heat well.
This is a monolithic material that can be given any color during manufacturing.
Thanks to modern technologies, porcelain stoneware can be made in the form of majolica, terracotta or tiles. The cost of such material is not high in comparison with the original ones.
Required materials and tools
Before you begin to line the stove yourself, you need to prepare all the materials and tools. Depending on the facing material, fastening materials and tools are selected.
Among the tools for tiling, it is advisable to take:
- Master OK;
- spatulas made of different materials (rubber, metal) and different sizes;
- measuring instruments (ruler, centimeter, plumb line, level, etc.);
- devices for cutting tiles, grinder;
- rule;
- a drill with a special attachment for stirring the solution;
- rubber or wooden hammer;
- shovel;
- container for solution;
- metal brush;
- brush.
Materials needed for tiling with ceramic tiles:
- special composition for gluing;
- grout for seams;
- the tile itself;
- Rabitz.
Preparatory stage
To ensure that the ceramic tiles used for tiling do not fall off and serve for a long time and with high quality, the working surface must be prepared. The preliminary stage consists of removing any old coating of the stove - whitewash, plaster, varnish, etc.
If the stove masonry is old, then it is worth carefully inspecting it and eliminating possible defects. All cracks, holes, and crevices must be covered, wait until completely dry, and then sand the surface. You will have to resort to leveling the walls if the device is askew. A curved surface is unlikely to serve as a good “platform” for strengthening the cladding. For leveling, it is necessary to use a sand-cement mixture (at a ratio of 3:1), cement with a grade of at least M400 is suitable. To keep the walls smooth and beautiful, do not forget to pick up a plumb line or building level more often.
In the process of leveling furnace walls, you cannot do without special equipment.
The seams between bricks should not be thick or protruding. It is best to deepen them using a grinder with a special attachment. 10 mm will be quite enough. If there are no such devices, then you will have to use the “old-fashioned” method - a chisel with a hammer. After this procedure, use a wire brush to clean the edges of the recesses.
A chain-link mesh placed between the brickwork and the ceramic surface will help avoid various troubles that appear from temperature changes (cracks, chips, distortions, voids, etc.). To ensure that the metal mesh holds firmly on the brickwork, use dowels (or nails 70–100 mm) in brick joints with a fastening pitch of 50 cm. The caps of the fasteners should protrude from the surface to a height of ten millimeters.
To give the working surface greater adhesion (adhesive properties), a deep penetration primer layer is applied over the chain-link. Wait for the layer to dry completely, clean it and start laying ceramic tiles.
The stage of attaching the chain-link mesh will help in the future to better join the ceramic plates
Do-it-yourself oven finishing
There are several types of work for finishing a stove device with your own hands: plastering, ceramic tile lining, painting, stone cladding, etc. There are often cases of using several materials at once.
DIY ceramic tile tiling
After carrying out the preparatory work and collecting the necessary materials and tools, you can begin to work.
- Select the location of the oven from which the ceramic plates will be glued. It's best to start at the bottom right or left corner. When laying tiles, check each of them for evenness, and also do not forget about the plumb line, using it to lay even rows. Use a notched trowel to apply the adhesive to the tiles.
- Before laying out the lower first row, install a steel profile in the shape of the letter “L” or a regular wooden slat on which the first row will “rest”. Fixing the bottom row in this case will be more reliable.
- To ensure that the seams between the tiles are smooth and beautiful, use special mounting crosses.
- You can adjust the position of the tiles using a rubber mallet, lightly tapping the ceramic surface.
- Having laid out the main part with full-sized tiles, you can begin tiling areas where a whole tile does not fit. Using tile cutting devices, lay out all remaining areas of the oven gradually.
- Try to erase any traces of adhesive remaining on the tile until they harden, otherwise it will be much more difficult to do.
Do not rush to grout the seams between the tiles until the glue is completely dry. Leave the oven alone for 2-3 days, and only then begin to grout the seams. If you want to give the ceramics an even more presentable look, then coat the cladding with colorless stone varnish using a soft brush (1-2 layers).
Cladding with ceramic tiles helps change the exterior for the better
Plastering
Applying plaster to the stove is the easiest way to transform the appearance of this heating device. Before starting finishing work, all owners of “newly made” stoves must wait a month.
The most commonly used materials are dry heat-resistant mixtures. The prepared solution is applied in layers with a time period between them of at least four hours. The mixture for the first layer can be used in a more liquid state than for all subsequent layers. In total, you can apply 3-4 layers.
Plastering the stove is used by many of their owners, because it is much easier than cladding
Coloring
For painting, you can purchase various paints and whitewashes. Moreover, the surface to be painted can be either brick or plastered. Whitewashing is most often chalk or lime. To prevent the layers from crumbling in the future, stove masters advise adding ordinary salt to the whitewash. This coloring option is suitable for those who adhere to the use of environmentally friendly materials.
There are also heat-resistant chemical compositions that you can use to paint the stove yourself: alkyd, silicate, silicon.
The color for painting the stove can be chosen depending on the style of the room
Stone finishing
- Priming the working surface.
- Laying out the first bottom layer using a special compound. A level is a necessary tool when aligning rows.
- Stone fragments are cut using a grinder with a concrete disc.
- Sew the seams between the masonry elements using plasterboard pieces of the required size.
The choice of material (natural or artificial) often depends on the financial capabilities of the owner of the stove device
Furnace finishing
The firebox is finished with the same materials as the stove itself. The main condition when choosing materials is safety, fire resistance, reliability, and strength. When designing the firebox, special attention should be paid to fire safety rules, because this part is most directly related to fire.
It is very important to leave a gap between the firebox and the stove lining. This is necessary for free air circulation, which affects the efficiency of its operation as a whole. It is not advisable to fill this gap with sand or thermal insulation material. It will become a reliable obstacle to deformation of the facing material. If there is a gap, then the finishing material will not crack, voids or other negative aspects will not appear in it.
When using plasterboard structures, leaving a gap will be an additional means against fire. 10 centimeters is the minimum gap that must be left between the firebox and the stove for safety reasons.
A few recommendations
- It is necessary to take care of the space behind the stove in advance. Most often, this wall is finished with heat-resistant brick; it must be laid according to the dimensions of the stove. If the heat source is not located close to the wall, you can use foil or a more reliable stainless steel sheet; they successfully reflect the heat.
- It is important to remember that all materials used must be thermally resistant. Do not place any interior items near the stove that could be damaged by heating.
- When working with soapstone from the outside, it is better to use vertical masonry, while inside the furnace the stone is laid horizontally. This sequence accelerates heat transfer processes due to faster heating. This material requires a special glue based on soapstone powder and liquid glass.
- If you add coarse salt to the adhesive solution at the rate of 1 kg per 10 liters of glue, the facing material will be very firmly fixed.
- To get the desired pattern, you must first lay out the intended pattern on the floor. You can mark the back of the tile or stone with chalk, and sign the numbers of adjacent elements along the edges. This will greatly simplify further work and avoid confusion.
Whatever material is chosen for cladding, simple installation rules help create not only a reliable, durable surface, but also give this part of the interior a wonderful appearance.