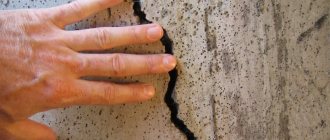
Do I need to level the walls before puttying?
A properly prepared surface is the key to quality repairs. Many people have a reasonable question: is it necessary to prime the wall before applying putty? This is necessary in the following cases:
- The primer levels the wall, smoothes out microcracks and defects.
- The composition improves adhesion.
- A primed wall requires less putty.
- The composition adheres better to the treated surface.
- The primer contains useful substances that protect against moisture, mold and fungi.
Putty can be:
- Starting.
- Finish.
- Universal.
Ready-made and dry mixtures are available. The latter must be diluted with water to a thick consistency.
For better quality of work, it is recommended to prime the wall before puttying.
What type of putty is the cheapest?
Any builder can easily answer this question. This putty is made on an oil-adhesive basis. The composition includes drying oil, which makes the composition cheap. This putty for walls and ceilings is considered obsolete for one reason - it can only be used under coating with drying oil-based paint. Otherwise, your wallpaper or paint will end up with chaotic oil stains.
This composition is deeply absorbed into the wall, so during the next repair you cannot do without degreasing. Plus, experts call drying oil not the most useful material for use in residential premises. Assumptions about its harmfulness have been confirmed more than once by the fact that some people showed signs of allergies when living in a room with this type of finish. Another disadvantage of this type of putty is its fragility. It cannot guarantee a long service life.
Oil-adhesive putty will cope well with the treatment of wooden walls
But oil-adhesive putty also has positive qualities. First of all, this is an increase in waterproofing of the treated surface. And when working with wooden walls, it is an indispensable assistant. By treating a wooden ceiling or wall, you can be sure that the wood will be protected from rotting and moisture.
Is it possible to level the walls with putty yourself?
Anyone who has a slight understanding of the specifics of this work can level walls using putty, following certain rules and recommendations.
The process takes place in two stages:
- Applying the starting lineup.
- Leveling with finishing putty.
When working, the spatula must be held at an angle to control the level of thickness of the solution applied.
If work is carried out on a wall with large differences, then a reinforcing mesh is used, which gives strength and prevents new cracks from appearing. The mesh is attached to the surface using glue. When the composition dries, you can begin work.
Similar to the mesh, you can putty along the beacons. They are installed on the surface at the most defective points. Focusing on the beacons, work happens.
Types of putties and their features
Before you purchase a finishing material, you need to know that there are putties made for treating walls indoors and outdoors. Also, depending on their mechanical and physical properties, such materials are divided into three main groups.
Starting putty
The mixture contains large mineral elements, so the putty has a rough structure and thick consistency. It is used to hide large defects on walls, as well as to correct geometric inclinations. The layer of application of starting putty can reach 3 cm.
Finishing putty
The finishing one can be distinguished from the starting one by its fine-grained structure, thanks to which it is possible to create a smooth and perfectly level base. It can be applied directly to untreated walls. Such mixtures will provide a base for applying any paints and varnishes.
Universal putty
The universal one can be used as a finishing or starting one. Its peculiarity is its polymer base, but it is better to use it if the surface has small differences and unevenness.
In case of serious flaws, it is better to purchase two compounds separately; you can win on the result and in money, since the universal one is more expensive, but loses in quality.
What tool can you use
To complete the work you will need the following tools:
- Construction mixer - a drill with a special attachment. It is with the help of this tool that it is better to stir the mixture if you purchase dry rather than ready-made. The mixer completely eliminates lumps and makes the mixture homogeneous, ready for application.
- Spatulas of different sizes to apply the composition to hard-to-reach places, such as corners, openings, behind pipes and radiators.
- A building rule to determine the degree of leveling.
- Skins for grouting.
- Container for the composition.
Acrylic putty - ideal for painting
When a room is to be finished for painting, acrylic putty will help. This type of material is often used in modern renovations and allows you to bring the walls and ceiling to the smoothest possible condition. In addition, this mixture helps to extend the life of the room. The treated surface acquires water-repellent properties, which allows the plaster to be used in the bathroom and kitchen.
The composition itself is viscous and stretches well when applied to the wall. This provides a simple finish that is easy to handle. This putty is sold in buckets of various capacities, and the composition itself is environmentally friendly and guarantees the absence of allergies to the material.
Acrylic putty does not contain harmful substances
One of the disadvantages is that this type of mixture is unsuitable for further finishing with cheap paints and varnishes. Therefore, when purchasing an acrylic type of putty, take care of the paint that matches it.
How to properly level walls before puttying with your own hands
Before applying putty, the surface must be prepared:
- Remove old coating, dirt and dust.
- Prime. This process eliminates minor defects and cracks and improves adhesion. The primer is applied with a roller and dries within 10 hours.
The dry mixture is poured into the water, and not vice versa. The finished composition should not be covered with a lid - it will dry out faster and become unusable.
Which is better for leveling concrete walls?
There is a special putty for concrete walls, which has the following advantages:
- Strength.
- Adhesion.
- Resistant to water and fire.
- Non-toxic.
- Resistant to chemical elements.
- Resistant to temperature changes.
- Durable.
Compositions for concrete have components that ensure the safety of the surface.
The work is carried out in several stages:
- The concrete wall is prepared: the previous coating is removed, the cracks are widened and filled with cement mortar.
- Primer in two layers.
- The putty solution must be prepared in accordance with the instructions. The composition is used within four hours after preparation. It is recommended to mix with a construction mixer, but if the mass is more than 25 kg, then with a concrete mixer.
- The first layer is thrown onto the wall and spread with a spatula. For better results, you can use a reinforcing mesh. After drying, apply a second layer.
- Grouting is being done.
Which one to choose for wooden walls
A special putty has been developed for wooden surfaces. Advantages of the composition:
- Moisture resistant.
- Hides defects and cracks.
- It has a structure that emphasizes the texture of wood.
- Can be used for further painting.
A polymer-based composition is suitable for laminate and parquet. It is elastic, gives a smooth transparent coating and hides imperfections. Resistant to water and mechanical damage.
For the exterior, epoxy putty or nitro compound is recommended.
If you need to putty a large area, such as a house or garage, use a gypsum compound.
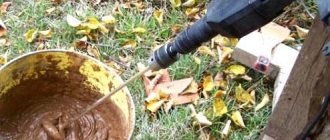
You can prepare the solution yourself; for this you will need:
- PVA glue, finely ground crushed chalk. Before cooking, the chalk must be sifted. Glue is poured into the container and mixed with chalk with a construction mixer. The finished composition has a consistency similar to thick sour cream. If it turns out too thick, you can add water.
- If you need to eliminate strong defects using homemade putty, then add sawdust and water-soluble varnish instead of PVA. Chalk and varnish are mixed, sawdust is gradually added. Leave the prepared solution for a day so that the sawdust swells.
The putty is applied to the wooden surface in the same order as on the others.
Types of putties by composition
Various components can be used as the basis for the manufacture of putty. Therefore, such material may differ in composition and the following types are distinguished.
Cement
The cement putty contains sand, water and fine, with a small amount of impurities, cement grade M400 or M500. The mixtures are inexpensive, since all its components are available. Before use, the composition is diluted with water.
Advantages:
- durable, the cement layer can only be cracked with a hammer blow;
- can be used for rooms with high humidity;
- affordability;
- made for facade work, as it is resistant to sub-zero temperatures.
Flaws:
- difficulty in application, experience is required;
- weak elasticity, sanding must be done immediately after applying the composition to the walls.
- shrinkage, sometimes you have to putty the walls again;
- long drying;
- over time, cracks may appear on the cement base;
- not suitable for wood surfaces.
The cement composition is not suitable for finishing walls for painting due to its coarse-grained structure and grayish tint. But such material can be used to putty walls under tiles, for example, in the bathroom or kitchen.
Plaster
Plastic white gypsum-based putty is exactly suitable for painting walls. Thanks to its composition, the base is perfectly smooth. At the same time, its composition is environmentally friendly. A surface finished with such material absorbs water, but as the air dries, it releases the required amount of moisture to the room.
Advantages:
- the ability to obtain a perfectly smooth surface;
- does not shrink;
- quick drying;
- safety, air passes through the plaster, it is not subject to mold formation;
- fire resistance;
- additional thermal insulation of walls;
- affordable price.
Flaws:
- low resistance to sudden changes in temperature and moisture;
- can help accelerate metal corrosion;
- low strength.
Gypsum putty can also be used as a starting, finishing and universal putty.
Polymer
This finishing material is expensive, but of high quality. The basis of the putty is a polymer, but it can be different, so polymer mixtures may differ in composition.
And here the following types are distinguished:
- Acrylic. Ideal for leveling any base, the surface is smooth, even mirror-like, so the material is used not only for walls, but also for ceilings. Acrylic is easy to work with, it does not have an unpleasant odor, is not afraid of water, and does not tend to shrink, but it is expensive.
- Latex. The base is made of acrylate latex, thanks to which the surface is flawlessly smooth. The material is suitable for different surfaces, but only indoors.
- Polymer-cement. This putty is similar to cement putty, only it is more elastic due to the introduction of polymer components into its composition. Suitable for brick and concrete surfaces.
There are also other types of putty material, for example, oil putty, oil-adhesive putty, putty. But they are used very rarely, mainly for finishing window sills, window openings, baseboards, etc.
Putties, ready for use
The finished solution is a thick suspension on a latex or dispersion base. Sold in plastic buckets. Retains its properties and does not thicken during storage due to special chemical additives.
About the benefits.
- Even an opened solution can be stored for a long time without loss of quality.
- Plastic.
- Does not require additional ingredients before use.
The price of the material increases in proportion to the capabilities. This can be considered a disadvantage of ready-to-use solutions.
This option will be more expensive compared to dry powders
Purpose of finishing putty
The finishing putty consists of fine particles, which distinguishes it from the main putty mixture. Has high adhesion rates .
The purpose of the material used is determined by the functions performed. Finishing putty is used for:
- leveling the surface, filling minor defects in the form of scratches and cracks;
- protection of the base coating from damage for a long time after repair work;
- endowing the surface with aesthetic qualities;
- use as a complete finishing coat without painting or other treatment.
Tools and materials
Leveling walls with your own hands requires preliminary preparation of tools and materials.
USEFUL INFORMATION: How to glue wallpaper on painted walls: water-based, oil and acrylic coating
To complete this task you will need:
- Dry mixtures or ready-made solutions of various types of putties.
- Drill with a mixing attachment if you purchase powdered material.
- Container for the finished solution.
- Spatulas – small (15–20 cm), large (45–60 cm), angled.
- A block wrapped in fine-grit sandpaper.
- A level is usually a plumb line for checking the evenness of walls.
Some tips
We offer you some useful tips to make your job easier.
- Dry mixtures are cheaper than ready-made solutions, but when combined with water they dry faster. Therefore, it is advisable to know how much material to use at a time.
- You can check the evenness of the walls with a thread stretched diagonally.
- If there is a long break in the puttying process, before applying the solution to the next area, you need to moisten the edge of the already treated area with water.
The technology for performing the work is simple, but requires careful and careful attention. It is necessary to provide for all the details in advance.
Performing operations independently
Beginners starting to putty with their own hands can find many recommendations on the Internet, many of which are presented in the video.
Each stage of work consists of two steps:
- checking the evenness of the wall;
- applying a leveling layer.
Using a broad rule, the size of the gaps is checked. These holes will need to be filled with the starting putty mixture, so you need to mark them with a pencil. The rule must be applied in different directions - vertically, horizontally and diagonally.
Note! If most of the protrusions are located horizontally, then the movements during puttying should be horizontal, if vertical, the spatula at the first stage must be moved from bottom to top.
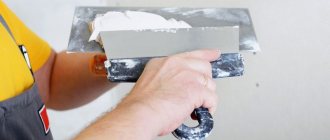
What is the best way to level a wall with putty?
- Using a small spatula, apply the mixture onto a large one and distribute it evenly and forcefully. Professionals often recommend using a tool at least 45 cm wide to quickly and accurately level walls.
Attention! You need to start putting putty from the corner. To create neat corners, it is convenient to use a special corner spatula.
- Movements are carried out in two directions: vertically and horizontally.
- Sometimes experts advise applying one layer strictly from top to bottom, the other from left to right. Moreover, when explaining to beginners how to level walls, experts recommend creating two or three rough layers and the same amount for finishing. Whether it is necessary to strictly adhere to such rules, everyone can determine from their own experience, however, when performing work for the first time, it is better to follow the recommendations.
- Having distributed the putty over the wall, the remaining material is removed from the spatula. After each movement vertically or horizontally, a little solution is added.
- Each new movement is made overlapping with the previously applied solution.
- After processing an area of about 0.5 square meters. m, you need to apply the rule to the surface and pull it from top to bottom to remove excess material.
- You need to wait until the wall leveled with the first layer dries well. This may take up to 2 days.
- Then a clean spatula or block wrapped in sandpaper is passed along the wall, removing the formed tubercles and grouting the surface. This can also be done with a special grater.
- Next, the evenness of the surface is checked again.
- Leveling the walls with a special finishing putty is the final stage. It is carried out when an almost ideal flat surface is achieved according to the principles described earlier.
USEFUL INFORMATION: Features of installing plasterboard boxes in the bathroom
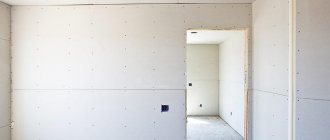
Working with drywall under wallpaper
The very name of the surface material contains the answer to the question of which putty is best to level such walls. The structure of drywall contains gypsum. This means that we choose gypsum for wall treatment. An important thing: we coat the seams between the sheets with the starting one, and the surface itself with the finishing one.
For puttying drywall, it is better to choose a gypsum mixture
Beacon putty system
Leveling walls with putty using this technology is important in the presence of significant unevenness. It is advisable to ask yourself whether it is worth eliminating the defect with a thick layer of solution. The answer is logical - it is worth it, but using specific technology. First of all, you need to stock up on special beacons. Construction hypermarkets offer galvanized profiles of various sizes.
The beacons are fixed to the wall with a putty mixture and leveled. After the solution has hardened, the beacons are securely attached to the wall.
After application, the starting mixture is leveled between the beacons using the rule. It is physically easier to perform operations when the gap between the beacons is small. To apply a dense layer of solution, it is easier to divide the entire process into several stages. It is necessary that the putty be applied to the wall to a height of 0.5 m from the floor, then it is left to harden, then we move on to the next stage of work. This method prevents the solution from sliding down the wall, forming a flat surface.
Once the mixture has hardened, the beacons should be removed, the holes from them filled and the wall finally leveled. This operation will prevent the occurrence of yellow spots due to corrosion of metal parts. The finishing method is labor-intensive and therefore not very popular.
Which one to choose, according to what criteria
For the facade it is better to use a cement mixture. But acrylic would also be appropriate here if the wall is under a cornice or canopy.
Cement, latex, and acrylic will work well in wet rooms. You just need to choose according to the degree of wear of the surfaces being repaired. If there are few defects and they are small, then the latex variety is suitable. If there are more flaws, you need to use acrylic.
It is better to finish wooden surfaces with latex. Ceiling and drywall with acrylic.
What is better for finishing walls?
Polymer cement is not suitable for forming the final layer. But other types will do it perfectly. Finishing polymer putty has a fine dispersion of the materials used in them. Its task is to hide small cracks, irregularities and make the surface smooth, intended for final finishing.
Many craftsmen today use universal mixtures. They can be applied in thick or thin layers. But we must pay tribute to specialized solutions. They have better characteristics. That is, for final leveling it is better to use finishing putty.
Types of mixtures according to degree of readiness for use
The mixtures are available dry and ready-to-use. Which putty is best for walls? The main emphasis during repair and construction work of varying complexity is on dry mixtures. Due to their low cost and ease of transportation and storage. Dry solutions have other advantages.
- Loyal to temperature conditions during storage.
- The solution is easy to prepare.
- Different amounts of water give the composition different thicknesses.
The mixture can be dry or ready-to-use.
There are also problems that you will encounter when using powdered mixtures.
- The prepared solution should be used promptly for its intended purpose. The composition thickens within an hour maximum. Cheaper putties can thicken within 15 to 30 minutes.
- If the working surface has a large volume, the solution should be prepared in portions.
- Store carefully sealed in a dry place, avoiding contact of the powder mixture with moisture.
One of the first recommendations when using dry powder is to bring the composition to a homogeneous mass. It is best to use a construction mixer or drill when mixing, since it is difficult to achieve the desired consistency manually.
The mixture must be mixed with a construction mixer.