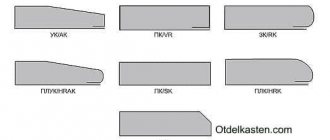
Do you want to line the partitions in your apartment with plasterboard, but it’s a pity to lose precious centimeters that are already missing? Install drywall on unframed walls. This method is even simpler - you don’t have to bother with installing the profile. It will save space and create equally ideal surfaces. Even without extensive experience in repairs, you can cope with this task on your own.
Advantages of leveling gypsum board walls without a frame
This method of installing a gypsum board sheet:
- Economical in materials.
- Takes less time.
- Produces less debris and dirt.
- Installation and finishing are completely done by yourself, so you can feel like a pro.
Using gypsum board (plasterboard sheet) you can level any wall: brick, concrete, wood.
To install gypsum board sheets on the wall, you need to purchase special adhesives. The most popular of them are the Knauf and Volma mixtures. You can also mix gypsum putty with a small amount of PVA glue.
Advantages and disadvantages of adhesive mounting
Finishing gypsum board surfaces with glue has its positive and negative sides.
The advantages include the following:
- plasterboard is mounted without the use of a profile frame , thanks to which it is possible to save useful space in the room;
- savings on materials. Installing drywall with glue eliminates the need to use metal profiles, dowels and an additional set of tools;
- speed of work completion. The frameless cladding method allows you to complete the cladding in a matter of hours ;
- simplicity. While installing gypsum boards on lathing requires certain skills and abilities, even an inexperienced person can cope with the adhesive finishing method.
- installation with glue is not suitable for plasterboard ceilings . This is especially true for multi-level structures, the construction of which is only possible using a profile;
- direct contact with the wall. Drywall is afraid of moisture. Therefore, if the surface on which it will be mounted is damp, then there is a very high probability that the plaster will get wet. As a result, the casing will collapse;
- there is no possibility to use insulation. When finishing with glue, it will not be possible to place sound or heat insulation under the gypsum board;
- It will not be possible to lay heavy types of finishes (for example, ceramic tiles) on the surface of glued drywall The glue may not withstand the weight of the cladding and the sheets will eventually tear away from the base.
For more information about installing drywall with glue, watch the video:
The essence of the frameless method of fastening a gypsum board sheet
Installation of drywall on walls without a frame is carried out using a special compound. They glue the sheet onto the base surface. The joints are puttied and reinforced with tape. After priming, the wall is ready for finishing - wallpaper, decorative panels are glued to it, or painting is done at your discretion.
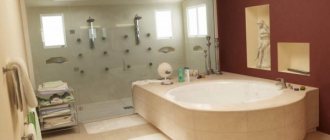
Since the sheets themselves are small in thickness, the overall area of the room is almost not affected. They are convenient to use when leveling the walls of small rooms: bathroom, storage room, loggia, and in other places where every centimeter of space is important.
Summary. Useful tips
As you can see from the article, gluing drywall to a wall is not that difficult. And with constant practice, frame fastening is even easier and faster.
Depending on the condition of the walls in one room, several different methods can be used. For example, a frame with insulation is made on the external wall of a house, and slabs are simply glued to the internal walls.
For each specific case, use the most suitable option. Do the work slowly. Having previously made all measurements and markings. This way you will save yourself from many mistakes and rework.
Drywall is the material of the future. Easy to use, it retains its qualities for a long time. Don't be afraid to try it once and you will realize that it is comfortable and good material to work with.
Preparing walls for gluing plasterboard sheets
Before you begin installing drywall without a frame, you need to clean the wall of the old finish.
- It is easier to remove wallpaper with a spatula, after wetting it with water using a sponge or spray bottle. An excellent soaking effect is obtained when using a steam generator.
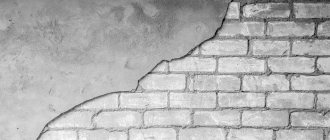
It is difficult to remove paint from a concrete wall, but it is necessary, otherwise the composition for gluing gypsum boards will either not stick to it or will tear it off from the base. As a result, the sheet will not hold.
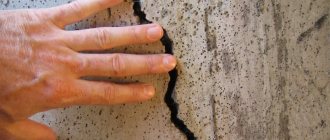
- Old plaster is tapped to detect hidden delaminations. Remove damaged and suspicious parts to a solid base.
USEFUL INFORMATION: Drywall slopes: do-it-yourself installation
If the layer of plaster is thick over the entire wall, it makes sense to remove it entirely using a hammer drill or a hammer and chisel. This will help save additional centimeters of usable space.
Work options
The good thing about covering walls with plasterboard on glue is that you won’t disturb your neighbors with the roar of a hammer drill, and you won’t have to spend a long time checking the plane of the frame. For inexperienced developers, this is the simplest option; the wall is covered entirely from floor to ceiling and the work progresses quickly.
Preparatory stage
First, let's figure out what is needed, especially since the list of basic materials and tools is the same for all options for carrying out the work, only their quantity changes. As for materials, we need the following:
| Materials | Description |
| Drywall | We will use a wall version with a thickness of 12 mm; we should not use ceiling sheets due to their low strength. Naturally, for rooms with high humidity you will need a moisture-resistant material; it is green in color. |
Sometimes you need to level the base with cement mortar or seal the cracks in it with foam. We will not consider these work options, since we assume that you have a more or less finished surface that can be finished.
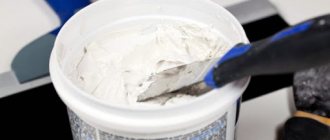
Gluing drywall is done using special compounds
You cannot do without a certain set of tools; its list is not as extensive as in the case of constructing a frame:
- Since the adhesive composition sets within 30 minutes, it must be prepared often and in small portions. That is why it is better to have a drill with a mixer attachment on hand, otherwise you will very quickly get tired not from the main work, but from mixing the glue, and this takes a fair amount of time;
The mixer attachment is suitable for both drills and hammer drills
- The composition is best stirred in a convenient container with low sides; its volume should be at least 10 liters;
- It is very important to have a long level or a rule with a level on hand, because we will constantly check the plane of large sheets and we simply cannot do without it. This is the simplest weapon; if desired, you can also use laser devices that the pros love so much;
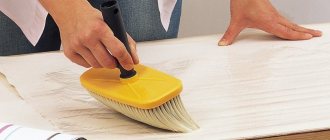
- Application of glue can be done with a notched or regular spatula, trowel, or small spatula. You need to choose what is most convenient for you in a given situation.
You can apply glue with any tool convenient for you.
Technology No. 1 – for smooth walls
If your walls are almost perfectly smooth, which happens on concrete or plastered surfaces, then gluing drywall to them will be done according to the following scheme:
This is what the correct sequence of work looks like
- Since we will be attaching the sheets close to the wall surface, it is necessary to lay all the wires in advance . To prevent them from creating interference, grooves of the required size are made on the surface, into which the cable is secured; after laying the wire, it can be covered with cement mortar. Wires are brought out in the required places and holes are made for sockets and switches; special crowns of the required diameter are used for the work;
- The surface is cleaned of dust, after which a primer must be applied to it; if you have a regular plastered or concrete wall, then it is best to use a strengthening compound. Sometimes there are situations when the surface is painted with oil or other paint and the adhesive composition will not stick to it. In this case, a special adhesive composition with quartz filler is used; after this treatment, the glue will hold perfectly;
Applying concrete contact significantly improves the adhesion of the adhesive composition
- Before gluing the element to the surface, it needs to be prepared. If necessary, part of the sheet is cut to the required height, and holes are also cut for sockets and switches. The work is done using simple crowns, which cost a penny and can even be installed on a screwdriver; drywall is not a hard material, so more power is not needed;
Making a hole in drywall is not difficult
- As noted above, the adhesive composition hardens very quickly, so you need to prepare it for 1-2 sheets, especially at the beginning, when you have not yet gotten your hands on it and have not gotten into the rhythm . The composition is applied to the surface using a notched trowel with a tooth size of 8-10 mm, this will ensure good adhesion and economical consumption of the mixture. Excess is removed; it may interfere with the alignment of the element;
This application option ensures a strong hold on a flat surface.
- The sheet is placed face down where it will be installed. In general, you can immediately put it in place and apply glue there, this will even simplify the work process. Naturally, you need to place boards under the material so that it does not get damaged on the floor or get dirty;
- Before gluing the drywall to the wall, you need to carefully lift it and pull the wires through the holes; if you forget about this, you will have to either tear off the sheet or cut it;
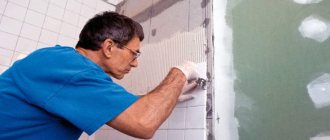
- Gluing drywall is very simple: first, the sheet is gently pressed against the wall, no need to press hard. After this, using the rule, the places where the material should be pressed are determined; this can be done by simply tapping with your hand (usually this is how I correct most flaws) or by applying a board and hitting it with a mallet or something else. You don’t need to be too zealous; it’s better to hit it again later than to overdo it right away.
When we glue drywall to the walls, we constantly check the position of the sheet with a level
Under no circumstances should you hit the level, as this will damage the tool faster than leveling the walls. This is a very precise tool and using it for leveling is not a good idea.
Technology No. 2 – for moderately uneven walls
If your level differences on the wall are up to a couple of centimeters, then the previous option for carrying out the work will not work. Let's figure out how to attach drywall to the wall with glue in another way; it has a lot in common with the option described above, but there are a number of differences. Instructions for doing the work yourself consist of the following steps:
- Preparing the base, priming it and laying the cable is carried out in the same way as in the case described above. The same applies to the preparation of sheets, so we will omit these points and immediately move on to considering the workflow;
- Before starting work, you need to prepare an adhesive mixture; in this case, its consumption will be much higher, since application will be done not with a notched trowel, but in dots or piles on the surface. With their help, you can compensate for unevenness and at the same time firmly secure the material;
- The sheet is placed on the pads at the place where it is glued (work usually starts from the most protruding section of the wall), after which glue is applied to it. The points are made around the entire perimeter and are located in increments of 25 cm, in the middle of the sheet - placed every 40 centimeters, there should be no large voids , as this will negatively affect the reliability of the fastening;
Special care is not needed here, the main thing is that the height of the points is greater than the differences in wall level
- Gluing drywall begins by pulling the wires, if available, and lightly pressing the element to the surface; it should simply catch on the wall. It is best to work together, so that one person constantly holds the sheet and helps press if necessary, this is both easier and faster;
- Before gluing the drywall thoroughly, you need to carefully check the plane in all directions, and then determine in which places the material needs to be pressed. After the initial leveling, another check is carried out, if necessary, individual sections are tamped down, and so on until the result completely satisfies you. If you do not complete the work, it will be even more difficult to align the next sheets, remember this.
If everything is done carefully, then you get a smooth wall in literally a matter of hours.
Here you need to consider another option, when drywall is glued to walls made of aerated concrete or foam concrete. In this case, we glue the gypsum board in reverse, applying the composition not to the sheet, but to the wall, this ensures a more reliable fixation of the material. I would like to note that this option is less convenient and requires more care when installing the sheet; it can be very easily skewed.
This way you can attach the sheets not only to a foam block wall, but also to brick surfaces, but I repeat once again, it is more convenient to apply the composition to the sheet
Technology No. 3 – for walls with large irregularities
One of the common questions is whether it is possible to glue drywall to surfaces with large differences without continuous plastering. Everything is quite feasible, but the technology will differ noticeably from the options described above; the process looks like this:
- First of all, you need to remove from the surface all pieces of plaster that do not adhere well. That is, there should be no elements on the surface that could fall off later;
- Priming is also a mandatory step; the composition allows you to strengthen loose areas and reduce surface absorption, thereby improving the adhesion of the glue. You need to apply the primer so that it gets everywhere, so on uneven surfaces it is better to use a paintbrush rather than a roller; it distributes the solution better;
The soil must be distributed over the entire surface
- Next, we need to prepare the beacons; 100 mm wide strips are cut from plasterboard, which is what we will use to create a flat base . The number of elements depends on the area being tiled; the elements are located along the perimeter of the wall, as well as vertically every 40-60 cm, based on this, calculations are made;
The material is marked, after which the paper layer is cut through the front side with a knife, and the sheet is broken
- Next, you need to place the beacons; to do this, first mark the surface around the perimeter so that you can see which line to place the elements on. They are also fixed using glue, the layer of which is adjusted depending on differences in the level of the walls. I recommend sticking the elements around the perimeter first and waiting for them to dry, especially since this will only take half an hour;
- Then you need to glue the vertical posts, they are leveled, it is important to control the position of both each element individually and the surface in general. Check entire sections of the wall and adjust the position of the guides while the adhesive has not yet hardened;
Gluing drywall in strips allows you to correct even large differences in level
- When the glue on the structure has hardened, you can begin gluing the base material. To do this, the adhesive composition is applied in lines along the width of the guides, after which the element is carefully lifted and pressed against the surface. If you have leveled the base well, then at this stage it will not be difficult to level the drywall; the end result will be a structure like the one in the picture below ;
It turns out two layers of glue and drywall, so you can compensate for large unevenness
- Work is carried out until all surfaces are covered. Further finishing is no different from the usual version, the main thing is that the adhesive composition dries.
Sometimes, to save drywall, beacons are made not in stripes, but in the form of points; in this case, it is easiest to first set the topmost elements and hang a plumb line from them to control the vertical. How to glue sheets correctly in such a situation? It’s simple: the composition is applied not to the sheet, but to the resulting areas, so you don’t have to rack your brains about how to place the glue where you need it.
Here is the answer to the question, is it possible to glue the material not to stripes, but to dots?
Additional wall treatment
Proper wall treatment before attaching drywall sheets to an unframed wall is extremely important.
- Inspect the wall itself - repair cracks, fill in holes from old communications, and apply mortar to the places where large pieces of plaster have fallen out.
- If necessary, make recesses for sockets, switches and wiring. Wires and junction boxes must be installed.
The latest generation of wire insulation means you don’t have to pack them in fireproof corrugation, so you just need to attach them to the wall with clamps.
- Remove debris, use a brush or vacuum cleaner to collect dust from the walls and floor.
- To ensure that the glue adheres firmly to the surface of the wall, it is primed evenly. In areas with fresh plaster, the primer is absorbed more strongly, so here it is applied in two or even three layers.
When installed under the gypsum board sheets, a poorly ventilated air gap remains. In rooms with high humidity, optimal conditions are created for the development of various types of rot and fungus. Treating the base wall with an antiseptic will help avoid this danger.
- Since the gypsum board sheet has large dimensions (2500 x 1200 mm), clear a suitable flat area on the floor for working with it.
GCR can be installed only when the wall is completely dry, after all the procedures have been carried out.
Frame fastening of drywall to the wall
Installing drywall using a frame made of metal profiles is the most common method. It has its advantages - strength and durability. You should not make mistakes when creating the frame, as they can lead to the dismantling of the drywall.
The procedure for installing drywall using an aluminum profile
- Performing markings. On the floor, using a paint cord, draw a line - the border of the frame. We do the same on the ceiling using a plumb line. On the walls we mark the vertical boundaries to which the frame posts will be attached. The distance between them is 50–60 cm.
- Installation of video guides. Horizontal guides must be sealed with sealing tape to increase sound insulation. Then you need to drill holes in the bases. Insert dowels - nails and attach the profile with insulating tape using self-tapping screws. The optimal distance between screws is from 50 to 100 cm. Each profile must be attached in at least three places.
- Attaching hangers. Along the vertical lines marked on the ceiling, you need to secure the hangers. They will ensure strength and reliability of the structure.
- Installation of vertical racks video. Vertical posts are attached to the horizontal guides. It is better to insert the rack into the guide on the floor, then on the ceiling. The stand is attached with self-tapping screws to the guides and hangers.
- Installation of plasterboard sheets. One person cannot do this job. Two people should hold the sheet, and a third should screw in the screws. You need to start fastening from the top. The distance between the screws is 25-30 cm. Place the drywall seams offset.
- Cutting holes for switches, sockets, and cable exits is shown in the video.
In rare cases, the frame is made of wood. The structure is used less often, since wood strongly absorbs moisture. The method of installing a frame made of wooden slats is no different from assembling a structure from a profile. Markings are made on the ceiling and floor. Wooden posts and spacers are reinforced with dowels. Using a plumb line and level, the evenness of the frame is checked. The sheets are attached according to the principle of installation on a frame made of a metal profile. The joints of the sheets should fall in the middle of the slats.
Technology of frameless installation of plasterboard sheets
Before gluing drywall to the wall, you need to set the general level. Using the installation rule and a plumb line, vertical surface deviations are measured. The length of the wall alignment line is marked on the floor and ceiling.
A sheet of gypsum board is cut out onto the entire wall at once. To reduce the amount of work, it is better to buy sheets the height of the room or larger. Then you won’t have to adjust and putty the horizontal joints.
USEFUL INFORMATION: How to glue wallpaper under a suspended ceiling (video)
GCR can be attached to walls in two ways.
An additional way to stick drywall to a wall
In addition to all of the above, gluing drywall to the wall can be done using polyurethane foam. However, this method should only be performed by professionals, otherwise the result will be of poor quality and short-lived. The advantage of this technology is that installation can be easily done by one person. Foam mounting is done using the following technology:
- The slab is leaned against the main wall on supports and secured to it with hardware using plastic dowels installed in plasterboard;
- The slab is leveled using a level and adjusting the fasteners;
- Small holes are drilled next to the dowels, sufficient to insert the spout of a foam container;
- Through the holes, foam is pumped behind the wall in small portions, since too much can cause the wall to swell, which means you have to start all the work again. The holes are made in a checkerboard pattern, every half a meter or a little less from each other.
- After a day, the fasteners are pulled out of the wall, and all the holes are filled with putty.
However, this method requires a lot of skill and is not recommended for use by non-professionals.
Attaching the sheet with glue
The fastening technology will differ slightly depending on the degree of curvature of the walls.
If the differences on the wall are less than 4 mm, then the adhesive composition is evenly applied to the perimeter of the gypsum board sheet using a notched trowel. The sheet is placed in the chosen place, pressed and leveled by applying a rule to the surface and tapping it with a rubber hammer, not forgetting to check with a building level.
Important! The adhesive solution sets quickly. Find out experimentally what volume needs to be diluted in order to have time to produce it in one go.
A wall with a level difference of up to 2 cm will require thicker glue. It is applied to the surface of a sheet of drywall in cakes about 5 cm high at a distance of 30 cm from each other. Installation is carried out similarly to the method described above.
If the wall has differences of 4 cm or more, additional work remains. In the recesses it is necessary to glue additional beacons from gypsum board scraps. There is another method: fill the desired area with polyurethane foam, and after it dries, cut it at a general level.
Subsequently, the adhesive composition is applied to the dried beacons and directly to the wall. The sheet is pressed against the glue and aligned in all directions.
Basic ways to stick drywall to a wall
There are three main methods that are used when you need to fix drywall with glue to the wall. The choice of one method or another depends on the curvature of the walls on which installation is carried out:
- If the walls are fairly even and the curvature of individual sections does not exceed 5 millimeters, the simplest method is used: after all the preparatory procedures, putty or special glue is applied to the slabs laid out along the walls using a notched trowel; the glue is applied around the perimeter and in the center of the slab. If the slab is thinner than 10 millimeters, two strips of glue are applied in the center. In areas to be finished with tiles, the adhesive is applied in a continuous layer. The adhesive layer is from 5 to 15 millimeters.
- The technology for walls with a curvature of 5 to 20 millimeters is different in that the glue is applied with a trowel, in a layer of 25 to 35 millimeters, in piles, in a checkerboard pattern, every 30 centimeters. In this case, the height of the glue is adjusted to suit specific areas of the walls.
- For walls with a curvature of more than 20 millimeters, a third method is used: installing beacons. Before installing the slabs, strips of plasterboard 10 centimeters wide are glued to the wall. They are attached every half meter, aligned with the rule. Glue is applied to them in the same way as in the second installation method. After drying for a day, the slabs themselves are glued onto the lighthouses; the glue is applied using the first method.
How to properly seal seams on drywall for a long time
What you can’t do without: after installing the slabs, do not rush to immediately seal all the joints and seams - let the glue dry thoroughly, this will take 48 hours, during which there should be no drafts, sudden changes in temperature and humidity in the room. After this, all seams and joints can be sealed.
Fastening the sheet to the wall using polyurethane foam
Covering walls with this method is more labor-intensive, but it will provide greater reliability of fastening, regardless of the curvature of the surface.
- The gypsum board sheet is pressed against the wall. In its corners, and in another 4–6 places, holes are drilled in the wall, making marks. The sheet is moved to the side, and the resulting marks are drilled out and dowels driven into them.
- On the sheet, stepping back from the holes by 10–15 centimeters, glue pieces of the shock absorber (foam rubber, foam rubber). This distance is necessary for free expansion of the foam. The thickness of the sponge depends on the differences on the wall. Ideally they should be the same.
- The sheet is placed against the wall. Screws with wide heads or an attached washer are screwed into the dowels. They also regulate the level, creating a flat surface. The remaining sheets are installed in the same way.
- After checking the rule, a hole is drilled near each self-tapping screw. The tube for pumping polyurethane foam should fit into it without effort. Foam is pumped into the cavity through the hole. It should form a cushion between the wall and the sheet. The amount of foam is determined experimentally in advance. After the foam has hardened, the screws are removed.
USEFUL INFORMATION: Technical characteristics of Fugenfüller Knauf putty
Regardless of how the gypsum boards were attached, the holes and joints are filled with putty. After drying, all roughness is smoothed out with sandpaper, bringing the wall to perfect condition.
Take your time to start decorating the wall with decorative materials. The adhesive base sets quickly, but it will take at least a day to dry completely.
How does the flatness of the wall affect the choice of glue?
A wall is considered flat if the height difference does not exceed 0.5 mm. Drywall is fixed to them using almost any glue. For example, a mixture based on cement or gypsum. Before applying such solutions, it is recommended to pre-wet the base with water from a spray bottle.
It is cheaper and easier to glue gypsum board onto leveled walls with polyurethane foam. Polymer mastic is also suitable. It is packaged in plastic tubes and applied with a pistol.
For even brickwork, any glue is also suitable, but if the brick is laid unevenly, it is better to use Perlfix. The glue is applied in a dotted manner around the perimeter. The layer should not exceed 3 cm, and the step between points is 30-50 cm.
For installation on curved walls, you need to choose Knauf-Perlfix, but if the height difference is no more than 20 mm. With a greater slope, it is necessary to install beacons from thin strips of gypsum plasterboard, which are glued with Fugen putty in increments of 0.35 m.
A few words about safety precautions
Working with gypsum boards generates quite a lot of dust. Inhaling it will not add health to anyone, so it is better to protect yourself with a respirator. You should also ensure that dust does not penetrate into living spaces by curtaining the openings with a damp cloth.
As you can see, gluing drywall to a wall with your own hands is not such a difficult task. To do this, it is not necessary to invite a specialist of the appropriate profile. Just be patient and have a little experience, and you will succeed.
Installation of sheets on a flat wall (with differences of up to 5 mm)
If the unevenness of the base surface does not exceed 5 mm, the instructions for gluing drywall to the wall will look like this:
- The sheets are cut to the required size, the reverse side is covered with glue: the composition is applied in wide stripes around the perimeter and in the center.
- Pads 10–15 mm thick are installed on the floor near the wall, on which the sheet is placed.
- The gypsum boards are pressed tightly against the ceiling and aligned in accordance with the previously made markings.
Installation starts from the corner. If the walls of the room have the correct geometry, the sheets can be bent 90 degrees at the joints, making a cut using a cutter. The pads are removed after the glue has hardened (preferably after 2-3 days), the remaining gaps are sealed with sealant.
Important! It is recommended to carry out work at an air temperature of +15...+20 degrees, the recommended humidity is no more than 70%.
What kind of glue can I use to glue drywall?
The answer to the question whether it is possible to glue drywall with glue sounds affirmatively yes, but for this you will need to use the right glue, which will be discussed here. The choice of mixture will largely depend on the factors present in the room.
Today, the following types of mixture are offered on the market and in construction stores:
- "Perlfix" is a specialized adhesive for gypsum products from the manufacturer, "Volma-montazh".
- “Start”, “Finish” - a mixture for plaster and putty, made on a gypsum base. Read also: How long does it take for plaster to dry on walls?
- “Knauf-fugen” is a putty mixture also based on gypsum.
- “Ceresit-SM 11” is a cement-based composition for ceramic tiles with some fillers.
- “Liquid nails” - a silicone mixture made of polyurethane and acrylic, assembly adhesive.
- “PENOSIL Premium Fix&Go Montage” – foam mounting adhesive. Remember, you need to select a mixture with a “min” coefficient.
As for sealants, they can be used on surfaces consisting of brick, concrete, or foam block.
Installing drywall with glue: how to properly prepare the adhesive composition
In principle, the process of preparing adhesive for drywall is practically no different from the technology of mixing any building mixtures. When approaching this issue, the only thing that needs to be taken into account is the nature of the curvature of the surface being glued - a strong deviation of the wall from the level or the presence of large bumps requires mixing glue of a certain thickness. The greater these deviations, the thicker the solution will be needed.
How to glue drywall with your own hands, prepare glue photo
So, pour a third of the water into the bucket and pour dry glue like “Perlfix” into it - you need to pour it so that an island forms on the surface of the water. Now insert a mixer mounted on a drill into the bucket and mix thoroughly until a homogeneous mixture is obtained. If the glue turns out to be sparse, feel free to add the dry mixture and stir everything again. You can do the same with thick glue - water dilutes it perfectly.
Smooth walls
The simplest task, which will require less effort during repairs, is attaching drywall to relatively flat walls. The first stage includes cleaning the surface of any dirt and foreign coatings. To improve adhesion and reduce the consumption of the binder solution, you can apply a primer mixture to the walls. Drywall adhesive is diluted according to the principle of a dry tile mixture. It is better to use mechanical tools to mix it. Do not dilute the solution too much, as it adheres quite firmly to the surface and dries quickly.
Before you start gluing the sheets, you need to make the necessary connectors for sockets in them. To apply the adhesive to the drywall, you will need a notched trowel. The mixture is applied inside the sheet and around the entire perimeter. Drywall is installed on special pads. They can be made from pieces of the same material. To achieve a level surface, use a rule or level. Only after measuring can you completely press the sheet to the base. The pads should be removed as soon as the glue has completely cured. The gaps between the sheets must be filled with putty, and the distance between the drywall and the floor can be sealed with sealant.
Preparing walls and glue
Before you begin installing drywall with glue, it is recommended to prepare a set of necessary materials and tools:
- Sheets of finishing material
- Dowels
- Self-tapping screws
- Adhesive composition for installation of gypsum boards
- Hammer
- Special plumb line
- Screwdriver
- Rule
- Strong thread
- Construction knife
- Level
- Container for preparing glue, plaster mixture
- Drill with mixer attachment
- Several spatulas of different widths
Preparation of the working surface consists of:
- Cleaning the base from old coating, particles of dust, dirt;
- Degreasing the wall;
- Priming, which uses a special solution for cellular concrete bases (Ceresit CT17);
- After the primer has dried, you need to prepare plasterboard wall slabs in which you need to make holes for sockets.
In order for the finishing of walls with plasterboard on glue to last for a long time, it is recommended to adhere to the technology for preparing the working composition:
- Pour the liquid into the container according to the directions on the package;
- Add the required amount of dry putty;
- Mix everything well;
- The mixture should be homogeneous, similar in consistency to sour cream;
- Add PVA glue for greater effectiveness;
- Mix everything again.
It is not recommended to use an adhesive composition to glue the finishing material right away; you need to let it sit for some time so that all the components can bond well with each other.
Preparing the wall surface
The base must be level and clean. It should not contain greasy stains or dust. It is best to clean the walls with a slightly damp brush, which will remove most of the dirt. Try to limit the use of chemicals to a minimum, only for removing greasy stains.
Then the wall should be well primed over the entire surface. However, it is not necessary to use expensive primers. Typical popular primers are quite suitable.
Many manufacturers offer primers designed for a specific type of wall (brick, concrete, blocks, etc.). Regardless of the type, it must be remembered that the purpose of using a primer is to equalize the absorbency of the wall over the entire surface and improve the ability to bind it to the adhesive solution.
To glue plasterboard sheets, you must use glue (for example, Perlfix) intended for this type of work. They have a composition adapted to the unusual material such as cardboard. A poor choice of adhesive can result in the solution not bonding to the gypsum sheet.
Preparatory work
In order to facilitate the work and correctly glue the drywall with glue, it is necessary to prepare a certain set of tools, materials and prepare the walls.
And so it follows:
- Before starting work, decide on the type of gypsum board; it can be moisture resistant or regular.
- Dowel nails or self-tapping screws.
- Selected adhesive mixture for installation.
- Hammer and construction mixer.
- A plumb line, usually a knife, a level.
- Spatula, prepared adhesive mixture.
- Primer, roller, brush.
After selecting the required number of necessary tools, it’s time to prepare the wall for leveling:
- The walls are cleaned of everything unnecessary.
- If there are holes or cracks, they are processed and removed by rubbing with cement mixture, putty, etc.
- The prepared wall must be primed.
- After preparing the walls, they begin to prepare the drywall.
In order for the work to be carried out at the proper level, and for the repairs to last for many years, it is necessary to dilute the glue properly.
Glue recipe:
- A certain amount of water is poured into a specially prepared container.
- Then add a mixture of dry glue to this amount of water and mix everything thoroughly using a mixer.
- After this, add a little PVA glue and mix the resulting mixture thoroughly again.
- After preparation, it is necessary to keep the solution for 5 minutes to completely dissolve the entire composition of the mixture.
You can learn more about how to dilute tile adhesive from this review.