Tile is an indispensable material for finishing a bathroom. But before laying the tiles, the issue of leveling the walls arises. A simple way to solve the problem is to use moisture-resistant plasterboard sheets. An inexperienced craftsman at this stage may have doubts: will the gypsum board withstand heavy tiles in conditions of high humidity, will the tiles be able to reliably adhere to smooth cardboard? We suggest you find out how to properly glue tiles onto drywall and whether you can do it yourself.
Can drywall be installed on tiles?
Typically, gypsum plasterboards are used in cases where leveling using the traditional method - by plastering - seems to be quite labor-intensive and financially expensive.
In simple words, when the walls are so crooked that the construction mixtures for their preparation can be calculated not in bags, but literally almost in dump trucks. As a rule, such surfaces are found in old houses. And if we talk specifically about bathrooms, then at the time of renovation they are most often already lined with old tiles. And then the home master is forced to think about whether it is possible to install drywall on tiles - the old cladding? To answer this question, we need to make a small digression. When arranging a plasterboard surface, two methods are used: installing sheets on a frame and directly gluing them to the wall. First, let's talk about what concerns the first option. If the old cladding is in more or less acceptable condition, then after appropriate preparation, which we will discuss below, plasterboard can be installed on the tiles using the frame method. If you decide to attach the gypsum board directly to the wall, the answer will be clearly negative. The old coating must be removed. Even if it seems at first glance that it is quite durable. The fact is that after the end of the procedure a very serious load will fall on him. And how it will behave subsequently is unknown. So, rule number one: you cannot glue drywall to tiles! Next - about the preparation procedure itself.
Advantages
Drywall adhesive has a certain list of advantages over other methods of attaching this material:
- significant acceleration of the process of laying plasterboard sheets. For example, if drywall is installed on a metal frame, it takes twice as long as gluing the material to the surface.
- In addition, drywall adhesive dries very quickly , so you can soon move on to other repair work.
- ease of use. Diluting the mixture is not difficult if you follow the instructions on the package. And the installation process itself is very simple, because it is enough to apply glue either to the wall itself or to a sheet of drywall, and then press it against the wall.
- In addition, there is no need to pre-level the surface , because to apply the glue it is enough to simply clean the wall of debris and prime it.
- less financial costs. This is especially noticeable in comparison with a metal frame, where you need to purchase fasteners, metal profiles and other components.
- on average, when compared in terms of financial costs, installing one sheet of drywall on a metal profile will cost four times more in cost than using glue. In addition, the frame “takes away” space from the room - about 4 cm from each wall .
- As for the glue, with this method it is possible to minimize these losses to 2 cm.
How is it different from usual styling?
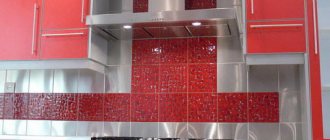
Comment from our expert: “In most cases, tiles are laid on drywall in the bathroom. The bathroom is a “wet” room, so it is imperative to use moisture-resistant drywall.”
Very often, owners of private houses specially line the walls with plasterboard to make it easier to lay tiles, because in the house there is usually no problem with saving space.
To lay tiles on gypsum plasterboard, you can use three types of adhesives:
- Combined bathroom - interior design review >> Classic cement-based tile adhesive. The only condition that must be met is that the solution should not come into contact with clean plaster. Carefully examine the surface of the drywall for gouges and damage. Cement-based adhesive will not adhere to plaster.
- Elastic glue. A universal option that is suitable for most surfaces. Much better than cement-based ones.
- Liquid Nails. The simplest, but most expensive fixation option.
If you will lay tiles on it in a room with high humidity (bathroom, toilet, bathroom), use only moisture-resistant drywall.
Is it possible?
And first, you should make sure that laying on drywall is generally acceptable? And this is a reasonable question, because, in essence, it is supposed to be laid out on paper. But the answer is obvious - yes, it is possible.
This coating makes it possible to create good adhesion to tiles and glue. It is only important to choose the correct composition of the mixture. Essentially, the dilemma is between two types: elastic or cement glue. The latter creates a durable and tenacious film between materials.
How to properly lay tiles on drywall?
Elastic glue is more expensive, but has improved qualities for such purposes.
There is another question that worries many users: is it possible to lay tiles on drywall if decorative elements are made from it? After all, a cabinet is often created from such material, in particular in the bathroom. So that it does not fall out of the overall ensemble, it is also recommended to veneer it. Therefore, the answer in this case is positive – there will be tiles!
Advantages of using drywall as a base for tiles
The base for laying tiles must meet the following requirements:
- Ideally even, without distortions that can affect the row of tiles;
- Without chips, potholes and bumps that change the thickness of the adhesive layer when laying tiles;
- Durable and monolithic to eliminate vibrations that can damage the decorative coating.
All these requirements are met by walls covered with plasterboard, which is excellent for installing tiles. A flat base speeds up work, reduces glue consumption, and also increases the strength of the masonry due to the use of a uniform layer of glue distributed over the entire surface of the wall.
Requirements for base and material
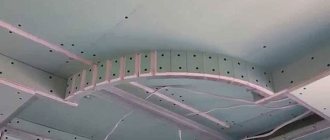
Tile is a fairly heavy finishing material, so emphasis should be placed on strengthening the structure of the frame for drywall. Vertical guide profiles are fixed with a minimum pitch of about 40 cm, and reinforced with horizontal guides every 0.5-0.7 m. It is also worth remembering that the distance between the screwed sheets of drywall, walls, ceiling and floor should be within 4- 7 mm.
Plasterboard foundation
The tiles can be glued to any type of drywall, but if these are wet rooms, then the conditions here are dictated mainly not by the finish, but by the microclimate. In a bathroom or toilet, all work is done from moisture-resistant gypsum board, while for the kitchen or hallway, ordinary sheets are also suitable.
Which drywall to choose?
Before considering the issue of choosing an adhesive for laying tiles on drywall, it is worth understanding what the plasterboard sheets themselves should be like?
It should be noted that they are made from gypsum and cellulose waste paper. This results in a fireproof and environmentally friendly material with high strength and excellent thermal insulation properties.
The result is a universal product for various use cases. Moreover, the implementation of ideas is quite easy, so even a beginner can start creating a plasterboard structure.
Production offers two types:
- For normal conditions (dry and normal levels of moisture and temperature). Used for redevelopment or renovation of premises.
- For kitchens and bathrooms. It has a hydrophobic impregnation, thanks to which the material can be used to lay tiles in the bathroom.
The first option is not recommended for use in wet rooms, as well as for wet work. Therefore, laying tiles on it is excluded.
Selection of materials
The main material is tiles. The choice is limited only by budget. Modern manufacturers have saved property owners from creative pains: most collections have two shades (dark and light), a set of inserts (“paintings”, “portraits”), vertical and horizontal friezes of different widths for decorating designer delights. Therefore, it is enough to choose the design you like at the exhibition stand - in large stores they will even calculate the required quantity of each element according to the presented drawing of the room.
When choosing drywall for tiles, be sure to choose one with a moisture-resistant coating
Glue – it is better to buy this material in the form of dry mixtures. Although there are ready-made formulations on sale, they are quite expensive. There is not much difference in how to glue ceramic tiles to drywall, because increased strength is needed in industrial facilities where surfaces are subject to heavy loads. For home use, “Universal” glue without the marks “Super”, “Super-polymer”, “Frost-resistant”, “Heat-resistant” is suitable.
Note. It is worth buying a mixture with enhanced properties if the tiles are unusually large (50/50 cm) and heavy. In this case, it is worth purchasing glue marked “For natural stone” or “For porcelain stoneware.”
Crosses for seams. Sold in different thicknesses - from 1.5 mm to 5 mm or more. The optimal size is 2.5 mm. With smaller ones it is difficult to maintain a seam due to errors in the sizes of individual tiles, while large ones visually “break” the monolith of the tiled surface.
We carry out high-quality plasterboard repairs with our own hands
Grout for joints - it is better to purchase it with antiseptic additives, so as not to have to worry about additional passage of joints with a special compound against mold and mildew.
What adhesive is used for laying tiles on drywall
To glue tiles to gypsum plasterboard, in principle, you can use any type of adhesive available on the construction market.
- Printed-cement based tile adhesive has the most affordable price. As the name implies, the base is sand and cement with a certain amount of polymer additives that improve the adhesion and ductility of the glue. The mixture is sold dry. Before use, the glue is diluted with water to the required consistency.
- Elastic dispersion adhesive for tiles is more expensive than sand-cement adhesive, but its low consumption to some extent eliminates this difference. Elastic adhesive mixtures are sold in finished form; they are characterized by good adhesion and resistance to temperature and humidity fluctuations.
Applying tile adhesive - Epoxy multicomponent adhesive is mixed with a catalyst before starting work. The additive is sold as a set and packaged in a separate container. Active glue is quite difficult for a beginner to work with; cladding must be done quickly, accurately and accurately. Any adhesive that gets onto the surface of the tile must be removed immediately.
- "Liquid nails" are generally used only for covering small areas or individual tiles. The adhesive properties of “liquid nails” are not bad, but using them over large areas will not be the most economical option. In addition, neoprene-based adhesives, which are suitable for wet rooms, are toxic and have an unpleasant odor, while harmless water-based adhesives are not sufficiently moisture-resistant and therefore short-lived.
Don't miss: How to choose home office furniture?
TOP 5 brands
The main leaders of tile adhesive that can be used on drywall:
- Ceresit CM17. Suitable for most surfaces. Moisture-resistant, frost-resistant, elastic.
- Moment. The line of this brand is wide, it all depends on your needs. Can be used for laying all types of tiles. Has high adhesion and moisture resistance.
- Knauf Fliesen. High quality mixture at low cost. Moisture resistant, elastic. The mixture is economical in consumption. Almost a budget option.
- Kilto PRO FIX. The mixture has high strength and average hardening time. Ideal for laying small to medium sized tiles.
- Yunis 2000. The adhesive is intended for laying most types of tiles, including mosaic. Moisture-resistant, has a high degree of adhesion, and is not afraid of moisture.
What properties are inherent in high-quality glue?
To choose a high-quality solution that ensures reliability and long service life of the cladding, pay attention to the following characteristics:
- adhesive properties and rapid adhesion to bonded surfaces: this indicator is of particular importance when installing large, heavy tiles.
- potable period: glue with a short hardening time requires dilution in small portions and high speed, which is not very convenient and can affect the quality of installation;
- plasticity: a mixture with a low level is suitable for leveling or laying cladding on inclined bases, a composition with a moderate level is used when installing tiles on flat, smooth surfaces;
- elasticity: under conditions of slight deformation, the cladding will not peel off from the base;
- spreadability: a high level of the indicator allows you to evenly distribute the composition over the base of the floor and fill all unevenness; moderate and low levels should be for compositions intended for wall cladding;
- water resistance: a high-quality mixture retains its performance properties for a long time in conditions of high humidity.
Most popular options
If you want to know which adhesive to choose for drywall, then you should probably pay attention to the following brands of manufacturers that have proven their worth with the quality of their products.
In total, there are several most popular options:
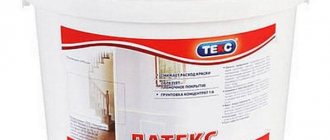
- Perlfix from the Knauf company.
- Silicone glue.
- Gypsum based adhesive.
- Polyurethane glue.
- Fugenfüller putty
I would like to start the review with Perlfix from the Knauf company, which is one of the leaders among manufacturers of dry mixes . This adhesive is great for gluing drywall to a wide variety of surfaces.
The prepared composition is not afraid of moisture, so it can be used in the bathroom, kitchen and other similar rooms.
For more information about Knauf Perflix glue, watch the video:
The mixture should be diluted as follows:
- the most important thing is to pour the mixture into water, but not vice versa;
- the glue should be prepared immediately before performing work, because it dries quite quickly - after half an hour;
- The proportion is as follows: a standard bag of 30 kg of glue will require 15 liters of water.
Pour the mixture into water, then leave it for a couple of minutes so that it infuses a little. Then you need to take a construction mixer for mixing.
This will take about three more minutes until you reach the consistency of thick sour cream. The applied glue dries in about 7 days, but if certain conditions are created, this period can be reduced by 2 days.
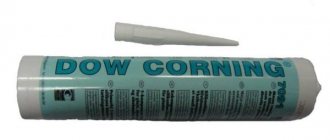
Silicone
If you want to purchase tile adhesive for drywall, then silicone is fully suitable for this.
It is in many ways similar in properties to polyurethane, but has a slightly different consistency.
It is also called a sealant, because it can be used to seal joints and seams.
After applying it, the seams no longer let moisture in . The versatility of this glue allows it to be used not only for plasterboard sheets, but also for gluing wallpaper, laying tiles, etc.
Polyurethane
This type of glue comes in cans, so to use it correctly you will need a special construction gun.
It can be equally effectively used for gluing plasterboard sheets, tiles, and also for leveling walls.
Gypsum based
Among gypsum mixtures, the Volma brand is very popular, whose glue is considered one of the most flexible. Using this adhesive composition, you can glue drywall, as well as attach foam to the walls for additional sound insulation.
Diluted glue has the ability to take the shape of wall irregularities, which is very good when working on leveling surfaces. A distinctive feature of this mixture is the fact that after drying the glue does not shrink.
Good resistance to various harmful microorganisms and fungi is also noted. This circumstance allows the use of this glue in bathrooms , as well as in any other rooms where there is high humidity.
Fugenfüller
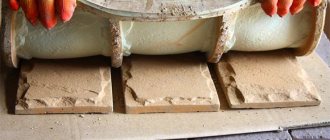
The advisability of using this putty arises if it is necessary to lay ceramic tiles on drywall. It is used quite sparingly, because it is applied pointwise to the surface.
Using this putty, you can attach sheets of drywall to wood, stone and other surfaces.
Among the positive qualities of this adhesive composition, one can note its protective functions, allowing the surface not to be afraid of the effects of microorganisms, fungi and moisture.
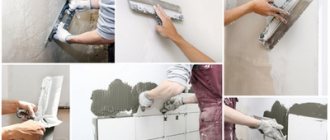
Putty and surface primer
Beginners often wonder whether it is necessary to putty drywall before laying tiles? The answer will be necessary, but only the areas of the joints. This is done to level the surface and obtain a prepared base. It is necessary to apply putty to the main part when painting or when you decide to stick wallpaper on the walls. If you are going to combine ceramics, for example, with paint, then puttying of the sheets will be required.
The process of closing seams is as follows:
- It is necessary to embroider the seam areas of the sheet material without chamfers with a knife, create a recess in the shape of the letter v, the size is one centimeter.
- Treat the area with a deep penetration primer; types supplemented with antiseptic options are required; a two-layer treatment should be done, each drying for about 30-40 minutes.
- A gypsum-based putty is applied to the dried layer, a serpyanka tape is installed on top of the layer, immersed in the putty layer, and then covered with a new thin layer.
- After drying, sand the surface with sandpaper.
Putty is done to level the surface and obtain a prepared base.
The next burning question is, do I need to prime drywall before laying tiles? The answer is a must, it helps create additional protection from moisture and also get better adhesion between materials. A deep penetration primer containing an antiseptic is selected. The surface must be treated in two layers, forty minutes must pass between each to complete the drying stage.
The primer helps create additional protection from moisture and also obtain better adhesion between materials.
Preparing the walls
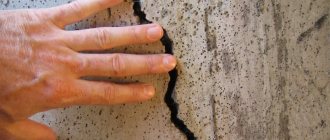
- To choose the method of wall cladding, it is necessary to determine the curvature of the walls using a water level or plumb line.
- Protruding nails, screws, etc. are removed from the wall.
- The base is cleaned from the remnants of the old cladding to clean brick or concrete.
- The wall is cleaned of dirt and primed to increase adhesion.
- Lines are drawn on the floor along which the position of the sheets will be adjusted. In case of strong curvature, lines are also drawn on the ceiling, which will ensure high-quality installation of the sheets in the same plane.
Don't miss: Removing chalk and adhesive paints from walls
Moisture-absorbent materials are coated with an agent that reduces absorption.
How to fix drywall
The choice of installation technology depends on the degree of deformation of the base.
On flat walls
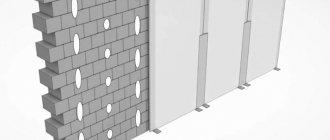
Concrete and plastered walls are ideally smooth. Gluing drywall to them is done without a profile.
- First, wiring is laid in the concrete wall, if necessary. In order not to create interference, a groove of the required size is made in the base, a wire is laid in it, and the empty space is covered with cement mortar. Holes for sockets and switches are made in the right places.
- The base is cleaned and primed. It is better to apply strengthening mixtures to a concrete or plastered base. A surface painted with oil or other dye must be pre-treated with an adhesive mixture with quartz filler.
- The material is cut to size, holes are made for sockets, if necessary. Conventional crowns are used, which are installed on a low-power screwdriver.
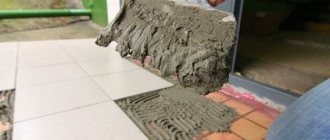
- The glue is mixed; its volume should be enough to attach a maximum of 1-2 sheets of gypsum board. For economical consumption and good adhesion to the surface, the mixture is applied with a spatula with a tooth height of 0.8-1 cm. Excess glue is immediately removed.
- Drywall is coated with glue and applied to the prepared base.
- The structural elements are lifted and wires are pulled under them into the cut holes.
- The sheet is carefully pressed against the wall and tapped over the entire surface for a more reliable adhesion. You can place a board on it and lightly tap it with a mallet.
For moderately uneven walls
The technology is suitable for walls whose level curvature does not exceed a couple of centimeters.
- The base is prepared and primed. Electrical wiring is laid in the same way as the previous method. Drywall sheets are prepared in the same way.
- The adhesive mixture is being prepared. If there are uneven conditions, the consumption will increase. The composition is not applied with a notched trowel, but dotted or in heaps on the base. The mixture not only fastens the material, but also levels the walls.
- Drywall is laid on the lining and treated with glue. The points are placed along the perimeter in increments of 0.25 m; in the center of the sheet, the increment increases to 0.4 m.
There should be no uncoated areas on the back side of the gypsum board.
Gluing begins from the most uneven area. If the base is gas or foam concrete, then the glue is applied not to the sheet, but to the wall for more reliable fastening.
- If there is wiring in the wall, its ends are pulled into pre-made holes in the drywall. Afterwards, the gypsum board is pressed against the wall, its surface is leveled.
Big bumps
- Cleaning the surface of peeling pieces of plaster and old finishing; there should be no elements left on it that could fall off over time.
- The wall is primed. The soil strengthens loose areas and reduces the absorbency of the material. On surfaces with large uneven surfaces, the primer is applied with a paintbrush rather than a roller in order to better distribute the solution.
- Beacons are being prepared. Drywall is cut into strips 0.1 m wide. The number of strips depends on the area of the cladding. They are located along the perimeter of the base, as well as in vertical stripes in increments of 0.4-0.6 m.
- Markings are made along the perimeter of the base, beacons are placed along it and “sit” on glue, the layer of which is adjusted depending on the depth of the differences. It’s better to start by gluing the beacons horizontally, and after half an hour start working on the vertical elements.
- When gluing vertical posts, the level of the individual strip and the entire surface is controlled. The position of the guides can be adjusted until the mixture has completely hardened.
- After the glue that fixes the beacons has dried, the adhesive composition is applied to the gypsum board sheet along the width of the located guides. When the beacons are positioned correctly, the plasterboard almost immediately lies flat on the surface.
- The procedure is repeated with each sheet.
To save material, beacons are made not in stripes, but in dots. Then the upper elements are first set up, a plumb line is hung from them for vertical control, and the glue is coated not with the drywall, but with the wall.
Calculation of the laying order
The dimensions of the room directly affect the choice of where to start laying the tiles. The “reference point” is determined after preliminary calculation of the number of tiles along a horizontal line, adjusted for the gaps between them. The result is very rarely an integer. The place where work begins depends on the amount of balance:
- If it is less than half of one tile, then start from the center of the wall. This way the tile will lie symmetrically with the trimmed elements at the edges.
- If the remainder is more than half of the fragment, then the installation is carried out so that the trimmings are less visible: they start from the most noticeable area.
USEFUL INFORMATION: How to remove old wallpaper from drywall without extra effort
Important point!
Rule ten: when laying tiles on drywall, all work is carried out intermittently. You cannot cover the entire wall at once. We made five rows - rest. Let the drywall “get used” to the load and adapt to new conditions! In addition, carry out all work only using a level. Each tile must lie flat. And don't rush! Remember that correcting defects is quite problematic, since glued tiles can only be removed with a piece of plasterboard base. The work is completed by laying the last row.
Completion of work
After installation, at least 2-3 days must pass for the adhesive joint to completely dry. Then you can putty the joints. Putty is applied to them, over which reinforcing tape is pressed. After hardening, another layer of leveling putty is applied to the joints and nail heads protruding forward, if any. You can also level it with the mixture on which the gypsum board was installed.
Gaps along the floor are sealed with sealant. After the seams have completely dried, you can begin finishing.