Any building structure requires the next stage of work - finishing. The most common option for protecting and giving smooth geometry to walls and ceilings is plaster. The material is produced in a wide range for different substrates and conditions of use, but not a single mixture is capable of creating an ideal surface without the use of additional equipment and tools. With the help of profile structures, you can simplify the alignment process and provide the walls and flows with the desired geometry, which will subsequently become the basis for decorative finishing.
What is a plaster beacon
A plaster beacon is a special device that simplifies the work of leveling bases and provides a flat surface. Beacons for plastering walls can be made of metal, plastic and wood, and there are also different options for homemade devices that create a restrictive barrier during alignment.
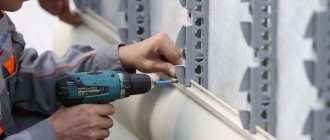
The design consists of a U-shaped corner or V-shaped profile with perforation and even a round section in the form of a pipe. Holes in the elements make it possible to secure them to the surface. Hardware can be different - these are dowels for walls made of concrete or brick and self-tapping screws for wooden and block structures. The technology for installing guides consists of a variety of fasteners: the more of them, the more accurate the alignment will be.
Corner beacons are used to construct corners; V-shaped profiles create optimal conditions for constructing a coating.
On a note!
When performing work, disposable profiles are used, which are dismantled when the solution sets and used again.
The most effective means for making walls even are beacons for plaster.
What it is
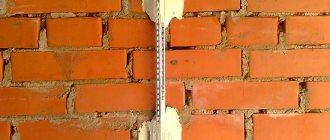
Beacons for plaster are special guides that greatly facilitate the procedure of leveling surfaces during interior finishing of a house. Similar products are shown in the following photo.
Modern manufacturers make such devices from various materials. The most common are steel beacons with thicknesses of 3 mm, 6 mm and 10 mm.
The main advantage of using such materials when performing plastering work is the ability to obtain an expansion joint, with which you can solve the problem of cracks during sudden temperature changes. They are especially relevant when constructing monolithic buildings.
Beacon installation
Purpose
The main function of the lighthouse structure is to level the mixture along the guides, but profiles are often used to perform other finishing work.
Purpose and use of beacons:
- creating the top border of a layer or fill;
- guides for leveling ceramic and stone tiles;
- reinforcing function when the structure remains inside the coating.
For all applications, profiles made of different materials can be used. Galvanized metal, aluminum and plastic can be used both one-time and to create additional reinforcement of the coating, and reusable when elements are dismantled. It is not recommended to leave metal beacons inside unless they are intended for that purpose. During the operation of buildings, the coating can accumulate moisture, which will lead to corrosion and peeling of the finishing layer from the base.
Most often, beacons are installed along the entire length of walls requiring plastering.
Marking for beacons
Before starting the process of installing beacons, it is necessary to first mark the surface. Today, different methods are used with their positive and negative sides.
Simple method
This method involves installing guides on plaster, which will then be used to finish the walls. Marking is carried out according to the following instructions:
- The distance from the corner is 30 centimeters, the floor and ceiling are 15 cm.
- A vertical line is drawn, the evenness of which is measured by a level.
- The operation is repeated on all walls in the room.
- The distance between the stripes is measured, it must be divided by 1.5 meters. The result obtained means the number of beacons that should be placed on a certain wall.
- The profiles are cut so that their length is reduced by 30 cm.
- At the very beginning and end of the lines, holes are drilled into which dowels are installed.
- The entire wall is drawn with lines at a distance of 1.5 meters from each other.
- Self-tapping screws are placed in the holes, and two threads are stretched between them.
- In places where the threads and drawn lines intersect, holes are also drilled into which dowels and screws are inserted.
- The level of the screws is leveled according to their heads: the number of wall obstructions, the thickness of the beacon and the additional margin (about 0.5 cm) are summed up. The result obtained means the length of the protrusion of the fastener from the walls.
As soon as the screws are installed, the threads are tensioned diagonally. The beacons are attached under the resulting plane. The products only need to slightly touch the threads. Then the ropes are removed and the walls are covered with mortar.
Using a laser level
Not every home craftsman has such a device. However, its use simplifies the process of placing beacons under plaster, which is carried out according to the following scheme:
- The laser level is used to locate the blockage of the wall. The device is installed against the wall opposite, then the cross-level is turned on. This procedure will help you find out the required thickness of the plaster layer without carrying out preparatory work.
- Using the device, vertical stripes with indentations are drawn on the wall, which were indicated in the simple method above.
- The level is placed 40 cm from the corner, a vertical line is included.
- The location where the laser beam reaches the wall at the minimum distance, for example 36 cm, is determined.
- A long strip (0.5 m) is taken and a point at a length of 37 cm is marked on it. This result was obtained by adding the distance from the laser strip to the wall, the thickness of the beacon and the required margin.
After the calculations have been carried out, glue is applied to the drawn lines. Then the beacons are pressed with a wooden strip until the mark coincides with the laser strip.
Types of beacons for plastering walls
A large selection of guides in construction stores can confuse a novice craftsman, because different materials for making profiles have features in installation, different strengths and their own subtleties of working with them. Beacons for plaster come in different sizes, so before purchasing you need to take measurements, markings and calculate the required quantity and required size of products.
Metal
The most popular profile, it has sufficient strength and a large number of perforations, which is convenient for installation on walls with strong defects. Metal beacons can be made of different alloys, and this determines their ability to be left in the finishing material. The aluminum profile performs its functions perfectly and can be left in the wall cavity. However, it is very thin and can easily become deformed during shipping and installation.
For your information!
A product made of carbon steel has sufficient strength, is easy to attach, but is not intended for long-term contact with the finishing material; it is removed after the solution has set.
Metal pipe
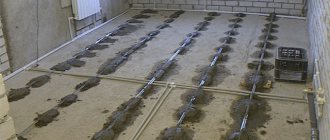
A metal pipe is often used for floor screed. It has thick walls, so it is applicable both in residential premises and when pouring the foundation in industrial buildings. Moreover, the larger the diameter, the thicker and stronger the fill will be. The metal pipe is laid on a bed of mortar, which allows the floor to be leveled horizontally and remains in the fill, which provides additional reinforcement.
Iron lighthouses without coating
Uncoated iron beacons are used both for floor screeds in the form of a U- and V-shaped profile, and for finishing walls. Elements for aligning external and internal corners are also made from metal.
For profiles, carbon steel is used, which is perforated. Iron is a durable material, but not intended to be left in plaster, with the exception of U-shaped profiles that are used to fill the floor.
Coated steel beacons
Galvanization is used to protect elements from rust. At the same time, the product is sufficiently durable and can be used repeatedly. Galvanized elements are often used for plastering facades and left in the solution as additional reinforcement. To decorate walls indoors, the steel product can be dismantled or used as a guide element for cladding with heavy piece materials and left in the finishing.
Popular metal beacons are profiled elements
Plastic
Profiles have a lot of advantages - they are light weight and not susceptible to rust. And also a relatively low price and the ability to be left in solution, but low mechanical strength. Plastic products can only be used when plastering ceilings and walls indoors. At sub-zero temperatures they lose elasticity and may break under the influence of leveling tools.
Plastic profiles are lightweight
Homemade
Many craftsmen make guides with their own hands and use working solutions or self-tapping screws to produce the required level of plaster on the surface.
Hardware is often used on substrates that can be easily perforated - wood, plasterboard and OSB sheets. Alignment is focused on the heads of the screws, which are screwed in relation to the surface with the control of a building level. In this case, the hardware remains in the plaster and does not require their removal after applying the mixture.
The cheapest option is homemade beacons for plaster.
Strings
Strings consist of a set of hardware, thin rope and fasteners, which you can buy in a store or make yourself. They do an excellent job, but they require precision when constructing the structure, otherwise you may end up with a crooked wall.
Installation of the structure is similar to the homemade version of using self-tapping screws, but a thin cord is stretched between the aligned heads of the hardware, which determines the upper level of the solution.
String plaster beacons are often used by professionals with a good eye, but for a novice master it is better to use a metal structure that does not bend under leveling tools.
Note!
After applying the mixture, the string is cut and pulled out of the slightly dried solution, and the deformed areas are rubbed.
To install string beacons you need to have self-tapping screws, thread or wire and a drill.
Corner
Corner corners are used to create the correct geometry of window and door slopes, as well as internal and external corners when plastering walls indoors and on facades. Corner guides can be made of metal, plastic and wood. When forming, galvanized steel elements are often used, which, if necessary, can be left under a layer of mortar, which gives additional strength to the corners that are most susceptible to mechanical damage.
Plastic profiles are used only indoors and are not intended for facade work. Wooden structures are used only to form the geometry and are removed when the solution is partially dry.
To obtain a geometrically correct angle, a corner beacon profile is used
Wooden
Wooden ones are used for plastering walls in the form of slats, which are installed on the base and dismantled after the solution has partially dried. The attachment points are filled with the mixture and leveled. Wooden beacons cannot be left under a layer of plaster; over time, the material begins to rot and collapse, which will affect the durability of the decorative coating.
Wood is also used when pouring floors in the form of bars, which provide sufficient rigidity to the coating and form a perfectly flat base. In this case, the structure is treated with antifungal drugs and left inside the fill. The height of the beam is selected based on the unevenness of the floor and the thickness of the coating.
Wooden includes guides made from boards or plywood
By brand
A self-made guide can be cement or gypsum mortar, which is thrown onto the walls in heaps and leveled. This type of device requires some skill, but eliminates the cost of purchasing elements in a store.
The “mark” device on the surface is made on the basis of hardware screwed into the wall, onto which a pile of mortar is thrown. When partially dry, the upper part is removed up to the screw head, which forms a level, the height of which is oriented during the work process.
When using a gypsum solution, the beacon will be ready for use in 4-6 hours, depending on the thickness of the layer. The cement-sand mixture takes longer to dry and requires at least a day to set.
The mark is a small volumetric marker pad of a given height
Homemade lighthouses
In some cases, wooden blocks are used as beacons, this is especially true when finishing wooden surfaces. These products are attached to the walls using self-tapping screws, which significantly speeds up the plastering process. The fact is that ordinary beacon profiles are attached to a solution that must dry before plastering.
Homemade plaster beacon made from mortar
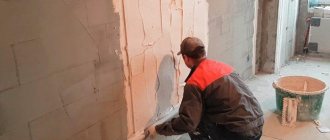
More experienced craftsmen prefer to make beacons from plaster themselves. To do this, install self-tapping screws along a line drawn and verified by the building level. Their caps serve as a kind of level on which the plaster solution is applied. There are two methods of application: the master uses spatulas to rake the mortar and shape it, or presses a wooden beam against the heads of the screws and fills the space between the wall and the beam with plaster. Such a beacon will not need to be dismantled; with its help, you can save money on purchasing factory products.
Another interesting solution is string beacons. They consist of several self-tapping screws with a wire stretched between them. The first step is to drill holes, after which dowels are installed in them. Self-tapping screws are installed in them so that the caps are at the same distance from the coating. Then the wire is pulled.
Under this structure there remains free space, which is filled with plaster. While the solution is still fresh, the strings and screws are removed, and the resulting holes are covered with the solution.
String beacons for plastering walls
On a note! The main disadvantage of the string method is the risk of getting a curved surface due to an error.
You can also use metal profiles, corners or pipes for work. Some craftsmen use wooden slats as a beacon. A profile for installing drywall is also suitable. The advantage of using such parts is the low price, but the disadvantage is that using such beacons, you will have to spend more plaster.
Sizes and shapes of beacons for plaster
Choosing the right product in the store is not difficult. Retail outlets offer an assortment of all types of elements, but before purchasing you need to know the surface area and the number of guides needed.
The height of the profiles is 3-30 mm, which determines the thickness of the coating; the length for purchased guides does not exceed 3 m, but this size is quite enough to carry out work in most modern houses. There are non-standard lengths that reach 6 m, but such profiles are difficult to transport, so they are not sold in all stores.
Attention!
The size of the beacon base for perforated plaster can vary between 20-50 mm. The diameter of the holes is different in any type of structural element, which allows you to use any fastening element for installation.
What are lighthouses in construction - All about insulation and energy efficiency
It is very important to use plaster to level surfaces and give them the desired flatness.
But it is quite difficult for a beginner to obtain the required surface on his own.
The use of certain technologies and construction techniques will help facilitate the process of plastering and leveling walls. Even an inexperienced craftsman can do this kind of work.
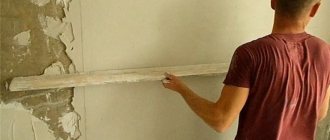
Aligning walls with beacons is a rather labor-intensive process and requires a person to have some knowledge and even experience. But there is no particular reason to refuse to do such work yourself, since it is quite easy to understand how to align a wall with beacons, what is the principle of the whole process.
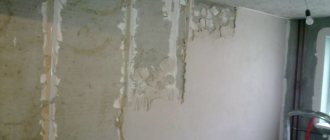
In many apartments, despite seemingly correctly completed finishing and preparatory work, the walls have strong blockages and a large number of flaws, which manifest themselves in the form of certain irregularities. They can be eliminated by applying a layer of plaster to the walls using special beacons to level the walls.
How to choose a plaster mixture
When choosing finishing materials, you should try to pay special attention to one manufacturer . This will help avoid incompatibility of materials and the subsequent development of various defects and difficulties.
On the Russian building materials market you can find plaster mixtures based on cement and gypsum. Gypsum plaster materials are in great demand as they help to apply a plaster layer of up to five centimeters without causing cracks.
The gypsum mixture is not subject to shrinkage and has a high plasticity index.
Due to its high adhesion and low weight, gypsum mortar is the best material for ceiling leveling work.
Unlike the cement composition, gypsum has the properties of thermal insulation and sound insulation, as well as the ability to “breathe”.
Gypsum mixture is considered the best material for leveling smooth concrete bases without reinforcing mesh.
The best gypsum-based building mixture is considered to be the material produced by the German company Knauf. But the price for such mixtures forces users to look for more budget-friendly materials from Russian manufacturers.
Dry mixtures are considered more preferable than ready-made ones , as they give the master the opportunity to choose the desired consistency on his own.
Russian grouts include: dry mixes from the company Starateli, material from the company T.D.
Stroymontazh MS, ready-made mixtures Rusean, as well as Mansurov mixtures of the Joint-Stock Company MKU.
Not so long ago, inexpensive grouts of European quality from a young construction company called Kreps appeared on the modern market.
Rules for selecting beacons
Beacons are metal strips of a special shape and up to three meters long , which are fixed on the surface of deformed walls and serve as the main guide for creating an even layer of plaster. They can be fixed to a variable surface using:
- self-tapping screws;
- dowel nails;
- special fastening elements;
- mixtures for plaster.
Possible replacement
In this case, there is no need to use beacons purchased at a hardware store when plastering. They can be easily replaced with the following materials:
- smooth metal strips;
- square metal profile;
- pipes;
- elongated self-tapping screws with caps.
Sometimes it is possible to replace beacons created in production conditions with simple plaster , which is applied to the surface of the wall in a certain area and in small quantities (as islands).
First, the person doing the work determines a more protruding point on the surface and applies a small amount of plaster mixture in this place. Several more such points are laid off from the resulting landmark in a strictly vertical direction. The height of the lighthouse, that is, the total distance from its top to the wall, can be determined by a plumb line.
Aligning walls according to beacons requires special care and increased attention from a person ; in addition, such a process must be carried out under the strict supervision of an experienced builder.
It is also very important to pay attention to the ability of the device used not to succumb to the negative effects of moisture that is released from the solution.
This means that the material for beacons created by yourself cannot be wood or iron, which is susceptible to corrosion.
Ready-made beacons made of galvanized iron or aluminum have reliable quality . But plastic cannot play the role of a guide when leveling walls with beacons.
It is fragile and not hard enough to continue to hold its shape and withstand the combined pressure of the tool and the mixture.
The best way out of this situation would be to purchase ready-made beacons based on aluminum or galvanized iron.
How to choose beacons
Before making a purchase, you need to estimate the curvature and know the surface area. The cost of the products is low, but the approximate quantity must be determined before going to the store. The disadvantage entails additional travel costs or violation of installation technology while saving guides, which as a result may affect the quality of the coating.
Rules for selecting elements:
- the profile height is determined by the largest surface curvature;
- a product length of 6 m is more often used when finishing facades; for applying the solution indoors, a standard size of 2.7-3.0 m is sufficient;
- when choosing, you need to pay attention to the shape, which should not be deformed, otherwise it will be difficult to achieve a flat surface during application;
- if you plan to leave the guides in the solution layer, then the quality of the anti-corrosion coating should not cause concern;
- at the slightest violation of the galvanized layer, you should refuse to purchase or choose a more expensive option for aluminum products that are not susceptible to rust.
The number of required products is determined based on the markings with the addition of 10-15% to the total figure, which may be needed in case of fracture or deformation of profiles associated with delivery, unloading and installation.
There are guides of various sizes on sale - from 3 mm to 3 cm
Features of using gypsum beacons
Temperature influences
Such a “plaster blot” can hardly be called a beacon.
If it is of significant length, a crack located, for example, in a boundary wall, acts as an expansion joint, changing the width of the opening depending on temperature changes. If a gypsum beacon is installed on such a crack, then it always “triggers”, regardless of whether or not there are other reasons other than temperature effects. The ability to judge the trends in deformation development using such a beacon is almost completely absent. In addition, most surveillance methods require that a new one must be installed next to the “triggered” beacon. For the situation described above, this means installing a new beacon at each inspection, i.e. in general, once a month. Based on these facts, the use of gypsum beacons should be excluded in situations where the crack has a significant extent and significant temperature changes in the structures are possible. It also makes no sense to install beacons on cracks, the nature of which is related to thermal deformations of structures - so-called temperature cracks. The length of the crack on which the beacon can be installed under the specified conditions is determined based on the design features of the building and the location of the crack. Based on practical experience, we can say that, taking into account the described features, the scope of application of gypsum beacons in building envelopes is extremely limited and their use outside heated premises should be completely abandoned.
Possibility of measurements
The gypsum beacon does not help in any way when measuring the width of the crack.
As mentioned above, the purpose of the gypsum beacon is to signal that an increase in the width of the crack is occurring.
Is it possible to measure the change in crack opening width using a gypsum beacon? If the crack closes, then the gypsum beacon does not work at all - in most cases it will come off or receive damage exceeding the amount of change in the width of the crack opening. In any case, it is not possible to measure the amount of crack closure using a gypsum beacon. It seems that it remains possible, using a gypsum beacon, to measure the magnitude of the change in the width of the crack opening as it increases. But in fact, this is also completely unjustified. When observing cracks in buildings and structures, it is recommended to measure the crack opening width with an accuracy close to 0.1 mm. Try measuring the crack with a caliper with such precision in one place, and then step back a few centimeters from it and repeat the measurement. In most cases you will get results that differ by more than 0.1mm. It is for this reason that in most methods it is recommended to mark the places where crack widths are measured with a stroke drawn across the crack. This mark allows you to take measurements in the same place every time, but even this method is not accurate enough. Remember the geodetic observations of building settlements and the design of the settlement marks used there. They are designed in such a way as to make it possible to install the geodetic rod in only one correct way. For this purpose, rounded surfaces are used, which provides a point support for the rail, i.e. the rail can only be installed at one specific point. This is exactly how it is necessary to organize observations of cracks - to ensure the possibility of measuring the opening width in only one single correct place - between two points. In the simplest version, these can be two dowels driven on opposite sides of the crack. In the advanced version, these are reference points provided in the design of the plate beacon. The gypsum beacon provides absolutely nothing for the ability to measure the magnitude of the change in crack opening width. Those. its design does not carry any useful functions, except for the one for which it is intended - signaling.
Marking and installation
Proper installation of the structure will determine how level the surface will be. Before fixing the elements, experts recommend making markings that will eliminate errors and help determine the number of guides needed. The height of the lighthouse is determined using a plumb line, which is fixed at 4-5 points under the ceiling. The departure of the cord from the surface shows the curvature of the walls, from which the desired parameter is calculated.
Stages of installation of profile elements on the surface:
- The first marking line is drawn at a distance of 20-30 cm from the corner. The same is done on the opposite side.
- The gap between the extreme elements is divided into equal parts. Typically, the installation step is 1.2-1.5 m, which should be 10-20 cm less than the length of the tool for alignment-rules.
- If the wall has strong potholes, it is recommended to first partially fill them with mortar and let them dry to make installation easier.
- The guides are installed along the height of the entire wall; if the length is not enough, then the required size is cut off and fixed along the marking line.
- Fastening is carried out through perforated holes using special additional elements or using a working solution.
- Fixation begins with the outer elements, onto which the middle profiles will be aligned.
- Hardware is screwed in in increments of 0.5-0.7 m with constant height control at the building level.
- If the installation was carried out on a mortar, then before starting work the mixture must undergo a full process of setting with the base. For gypsum compositions it is 4-6 hours, for cement compositions at least 24 hours.
Advice!
It is better to mark out and install structural elements simultaneously on all surfaces that will be plastered.
Installation of beacon profiles
After the preparatory work, you can begin installing the beacons. To do this, three different methods are used.
Installation with mortar or glue
The first step is to prepare the solution according to the instructions indicated by the manufacturers on the packaging. If you plan to plaster with cement or lime mortars, which take a long time to dry, then you can add a little gypsum or alabaster to speed up setting. The prepared mass should be applied in small portions every 15-20 cm, along pre-drawn lines.
Installation of the beacon profile on the solution
Then the trimmed beacon profile is applied to the mortar and pressed against the wall. If a simple marking method was used, then the beacon must be installed so that it is level with the screws. If you have a laser level at hand, you need to turn it on and check that the position of the beacons matches the previously made marks. Excess solution must be removed, and then proceed with the installation of the following products.
Mounting on fasteners
To install beacons, special mounts were invented a long time ago. These parts are made of plastic. To install them, you must first remove the retainer from one of the surfaces of the part, and then install it on the heads of the self-tapping screws, which were previously screwed in along the lines every 30 cm. Then the beacon is attached and the retainer is put in place. The main advantage of this method is the speed and ease of installation. But at the same time, the thickness of the plaster increases by about 0.5 cm, which will significantly affect the final cost of the work.
Fastenings for plaster beacons
Not long ago, painters and plasterers used one trick - they cut out tabs with a hole from the fasteners for installing plasterboard panels. With the help of these metal fasteners the beacons were installed. Now factories are engaged in the production of such parts, so they can be bought at any hardware store. They are called "ushastiki". A self-tapping screw is inserted into the hole of the product, after which it is screwed to the required depth. Metal ears are used to fix the beacon. It is leaned against the surface and secured in turn with these ears. To increase the reliability of the connection, the ears are treated with round pliers. The installation of the beacons itself is not difficult, but removal will take a lot of time.
After applying the plaster, the beacons will need to be removed
A plaster beacon is a very useful product with which you can achieve a perfectly smooth surface and high quality coating. It is only important to follow the above recommendations, and also not to leave beacons in the wall. Even high-quality galvanized products can rust inside the wall, requiring re-plastering.
Tips and Cautions
Professional builders know how to work with different types of profiles, but most of them tend to use metal products. A few tips will help you avoid gross mistakes and level the surface yourself.
What you need to know when plastering walls using beacons:
- If the surface is to be finished for painting or wallpapering, it is recommended to dismantle the metal profiles. Even high-quality products can have small scratches that will begin to rust over time, which can show up on the wall.
- When further covering the surface with ceramic tiles, before installing the guides and applying the mortar, it is recommended to reinforce the surface with a mesh and leave the beacons in the plaster layer. This will give additional strength to the decorative finish.
- You should not skimp on structural fasteners: the more hardware used, the less the profile will be subject to deformation when pressed by the leveling tool.
- Dismantling of elements after applying the solution is carried out after the mixture has set, but not completely hardened, then coloring of the edges of the plaster layer is excluded.
The first two beacons are installed on both edges of the wall
If the correct calculations are made for the height of the profiles, their number and proper installation, the process of leveling the walls will not take much time. Careful preparation and use of beacon structures can significantly reduce the cost of mixtures and create a perfectly level base for subsequent finishing.
Was this information useful to you? Share in the comments!
Gypsum beacons. Requirements and terms of use
Gypsum crack monitoring beacons have previously been the most popular inspection tool. Due to the spread of more effective means of monitoring damage and deformation of building structures, gypsum beacons have lost their former importance and are used less and less. Nevertheless, there are many supporters of their use, and there are still enough cracks on which they are present that those who wish could familiarize themselves with this device in person. Today we will analyze the basic requirements and conditions for the use of gypsum beacons when observing cracks in the building structures of buildings and structures and will try to find the answer to the question: “Is it time to ban the use of gypsum beacons?”
Lighthouse made of alabaster (plaster) on a brick wall. The plaster under the lighthouse has been removed
Beacons made of cement-sand mortar are usually installed on the street side
Lighthouses of the type discussed today can be made from building gypsum (alabaster), from cement-sand, or any other mortar, from various dry building mixtures, or from ready-made gypsum plates. Despite the variety of materials, they are united by the main thing - the mechanism of use for observing cracks in building structures. The signal for a specialist is the so-called “triggering” of the beacon - the appearance of a crack in the beacon itself. It is for this reason that we have combined under the most common name “ gypsum beacons ” any structures for observing cracks that work on the above principle (with the exception of glass, which work on the same principle, but differ significantly in the material of manufacture). The vast majority of experts have seen gypsum beacons installed on structures. Many people have experience in “making” them. But when it comes to their shortcomings, limitations and principles of use, not everyone understands the features of this type of observation and the reasons for its displacement by more advanced instruments. Let's start studying the issue with methodological literature and recommendations for the use of gypsum beacons.
