Repair is a troublesome task, taking a lot of effort, time and money. That is why many who do it themselves try to simplify their task as much as possible and often glue fresh wallpaper on top of old ones that have lost their appearance, or install new floor coverings on top of previously laid ones. But, unfortunately, it is not always possible to update an apartment in this way and bring it into divine shape. Is it possible to lay tiles over old tiles on the floor? A question that is relevant for those who are planning to update the floors in the bathroom or kitchen, but want to save time and money on dismantling the old covering.
Is it possible to lay tiles on old tiles on the floor?
Oil paint
Another popular composition is oil paint. Unlike enamel, it is quite possible to lay tiles on such a surface if you carry out a number of preparatory work
In this case, it is important to give maximum roughness to the coating and increase its adhesion
To lay tiles over oil paint in the bathroom, you must perform the following manipulations:
- Sand the wall with sandpaper or a grinder to create a rough surface.
- Make shallow cuts over the entire area. To do this, you can take an old ax with a non-sharp blade, a chisel or a chisel. The more notches, the better.
- Remove dust and degrease the wall, for example, with acetone or alcohol.
- Carefully coat the surface with a deep penetration primer using a brush so that the liquid fills every notch and pore.
Technology for preparing surfaces for tiles with oil paint
Thanks to this method, it is possible to significantly improve surface adhesion and increase the reliability of future masonry.
“Contraindications” to preserving the old coating
As has already become clear, many additional problems arise during dismantling. To minimize them, you should try to leave the old cladding. However, this is not always possible. There are several cases when leaving tiles is strictly not recommended:
- After finishing, the expected floor level will be higher than in other rooms. The bathroom is one of the rooms where the risk of leaks is especially high, so it is recommended to make the floor level in the bathroom 3-5 cm lower. This is done so that in the event of an accident, water cannot flow out of the room. It is not recommended to break this rule.
- Poor quality old cladding materials. This applies to both the glue and the tile itself. A cladding covered with a network of small cracks will not be a good base for a new coating. Fungus, indelible grease and dirt have already appeared in the cracks. Bad glue will not be able to reliably hold the tiles; they will break off and weaken the base of the new cladding.
- The room is small in size. It should be taken into account that laying tiles on top of the old coating will reduce the size of an already small room.
- Utilities are laid under the tiled covering, and there are no inspection hatches. If you put a new cladding on top of such a base, in the event of an accident you will have to dismantle two layers of tiles, which is much more expensive and labor-intensive.
- Uneven cladding or a clear slope that you want to level. When laying tiles, height differences of less than 4 mm are allowed for every 2 m of surface. If the difference is greater, you will have to dismantle the old coating.
SNiPs state that the base for the tile covering must be monolithic, rough and porous. All this does not correspond to the characteristics of ceramic cladding, which is composed of individual, small-sized elements, and is also highly smooth.
Thus, it seems that it is absolutely impossible to lay new tiles on old ones. This is not entirely true. Let's consider the solidity of the coating. Properly laid with good adhesive, high-quality tiles form a solid monolithic base, quite suitable for laying another layer of cladding.
With the porosity of the material, everything is somewhat more complicated. The most significant advantage of building ceramics is its high density, which is combined with a minimal number of moisture-absorbing pores. The fewer pores on the surface of the tile, the better it is.
In any case, the absorption coefficient of the cladding is about 0.5%. This is negligible for the glue to penetrate inside the tile, adhere to it and hold the new ceramic element on itself. That is why, before starting work on installing a new tile, it is necessary to remove the glaze from the old one in order to open the pores of the ceramic and at the same time increase its roughness.
You can solve the problem in three different ways:
- Cleaning old tiles using a grinder with a special attachment. As a result, the top layer of glaze is removed and the pores of the material are opened.
- Formation of notches on the surface of the tile. This is done using a grinder with an abrasive disc. This way, cross-cuts can be applied to the ceramic, which improves the adhesion of the base.
- Application of a special primer that improves the adhesion of the material. This can be any composition enriched with needle quartz or ordinary sand. Such solutions are produced by all manufacturers of building mixtures.
Experts note that the best results can be achieved when all three methods described above are used in combination. Therefore, it is strongly recommended to do exactly this way.
The surface of ceramic tiles is very smooth and practically free of pores. It is impossible to glue the cladding to such a base, so it must be prepared in a special way
How to lay tiles on tiles: surface preparation features
Having made sure that the old coating will withstand the expected load and is in good condition, you can proceed directly to preparing the surface for laying new tiles. First of all, you should make sure that the surface can provide the necessary level of adhesion, giving the old tiles roughness. You can achieve the desired effect in several ways:
- removing the top glossy layer from the tile;
- using a special primer for surface treatment;
- making notches on the tile.
Each of these methods has its own advantages and disadvantages. So, the simplest is to use a primer, but it requires financial investment. The other two do not require costs, but involve significant physical effort and a lot of dusty work.
Damaged elements of the old coating must be removed or notches made to improve adhesion
You can remove the top layer of tiles, as well as make the necessary notches, only with the help of a grinder. These procedures allow you to create the necessary contact between the bottom layer of the new tile and the old coating. It is not necessary to remove absolutely the entire top layer. 60% of the tile surface will be quite enough. As for the notches, they are placed at a distance of 1-2 cm from each other.
An easier and cleaner way is to use a tile primer. The composition, which is also called concrete contact, is capable of imparting the necessary properties to any smooth and waterproof surface. This composition adheres perfectly to the glazed surface of the tile, creating a rough layer on top, which serves as the basis for the tile adhesive.
Before laying a new layer of tiles, it is necessary to replace the grout of the old base.
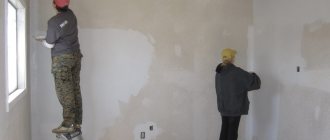
Alignment of walls
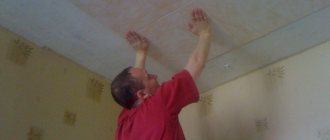
You can level the walls in at least two ways. The walls can be plastered or covered with plasterboard. In both cases, a building level must be at hand.
Plastering is done with cement-sand mortar. First, special beacons are placed - metal strips for plaster. They are placed strictly vertically and in the same plane, in increments of 1.5 - 2 m. Such a plank is held on the wall due to the fact that it is glued in several places with a solution of a mixture of cement, sand and gypsum. Several patches of mortar are applied to the wall vertically along one line, and then a plank is pressed into them to the required depth. The verticality of the beacons is checked by the building level. And in order for all the beacons to be in the same plane, the process of installing the beacons can be controlled using a cord. Next, the first layer of plaster is thrown onto the wall, after it dries, the finishing layer is applied. Leveling this layer is done using a rule that is pressed against the exposed beacons and pulled from bottom to top, stretching the excess plaster mortar behind it. After the plaster has dried, it is recommended to putty it, and then also prime it.
Many craftsmen prefer to level the walls with plasterboard, since here they can do without removing the old coating, get rid of the need to mix the mortar and avoid inhaling cement dust. In addition, the surface turns out to be very smooth, and during the process of gluing tiles, it is very pleasant to work with such a surface.
Since the bathroom requires high humidity, drywall should be moisture-resistant. After installation, it is recommended to treat it with an antiseptic and then prime it.
So, should I level the walls or not? Let the novice masters decide for themselves. We can only add that all modern technologies, in any industry, strive for improvement. They assume that everyone does their job efficiently and according to certain standards. That is, in our case, it is believed that a wall is something that has a flat, vertical surface, and people with crooked hands or sleep-deprived foremen are in no way involved in the process of its construction. Even a special spatula-comb for applying glue was also created based on these principles, because for a bumpy wall it would be much more appropriate to use something like a shovel rather than it.
The process of constructing tiles on top of tiles
Fundamentally, the described scheme differs from the standards only in preparation. First, according to tradition, a small plan is drawn with all the design features of the room. Then a fitting is carried out with the layout of the material “dry” to see how the ceramic floor will look, in order to place the cut pieces of tile in places far from view. The tiles must be laid out so that the seams of the upper elements rest on solid tiles. Those. you need to move the upper seams relative to the lower ones or try to keep the number of matches to a minimum.
Next, we carry out the work according to the following algorithm:
- We carry out a thorough inspection with detailed tapping of the elements in the center and corners. We carefully dismantle the identified unreliable tiles using a chisel and hammer, and fill the exposed area with cement mortar. We are waiting for it to harden. The hardening time of the solution is proportional to the thickness of the cement-sand fill. 10.0 mm will cure in 1 week.
- We clean the crumbled seams with a chisel and fill them with tile adhesive or the same solution that was used to fill the areas.
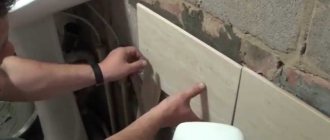
- We clean the glossy surface of the tile with a grinder, choosing a grinding wheel with medium grit. It is advisable to also make notches.
- We thoroughly wash the old ceramics, first with just water to remove dust, then with a soap solution. If there is old dirt and greasy stains, add soda to the water. Finally, rinse off several times with clean water.
- We treat the old ceramic floor with Concrete Contact Ceresit ST-19. Apply it evenly, distribute it with a brush or roller. The material is sold in finished form, packaged in 15 liter buckets. Approximately 300 grams are consumed. per m². Before applying to the floor, it is recommended to cover adjacent structures, pipes, and parts with polyethylene. Otherwise, random blots and pink smears will be difficult to remove. We wait 3-4 hours for drying. If we install the tiles with tile adhesive, there is no need to moisten them before laying.
- Apply glue at the thickness specified by the manufacturer to a small area of the floor. The glue quickly loses its elasticity, so we use it to treat an area of less than 1 m².
- Glue the first tile with force. Until the glue begins to set, its position can be adjusted. We arrange the elements surrounding it in the same way. An expansion joint must be left along the perimeter of each tile for linear expansion. Its size depends on the size of the elements, usually 1-4 mm. To form the seams we use plastic crosses.
- After a day, the grooves around the tiles will need to be filled with a polymer-cement composition that matches the tone or with a solution of equal parts of sand and cement.
Tile adhesive should harden naturally without artificial heating and ventilation. There is also no need to moisten the adhesive-mounted coating after installation.
It is extremely important to strictly follow the instructions of the material manufacturers, without deviating one iota from the instructions. If you carefully follow the rules, after 3 or 5 days you can safely walk on the finished surface. And to the questions of neighbors, colleagues, and acquaintances, “is it possible to lay tiles on tiles,” give an honest affirmative answer.
Preparatory work
Before laying tiles on a wooden floor with your own hands, you need to prepare the following tools and materials:
- scraping machine;
- electric drill;
- screwdriver;
- grinder;
- building level;
- notched spatula;
- rubber hammer;
- roller or brush;
- tiles;
- liquid latex;
- primer mixture;
- tile adhesive;
- polyurethane foam;
- chop cord;
- self-tapping screws
The main stage of installation work, the correct execution of which will determine the functionality and durability of the finishing coating, is preparing the wooden floor for finishing. The sequence of preparatory work directly depends on the condition of the foundation, which can be:
- good;
- have creaks and sag under load;
- bad.
In the first case, the floor is first checked for horizontal evenness using a building level and, if necessary, processed with a sanding machine. Then all the cracks between adjacent boards are sealed with putty mixture. To protect the wood from the harmful effects of moisture, the boards are additionally primed with a special mixture or regular drying oil.
Even the most durable plank floor is not recommended for use as a base for laying tiles. This is due to the fact that after a few years such a structure will weaken. And this will negatively affect the functionality and attractiveness of the finishing layer. Therefore, many experts recommend additional leveling of the wooden floor using chipboards (chipboards), which can be used as ordinary panels or moisture-proof sheets with a seam joint. It all depends on your financial capabilities.
Before installing the slabs, they should be primed with a moisture-proof mixture (for example, drying oil) in several layers. After the primer has dried, the sheets are mounted on the prepared base, and then a thick layer of liquid latex is applied to their front side using a roller or paint brush. While the latex is in a liquid state, a painting mesh is placed on it. When everything is dry, the mesh is additionally attached to the sheets with self-tapping screws. At the last stage of preparatory work, to improve the adhesion of the tile adhesive to the chipboard, the entire facing surface is treated with a primer mixture (for example, “Concrete Contact”).
If the subfloor is not in very good condition, then you first need to determine the extent of damage to the boards and joists. If necessary, individual elements are replaced with new ones. The further sequence of work is practically no different from the technology described above. The only difference is that instead of a chipboard substrate, a more durable material is used (DSP or GVL 20 mm thick). In this case, there is also no need to apply latex, reinforcement and priming of the base, since such slabs have high moisture resistance, mechanical strength and adhesion. The sheet material is attached to the joists or boards using self-tapping screws with a pitch of 150-200 mm. The joints between the slabs and the wall are filled with polyurethane foam. After the foam has set, its remains are cut off with a mounting knife.
If the floor is in poor condition, when resuscitation work is impractical, then there are two ways to get out of this situation:
- completely dismantle the old boards, and instead lay sheets of gypsum fiber board or fiber board along the joists;
- dismantle the old flooring along with the joists, and then perform a rough and finishing screed.
Is it possible to make a self-leveling floor on old tiles?
As a basis for a new coating, you can also use a self-leveling floor, which is installed directly on the surface of the old tile. As in all previous cases, a mandatory procedure is a thorough check of the quality of fastening of the lower layer. All loosely fitting elements must be dismantled.
The self-leveling floor can be used as a base for laying a new layer of tiles
It is also worth paying attention to the fact that in cases where we are talking about working with a glossy surface, the top layer of coating is removed to ensure the necessary level of adhesion between the solution and the tile. Filling and further work are carried out according to the standard algorithm.
Helpful advice! Laying a new layer of tile does not require a thick layer of self-leveling floor. Its thickness should not exceed 5 mm. The main thing is to distribute the composition evenly over the entire surface.
Taking into account the opinion of experts, we can say that installing a self-leveling floor on top of tiles is possible only in extreme cases. In this case, the area of the room should be small, and the requirements for the operational characteristics of the surface should be minimal.
Why is it worth saving the old coating?
SNiPs definitely do not recommend laying a new coating on top of the old one. We must admit that they do this with good reason.
Building regulations do not recommend laying new tiles over old ones. However, in some cases this is quite justified and feasible.
But, nevertheless, in some cases, it is better to preserve the old floor or wall covering and make it the basis for a new one. Why? Let's try to justify it.
Destruction of the old foundation during dismantling
Dismantling old tiles will most likely lead to the destruction of the base on which it is attached. Thus, when removing floor tiles, fragments of the screed will inevitably break off, the leveling plywood flooring will also become unusable, and when working with wall coverings laid on drywall, the latter will most likely be damaged.
Thus, in addition to carrying out the work of dismantling and laying new tiles, you will have to re-arrange the base, which is very labor-intensive, costly and will take a lot of time for the material to harden.
“Dirty” and costly preparatory work
No matter how hard you try, dismantling the old cladding cannot be done cleanly. The dust will be very strong, since you will have to work with a hammer drill. The amount of construction waste that will need to be removed is also large. In addition, the bathroom will have to be completely emptied of furniture and plumbing equipment.
Experienced craftsmen note that neighboring rooms can also be damaged by dust. Equipment and furniture in them should definitely be covered with polyethylene; if possible, it is worth protecting the decoration of the room, otherwise it may be seriously damaged.
Dismantling old tiles is a very labor-intensive undertaking. During its implementation, the old base on which the cladding lies will certainly be damaged and will have to be restored
How to remove old grout from tile joints
Quite often you have to deal with a situation where the condition of the old tile is quite satisfactory, but in order to use it as the basis for a new coating, it is necessary to replace the grout for the joints. It is quite possible to carry out this procedure, however, it requires attention and time. Let's look at how to remove grout from tile joints correctly.
Use a grout remover to remove old grout.
In order to remove old grout, there is a special tool called a “grout remover.” It can be used to remove grout mechanically. By itself, it is a blade with a comfortable handle, but as an alternative, you can use a regular knife.
The blade of a knife or embroiderer must be passed on both sides at an angle and straight. When doing this, you need to be careful not to chip the edges of the tiles. It is worth noting that this cannot be done quickly “by hand”, so you can use a drill with a thin drill bit or an electric chisel.
Important! If, in the process of removing the old grout, the tiles also begin to crumble, it is better to abandon the idea of laying another layer on top, even if there is new grout.
How to remove old grout from tile joints if it is silicone
Silicone grout also requires dismantling and replacement, especially if the room has not been provided with high-quality ventilation. Very often you have to deal with the fact that the seams are affected by mold, which is almost impossible to remove. Therefore, before laying new tiles over old tiles, you need to take care of the hygiene of the joints.
You can remove old silicone grout using a special tool or a regular knife.
Removal of silicone sealant is carried out using a sharp knife or a special scraper. After this, additional cleaning is carried out using a vacuum cleaner.
Helpful advice! There are special products that allow you to remove silicone faster and with less effort. Such compositions are applied using a mounting gun, after which it is necessary to wait at least 24 hours. Then the seams are wiped with a rag or paper.
Tips on how to lay a new tile on an old one using concrete contact
I came across this problem. A man was preparing an apartment for sale and did not want to invest a lot of money in its renovation. I saved wherever possible. So, I set the task of laying tiles on top of the old ones in the kitchen. After searching for the information I needed, I came to the conclusion that this is quite possible. It turns out that tiles can even be placed on glass.
In the world of building materials, there is such a thing as concrete contact. This is an acrylic-based liquid solution containing quartz sand. Used to improve adhesion of materials to the surface. It is effective in cases where, for example, it is necessary to plaster or putty metal surfaces or any other surfaces.
In our case, it is perfectly suitable for laying old tiles on new ones. Before applying concrete contact, old tiles must be cleaned of dust, dirt and grease. This miracle of modern material is applied to the surface using a brush, roller, paint brush, in a thin layer. Apply at a temperature not lower than +5°C. At lower temperatures, it is destroyed. During operation, the primer must be stirred periodically so that the quartz sand particles do not settle. Complete drying occurs within 9 hours. Therefore, we apply it to the old tiles in the evening, so that in the morning we can start laying the tiles.
Try to avoid dust getting on the hardened concrete contact; to do this, mix the tile adhesive and cut the tiles, move them to another room. Fresh, not hardened material can be easily removed with water and a cloth. But to remove the frozen one, you will have to sweat.
Everything is fine, this technology works. Here's what to do if it's not the new tile that falls off, but the old one or the plaster in the area with the old tile. Before making such a drastic decision, think a hundred times. If you want to do such a procedure at home, it is better to refuse; the service life of your new tiles in this case will be equal to the lifespan of the old tiles.
Using concrete contact and using regular tile adhesive (type CM11), the tiles can even be laid on glass.
New materials:
- How to choose the right wallpaper - tips
- How to choose a professional hair dryer - tips
- How to choose a sealant - tips
- How to choose door hardware - tips
- How to choose a door closer - tips
Previous materials:
- How to choose facade paint for walls - tips
- How to choose a floor plinth - tips
- Plasterboard sheets - ease of use
- How to choose the right cement
- Aluminum windows - advantages
Next page >>
Is it possible to put another on one tile?
Yes, you can, but subject to a large number of conditions. And although some professionals generally view this venture with doubt, they still allow this type of work. So, what you need to pay attention to.
- The old cladding is firmly attached - there are no voids underneath. This is found out by tapping and listening to each (!) element with a mallet. However, this method may not reveal small gaps.
- The panels are durable - there are no cracks on them. Not chipping (we will specifically apply these to increase the absorbency of the composition), but cracking. This may indicate the same voids or, conversely, laying on an uneven surface, swelling, which in the future will inevitably lead to damage to the new coating.
- No work with hazardous chemicals was carried out in the room, including mercury thermometers. This is important, since hazardous substances can penetrate into the porous structure of the ceramic, into voids and then release harmful vapors into the air for a long time.
- There is no mold under the panels, including at the ceiling level.
- If complete dismantling really takes a lot of effort and time.
If these conditions are met, you can start laying the material on top of the old one.
Renovation of a small kitchen 5-6 sq.m.
Small kitchens are a common occurrence in apartments of the Soviet period (Khrushchev, Brezhnevka). Modern architects often also neglect the need for large cooking space. Therefore, the problem of renovating a small kitchen of 5-6 square meters. m is relevant for both buyers of secondary and new buildings.
How to start
There are several possible starting points. To put it quite simply, you can lay out the first row right from the corner, following the floor line. But the first row will become level and without problems only if the floor is perfectly level, without any deviations. Otherwise, you will be trimming the tiles to somehow get vertical joints. As a result of these prunings, the second and all subsequent rows can “walk”. The work will be very hard and unpleasant. Therefore, it is better to spend time and mark the wall, finding the “start” points.
Wall marking
Options for laying tiles on the wall
If you don't really care about the small pieces of tile that have to be placed in the corners and at the top, under the ceiling, you can skip this step. But if you want all the tiles to lie symmetrically, before laying the tiles on the wall, you will have to do the layout:
- Find the middle of the wall. You can even draw a vertical line to a certain height.
- Lay out the tiles relative to it. In the middle there may be a seam or the middle of the tile. Depends on how many pieces (whole ones) fit on the wall. To find out, first add the thickness of the joint to the width of the tile, then divide the length of the wall by the resulting figure. Find how many whole pieces “lie” on the wall. If the number is odd, place the center of the tile in the middle of the wall; if it is odd, the seam will be located on the marked line. Several layout options for difficult places
- Relative to this center, place the tiles in both directions (lay them out on the floor), placing crosses between adjacent ones, which will mark the width of the seam.
- There is usually empty space around the edges. You measure it. The outer tiles will need to be cut to this size. In theory, both on the right and on the left they should be the same. If the discrepancy is large, recheck the installation. After everything matches, you can mark these boundaries on the wall with a clear line. We do it on one side and the other. Lighthouse tiles are then installed using these marks.
If it turns out that only narrow strips remain at both ends, it is advisable to redo the layout. If the middle was located in the center of the wall, try laying it out from the seam, and vice versa. It should come out better.
When placing tiles in height, the situation is slightly different. In some cases, the seam is made at a certain level. In the bathroom this is often the edge of the installed bathtub. If there are no such requirements, you can do the same: find the center, arrange (draw on the wall) the position of the tiles relative to it. This way you will find how to trim the tiles of the top and bottom rows.
When laying, constantly check the levelness
There is another way to arrange it vertically: mark the first tile from the ceiling, and so on to the bottom. In this case, only the bottom row will have to be trimmed. This is not entirely correct, but the consumption of tiles is slightly less.
In any case, when calculating how to lay tiles on the wall, mark the level where the first row ends. This usually serves as a starting point. This is where the laying of tiles begins.
Start line
Based on the layout results, you have a line where the first row ends. It is at this height that a flat bar is nailed. Resting the tile on it, place the starting row, and all subsequent rows on it. The last row to be installed is the first row, into which the tiles will have to be cut.
If you have a laser plane builder, the work is much easier
Profiles for working with drywall are usually used as a support strip, but a flat dry block can also be used. At a given height, it is attached to the wall with self-tapping screws or dowels (depending on the wall material). To lay tiles on the wall with your own hands without problems, you need to fasten them often enough so that there is no sagging. Be sure to check that it is installed horizontally. There shouldn't be even the slightest deviation.
How to understand that you should not glue tiles on tiles: recommendations from experts
Before gluing tiles, every owner wants to be sure that his work will not be in vain, and the new coating will serve well for many years. That is why it is worthwhile to first familiarize yourself with the recommendations given by experts. They indicate aspects that may prevent the elements from being securely fastened and serve as a warning sign that you should pay attention to:
- During the tapping process, the tile retains its integrity, but the sound that is heard is not uniform. This may indicate the presence of air voids under the tile, which in the future can lead to its destruction. The thing is that the old solution may not withstand the load and eventually both layers of coating will fall off;
Before laying a new layer of tiles, it is worth checking the fastening of all individual elements of the base by tapping them with a rubber hammer
- Most often the question arises whether it is possible to lay tiles on tiles in a bathroom or toilet. In this case, you also need to pay attention to the size of the room, because these rooms are quite rarely spacious, which means an additional layer of mortar and facing material will reduce the already small area of the room. So if you see in advance that this method will affect the size of the room, it is better to remove the old tile and lay a new one in accordance with all the rules;
- A bad base is old, cracked tiles, the top layer of which has natural damage and is prone to chipping. If you lay another layer of tile on such a base, then most likely it will not last long, and in the near future all the work will have to be redone. And this will entail not only a significant investment of time and effort, but also financial costs;
- Before laying tiles on top of a layer of old facing material, you need to make sure that this will not interfere with free access to all communications and inspection hatches. Otherwise, the slightest damage will lead to the need to dismantle both layers of tiles at once to carry out repair work. In this case, it is wiser to think through everything in advance so that you do not have to face such serious problems in the future;
When laying over old tiles, the floor tiles have special performance requirements.
- Do not lay tiles on uneven floors. No matter how hard you try, the situation with the slope will only get worse due to the additional layer, so it is better to first dismantle not only the tiles, but also the old screed. By carrying out the repairs properly, you can eliminate the existing distortion as much as possible. This is also worth paying attention to before laying tiles on an uneven wall.
Having considered all these recommendations, we can conclude that before you start laying tiles over old tiles, you need to carefully weigh all the arguments. There is always a risk that the old coating will not withstand the load and simply fall off, destroying the new layer at the same time, and it is better to think through all possible options in advance so that, if necessary, abandon this idea.
Related article:
How to lay tiles on the floor: installation methods and technology features
Features of preparation of various types of surfaces. How to rub seams. Criteria for choosing tile coverings and laying patterns for the floor.
Is it possible to lay wall tiles on the floor?
If, due to certain circumstances, the need to lay wall tiles on the floor nevertheless arises, it must be taken into account that the larger the tile, the lower the level of strength it will have. Since the strength of ceramic wall coverings is less than that of floor coverings, it is necessary to take into account the following requirements:
- the room should have little traffic (this could be an insulated balcony, a storage room, etc.);
- the floor should not have protrusions or depressions - such a coating can only be used on a perfectly flat surface;
- a very important factor is thickness; only tiles with a thickness of at least 8 mm (in most cases, this is the maximum for wall coverings of this type) can be a suitable option for the floor;
- the surface of the tile should not be smooth, but rough - tiles with a pronounced relief pattern will not be suitable, because they will make cleaning too difficult.
When laying such finishing material, the adhesive composition must be applied in an even layer. It is recommended to use a notched trowel with a thickness of 6–12 mm. Each element must be pressed tightly enough and tapped with a rubber hammer to ensure the best fit to the surface.
Based on the above, we can conclude that, if necessary, it is still possible to lay ceramic wall tiles on the floor. But given the nuances that will have to be encountered in the process, it is recommended to do this only in certain cases in the absence of more suitable material for this purpose. If you lay wall tiles on the floor taking into account the necessary recommendations, there is a high probability that they will serve for a long time and reliably.
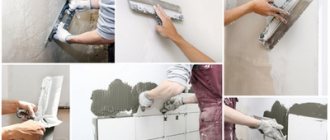
How to glue tiles onto tiles: step-by-step instructions
The technology for laying tiles on old tiles involves the following sequence of actions:
- Using cement-sand mortar, cover all areas of chips, cracks and irregularities in such a way as to level the surface as much as possible. After this, you need to wait for the solution to dry completely and clean the old coating, removing all dirt, lime deposits and moisture from it.
- Using one of the possible methods of ensuring adhesion, the old coating is treated. As already mentioned, the easiest way is to use a special primer for this purpose.
- Using a smooth spatula, tile adhesive is applied to the back side of the tile, after which the composition is leveled over the entire surface and special grooves are created on it using a notched trowel. Simply put, at this stage, tiles are laid according to standard technology.
Helpful advice! If we are talking about partial removal of glaze or notches, then personal protective equipment against small chipping particles and dust must be used during the work.
The process of laying a new layer of tiles on the old coating
It is important to know that in this case it will take more time for the adhesive to dry completely. This is due to the low absorption capacity of the base. That is why it is best to carry out all work related to grouting no earlier than 3-4 days after installation. At the same time, the standard technology, which involves the use of a special composition and a rubber spatula, is completely preserved.
What are the difficulties?
There are good reasons for the slightly outdated technological decree, according to which ceramics should be unconditionally destroyed before laying a new coating:
- the rough foundation should be monolithic, and not made up of separate, insufficiently large elements;
- the rough surface must be characterized by porosity and roughness, which is required for reliable adhesion of the adhesive to it, which is not typical for ceramic products.
Solidity will not cause concern to owners of a floor with correctly laid previous tiles, which are usually quite new. If the ceramic coating with the underlying base really creates a single whole, it will adequately perform its load-bearing function. Otherwise, an excessively large load will fall on the connecting layer located between the old coating and its base. As a result, elements of both coatings will break off.
With porosity everything is more complicated. This is the main problem for those who are thinking about the question “is it possible to lay tiles on tiles?” The main advantage of building ceramics is their high density with a minimal number of pores that can absorb moisture.
Moisture absorption or scientifically its absorption coefficient is directly related to the number of pores. For tiles for interior decoration, it varies from 0.5 to 3.0%. Moreover, in the 3% case it is supplemented with a top glaze, leaving the back side porous to optimize adhesion. But the glue needs to penetrate through the miniature channels into the body of the base, gain a foothold in it and attract the finishing coating to itself. This means that the pores just need to be opened or created, and at the same time the roughness must be increased. How?
In order to increase porosity and provide the roughness necessary for gluing, three options were invented:
- Cleaning the top layer of the supporting ceramic floor with a grinder grinder.
- Formation of notches, preferably combined with the previous product.
- Use of Concrete Contact marked CERESIT ST-19, enriched with needle quartz, or its counterpart with ordinary sand. There are analogues with the brand Knauf, Bolars, etc. After applying these priming materials, the surface acquires the required roughness, thanks to which it will be possible to use ordinary tile adhesive, such as CERESIT CM-11.
It is best if all three effective methods are used together. Then the grip will definitely be excellent.
Even an impeccable tile installation will not look perfect if you do not pay enough attention to the tile joints at the final stage of finishing. You will learn how to choose a grout for tiles and how cement and epoxy options differ in the following material: https://pol-master.com/pol-pokritiya/plitka/kak-vybrat-zatirku-dlya-plitki.html.
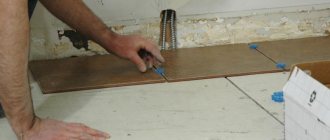
Laying tiles on a wooden floor with your own hands
Before laying tiles, you need not only to prepare the finishing base, but also to choose an installation scheme. The tiles can be laid according to the following schemes:
The most economical and easiest to implement is considered to be laying tiles in rows with matching seams or staggered. In this case, the material consumption for trimming is about 5-10%. However, experts recommend buying tiles with a margin of 10-15%, especially if you are dealing with tiling work for the first time.
In most cases, laying tiles begins from the center of the room, moving towards the walls. Floor marking is carried out as follows: the middles of all walls are marked and connected to each other using a tapping cord. As a result, you will get an intersection point, which will be the center of the room.
After preliminary dry laying of the tiles, they are installed using tile adhesive. Such mixtures contain plasticizers that reduce setting time. Therefore, the glue must be mixed in small portions immediately before facing.
Using a notched trowel, glue is applied not to the tile, but to the finishing base.
Place the first tile on the glue, lightly press it down and tap it with a rubber hammer. We check the evenness of the installation using a building level. Next, the remaining elements are laid out. Their evenness must be constantly monitored with a level. To create assembly seams of equal width between adjacent elements, plastic crosses are installed.
Is it possible to lay floor tiles on tiles: a professional answer to a pressing question
Professionals do not exclude the need for such finishing work. As we have already noted above, this significantly simplifies the repair process, making it less expensive and dusty.
Assessment of the condition of the old coating
In addition to the above points that we talked about earlier, it is not advisable to lay tiles on old tiles in the following cases:
- if your home does not have high ceilings, in this case an extra layer can visually reduce the space;
- Sometimes there is a need to replace the old screed.
Important! If the surface of the tile is smooth, its adhesive characteristics should be increased. You can clean the glossy surface with a special brush.
If you don’t have a special tool at hand, you can simply scratch the surface with a stiff brush.
We suggest watching the video to understand in detail how to lay tiles on tiles:
What is it for
The positive results of this decision are the following:
- Saves a lot of time and effort. Every person who has removed old tiles at least once in his life will agree that such a procedure is one of the most labor-intensive and time-consuming construction operations. And if the old solution turned out to be of high quality, then you cannot do without a hammer drill in jackhammer mode. During this noisy process, a lot of dust and debris is generated, which then has to be removed. In addition, such impacts usually destroy the base screed, so it has to be refilled.
- Saves money. The cost of a hammer drill, the purchase of material for a new screed, the cost of garbage removal - these and other operations will incur additional costs for repairs.
- The floor (or wall) is built up without a separate operation. Often a renovation project involves raising the level of the base, and if you keep the old tiles, you won't have to spend additional time and effort on this.
Private questions
Home craftsmen have a lot of questions when finishing tiles on tiles, which cannot be covered during the work. The answers to the most common difficulties are below.
Is it permissible to lay new tiles on top of old ones on the street?
When it comes to tiles on the street, clarification is needed: we are talking about whether it is possible to glue tiles on tiles on the base or facade of a building, or whether we mean paving slabs.
If we are talking about ceramic tiles, then everything is done in the same way as inside the building. But there is no choice of glue at all: you can only use “Knauf” flex - it is frost-resistant and has high adhesion.
Paving slabs are either removed, or the laying technology is fully followed: installation of a cushion, backfill, laying of tiles. Note that in this case the path will rise significantly, which does not always fit into the landscape. Therefore, in most cases, old tiles are removed - this is much easier to do than removing ceramics. The fill is not touched - a new path is laid on it in compliance with all technological operations.
How to remove old grout
There are two ways to remove the fugue from the seams: mechanically, using a power tool, and manually.
Mechanical. An angle grinder or renovator will help remove the grout. A grinder can only be used if the finishing is tile by tile. After all, using a carbide wheel on concrete can damage the edges of the laid ceramics.
The renovator does not damage the tiles, but quickly and efficiently removes the grout (used when replacing the grout with a different color). To do this, you need a special diamond disc in the shape of a hemisphere. In this case, the disk does not spin, but makes oscillatory micro-movements, due to which the grout is cut. All that remains is to move the tool smoothly in the middle of the seam.
For reference: an electrical device called a renovator appeared on the Russian construction tools market relatively recently. Because of its versatility, it has many other names: vibrating tool, multi-tool, multifunctional tool (MFI), vibrating cutter, oscillor cutter. Consumers have not yet formed their attitude towards the new product. Some consider its purchase a senseless waste of money, others are completely delighted, declaring that they do not understand how they managed without it before.
Manual. Manual grout removal is considered a classic. You can use a construction knife, a metal cutting blade, or a seam expander. The work is labor-intensive and requires a lot of time and attention.
Seam expander.
The technique is simple. First, the grout is cut in the middle of the seam, then at an angle along the edges. Silicone can be removed using a scraper, a simple knife, or using special chemical compounds that dissolve the sealant.
What else can be laid on tiles?
Home craftsmen often ask: what can be laid on old tiles. It would seem like a private question, but there are so many answers that you could write a separate article.
Floor. The following types of finishing coating can be laid on floor tiles:
- piece parquet;
- parquet board;
- laminate;
- PVC tiles;
- carpet;
- linoleum;
- terrace board;
- pine floor.
Walls. Here, plasterboard or PVC panels are usually attached to old tiles.
Apron in the kitchen. As with the floor, there are many design options:
- glass;
- MDF;
- decorative adhesive film;
- plastic;
- wallpaper;
- veneer.
Answer
Good afternoon As practice shows, most homeowners prefer not to carry out dismantling work. In the case of tiles, this can really be avoided and here's why.
Tile as a flooring material consists of thin plates of baked clay mass of high density and strength. The coating is available in a huge variety of sizes, but with two types of surface:
- Glazed glossy, semi-gloss or matte. A distinctive feature is that the surface is smooth to the touch even with textured decor (lappating, relief, etc.), slippery when wet. It is difficult to stick anything to the glaze precisely because of the slippery surface.
- Unglazed matte. The top of such a coating, as a rule, is finely porous, slightly corrugated, and easily absorbs dirt and water. Therefore, it is recommended to cover the floor tiles with protective film-forming or pore-filling compounds after installation.
Laying tiles, according to manufacturers' recommendations, should be carried out using contact adhesive on a cement, or less often, a polymer base. Cement-containing dry mixtures are produced by absolutely all manufacturers of building mixtures (from Kreps to Knauf), since the composition is quite simple, but the quality factor of the material largely depends on the quality of the raw materials. Polymer products belong to a highly specialized series and are produced only by the largest concerns in the chemical industry (Eurocol, Uzin, Kiilto, etc.)
Tile tiles are most often laid on dry cement mixtures. With their help, you can not only partially level the rough base, but also firmly fix the floor covering on almost any base of sufficient strength (at least 150 MPa) and rigidity.
An old ceramic floor can easily be classified as one of these floors. With one essential condition - a smooth glazed or varnished (enamel) surface has almost zero adhesion coefficient. But first you need to create a so-called adhesion bridge. Or, more simply put, make the top of the tile rough. This is achieved in several ways:
By applying the Betonkontakt composition to the ceramics in 2-3 layers. The primer is an acrylic or copolymer dispersion with quartz filler. After application, an intermediate layer is formed on the surface, thanks to which it becomes possible to fix the new tile floor to the old one.
- Removing the surface enamel or glazed layer with a grinder with a special attachment for granite and stone. This method is used infrequently due to the formation of huge amounts of dust during operation. However, it allows you to lay a new tile on the old one with the guarantee that not a single element will “fly off” in the future.
- By cutting notches on the surface of the coating with any tool - an ax, a grinder with a diamond cup, etc. This method, in combination with priming, is considered quite reliable and has also been time-tested.
Thus, gluing new floor tiles onto old ones is permitted provided there is a rough surface. If the coating is not smooth, you can simply use reinforced tile adhesive.
Before work, be sure to check the floor for:
- The presence of defects, “empty” tile joints, falling out and loosely fitting elements. Loose tiles and remnants of old mortar must be removed, and the vacant area must be leveled using quick-drying repair compounds or tile adhesive. Chips, cracks, crevices and other possible defects are also eliminated in the same way.
- Evenness. Differences of more than 2 mm per linear meter of laid ceramics must be leveled using cement mortar or tile adhesive.
Next, you need to clean the surface, degrease, treat it with Betonkontakt primer or make notches, followed by removing debris and dust from the floor. After this, apply tile adhesive in accordance with the instructions and lay the ceramics.
If you want to remove the glazed or enamel surface completely, do not forget to thoroughly remove dust and clean the base, degrease and prime after removing the smooth coating. Only after this can the tiles be laid with glue.
Good publicity
Most read
Surface check
To determine whether new floor tiles can be laid over the existing flooring, it is necessary to assess the condition of the latter. It must be complete, durable and reliable. The presence of some defects is acceptable, but only if small chips or cracks are caused by improper use (dropping a heavy object or using aggressive detergents during cleaning).
To check the quality of the surface, you need to tap each element with a rubber hammer. Poorly secured tiles will make a rattling sound.
When saving tiles is not possible
Even if you have a strong desire to use the old coating as a base for a new one, you cannot use it in the following cases:
- The tiled floor “walks” under your feet.
- Voids were found under the tiles.
- The floor itself is uneven, which requires leveling the base.
- The entire area of the tiled floor is covered with cracks.
- The floor surface is already too high in relation to the hallway floor.
Coating preparation
The possibility of using used tiles as a base for new tiles is assessed based on the area of damage. If no more than 20% of the ceramics are in poor condition, you can try to remove the defects.
To do this, you need to knock out poorly fixed or damaged elements, sweep out the debris, prime the resulting spaces, and then seal them using the same glue that will be used to lay the new tiles.
In this case, you need to make sure that the composition does not stick out above the surface - it should be even.