Andrey
22057 0 22
Andrey October 1, 2016Specialization: facade finishing, interior finishing, construction of dachas, garages. Experience of an amateur gardener and gardener. We also have experience in repairing cars and motorcycles. Hobbies: playing the guitar and many other things that I don’t have time for :)
Every home craftsman tries to reduce labor costs and work time during the renovation process. Therefore, many people who are faced with repairs ask specialists whether it is possible to glue ceiling tiles to whitewash, and how to perform this procedure correctly? Next, I will try to answer this question in as much detail as possible.
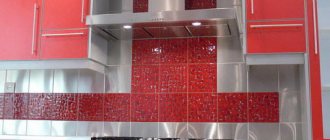
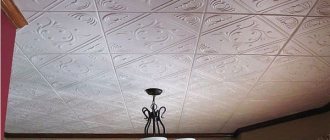
Gluing tiles to a whitewashed ceiling
Gluing tiles to whitewash - rules
Experts say that for a high-quality result, the ceiling must be as free of coating as possible. The possibility of gluing the material to a whitewashed ceiling depends on the specifics of the whitewash and the type of tile. If many layers of lime have already been applied to the ceiling surface, the polystyrene foam tiles will not adhere securely. Also, you should not install slabs if the whitewash is done with chalk. Even a surface that has been primed several times will gradually crumble under the weight of the tile.
The only possible situation in which the material can be glued to whitewash is the presence of a thin layer of lime. The coating should be very firmly attached to the base, and the tile should be light, not thick, made of extruded polystyrene foam or polystyrene foam.
You can check the reliability of the adhesion of lime to concrete using a spatula. You should scrape in areas of swelling and cracks - if the coating crumbles easily, it is better to abandon the idea. Another situation in which it will not be possible to stick tiles is the use of frozen lime for whitewashing. Whitewash turns out similar to chalk; adhesion to glue will be poor.
The essence of the problem with whitewashing
It’s worth making a reservation right away: you can glue ceiling tiles without much fear or any special preparation only if the concrete surface of the ceiling has been whitewashed with chalk. The entire preparation process comes down to two operations:
- Using a damp brush and sponge, remove the chalk whitewash from the concrete. Often you can remove chalk with a dry, hard cloth, but in this case a lot of dust is formed, which is definitely not worth even trying to stick something on;
- The second stage involves treatment with a mixture of copper sulfate. Steel reinforcement embedded in a ceiling slab often becomes a source of rust stains, so it is better to treat the base before whitewashing than to have problems with stains on the tiles.
Chalk absorbs moisture well; if the ceiling chalk coating is so thin that it shines through to the concrete, then you can glue the tiles without any preparation, simply wiping off the dust from the surface.
Tools needed
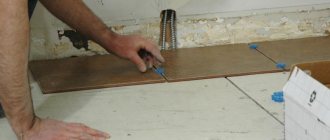
To work on gluing slabs, you need to prepare a number of tools. To cut the slabs, you will need a stationery or sharp construction knife; markings are made with a painter's cord. To glue the slabs, you will need high-quality tile adhesive (Moment, Liquid nails, Titanium and others). Other tools needed:
- a hard spatula or a set of spatulas of different calibers,
- scissors,
- simple pencil,
- roulette,
- roller,
- sponge, rag,
- construction level.
To dilute the glue, if it is not sold in finished form, you will need containers and water.
Preparing the base for gluing
After cleaning the ceiling from dust, debris and other traces of contamination, you should check the level of the surface relative to the horizon - the quality of the installation work and the final appearance of the decorative finish depend on this.
The need to wash off the whitewash is not always a prerequisite for successful gluing, but if this is required, you can use the following method:
- Wet the surface with a brush or roller.
- Wait about 20 minutes for absorption.
- Remove the whitewash layer with a construction spatula.
This method is recommended for use when the whitewash layer is very thick. In other cases, ceiling tiles can be glued without removing the lime coating.
If the condition of the ceiling is satisfactory, level the base. Using a water level, determine how level the ceiling is. If the level is not maintained, the surface is brought to an ideal state using putty applied in a thin layer (no more than 1 cm) using a construction mesh. Next, after drying, a primer is applied, and only then the tiles are installed.
Ceiling preparation
Before gluing the material, you need to carry out some preparation. This will help improve the quality of adhesion. First of all, you should find all places where the whitewash may peel off. You also need to run your hand along the ceiling, if there are few traces left, this serves as a favorable sign. Otherwise, the coating must be removed.
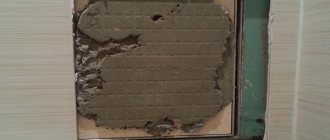
Whitewash removal and cleaning
After carefully looking for flaking whitewash, it is carefully removed with a spatula. This is done until the spatula touches the firmly adhering lime. The rest of the whitewash must be crumbled, then sweep the area with a brush and a rag to remove fine dust. To improve adhesion to the tiles, the ceiling must be washed and wiped with a damp sponge.
When the coating begins to crumble a lot, you will have to remove it completely. This is done by rinsing and sanding:
- put water in a bucket,
- walk over the surface with a dampened roller,
- after 20 minutes the whitewash will get wet,
- remove the top ceiling layer with a metal spatula,
- For thin whitewashing, sand the surface.
You can go over a single-layer coating with a wet cloth, brush, or roller. Washing will help remove all poorly secured areas, and lime from the pits is removed with the angle of a spatula.
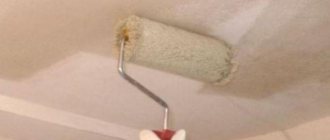
Padding
It is impossible to glue tiles onto whitewash without primer; only primer will ensure proper adhesion. You need to buy deep absorption soil. Before use, shake it thoroughly and pour it into a tray. It must be applied with a roller, squeezing so that the primer does not run off, in a thin layer, evenly. In the corners, moisten the ceiling with a paint brush. After complete drying, be sure to apply a second layer. The roller and brush quickly become clogged with lime, so the soil must be poured into the pan in small portions.
People have another method of priming. Laundry soap is used for it. It will glue the lime particles together, which will adhere firmly and will not peel off. Dissolve a piece of dark soap in 4 liters of boiling water. This product is applied with a brush or roller across the ceiling. There is no need to wet the coating too much.
Alignment
Before gluing the ceiling tiles, it is important to level the ceiling. This is required for a surface that has serious differences, holes, or chips. Small irregularities will be hidden by polystyrene foam, but significant ones will cause disruption of the pattern and an unsightly appearance of the coating. The alignment rules are:
- Putty is applied to holes 5 mm deep,
- putty and construction mesh are placed in defects more than 1 cm deep,
- a significant difference in ceiling heights will have to be leveled with plasterboard.
The ceiling is measured using a level. With its help, the lowest angle is identified and a mark is placed. According to this indicator, the entire ceiling needs to be leveled.
How to treat a whitewashed ceiling?
What and how to properly glue ceiling tiles
Treating the ceiling increases adhesive properties and increases the likelihood that the cladding will not fall off if the chalk layer is not washed off. Here are the stages of work:
- Wipe the ceiling, previously checked and cleaned of loose lime, with a wet rag to remove dust.
- Check for differences in ceiling height. If there are differences, smooth them out with putty.
- Treat the base with a deep penetration primer. The Betonokontakt composition is well suited for this purpose - it increases adhesion and, when dry, creates a velvety layer on the surface that perfectly holds the adhesive composition and cladding.
- Allow the primer to dry and you can begin work.
How to treat the ceiling before gluing ceiling tiles other than Betonokontakt? It all depends on what and what kind of tile sits on. If you glue it with standard polymer glue, a deep penetration primer will suffice; if the base is pretty damaged, use epoxy-based glue and then you need to treat the base with primers for epoxy compounds.
Marking
You need to glue the tiles according to the chosen pattern. If you decide to use the classic method, you can start from the corner. The markings are made in smooth, straight lines. Next, strips of material are glued on.
The diagonal method involves gluing the slabs from the center. Mark the middle of each side and stretch the twine to the opposite wall. The point where the cords intersect is the center of the room. The first tile will be located diagonally in it. First draw diagonal lines with a pencil to glue the slabs evenly.
Gluing technology
So, we figured out whether it is possible to glue tiles to a whitewashed ceiling. Now let's look at how to do it correctly.
The gluing process itself contains virtually no special features. All the nuances lie in preparing the surface.
The work can be roughly divided into several stages:
Stages of gluing ceiling tiles to whitewash
Ceiling preparation
Before gluing the ceiling tiles to the whitewash, you must complete the following preparatory work:
- first of all, run your hand along the ceiling and make sure that the whitewash does not smudge;
- then you need to clean the ceiling with a brush and wipe with a damp sponge;
Peeling areas must be removed
- Now you need to make sure that the lime sticks well everywhere. To do this, take a spatula and scrape the most suspicious areas with the spatula.
If the lime has fallen off, the coating should be removed with a spatula to an area that adheres well, capturing it a few centimeters.
At this point, the preparation is almost complete, however, before gluing the tiles, you need to perform some more important operations.
Primer
A necessary procedure is priming the ceiling, since the primer increases the strength of the whitewash and also improves the adhesion of the adhesive. In other words, it is also the key to the success of this operation, so it cannot be neglected.
The priming instructions look like this:
- first of all, you need to prepare a deep penetration primer - the composition should be thoroughly shaken and poured into a tray for a paint roller;
- After this, you need to dip the roller into the soil, squeeze it out a little on a special platform on the pallet, and then use it to treat the whitewash. It is very important to apply the primer correctly - evenly and in a thin layer. To treat hard-to-reach places, you can use a paint brush;
- After the ceiling has dried, the composition is reapplied.
If there are significant unevenness on the ceiling that can prevent the tiles from being glued, they should be filled with putty yourself. On our resource you will find similar information on how puttying is performed.
An example of ceiling markings for gluing tiles diagonally
Marking
Marking, unlike all of the above procedures, does not affect the strength of adhesion of the tiles to the ceiling. However, it depends on how smooth and neat the finish will be.
The markings are applied to the whitewashed ceiling as follows:
- First of all, you need to mark the center of the ceiling, i.e. the point of intersection of the diagonals. It must be said that the easiest way to apply markings is using a special painting cord. To use it to mark a straight line on the ceiling, you need to fix the cord at two points of the beginning and end of the future line, then pull it down like a bowstring and release it;
- Now you need to draw the lines along which the tiles will be aligned. There are quite a few options for its location; for example, it can be placed diagonally or evenly. Depending on this, the position of the control lines is selected.
It must be said that it is not necessary to mark the ceiling completely, applying squares to it according to the size of the tiles. It is enough to make two lines in the center, and then align the tiles relative to each other.
Gluing ceiling tiles
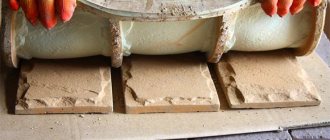
Before starting work, tiles should be sorted by size - often larger or smaller pieces are found. Excess pieces should be carefully cut off with a knife so that all the tiles are the same. The selected adhesive is applied to 4 sides of the tile and in the center in droplets.
Then proceed according to the instructions - immediately apply to the intended place or leave for 20-60 seconds until the product dries initially. Excess glue that has come out along the edges must be removed with a rag or sponge. The material must be pressed against the ceiling until it sets securely. In this way, all the material is glued according to the markings. After a day, the seams between the tiles can be covered with white putty.
Glue requirements
To increase reliability and make the installation process simpler, it is better to glue the ceiling tiles with adhesive that meets the following requirements:
- Viscosity. The liquid composition will not hold the products used, even despite their low weight.
- Set quickly. Increases the convenience of work, because it is difficult to hold the product on the ceiling for a long time while waiting for the glue to harden.
- White color. It is not transparent and allows you to hide the joints.
- Great adhesion. The adhesion of tiles to the surface should occur quickly and firmly.
p, blockquote 8,0,0,0,0 —>
Attention: In addition to these parameters, versatility is important, since the composition must be suitable not only for the finishing material, but also for the base surface.
After all, it is difficult to decide how to glue ceiling tiles onto whitewash if the composition is not intended for this. Therefore, you should carefully approach its choice, having familiarized yourself with the necessary information. Let's consider which glue is best for gluing tiles to the ceiling surface.