Primer and whitewash
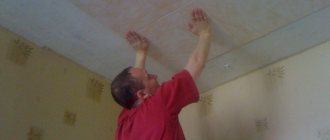
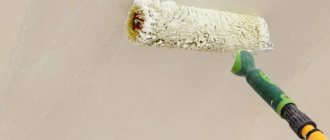
The ceiling surface prepared for further work must be carefully primed.
This will ensure better adhesion of the paint to the surface and reduce its consumption. It is best to use not just any roller for this, but a regular paint brush. It will make it possible to apply the primer most thoroughly in places where it cannot be primed with a roller, for example, in slab joints and seams.
Of course, there is no need to treat the entire surface in this way; on flat areas, a regular roller will do just fine. Next, after the primer mixture applied to the ceiling has completely dried, you can begin to paint it.
The easiest way is to use a paint roller and brush. You should choose a roller with medium nap size. Too long a pile can leave blots on the surface and it is simply difficult for them to work, due to the fact that, when it absorbs the coloring composition, it becomes very heavy, although professional repairmen praise the long-pile models. Which one to take is up to you.
A short pile can have the opposite effect - it is too light and can slip through some areas of the surface without painting them.
Foam rollers can leave bubbles on the ceiling, which will be very unsightly, and most importantly, they are very difficult to remove later, therefore, using foam rollers is highly not recommended.
You will also need a paint cuvette for paint, with a special platform for removing excess solution from the roller.
A small brush will be needed for painting corners and places where a roller simply cannot be reached. There is such a place along each wall - if you don’t want to get it dirty, then you can’t bring the roller close, which means there will be unpainted areas that will need to be painted over with a brush.
Having prepared the necessary tools, you can pour paint into the ditch and dip the roller there for the first time. You should thoroughly soak it, and after that, squeeze it out no less thoroughly on a special area of the paint ditch. This will ensure it is completely saturated.
The first layer, when whitewashing the ceiling with water-based paint, must be applied across the flow of light entering the room. The second is along it. This scheme is applicable in cases where no more than two layers will be applied. If you plan to make more layers, you need to choose their location so that the latter is applied along the line of the light flux entering the room.
Roll out one layer completely, preferably before the surface begins to dry. Otherwise, the transitions from one colored area to another may become too noticeable. It is also advisable not to make the overlaps between them large, no more than a couple of centimeters. Otherwise, you can get a kind of “step”.
This will make any streaks that may have remained during painting invisible. In addition, transitions from one painted section of the ceiling to another will not be visible.
Tools
There are three main methods of applying whitewash that you can use:
- roller;
- brush;
- spray.
If you paint with a roller , the paint will lay down in an even layer, there will be no streaks or stains. In order to get a good whitewash using this tool, the coloring composition will need to be applied in two layers. In addition to the roller itself, you will need a container for the solution, something for mixing and a painting tray. You also need a small brush to apply paint to the areas of the ceiling at the junctions with the walls - you won’t be able to do this carefully with a roller without staining the walls.
A whitewash brush can be purchased at any building materials store. It's inexpensive. While working with a brush, the paint splashes heavily, so you need to carefully protect the furniture in the apartment, as well as your eyes.
Tools for whitewashing the ceiling
Using a sprayer, whitewash can be easily applied in a very neat, even layer. If the paint will be applied by spray, you need to carefully ensure that it is free of lumps. Its consistency should be more liquid than that of whitewash, which is to be applied with a brush or roller.
How to whitewash the ceiling?
You can whitewash the ceiling:
Each of these options has its pros and cons.
Table. Materials for whitewashing the ceiling.
Chalk gives the ceiling an exceptional, shining whiteness, so the room will look very good.
This material gradually crumbles, thus introducing additional dust into the room. In addition, it is not waterproof, so it is not suitable for painting a bathroom ceiling.
Lime whitewash kills fungus, so it should be used in rooms where it is present. In addition, lime is resistant to moisture and is well suited for painting the ceiling in any room, including the bathroom (and this is where fungus can be found most often). In addition, lime whitewash hides minor surface defects by sealing cracks and cracks.
Lime quite often causes allergic reactions. It cannot be perfectly white, unlike chalk mortar.
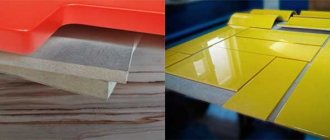
This type of paint has an excellent appearance, while the water-based emulsion fits very well on the old coating, it adheres perfectly to the existing whitewash and does not begin to peel off over time.
Water-based paint has only one drawback - work using it must be carried out at a temperature not lower than +5°C, but when painting the ceiling indoors, this does not matter.
If you do not want to wash off the old whitewash, you need to keep in mind that you cannot apply lime to the chalk and vice versa - otherwise the paint will not adhere well and dirty stains will form on the ceiling.
On top of the chalk you can put a new layer of chalk or water-based paint, and the lime can be covered with the same emulsion or lime. At the same time, it must be taken into account that enamel and oil paint are absolutely not suitable for painting over an old layer of lime or chalk.
Painting the ceiling over a layer of lime or chalk
Is it possible to paint the ceiling without washing off the whitewash?
Since it is not always possible to paint a whitewashed ceiling without washing off the whitewash, let’s look at when this is allowed and how. You cannot whitewash the ceiling with whitewash over the old one if:
- There are cracks
- The surface is uneven
- There are stains, rust or mold
- The previous layer of whitewash is very thick
- There are swollen areas
In these cases, washing off the old layer (complete or partial) is necessary. You don’t have to completely tear off the old coating, cleaning only the loose areas (more on this in the next chapter). You can whitewash or paint the ceiling over whitewash if:
- The previous coating is quite thin
- No cracks
- Nothing crumbles
Now about what you can use to paint the ceiling after whitewashing. It is very important to know the type of coating before starting work. Chalk does not cover lime and vice versa.
Chalk and lime do not whiten over water-based paint - the ceiling will be yellow regardless of the number of layers. It is not recommended to apply enamel and oil paint to lime and chalk.
For rooms with high humidity, you need to use a special composition for the ceiling area. It will protect the coating from fungus, discoloration and rapid shedding.
[custom_ads_shortcode1]
Painting with water-based paint
In order to get a good paint job over lime, it is best to first coat the old layer with an acrylic primer. After this, you need to check the surface for strength by trying to scratch it. If it does not crumble, then you can apply paint.
Painting a wooden ceiling using a sprayer
But when painting over chalk, it is not necessary to do this - water-based paint will bind it well and will stick even without primer.
Before you start work, you need to prepare the room. It is necessary to remove or carefully cover all items with film so that they do not get dirty with paint.
If you are applying paint with a brush, place strokes first perpendicular to the windows, then parallel. If the last layer is laid parallel to the light source, the streaks will not be visible after drying.
Painting with a roller is a simpler and more convenient process in which you need to perform the following steps:
- pour paint into the paint tray;
- dip the roller into the bath, and then roll it along the slope, evenly distributing the paint over the surface and letting the excess drain off;
- lay the first layer of paint perpendicular to the windows;
- wait for the composition to dry completely;
- then add a second layer, which should be parallel to the window opening;
- Carefully paint the sections of the ceiling at the junctions with the walls with a brush.
How to whitewash a ceiling correctly
Applying paint from a sprayer is even easier - just apply three even layers, and you don’t need to watch the direction. The main thing is not to miss a single square centimeter of the surface when applying each of them.
Which material to choose? Current prices for chalk and lime
To answer this question, look up and determine the type of old layer. The same type of material must be used! If your ceiling is whitewashed with lime
, then select suitable lime mortars and, conversely, monitor different
chalk
, if it was the one that was used to decorate the ceiling surface earlier.
It is quite easy to determine what the old layer is whitened with: run your finger over the surface, and if a clearly visible mark remains, then the base layer is made of chalk. Lime leaves virtually no traces - remember this information, it will definitely be useful to you for other repair work.
Below in the table we have reflected the current prices for popular options for chalk and lime mixtures, if you decide to whitewash the ceiling using old whitewash, but cannot think of a budget for this type of repair work.
| Name | Price |
| Dry chalk Unis 5 kg | 99 rubles |
| Chalk whitewash BOLARS, 5 kg | 83 rubles |
| Slaked lime Hermes 20kg | 155 rubles |
| Construction lime Lux 1.5kg | 69 rubles |
Ceiling preparation
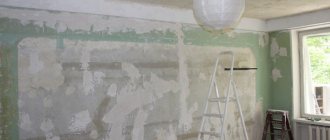
You cannot whitewash a ceiling using an old coating: when wet, the previous layers of whitewash will begin to peel off and stick to the brush, making the process difficult. In addition, the surface will not be perfectly smooth, which is completely undesirable. When cleaning the ceiling, you must take everything out of the room or cover it with polyethylene, otherwise you will have to wash everything from lime and plaster.
Step 1: Surface Cleaning
Cleaning the ceiling with a spatula
For cleaning you will need:
- bucket with water;
- sponge;
- medium-sized metal spatula;
- clean rags;
- ladder.
If you clean a dry ceiling, a lot of dust will rise, and the process itself will take a long time; It is much faster and more convenient to remove the whitewash after moistening. You should not immediately wet the entire area, as the surface dries out very quickly; it is better to divide the ceiling into small sections and moisten as you go.
After wetting the whitewash, you need to wait a few minutes until the layers are saturated with water to the base, then the coating can be very easily removed with a spatula. Finally, wipe off any remaining chalk or lime with a clean, damp cloth until no traces remain.
Step 2. Sealing joints and cracks
For further preparation you will additionally need:
- serpyanka;
- putty;
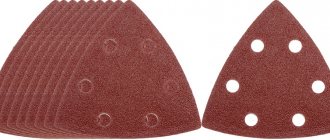
- sandpaper;
- primer;
- brush or roller;
- level.
There are always joints between the ceilings, which gradually diverge over time. To prevent them from appearing on the ceiling, they are embroidered, filled with putty mixture, and covered with sickle tape on top. Putty is again applied over the serpyanka and thoroughly rubbed with a spatula, making the surface even.
While the joints are drying, the ceiling is carefully inspected and defects are eliminated. Small cracks are simply rubbed with mortar, recesses and chips are puttied.
Step 3: Remove stains
Very often stains appear on the ceiling that show through the finish. It can be quite difficult to remove them, but this must be done at the preparation stage, otherwise after a while they will again be visible through the whitewash layer. Stains from water leaks are removed using bleach or bleach: dip a sponge in the liquid and press it onto the stain until it lightens. Of course, you need to wear rubber gloves to protect your skin.
How to clean a ceiling
To remove rust stains, you will need copper sulfate. Prepare a saturated solution of bright blue color, spread the stain well, let it dry and repeat everything again. If necessary, re-process until the marks fade. After this, the problem areas are well primed and dried.
Step 4. Alignment
Putty is best used to eliminate small defects on the ceiling: cracks and irregularities
When all noticeable defects have been removed, a level is applied to the ceiling surface in different places to determine the magnitude of the differences in height. If there are recessed areas, they are puttied separately, and when the solution dries, the entire ceiling is covered with putty. Usually a finishing putty is used, which is applied in 2 layers 1-2 mm thick.
To work, take two spatulas - a narrow and a wide one; when applying, hold the spatula at a slight angle to the ceiling. The resulting sagging or stripes are removed after the mixture has dried with sandpaper. It is necessary to sand the entire treated area to give the surface maximum smoothness. Finally, the ceiling is wiped with a dry cloth to remove dust and primed.
Primer
Using paint - is it possible?
Many owners of houses and apartments are wondering, among other things, whether it is possible to whitewash the ceiling over old whitewash with water-based emulsion. It is considered acceptable to use this remedy. But only if the layer of old finishing is not too thick and adheres to the ceiling firmly enough.
Under no circumstances should oil paint or enamel be applied to whitewash. When using them, the old coating will still have to be removed.
If you decide to perform such an operation as whitewashing the ceiling using old whitewash, before starting processing you will have to carefully prepare the old surface. Chalk on a layer of plaster usually lies flat. Lime may come off in chunks.
Therefore, in the latter case, before whitewashing, you need to check the entire ceiling for the presence of such detachments. Of course, all loose pieces should be removed with a spatula. After performing this operation, there will, of course, be some unevenness on the ceiling.
They need to be sealed with a special chalk putty or thick lime mortar with the addition of a small amount of PVA glue (depending on the type of old finish). Of course, you need to coat all the cracks and chips on the surface.
Before you start leveling the ceiling, it is advisable to go over it with a damp cloth in order to remove dust, cobwebs, etc. It often happens that the old chalk or lime coating has a yellow color. Once the new finish is applied, that yellowing will likely still show through.
Therefore, before starting work, such a discolored surface should be bleached. Such a need, for example, will definitely arise when finishing the kitchen. Ceilings also turn yellow if one of the owners smokes right in the apartment.
It is not difficult to whiten such a surface. It is enough to simply add a little inexpensive “Belizna” product to the water in which the rag is dipped during cleaning. If the ceilings are very yellow, you should go over them with a roller soaked in the prepared solution.
Chalk and lime usually do not adhere very well to concrete. Therefore, a ceiling previously finished with such a product should be treated using a spray bottle rather than a roller. In this case, the surface will be smooth and neat.
A roller can also be used. But when using this tool during work, you will have to carefully ensure that no streaks remain on the surface. Of course, you need to whitewash ceilings over old lime or chalk layers not in one, but in at least two or three layers.
[custom_ads_shortcode2]
Should I remove old whitewash?
Whether to remove the old layer of lime or chalk before applying water-based paint will depend on the original condition of the finish.
Under no circumstances should the old layer be left if:
- The solution was applied in several layers. Applying a water-based emulsion will negatively affect a thick coating. No matter how well the layer holds up, when exposed to moisture it will swell and gradually begin to peel off along with the new finish.
- Cracks, swelling or other defects are visible on the surface of the wall. If you apply paint to this type of finish, the repair will not be durable. After 1-2 months, the new coating will “fall off” in pieces along with the old one.
How to paint a ceiling with water-based paint over whitewash
Home › House › Repair › How to paint a ceiling with water-based paint over whitewash
Everyone. who has done repairs at least once in his life understands. that one of the most difficult processes is painting the ceiling. And at the same time, everyone is interested in knowing how to paint a ceiling with water-based paint over whitewash. so that it would be of high quality. the ceiling wasn't smeared and the paint didn't drip too much onto the floor. because it can damage the ego.
So painting the ceiling with water-based paint consists of several stages
- Preparatory work.
The very first and one of the most important parts of painting with this type of paint. You need to take some kind of rag and carefully walk over the entire area of the ceiling to do this. to remove various unnecessary elements - for example, cobwebs, some kind of dirt. Possibly some kind of insect.
If some part of the ceiling falls off, you need to scrape it off, otherwise after painting with water-based paint there will be no aesthetic appearance.
— Leveling the ceiling. After these operations have been completed, you will need to begin the process of leveling the ceiling.
First you will need to seal various cracks and cracks. unless, of course, there are some on the ceiling. Widen the cracks a little before performing this process - this is what you need to do. so that the putty can completely close one or another gap. For that. To level the ceiling you will need to carefully sand it with sandpaper.
— The main stage of painting. First you will need to prepare the necessary materials. and this is exactly what it should be - a paint brush, a narrow brush, and a long-haired fur roller. some kind of vessel into which you will need to pour paint.
When all these tools are ready, you can start, but you must adhere to the following principles:
1) You should always start painting from the place at the junction between the ceiling and the wall.
The farthest corner - that is, the corner that is opposite the front door - needs to be painted first. Now you need to take the smaller paint brush and walk around the entire perimeter of the room, thus making a strip approximately 4-6 centimeters wide.
This needs to be done for this. so that later you can easily paint with a roller (it is much wider) and you won’t be afraid of it. that some of the paint will end up on the ceiling.
2) After this, you need to take a roller and start doing the basic painting of the walls of a particular room.
When painting walls with water-based paint, it is important to remember that you need to paint the walls 3 times and you need to do it as follows - the first time you need to paint parallel to the rays of light, perpendicular to the rays of light - you need to paint the second time and always towards the window in the room be sent for the third and final painting time. 3) The main thing is to remember that if you painted it for the first time, then next time you need to paint it only after that
how the paint dried. It must dry completely over the entire surface.
3) The main thing is to remember that if you painted it for the first time, then the next time you need to paint it only after that. how the paint dried. It should dry completely over the entire surface.
Depending on the air temperature. room humidity and other factors, the paint dries in approximately 9-12 hours.
— Technological aspects of painting:
1) If you wet the roller in a bath of paint, you need to do it like this. so that the paint is distributed evenly over the entire surface of the roller.
2) The roller needs to be moved in different directions - that is, for example, first from left to right - then vice versa. You can also move the roller from top to bottom. and then from bottom to top.
3) the quality of the work performed can be checked using light. To do this, just stand like this. so that the sun's rays fall well on the part of the surface that you painted.
4) before the last painting it is advisable to change the roller
5) after all the work done, you need to leave the room to dry for approximately 12 hours. at the same time take care of that. so that there are no drafts. And in no case is it advisable to expose it to direct sunlight.
Painting a whitewashed ceiling
How to paint a ceiling with water-based paint without streaks
If you don’t know what paint to paint a whitewashed ceiling, then we want to disappoint you - such paints simply do not exist. In other words, in order to paint a whitewashed ceiling, you first need to clear it of this building material.
This is explained by the fact that whitewash does not have sufficient strength, and also has the ability to roll off if, for example, PF-115 enamel is used when painting. Also, the number will not work with water-based paints, since whitewash cannot tolerate moisture, and especially water.
True, some on specialized forums advise thoroughly priming the whitewashed ceiling before painting and this, supposedly, will solve all the problems. Remember, and if you can’t, then write it down: whitewash cannot tolerate absolutely any contact with liquid products.
Even if you prime such a ceiling with the most expensive and high-quality primer, the integrity of the whitewash will be damaged under the influence of moisture. And, even if you manage to paint the primed whitewash on the ceiling without any problems in the future, then in a short time all this mass will simply fall on your head. This can even happen because the upstairs neighbors slammed the door hard! Not to mention private houses, which are subject to shrinkage every hour. For this reason, before painting, it is necessary to remove all whitewash from the ceiling.
Removing whitewash from the ceiling
Removing whitewash
Please note that there are many ways to remove old whitewash from a ceiling. Among all of them, the most popular is removing whitewash by gradually wetting the ceiling and cleaning it from the whitewash layer
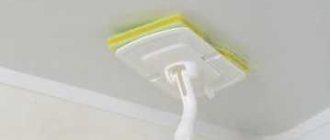
When wetting the ceiling, you can use a spray gun. If you don’t have one on your farm, you can make a homemade version. So, you should take the nozzle from a regular sprayer for cleaning windows and put it on a simple plastic bottle.
It is not recommended to spray the entire ceiling at once, because while you clean a certain wetted area of the ceiling from the whitewash, another will have time to dry and you will have to do the wetting procedure again. This will significantly delay the preparatory process of cleaning the ceiling for painting.
Please note that before you start removing old whitewash from the ceiling, first cover the floor and kitchen furniture
As roofing material, you can use both old unnecessary sheets and ordinary newspaper. To minimize dirt, when cleaning the ceiling from whitewash, you can hold a piece of plywood or a plastic tray over the area being treated.
When cleaning whitewash from the ceiling, do not try to remove all of it. As soon as a minimum layer of whitewashing materials remains on the ceiling, you can proudly consider all the dirty work done. Now, the remaining layer of whitewash on the ceiling can be washed off with a sponge. Try to keep the size of the latter as large as possible. This will reduce the tedious task of rinsing the sponge in water.
With the above operation, you should also not scrub the ceiling to a perfect shine. Currently, there is a huge selection of deeply penetrating primers, which you will subsequently use to fix the remaining layer of whitewash, which will be quite enough for further painting of the ceiling.
So, in order to properly paint the ceiling, it is necessary to carry out high-quality preparatory work. This action is responsible for the final quality of the painted surface and its appearance. As mentioned above, a ceiling that has been painted with whitewash must be thoroughly cleaned and washed.
Removing the whitewash layer is quite simple. To do this, you need to take a lint roller and thoroughly moisten a certain area of the ceiling with warm water. After the whitewash has soaked, it will take about 5-10 minutes; it can be removed from the ceiling using a simple spatula.
Useful tips
But this process has its own tricks:
- the coloring composition must be applied quickly;
- Separate tools must be used for each layer;
- structural paint will help hide some minor flaws;
- for kitchens and bathrooms it is better to use waterproof washable paint;
- be sure to use plastic barriers that can protect walls from paint splashes;
- when painting surface joints, use adhesive tape and masking tape;
- drying should take place in a dark room in the absence of drafts, otherwise the paint may peel off;
- It is not recommended to carry out work in a cold room with high humidity; you should also not paint in the heat, the coating will dry out too quickly;
- Painting should start from the window.
See below for more details.
Important nuances
When repairing the ceiling surface, you should take into account the purpose of the room. For example, if this is a bathroom, it requires the use of a special composition that is resistant to high humidity and can protect the ceiling from fungus. Otherwise, the paint will lose its attractive appearance within a short time and, most likely, will begin to crumble.
When performing painting work, it is necessary to remember safety, since the whitewash must not come into contact with the respiratory system, eyes or skin. To do this, use a respirator, rubber gloves and special glasses. The fact is that the coloring composition can cause serious allergic reactions, and sometimes chemical burns.
What tool do you use to work with water-based emulsion?
The procedure for painting a ceiling with water-based whitewash paint begins with selecting the appropriate tool - a roller or brush. If the roller comes with an extension rod, whitewashing walls with water-based paint will not require additional effort from the homeowner and will save time. In addition, you will need a tray with a grooved surface for rolling out and squeezing the roller.
A brush will be needed to handle corners and joints, so the best option would be a narrow fluted brush 5-10 cm wide. The water-based paint itself is applied to whitewash with a roller 15 cm to 25 cm wide. For work, it is best to choose a roller with a medium-length pile or a foam one roller with wire.
Whitewash
Then everything will depend on the quality of the prepared composition for whitewashing or on how good the paint will be used. The first direction of movement of the coloring layer should go across the light flow entering the room. Simply put, along the wall on which the window is located.
The next direction of coloring is across the first. If there are more than two passes for painting, then it is necessary to select their directions so that the last one is directed away from the window. To paint with different compositions, you need to use different tools.
It is best and easiest to use a spray gun, but not everyone has such a device. Therefore, most people prefer a roller.
You should always start painting from the corners and lines along the walls. To do this, use a narrow brush. It is more convenient for her to work in the corners, and along the wall, a strip of paint is applied so as not to stain the walls with a roller. In addition, the roller will leave unpainted stripes where its edge simply does not fit close to the wall.
You should take a roller with medium pile. A small pile can leave unpainted areas, but too long pile paints everything quite thickly. And besides, it’s harder to work with such a roller.
If in some areas the whitewash begins to peel off, it means that the work on cleaning the surface was done poorly, and after the applied coloring composition has dried, in such places you should clean the surface down to the concrete and putty it again.
[custom_ads_shortcode3]
Whitewashing the ceiling
You can begin whitewashing after the ceiling has been prepared and the primer has completely dried. The whitening solution can be applied with a brush, roller or spray gun.
Tools that need to be prepared before work:
- choose a wide, wooden brush with natural bristles, so that the hairs from the brush do not crumble during the whitewashing process; it is pre-soaked in warm water for several hours, while the swollen wood clamps the bristles more tightly;
- the roller can be either foam rubber or fur; the structure of the coating depends on the roller - a fur coat gives a rougher, more voluminous surface, and foam rubber gives a smooth and uniform surface; the roller is placed on a long handle, for example, from a mop;
- It is not necessary to buy a spray gun - you can rent it or rent it from friends; Before pouring whitewash into the spray gun, the solution must be carefully filtered so that there are no lumps or clogging of the nozzle.
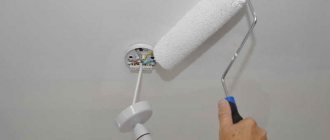
Applying whitewash to the ceiling with a brush or roller.
If the ceiling is whitewashed with a brush, pour the whitewash into a small container that is convenient to hold in your hands. Dip a brush into it, squeeze out the excess solution on the edge of the jar and apply it to the ceiling.
When painting with a roller, pour the working solution into the paint cuvette. Carefully wet the roller in the solution and roll it along the ribbed surface of the cuvette to evenly distribute the solution over it. The first layer of whitewash is applied perpendicular to the window line. Paint the ceiling with a thin layer, avoiding drips
At the same time, it is important to know: the darker layers of the ceiling are visible through the wet whitewash; after drying, the hiding power of the whitewash increases. You should not achieve color uniformity by increasing the whitewash layer - the solution will begin to collect in drops, which after drying will turn into hollow bubbles
At the slightest impact they will burst and the whitewash will crumble. After applying the first layer, the whitewash must be dried for at least 24 hours. The next layer can be applied only after the first one has completely dried. The second layer is applied perpendicular to the first and the line of incidence of sunlight from the window. Thus, the required number of layers is applied. It is better to dry a whitewashed ceiling naturally, without the use of heating devices or heaters.
How to whiten a ceiling correctly: instructions
When applying whitewash with a spray gun, it is also applied in two layers, and the direction is not critical, since the whitewash lays out more evenly and without streaks
It is important not to apply too thick a layer of solution to avoid dripping
After the whitewash has dried, the room is ventilated to remove excess moisture and odor, the covering film is removed from the furniture and wet cleaning is done. It is better to connect lighting fixtures or hang a chandelier after all work is completed.
How to whitewash a ceiling without washing off the old whitewash
Let's look at how to whitewash a ceiling using old whitewash. To make the coating last longer, you can add wood glue to the composition. This way the layer becomes more durable, and the appearance will please the eye much longer.
How to paint the ceiling after lime whitewashing? Best of all - the same lime. To prepare lime mortar, take:
- Two and a half kilograms of lime
- 10 grams of salt, previously soaked in water
- A little blue
Mix everything and add water. The final volume of the product will be approximately 10 liters. How to paint a ceiling with chalk whitewash?
You can prepare the chalk solution yourself. Compound:
- 10 liters of water
- 5 kilograms of chalk
- 50 grams of wood glue
The consistency should be such that the solution does not run off the knife. If the solution flows, add more chalk. If you are afraid that the surface will have a yellow tint, add a little blue.
The technology for applying chalk, lime and water-based paint is approximately the same. The main thing is to ensure that the composition lies evenly.
If you work with a roller and brush, you need to first make strokes perpendicular to the windows, and then parallel ones. This is done so that at the end of the work the stripes are not visible in the light.
How to paint a ceiling without washing off the old whitewash using a roller? The roller allows for a very precise application. The composition will need to be applied twice.
Additional tools will be needed: a container to dilute the solution, a painting tray, a brush (for processing joints). The disadvantages include the possibility of staining the walls. When whitewashing you need to adhere to the following algorithm:
- Pour paint into a special tray;
- Place the roller in the container and roll it down the slope. This way the paint will be distributed evenly over the roller;
- Paint perpendicular to the windows;
- Wait for it to dry;
- Paint a second time parallel to the window;
- Treat the joints with the wall.
But if you choose to paint with a spray gun, you will have to repeat the whitewashing process at least three times: the layer that the spray gun produces is very thin. If you maintain the correct consistency (more fluid) and make sure that there are no lumps, then application will be easy, and the result will please you.
You can also paint or whitewash with a brush. It is inexpensive and widely available. The downside is that there is a lot of splashing when applied. Regardless of which tool is selected, the next layer can be applied only after the previous one has completely dried.
Renovating a room is not easy. But if you approach this issue wisely, then it is possible to do such work yourself. And the question of how to whitewash the ceiling without washing off the whitewash will not become an obstacle to renovation.
Liked? Share on social media networks!
It is recommended to whitewash or paint ceilings only after the old finish has been removed. However, this matter is quite complicated. Removing old chalk or lime from the ceiling is long and tedious.
In addition, after this a lot of dirt remains in the house. Previously, glue was added to the chalk solution before whitewashing. If the surface is finished with just such a product, cleaning it becomes a pain.
[custom_ads_shortcode3]
Types of painting
Now we will look at how to properly paint a ceiling with water-based emulsion and find out what the features of different types of painting are. As elsewhere, here it all starts with preparatory work. The most correct solution in such a situation would be to eliminate the old ceiling finish.
But situations are different.
Perhaps the old finish leaves much to be desired, but the ceiling is still in pretty good condition. Then you can paint over the old paint. The most important thing here is to remove all visible dirt, possible irregularities and cracks.
But if you do not know what primer was originally applied to the surface, then it is better to abandon the idea of painting over the old finish. Why?
The fact is that vitriol and alum primers negatively affect the emulsion. They simply destroy it. Moreover, regardless of how long ago the work was done.
If you still decide to paint “uncharted territory,” then conduct a simple experiment: apply “water-based emulsion” to a small area of the surface. If it remains unchanged for several hours, then you can safely paint the entire ceiling.
If you paint over whitewash, take into account the thickness of the layer of that same whitewash. If the chalk layer is too thick, the paint will not stick to it. Only with a thin and well-adhered layer of whitewash can water-based paint interact without problems.
Using water emulsion
Having asked the question of how to whitewash a ceiling using old whitewash, you should, of course, decide on the type of finish used. Chalk and lime are used extremely rarely today when decorating ceilings. In most cases, apartment and house owners use water-based paint. This product is applied to the ceiling surface much more evenly. In addition, the water-based emulsion does not peel off over time. But of course, such a finish will last a long time only if it is applied correctly.
Before painting with water-based paint, the bleached ceiling should be primed. In this case, a special deep penetration agent should be used. After the primer has dried, you need to test the old coating for strength. To do this, just try to scratch the ceiling with a spatula. If the old coating is easily removed, it is better not to risk it and remove it anyway. If the chalk or lime soaked in primer holds tightly, you can start painting.
Sometimes owners of apartments and houses finish whitewashed ceilings with water-based emulsion and without prior priming. This is also acceptable. But only if very high-quality paint from a good manufacturer is used.
[custom_ads_shortcode3]
The main stage of painting
Painting tools
To perform high-quality painting of the ceiling with paint based on water emulsion, you will need:
- paint brush for painting butt joints between the wall and ceiling, as well as corners;
- a narrow brush for making corrections;
- fur, long-haired roller,
- paint tray,
- ribbed surface for even distribution of paint over the surface of the roller.
Coloring rules
just like when whitewashing with chalk, it is better to apply the first layer of paint parallel to the rays of light from the window, and the second - parallel to the window frame
Many people do not know how to paint a ceiling with water-based paint correctly. In most cases, they do not take into account the direction of the light flux and many other nuances during painting work. Therefore, the painted surface turns out uneven, with stripes from the passage of a brush or roller, with lighter or darker spots. To prevent this from happening to you, follow these rules.
- You should always start painting from the corners and joints between the wall and the ceiling. In this case, the farthest corner relative to the front door is painted first. To do this, wet a wide paint brush halfway in the paint, then squeeze it out slightly to remove excess. A passage is made along the entire perimeter, 3 to 5 cm wide. Thanks to this, during further painting with a roller, the junction of the ceiling and the walls, as well as the corners, will not be damaged.
- The main whitewashing of the ceiling with water-based paint is done with a roller. It is applied in three passes, regardless of what type of paint is chosen. In this case, the very first pass of paint is carried out parallel to the rays of light incident from the window. The second is in a direction perpendicular to it. The latter should always be directed towards the window.
- Each subsequent painting is carried out only on the well-dried previous layer. This requires from 8 to 12 hours.
Painting technology
- In a tray filled with paint, moisten the roller and rub it three or four times over the rough surface. This will allow the paint to spread evenly across the roller.
- Make the first pass on the ceiling section. Starting from the corner on the left side of the wall opposite the window.
- The roller must be moved from left to right. Then change direction. In this case, you need to ensure that the paint is applied in an even layer, without visible transitions. You can also move the roller using W-shaped movements.
- The following technique will help remove excess applied paint: when there is no more paint left on the roller, pass it over the painted surface. It will absorb all the excess.
- While painting, use a directed bright beam of light to check the quality of the paint.
- Using a new roller during the last painting will ensure a uniform surface.
- Until the paint has completely dried, no drafts are allowed in the room. It is advisable to protect the painted surface from direct sunlight. This will prevent stains from appearing. Do not try to dry the painted surface with electrical appliances.
Features of painting a plastered surface
The ceiling to which plaster has been applied can be painted using a special spray gun or a regular vacuum cleaner. They provide high-quality, uniform distribution of paint on the plastered ceiling surface. At the same time, it lays down in a thin, even layer. It is best to paint using a spray gun over a primer that has already been applied with a roller or brush.
If, when painting the ceiling with water-based paint, all the technology was strictly followed, then the result will delight you with the beauty and uniformity of the surface.
Is it worth finishing the surface without pre-cleaning?
So, we found out whether it is possible to whitewash the ceiling using old whitewash. In principle, this is allowed. If all the recommendations listed above are followed, the owner of an apartment or house can ultimately obtain a fairly even and beautiful coating. However, unfortunately, such finishing will have to be corrected in the future sooner than if the ceiling had been previously cleaned.
Therefore, before deciding to whitewash without removing the old layer, you should think carefully. The lime sticks to the ceiling quite firmly. Therefore, if the surface is finished with it, applying a new layer without removing the old ones still makes some sense.
But chalk can be removed from the ceiling very easily - just with a rag and water. Therefore, in this case, it is more advisable to pre-clean the surface.
Home / Types of ceilings / Painted and bleached / Restoring a whitewashed ceiling Sometimes, when performing repair work, the old coating on the ceiling still looks quite tolerable, but there is a desire to give it a little more “marketable appearance”. Let's talk further about how to refresh a whitewashed ceiling. This can be done, although it will require a whole range of measures.
In general, painting the ceiling after whitewashing is only possible with the same composition that was applied earlier. If chalk was used, then such a coating can be restored by simply washing off the old one and repainting, but if plaster and lime are applied, then there will be much more work.
[custom_ads_shortcode3]
Cost of mixtures and painting works
The final price of applying water-based emulsion to whitewash includes the cost of paint and painting work. Thus, the Russian-made VDAK-22LAZAR mixture will cost the buyer 30 rubles per 1 kg. The average cost of 1 kg of Lakra paint is 40 rubles.
Foreign-made paints are more expensive: a liter of dulux paint will cost, on average, 300 rubles. The cost of Tikkurila paint is much higher - 500-600 rubles per 1 liter. The average cost of a liter of Beckers paint is 600 rubles per 1 liter.
Prices for applying water-based emulsion to whitewash range from 250 rubles per square meter. treated surface up to 400 rubles for the same amount of work: the cost depends both on the experience of the master, and on the characteristics of the base surface and the paint itself, as well as the method of its application.
The preparation before whitewashing the ceiling with your own hands using water-based paint is shown in the video:
Lime whitewash
To prepare a lime mortar for painting the ceiling surface, take 2.5 kilograms of lime, add 100 grams of salt, pre-soaked in water, and also a little blue. All components are mixed, and water is poured in so that the resulting volume of the mixture is approximately 10 liters.
The rules for how to whitewash a ceiling with lime are similar to the recommendations for how to apply water-based paint and chalk mortar.
Water-based paint
“Water emulsion” is an emulsion, that is, a mixture of water and a composition that has another base - drying oil, varnish, resins, and so on. This paint has many advantages over other compositions:
- non-toxic and safe for health;
- hypoallergenic;
- wide variety of colors and textures;
- ease of application and care;
- practicality.
The following types of water-based paints exist:
- acrylic;
- silicone;
- latex;
- silicate.
The main difference between these paints is their ability to tighten cracks in the base and the ability or impossibility of washing the ceiling. Any of the above water-based emulsions are applied to the whitewash in an even layer, without requiring additional actions from the homeowner. Paint can also have three varieties:
- glossy;
- semi-gloss (semi-matte);
- matte.
You should not apply glossy water-based emulsion to whitewash - it is better to choose a matte water-based emulsion, as it will hide all the unevenness of the base.
Professional ceiling painting
If you do not have enough skills and knowledge on how to properly whitewash ceilings, you can use the services of professionals. This solution has many advantages. It allows you not only to save time, but also to get excellent results. A professional will use a minimum amount of paint to whitewash the ceiling, so the repair will not cost much more than painting it yourself. The main thing you should pay attention to is the skill of those who are to be hired.
It must be remembered that whitewashing old paint is an inexpensive and simple way to transform the interior of a room for the better. It should not always be used and only when the previous layer is even and holds up perfectly. In this case, water-based paint, lime, and chalk applied directly to the old base will adhere reliably.
Whitewashing is not difficult. You need to turn to experts for help and hire professionals in order to save time if the owner of the premises is a busy person and does not have the opportunity to carry out repairs.