If you have already made up your mind, but don’t know how to paint ceiling tiles, don’t despair! This construction operation is not as complicated as it seems at first glance. But you should still take it quite seriously, otherwise you won’t be able to achieve the expected result right away. In order not to get yourself into imaginary troubles on this, pay attention to the recommendations given below.
When is it necessary to paint foam ceiling tiles?
The coating not only can, but also needs to be painted. Especially if replacing the decor is not planned in the near future.
When painting foam ceiling tiles becomes a necessity:
- If the coating has lost its original freshness and is difficult to dry clean.
- When greasy and uncleanable stains appear, this is especially true in kitchen areas.
- If some of the elements are replaced with new ones that differ in whiteness, painting will ensure an even tone of the ceiling area.
- The tiles in the bathroom are painted to restore their waterproof qualities.
It is also recommended to paint the cladding immediately after installation. A nondescript grayish-white tile with a simple ornament does not look aesthetically pleasing on the ceiling, but the right paint can elevate the interior.
Preparing for the painting process
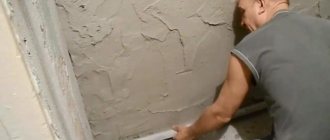
If the tiles on the ceiling are new, you should seal all the joints formed when the tiles come into contact with each other, as well as at the junction of the tiles and the ceiling plinth.
However, first you need to check how securely the products are attached, in particular the corners to the ceiling base, and glue them if necessary. Acrylic sealant or putty is ideal for sealing joints. After the sealed joints have dried, their surface must be treated with sandpaper so that there are no stains on the new painted ceiling. These actions will give the ceiling a finished look.
In situations where tiles that have already lost their appearance will be painted, they must first be washed thoroughly. If the joints are damaged, we correct them, not forgetting to prime the surface first. After correcting defects at the joints, apply primer to the entire surface to be painted. It is more convenient to prime the main area of the ceiling with a roller, and the joints and places where the tiles and plinth meet are primed with a brush. The primer should be purchased water-based.
How to paint a laminated panel? If the board is laminated, it must be cleaned. Otherwise, the applied coloring composition will curl into lumps.
Advantages and disadvantages of painting tiles
Depending on the choice of paint, the tile receives a number of positive performance qualities:
- resistance to the growth of fungus and mold;
- fire safety;
- extension of service life;
- the ability to add any shade, highlight texture;
- resistance to burnout;
- insusceptibility to temperature changes.
If you refresh the tiles with acrylic compounds, the decor acquires good water-resistant properties and the ceiling can be washed.
How to properly glue foam ceiling tiles and different installation methods
There is only one drawback to painting - poor adhesion of previously painted elements. But if the foam coating is decorated for the first time, then there will be no problems.
Preparatory stage
First of all, a number of preparatory activities should be carried out, which include: Preparing the premises:
Emptying the room of furniture or covering it with film. Also protect the flooring and walls if you do not plan to renew them.
Wear personal protective equipment to protect your eyes, head, and hands. Prepare the necessary tools to complete the work:
"Goat" or stepladder; Roller and brushes of different sizes;
Container – tray.
[custom_ads_shortcode3]
What colors can you paint tiles with?
Having figured out whether it is possible to paint foam ceiling tiles, it is important to make the right choice of product.
The following formulations are best suited:
- Water-based paint has a number of advantages. These include non-flammability, environmental friendliness, quick drying and can be applied either with a brush or a roller. Disadvantages include poor moisture tolerance and rapid contamination.
- Acrylic paint is a more stain-resistant option. The composition does not lose color for a long time, dries quickly, is hypoallergenic, withstands low temperatures, and does not emit a strong odor. The acrylic mixture can be used to renew the ceilings in the bathroom; the tiles will acquire good water-resistant properties. The disadvantages are possible swelling of the layer and poor vapor permeability.
- Latex paint has a quick drying time, and can also be applied to a dry or wet substrate without the risk of subsequent peeling. Latex compounds can be used to paint any surface, and this provides new opportunities for decorating all surfaces in the room. The paint does not fade under the influence of UV rays and tolerates climatic and humidity changes well. The downside is that mold may appear and if the layer is too thick there is a risk of the coating peeling off.
The owner decides how and how to update the foam tile ceiling. Rooms with average levels of humidity and dirt can be whitewashed with water-based emulsion, but for other rooms an acrylic or latex composition is suitable.
Advice! Before painting the ceiling tiles with water-based paint, the surface is thoroughly cleaned of dust and dried. The layer applied with a spray gun is the smoothest.
Material selection
None The most popular option is acrylic paint. It has earned popular recognition for its excellent quality, wide color palette and quick drying.
They also choose acrylic due to some properties:
- Resistance to external factors;
- Ease of application;
- Harmless to health;
- Does not have a strong odor;
- Vapor permeability;
- Good level of elasticity;
- Wide range of colors.
When applied to foam tiles, the paint lays down in an even layer, without collecting dirt and dust. Temperature changes are not a problem for acrylic, just like moisture. But, like any material, it has certain disadvantages:
- wears off over time;
- high price.
Based on their last drawback, you can consider a more economical material. The next common painting material is water-based paint.
Advantages of water emulsion:
- attractive price;
- high level of vapor permeability;
- easy application to the surface;
- safe for health.
Flaws:
- poor moisture resistance;
- accumulation of dirt on the surface.
There is another option than painting a foam ceiling.
For work, you can use enamel or oil-based paint. This will significantly save money, but this option will not be the best for health. When choosing a paint, everyone decides on its own advantages and disadvantages. In order to choose the right one, you can seek advice from a specialist, and also look at samples of the painted surface in the store.
[custom_ads_shortcode1]
DIY painting technique
Having chosen what you can use to paint the foam ceiling tiles, you should do the preparatory work:
How to stick foam ceiling tiles on an uneven ceiling
- Remove dust and dirt from the surface. This is done with a damp cloth, then the tile should dry.
- Seal joints and cracks with putty, then prime the surface with a product for foam tiles.
Advice! If the surface of the elements is smooth, there is no need to apply a primer. But on porous and rough tiles the paint will not lay down in an even layer, which means you will have to prime it twice. The second layer is applied after the first has completely dried.
Now painting. The selected composition must be prepared in advance: stir or shake. To ensure that there is enough mixture on the roller, but without excess, it is better to take a painting tray with a platform for squeezing out excess paint.
Advice! When choosing white compositions, owners assume subsequent tinting of the mixture. The color is introduced at the mixing stage, in portions. It is best to mix the pigment with a small amount of paint and add the composition to the total volume, achieving the desired shade.
How to paint a ceiling made of foam tiles:
- dab the roller or brush into the paint, squeeze it onto the pad;
- evenly cover the ceiling area in a direction perpendicular to the light falling from the window;
- let dry;
- apply a layer of paint again, but this time across the first one.
A ceiling painted in this way will look perfectly smooth, without streaks or unpainted areas. The option considered is painting in one color. You can create a convex texture by decorating the pattern with a contrasting shade. Gold, bronze or silver paint is applied with a thin brush. You can create an interesting effect using a sponge or glaze - the finish takes on an expensive look.
Advice! When painting the ceiling with water-based emulsion, no preparation is required, but you will have to apply 2-3 layers of paint with preliminary drying of the previous layer. If an acrylic composition is applied, then the primer should also be acrylic - this will give the surface better adhesion to the paint layer.
Painting process
- Initially, you need to change into work clothes, put on safety glasses, and cover your head.
- The second step for properly painting ceiling tiles will be to protect the floor, walls and pieces of furniture that are not wise to remove from the room from paint drops. To do this, use covering films, sold in any hardware store, and secure with tape.
- Then, using masking tape, seal around the perimeter the contact surface between the baseboard and the walls so as not to stain the wallpaper.
- The fourth stage is the preparation of the coloring composition. To give the desired shade, you can mix different colors and cover it with a foam board specially stored for this. To create roughness, you can add a little fine sand.
- When you have achieved the desired shade, pick up a roller and carefully apply paint from the corner. If the tile has a relief pattern, then you should use a brush.
- In places where the roller does not reach, the foam boards should be painted with a brush.
- For more effective protection and rich color, re-paint after the 1st layer has dried.
In order not to have to worry about choosing a shade several times, calculate the required amount of paint in advance.
If the surface preparation and painting steps are carried out correctly, the foam panels will not show any stains, streaks or lumps.
Which tiles should not be painted?
Not every decor can be renewed with coloring compounds. There are types of tiles that only need to be washed or replaced. This category includes plastic, mirror ceiling tiles. Of course, you can take a risk and paint the cladding, but the result will not please you - there will be stains, unevenness and stains.
It is also not recommended to paint laminated elements; after treatment, bald spots appear on the surface. And, of course, you should not refresh foam fragments with creases, cracks and other defects. This type of cladding needs to be replaced, but the new ones need to be painted along with the rest, achieving an even tone.
Knowing how to update ceiling tiles, the owner will always be able to restore the coating without any special costs. The cost of the work consists only of the price of paint, primer and tools. In total, the costs do not exceed $50, which is much cheaper than installing a new ceiling covering.
Advice from the experts
To get a high-quality result, a number of nuances are taken into account:
- The thinner the paint layer applied, the lower the risk of decor bubbling. A thick layer may begin to peel off.
- Relief tiles are painted with a brush or spray gun. Spraying paint saves the composition well, but you should work quickly, without holding the nozzle in one place. This is the only way to get an even layer of decor.
- When painting ceilings, first decorate the areas where they meet the walls and the shaped elements. The roller is not brought to the very edge so as not to stain the wall.
- Dry paint without drafts or heat guns. Curtain the window, close all the doors.
If you follow the tips, the decor will turn out smooth and beautiful.
How to choose ceiling tiles
To get the desired result, you should approach the choice of the type of tile material with special attention. There are material options with smooth edges and with edging
If you choose the first option, then it is possible to glue it so that the joint parts are not visible, and you get the effect of a whitewashed surface or a painted ceiling. On sale you can find three types of this material, which is characterized by seamless gluing:
- With textured edges, which can be in the form of a zigzag or a wave, obtaining a seamless effect is easier with uneven transitions, because such lines are difficult to notice by the eye;
- With calibrated edges, they are distinguished by small errors in size and even corners. The suture areas with them come out thin;
- With a decorative design, an ornamental pattern is applied to the coating; due to its pattern, the seam zones are not noticeable.
If you decide to glue slabs with uneven edges, you will have to deal with seams that stand out due to the unevenness, then they should be covered with a special grout.
The most popular size of tile material is a 50-centimeter square, but you can also find various other sizes. There are rectangular slabs made of polystyrene foam, and there are other tile coverings that are made from other types of material, but the selected type of plastic does not affect the process.
The most popular size of tile material is a 50-centimeter square, but you can also find various other sizes.
To buy high-quality finishing material for the ceiling, you should focus on the following selection criteria:
- If a rectangular or square shape is chosen, then the edges must be smooth without flaws; if there are any breaks, they will greatly spoil the appearance of the coating;
- The density of all tiles should be the same, there should be no thinner areas along the surface;
- There should be no dents or gouges on the surface of the image;
- You can check the quality by taking the material by the corner and shaking it a little; if the slab is not crumbling, then it is suitable for use.
The density of all tiles should be the same, there should be no thinner areas along the surface.
Finishing with water-based emulsion
To work with water-based paint, you will need the same tools and devices as listed above. The progress of work can be described in stages:
- First you need to paint the junction of the ceiling and the walls around the entire perimeter of the room. To do this, take a brush, dip it in paint, squeeze it a little and apply a strip 3-5 cm wide along the perimeter of the ceiling. This is done so that during further painting the roller does not stain the walls.
- Water-based paint is applied to the surface in three layers using a wide roller . The first time the roller is moved in the direction of the light from the windows. Work begins from the left corner of the wall on which the window is located.
- To get rid of excess paint, use a semi-dry roller, with almost no solution left on it, to pass over the newly treated surface.
- The second layer is applied perpendicular to the first and only when the paint on the ceiling is completely dry.
- After the second layer of paint has dried, the ceiling is treated again. The third time, work begins from the corner of the wall located opposite the window. The movements of the roller should be directed in the direction of the light from the windows. It is better to perform the last layer with a new, clean roller, then the painted surface will be uniform.
Please note: each layer of water-based paint takes 8 to 12 hours to dry. The next layer of composition can only be applied to a well-dried previous one.
The quality of the paint can be checked using a bright light aimed at the ceiling. Until the surface is completely dry, it is better not to open windows and doors in the room. It is also advisable to prevent freshly painted tiles from being exposed to sunlight, so windows should be curtained.
Tips for painting foam board ceilings
At the very beginning, you should remove all unnecessary things:
Then cover with film all items that are difficult to move to another room.
Preparing to paint slabs
After that, you should clean the foam from dirt, dust, cobwebs; a vacuum cleaner, water, or a sponge are suitable for this purpose, which can then be used to clean the primer seams. Polystyrene foam that does not hold well can be dismantled and glued back, but glue must be applied to it over the entire surface, and not just along the edges and center, as many do. You can try with a screwdriver the places above the baseboards, that is, the corner between the wall and the ceiling; if voids are found, remove the baseboard, tap with a hammer to detect voids, all suspicious places should be opened and properly strengthened.
Unreliable plinth needs to be re-glued
If you find that the foam baseboard is unreliably fastened, you should apply glue over the entire adjacent surface, and not pointwise, which is also where many people make the mistake of applying drops too far from each other.
You need to carefully look at the adjacent surface of the baseboard; on ribbed foam baseboards you can miss the mark by spreading the glue a little lower or higher than necessary
It is also important to wait about a minute for the glue to dry so that it does not drip down during installation.
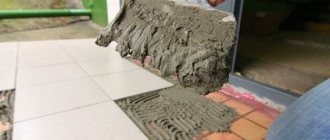
Methods of applying glue
You can use acrylic glue to attach the tiles to the ceiling. Its structure is similar to a thick putty, it is applied quickly and does not require additional drying time. After application, the tile does not need to be held for a long time; it is enough to press firmly once, after which it does not fall down. But it is more expensive and harmful to the environment.
Why do you need to paint plastic windows?
Foam tile ceiling
Painting a PVC profile may be required in the following cases:
- The frame has faded in the sun, lost its original color, turned yellow and looks unattractive. The absence of a paint layer can lead to a violation of the physical properties of the profile, so it is recommended to paint it.
- The paint layer can protect the window from the harmful effects of the environment.
- The design of the room has changed, and the original color of the profile no longer harmonizes with the room.
- The facade was repainted, the windows began to look unprofitable.
PAINTING A PANEL – STEP BY STEP
The specialist will show you how to paint a wall with a wooden panel with magnificent results. Tools: Set...
An alternative to painted windows is laminated. Read more in the article “Colored plastic windows - the best solution for glazing.”
How to seal seams and cracks
After gluing the tiles to the ceiling has been completed, the aesthetic effect should be completed by closing the seam areas, as well as if there are gaps. It is impossible to do without seams entirely; most often they are more noticeable in the area where the ceiling meets the wall. One package may contain slabs of different sizes; their difference is small, 1-2 millimeters, but it is noticeable on the surface.
Professionals advise sealing to take into account these rules:
- They move gradually, processing the seams in small zones so as not to leave individual elements missing;
- The product is distributed a little at a time, and the excess is wiped off immediately;
- If a large gap is identified, it is better to close it by cutting a strip of the slab that remains in the package to the required size.
The cracks are usually sealed with sealant or putty solution.