Materials and tools
To complete the work, you will need inexpensive materials to imitate brickwork and simple accessible tools, namely:
- spatula width 200 mm and 80 mm;
- flute tassels 5 and 3.5 cm wide;
- paint roller;
- paint tray;
- building level 2 m long;
- long metal ruler;
- tape measure and pencil;
- cardboard brick template;
- primer;
- masking tape 1 or 1.5 cm wide;
- dry mixture Rotbant;
- tex paint;
- color tex: red-brown, red, orange, black;
- matte acrylic varnish;
- electric drill with whisk;
- kitchen sponge;
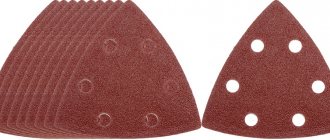
- sandpaper #180 and 240;
- bucket for mixing the solution;
- container for mixing paint.
In addition to this tool, to imitate brickwork with your own hands, depending on the complexity of the work and the quality of the wall surface, you may need additional tools and materials. The purchased spatulas must be prepared for work: sharpen the sharp corners with sandpaper and sharpen them. You can use #180 sandpaper to sharpen spatulas.
Preparation for painting: important requirements
When carrying out work on painting the surface, it is worth considering that brick is a porous material. To completely dry and weather the wall, the house must stand for a long time in its original form.
For external work
When choosing to paint an external brick wall, you should consider the following points:
It is not advisable to paint fresh masonry. The surface must fully go through the stages of drying, weathering and leaching. This may take a year. Before painting, prepare the wall surface; it must be clean. What color should I paint the decorative plaster in the hallway? To do this, remove salt stains, wash with soapy water and allow to dry thoroughly. Excess moisture will evaporate from the surface within a week. Painting brickwork creates a modern and trendy home style
Attention is diverted from small defects in the walls. You can choose a paint color that matches other buildings on the site.
For interior work
Large and clearly visible imperfections are better to be filled or plastered. Although the brickwork should be rough with a surface without large cracks or chips, it is easier to paint this way, and the wall looks neater.
The surface should be carefully primed. Choose a deep penetration primer that creates a dense water-repellent film.
Brick, as a building material, is not entirely suitable for painting. This is due to its porous structure. In the future, removing paint from it and plastering the surface will be quite problematic.
The only option is to repaint the wall a different color.
What about other ways to decorate brick walls?
On the modern building materials market there are many other finishing materials with which you can decorate the interior walls of a room with brickwork. Thus, flexible tiles made to resemble bricks are produced from polyvinyl chloride. Sometimes you can find collections of decorative panels made of MDV/PVC. These types of panels and tiles are characterized by the fact that they are not separate elements, but a kind of panel, the area of which reaches several square meters. All this can be mounted either directly on the wall or on a metal/wood sheathing. The cost of such panels is lower than the same decorative brick, and they are definitely easier to work with.
How to choose the right material for making gypsum tiles?
Gypsum is a material that has long been used for construction and finishing. Its source is natural deposits of this sedimentary rock. These deposits are quite numerous, so gypsum is inexpensive and available to everyone. Construction stores sell rock mined from the depths of the earth and crushed into powder. The gypsum used in construction work does not contain artificial additives, is environmentally friendly and completely safe for humans.
Advantages of gypsum as a finishing material:
- does not emit harmful substances;
- has an affordable price;
- does not burn or be destroyed in the presence of fire;
- has good sound and heat insulation properties;
- takes any form.
The powder packages have markings indicating the parameters of a particular product. The degree of grinding is indicated in Roman numerals:
- coarse grinding – I;
- medium – II;
- small – III.
The strongest and highest quality castings come from finely ground varieties, but this material is more difficult to mix. Coarser grinding is easier to work with, but products made from it are inferior in strength to those cast from fine gypsum. To make tiles, it is recommended to use fine or medium grind powder.
Compressive strength is indicated by numbers from 2 to 25. The higher the number, the stronger the material. The best option is gypsum with a strength of 10 or higher.
Based on the speed of hardening, gypsum is divided into class A (sets in 6 minutes), B (from 6 to 20 minutes) and C (over 20 minutes). The hardening speed can be adjusted by adding various plasticizers during mixing. The hardening process slows down when adding lime, wallpaper glue or washing powder. If you add table salt, the solution hardens faster.
Coating Methods
Qualified construction workers use different methods of painting decorative gypsum stone:
- mass staining;
- surface application of paint;
- custom coloring to imitate different textures.
Each of them has features of the work and nuances that should be taken into account when painting.
Painting gypsum stone with a brush
To create a decorative coating for stone walls, the classic method of painting using a brush can be used. This surface method is considered the most labor-intensive, but when using an airbrush it becomes faster and easier.
An airbrush is used to apply the pigment more evenly. It is a tool that sprays paint. To adjust the saturation of the shade, it is enough to change the distance from the airbrush to the surface being treated. This technology is used when it is necessary to make smooth transitions between shades or create darker convex areas. You can use multiple airbrushes with different paints to save application time and get unusual results.
Airbrush advantages:
- creates a thin and neat colored layer;
- applies paint more accurately, which protects adjacent surfaces from unnecessary contamination;
- possibility of changing shade;
- the ability to smoothly transition from one color to another.
There are various types of sprayers available for sale. The most affordable airbrush is considered to be a spray gun. If you choose a model with a high-quality compressor, the quality of painting will not be inferior to the result of a more expensive model.
Painting in bulk with an airbrush
This method of coloring is used when independently carrying out work on the production of the material. The technology involves adding a coloring pigment to the solution. Thus, coloring occurs from within the material.
Typically, a proportion of 0.5 parts of pigment per 200 ml of water is used. The resulting mixture must be mixed with an acrylic primer. After drying, a matte varnish should be applied to the surface of the stone to secure the painted layer.
The pigment can also be added in powder form directly to plaster for casting stone. This allows you to eliminate unpleasant situations with small chips on the resulting wall: the white base will not be visible. Working with such products is also convenient, since you don’t need to be afraid that minor defects will be obvious.
The technology is considered the simplest, since the surface should not be covered in several layers. However, along with the advantages, there is also a disadvantage: the surface loses its natural appearance when painted in this way.
Applying pigment to molds
You can do it even simpler and apply the pigment inside the mold. To do this, you need to dilute the pigment and apply it to the entire form or individual areas using a brush. Gypsum solution is poured into the prepared forms. The result is a material with an unusual color.
In some videos, decorative gypsum stone is painted using impregnation, which is also applied to the molds.
DIY painting method
There are several ways to add color to gypsum stone. The most commonly used method is hand painting with a brush. Each tile is painted with a base color, and then several pieces are highlighted with a darker shade. When applying paint, care must be taken to ensure that no smudges form and that no unpainted fragments remain. This method is labor-intensive and time-consuming, so it is used for painting a small amount of tiles and eliminating defects.
The use of electric and pneumatic tools makes the job easier. Painting gypsum products with a spray gun is popular among professional craftsmen. To do this, the tiles are laid on a horizontal surface measuring 1x1 m and the base layer is applied with a spray. The technology for applying shades is simple: after the tiles have dried, a layer of paint of a darker color is applied to individual areas using an airbrush or spray gun with a fine nozzle.
Some experts believe that it is best to paint tiles laid on the wall. This makes it possible to place darker pebbles over the entire treated surface. Paint applied to plaster dries quickly, which helps to immediately identify and eliminate defects. After this, the tiles are varnished. With this surface treatment, the care of the product is simplified, since you can wipe the gypsum stone with a damp cloth without fear of smearing the paint.
Mixing pigments to create color
Painting of plaster can be carried out both during the manufacture of the product and after. In the first case, the pigment is added to the mixture or directly into the mold, and in the second - into the paint. It is difficult to select the same color of gypsum mixture in large volumes. Therefore, this method is used for the individual production of small quantities of tiles.
It is easier to prepare paint using dry pigment or liquid color. It is not recommended to mix several colors to obtain the desired shade, because when mixed with paint, colored stains may appear. With a large volume of work, it is simply impossible to obtain the same color.
If a dry dye is used, it must first be dissolved in water and then added to the paint. To prepare the background and shading mixtures, different containers are used. If the tiles are painted to look like brick, the shading color is most often made lighter than the base color. Before applying the next layer, each time it is checked whether the previous one has dried. It must be remembered that after the product dries, its color becomes lighter.
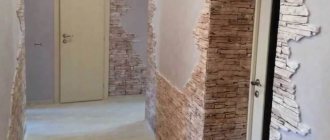
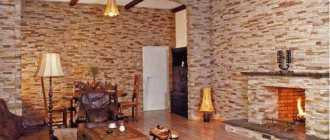
Brick wall decor options
Instead of real brick, other materials are often used for interior decoration in modern decor, the structure of which strongly resembles a brick surface.
Brick walls can be finished using materials and technologies such as:
The advantage of such materials over real brickwork is that they are much lighter than brick and occupy much less volume.
What type of decor is best to choose to reproduce a brick wall? Let's take a closer look at the most popular options for finishing brick walls. Knowing the features of each of them, you can easily create a unique wall decor at home.
Brick construction panels
Construction panels are a real leader among “bricks”, famous for their strength and water resistance. This finishing material has long conquered the exterior finishing market, and has now found its application in interior spaces.
Such imitation panels are made of plastic. This means that they are not afraid of dust, moisture, mold or rust. In addition, such brick panels are highly resistant to alkalis and acids and are not at all afraid of hot droplets of fat, which is why they are often used in the kitchen.
Advantages:
Flaws:
Some panels require additional sheathing, so this design takes up a certain part of the usable space.
Brick panels are mounted both horizontally and vertically, so the pattern on them depends on the method of placement. They are mounted on nails, screws or self-tapping screws. Most of these wall panels are mounted directly on the wall.
In decorative brick panels, each element has its own independent fixation, so an accidentally damaged part of the “bricks” can be replaced in half an hour.
Brick look tiles
An excellent alternative to brick for wall cladding is clinker tiles. This is an inexpensive and very beautiful analogue, made from raw clay. In terms of its characteristics, laying method and thickness, brick tiles are no different from simple tiles.
The surface of the clinker tile is covered with glaze, so the natural color of such a “brick” will remain for a long time, and the matte relief is difficult to damage even with a strong blow.
Advantages:
- the porous structure of this tile is identical to the structure of brick;
- perfectly retains heat indoors.
Flaws:
The clinker tiles are attached to the wall, previously coated with an adhesive solution. A mandatory step is the presence of crosses between the tiles. These crosses fix the seams between the bricks, into which a solution of a mixture of large fractions of cement and sand is then applied. This solution further emphasizes the naturalness of such brickwork.
Brick wallpaper
If you really want to freshen up the room, but time and finances for repairs are limited, brick wallpaper comes to the rescue. This interior looks unusual everywhere:
- in the kitchen;
- in the corridor;
- in a luxurious living room;
- in the little room under the stairs;
- on the balcony;
- in a strict office.
Applying pigment to molds
The essence of this method is that you need to dilute the pigment so that it is not too liquid. Apply it with a brush to some areas of the mold and pour in the gypsum solution. The disadvantage of this method is that the molds will need to be washed if you want to make other colors; they say 1-2 pours of cement will remove the pigment completely. I also didn’t like the fact that when pouring plaster, the paint (pigments) can spread.
Instead of pigment, you can use regular grout for ceramic tiles, which you can see in the video below. Grout is much cheaper than pigments, so it turns out very profitable.
Dye application technology
Km is applied to decorative stone in three ways.
There will be no economical use of dye if it is applied with a brush or roller. The layer does not lie evenly on the gypsum stone. It is convenient to perform several actions with a brush: creating a mosaic, drawing veins, inclusions, emphasizing contrasting areas, restoring individual places.
Working with a brush is not difficult. The pile is immersed in the composition, and the accumulated mass is applied to the tiles. It takes a lot of time and effort to complete the decor; the stone is painted unevenly, but the tiles will visually look like natural material. A brush is convenient for applying varnish to torn areas of the surface, increasing or decreasing the shade by halftone, and defining veins.
The consumption of CM is significantly reduced and the quality of the coating does not decrease if it is applied using a spray gun. Another plus is that the time required for painting is reduced, regardless of the surface texture. An even layer is applied with a spray gun, the color saturation and its depth are adjusted.
Original options for creating a decorative layer on a plaster product
You can show your creative talents by painting artificial stone.
Old marble effect coating
The technique of applying CM under old marble consists of the following steps:
- before painting gypsum tiles to look like stone with the effect of old marble, gypsum cladding is purchased;
- the material is kept in a room without lighting for 2 days;
- drying oil is used in a heated state, hands are protected with rubber gloves;
- The tiles are coated in 2 layers with hot drying oil using a flat brush. The layer is applied evenly, without missing areas;
- On a plaster tile, the drying oil dries and the colored veins are emphasized. They create an imitation of old marble. Most often, such decor is found in the kitchen, on fireplaces.
Imitation terracotta
Two substances are necessary to imitate terracotta: rosin, shellac varnish material. They dissolve in technical alcohol. The result of the action will be a composition that is applied to the ingots many times. The plaster decor is drying. Only when the coating dries does the desired terracotta effect appear.
Bronze cast on tiles
A bronze cast on the finishing surface can be easily created with your own hands:
- hot drying oil is applied to the gypsum surface;
- the coating dries in 10 hours;
- Bronze powder is mixed with varnish. Gypsum is processed with the mixture at least twice;
- the new coating dries;
- prepare an acetic solution: liquid - 300 g, acetic acid - 100 ml, silver nitrate - 10 g;
- dry bronze powder is applied to the dried stones, and a vinegar solution is coated on top. On the top layer of the gypsum surface, an oxidation process occurs;
- the treated areas are wiped with a velvet cloth.
Tip: wax dissolved in turpentine and applied to finished plaster products enhances the decorative effect. Liquid wax is absorbed into the plaster. Artificial tiles are treated with the solution until it stops penetrating into the plaster. The treated surface will not be afraid of liquids.
Stain treatment
A beautiful coating is formed by stain on a gypsum surface. The material for painting is applied by spray. For a more effective result, it is recommended to dip the plaster product in a hot stain solution for only 10 seconds. The brown coating becomes a substitute on the dried surface of the cladding.
How to paint decorative stone
To paint gypsum artificial stone, you should follow the stages of work. The sequence consists of several steps:
- Selection of material to be painted.
- Selection of tools.
- Preparing the stone surface.
- Applying paint.
- Drying.
This step-by-step process will allow you to get the desired result.
Tool selection
If the paint material has already been decided, you can start choosing a tool. The most important thing is a brush or airbrush. An ordinary sponge can be used for work.
In addition to the main tool you will need:
- container for mixing pigment;
- gloves and protective clothing;
- rags;
- additional brushes for decoration.
Sponges can be added if necessary.
Preparing the stone
Before painting a decorative gypsum stone, it should be prepared. To do this you need to perform several manipulations:
- Remove the previous layer of paint.
- Sand the surface.
- Blow off with a compressor or treat with a rag.
- Apply primer at least twice.
When working with new material, you need to wash and saturate it.
Coating
When painting, you should take into account the recommendations of builders:
- Fragments must be processed separately.
- When working with a finished wall, a relief is used or covered in two tones. This will prevent homogeneity.
- It is better to use a spray gun to increase the speed of work. The surface becomes evenly colored. It is considered inappropriate to work with embossed surfaces with a brush.
- If conditions permit, you can immerse the parts in the coloring composition.
- If we are painting a decorative stone made of gypsum, we should not refuse to test paint. This way you can evaluate the result in advance.
These tips will help you avoid problems when painting.
Unusual dyeing products
Drying oil for impregnation of gypsum coating Source kraski-net.ru
Coloring gypsum stone with rosin Source ozone.ru
Colored stain for decorating artificial gypsum stone Source insales.ru
- Drying oil. The main areas of its use are the base for paints and wood impregnation. When applied to a plaster coating, it creates an unusual effect of aged stone in warm beige-brown tones.
- Rosin and varnish. These two substances, when mixed with technical alcohol, can color light plaster into a brownish-red color, reminiscent of old ceramics.
- Stain. This compound is also commonly used on wood, but can be used just as well on plaster. The stain is available in various shades of red-brown colors.
Process
On the one hand, there is nothing complicated or tricky in this process, so even a child can handle it. At the same time, it is one of the most important and critical stages that can affect the appearance of artificial tiles. Therefore, you cannot approach the work without a serious approach and a bit of imagination, otherwise you can simply ruin the entire project, including the casting.
Make sure that in the second case the material is not stained with glue or joint filler. If you don’t want to worry about this, open the tiles first with varnish.
Water-based acrylic paints for working with decorative gypsum stone
Painting each tile separately is best done by those who do not yet have the proper experience in this craft. If you are already skilled at this, paint it directly after laying it on the wall. In this case, you will be able to better see the final drawing; the gypsum tiles will be colored more naturally and therefore fit better into the interior.
Remember also that this method requires:
- responsible approach;
- preliminary sketching of a painting plan;
- correctly selected color combinations;
- calculations of light and shadows.
In this situation, you will get some more shades of these colors, so you should not mix many different shades. Be aware that plaster absorbs paint differently, so one color can produce multiple finishes.
Paint application process
There are a sufficient number of technologies for painting artificial gypsum tiles, including airbrushes and spray guns. In this article we will look at several effective and at the same time simple methods that will show how to paint artificial stone at home or in production.
Techniques for applying paint compositions
Plaster has been painted in interiors and exteriors for thousands of years, so many techniques have been developed. Let's look at the main ones:
- Simple coloring;
- Multi-layer painting;
- Gilding, silvering, bronze plating;
- Creation of relief;
- Patination;
- Application of a coating that imitates natural materials - marble, granite, wood, brick;
- Finishing with decorative plaster.
Before starting work, you need to make sure that the paint has the correct consistency: not too liquid, otherwise drips will appear, not too thick - this will lead to an increase in the thickness of the layer and overspending. When painting with brushes, it is necessary to apply not too much composition so that there are no drips or splashes. The brush should be cleaned of excess paint on the edge of the can. Stray hair that has fallen from the brush should be immediately removed with a flute or pad before it has time to dry to the surface.
The second mandatory condition is that the gypsum product must be dry and clean; the purchased decor must be kept for 2 days at room temperature before painting. Before changing color, the plaster must be sanded - a very difficult task, especially with deep relief.
Begin applying the paint layer from the deepest areas of the relief, painting small details with thin soft brushes. The range of brush numbers is 1-24, depending on the size.
The process of painting stucco
Paints that are too thick are diluted up to 10% with water or up to 5% with solvent, depending on the composition. Work with paints and varnishes is carried out according to the manufacturer's instructions. The primer and paint must be compatible in composition; it is advisable to purchase them from the same company.
The paint is applied in 2-3 layers, drying every 3-6 hours. Application of the composition, drying time, compatibility of paint and primer is always determined according to the manufacturer's instructions.
Let's take a closer look at the techniques.
Simple basic coloring
For simple painting in one tone, take acrylic, lime or water-based paint of the desired color, a primer of the appropriate composition, and, if desired, varnish. When drying, gypsum loses its color intensity, therefore, and also to protect the surface from damage, it is coated with varnish. It is better to use water-soluble varnish - it has almost no odor and dries quickly.
It is better to do the work not with a brush, but with a spray gun or an airbrush - this way the primer and coating will form a more even layer, reducing consumption, but it is difficult to paint over deep depressions; they will have to be finished with a brush.
Painted plaster products
How to paint decorative plaster tiles:
- The dry surface, free of dust and dirt, is primed. The primer reduces absorption, reducing the consumption of the base compound, while at the same time ensuring adhesion of the layers. It is advisable to tint the primer - this will also reduce the consumption of the base paint and increase the brightness of the color.
- The soil has dried - apply a layer of paint; on an untinted base you will have to repeat the operation 2-3 times.
- Dried plaster is coated with varnish.
When using new generation acrylic paints we obtain the following coating:
- with lotus effect (contains wax) - resistant to dirt;
- the glow effect is provided by the content of marble dust or finely ground quartz sand;
- colored and shiny inclusions - with fiber or chips.
The latest technologies make it possible to achieve original effects on the surface.
Multilayer painting
Painting decorative gypsum stone in several layers is used if the product needs to achieve a smooth transition from one color to another, for example, painting tiles with a voluminous decor in the form of an autumn maple leaf or flower. We take paint of 3-4 shades:
- yellow;
- orange;
- crimson;
- terracotta.
Painting gypsum stucco begins with the lightest tone; apply a layer of yellow paint over the primed base. After it dries, apply the orange tint closer to the edges. We smooth out the border of the flowers with a pad made from a soft cloth or sponge. Along the edge of the leaf there is a section of crimson coloring. We also smooth out the border, achieving a smooth transition from one color to another. We paint the background with terracotta and draw veins on the leaf.
Painting stucco
Gilding, silvering, bronzed
Painting plaster stucco with gold, silver or bronze paint gives the interior solemnity and aristocracy. This technique is typical for classical styles of architecture from Renaissance to Empire. In the classical technique, gilding was done with thin leaves of gold leaf or gold leaf; now they often use metallic paint in aerosols. Traditional gilding is performed as follows:
- The surface is prepared - all chips and cracks are repaired, sanded with a special machine or sandpaper manually, dust is brushed off with a brush or vacuumed, the surface is primed with an industrial compound or glue;
- A layer of gold plating paste mixed with glue is applied over the dried primer;
- Next, apply gold leaf or gold leaf with a soft bristle brush and carefully, so as not to tear, smooth it to the base, repeating the relief of the stucco.
Painting plaster gold
It is much easier and cheaper to use acrylic compositions with a metallic effect in aerosol packaging: they dry quickly, have almost no smell, and apply well. Primer and varnish are selected according to the recommendation of the manufacturer.
Painting gypsum bronze is done over a primer with heated drying oil. Powdered bronze is diluted with varnish and applied with a brush.
Process sequence:
- Preparation of the base - cleaning, dust removal, priming;
- The surfaces are painted 3 times - 1 layer is the lightest, the entire product is covered with liquid paint, after drying, the convex areas are processed with a grinding machine or sandpaper, the dust is brushed off; 2nd layer is thicker, paint the recesses using paint with the addition of bronze powder; 3rd layer - paint thinned with turpentine, with the addition of beeswax to give a metallic shine. In order to imitate patina, some convex areas are painted with the addition of chromium oxide, or a mixture of bronze and graphite is used. Another option is to apply a solution from a mixture containing silver nitrate (10 g), vinegar (100 g), water (300 g) over the painted layer of bronze powder in varnish. Due to oxidation, bronze develops a patina.
- The painted and patinated surface is saturated with a solution of wax in turpentine until absorption stops, and wiped with velvet cloth.
Bronze painting of plaster
Painting plaster like silver
Now the process is significantly simplified: metallic paint is sprayed from a can on the primed surface, and areas of unpainted paint are corrected with a thin squirrel brush. Often, individual elements or edges of protruding parts in a pattern are trimmed with gilding. In this case, it is important to first protect areas that do not need finishing. This can be done using masking tape or a portable cardboard screen.
Creating relief
You can emphasize the reliefs of stucco decoration or plaster tiles using paint of 2-3 shades of saturation. They start with the lightest tone, covering the decor completely, paying special attention to the convex parts - there should be no unpainted areas here.
Then they take a darker shade, cover the buried parts of the relief with it, smoothing out the transition of tones with a brush with stiff bristles without paint: from light to dark. Accidental splashes or incorrectly applied color are immediately removed with a dry brush or rag.
Stucco relief
Lastly, the background or the deepest depressions are covered with the darkest colors, also achieving a gradual color transition with a hard brush.
Patination
If we want to achieve the look of an ancient, authentic finish, we paint the gypsum stucco molding with an aging effect: the base is tinted with primer or natural drying oil to a yellowish tint, then the main coloring composition is applied with fillet brushes. To paint sunken areas, we use thin brushes with soft bristles. You can achieve transparency of the paint layer by changing the thickness of the paint layer in different areas: a thicker layer is applied with a swab (rag or sponge), a thin layer is shaded with a brush with short, stiff bristles.
Intermediate gypsum patination process
The product can be patinated using a grinding machine, sandpaper or a metal brush: the painted, dried surface on the relief convexities is sanded, depicting abrasions. This technique looks great on stucco painted to look like wood (brushing effect) or coated with metallic compounds.
Plaster patination
Plaster patination
Application of a coating that imitates natural materials - marble, granite, wood, brick
Painting gypsum tiles to look like stone - this design technique for decorating gypsum is used to achieve an imitation of natural stone. Painting plaster to look like marble using a traditional technique involves using heated drying oil on a well-dried stone. Uneven absorption of oil by plaster produces stains reminiscent of marble veins. The dry product is coated with varnish to protect it and obtain shine.
Painting plaster to look like marble
To give gypsum tiles the appearance of granite, they use the spraying technique: the tile is primed, painted in the main background, then several brushes of varying degrees of hardness are taken and paint in colors different from the main background. Apply excess paint to the brush and use your fingers or a special tablet to ensure that the paint splashes onto the decor. Brushes of different hardness and bristle lengths, shades of paint produce splashes of different sizes and colors, resulting in a texture reminiscent of granite grains. To perform this technique well, you will first have to practice on an unnecessary sheet of cardboard.
Painting plaster to look like wood is done with a stain that imitates the colors of different valuable types of wood. You can get a characteristic wood pattern by making longitudinal movements with a rigid flute with different pressure; this results in uneven thickness of the layer of paint composition.
Painting to look like terracotta is done with rosin and varnish diluted in industrial alcohol.
How to paint decorative bricks made of plaster: cladding with decorative bricks looks completely different in different interior styles; the painting method is simple or multilayer.
Painting plaster to look like granite
Painting decorative gypsum bricks
Country styles are characterized by painting gypsum tiles to imitate brick in white, cream, or grayish colors with a varnish coating that imitates glaze. Gypsum tiles are dipped in paint of the desired tone, dried and varnished.
Painting gypsum tiles for a loft style, when the look of clinker brick is required, requires multi-color painting: terracotta, ocher and blue-black pigments will create a color transition characteristic of hand-made clinker tiles. To imitate hand-made clinker, the surface of the ingot is pre-treated with sandpaper and a brush with metal teeth, adding irregularities characteristic of hand-made products.
Finishing with decorative plaster
The latest technologies provide paints and varnishes that imitate any surface. Now you can buy ready-to-use decorative mineral plaster with quartz grain or crushed marble of different fractions, which will give the tiles the appearance of natural stone with a wild, ground or polished surface.
Silicone and latese paints replicate the texture of Venetian plaster, patina, velor or velvet. Without multi-layer painting, you can achieve many unique color and texture effects with just a spray gun. The same compositions will give the gypsum moisture resistance.
Painting 3D gypsum panels is done using a variety of techniques, but since their pattern is very active, you should be wary of the idea of bright tinting. Basic painting in one color with light accent tinting of individual parts is best. The easiest way to decorate is with a spray gun.
Painted 3D panels in the interior
Painted 3D panels in the interior
How to paint false bricks
The imitation of masonry can be made in a single color - white, light brown or beige. The most natural look will be imitation of silicate, clinker or red brick. Using the same method, you can update a boring monochromatic plaster coating with imitation bricks or “wild stone”.
If the artificial masonry looks somehow “boring”, you can manually lighten or darken individual blocks. The most attractive look is the combination of fragments that are more different in saturation in one color scheme - milky, terracotta, sand or rocky gray. You can add pigment to the water-based whitewash for bricks on the corridor wall. The surface can be slightly shaded with a sprayer with a bronze or metallic effect.
Depending on the desired effect, coloring is carried out using different devices:
- Spray bottle;
- Spray paint;
- Paint brush;
- Whitewash brush;
- Porous sponge;
- Roller with decorative attachments.
To treat a solid wall, it is recommended to treat it with a primer or special impregnation. Finish coating – acrylic, silicate, any interior paint recommended for decorative plaster (same base).
The most natural look will be imitation of silicate, clinker or red brick.
Advantages and disadvantages
Painting decorative stone has its pros and cons:
| Advantages | Flaws |
|
|
Attention Painting requires not only creativity, but also skill. To select the future appearance of the cladding as accurately as possible, you can use online works, which are presented with step-by-step instructions.
Hard tile bricks
An imitation of a brick wall can be successfully achieved using hard tiles. There are various options for hard tiles; as a rule, they are all installed using identical technology.
Types of hard tiles
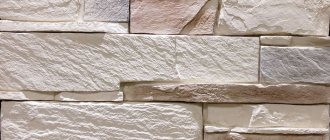
The following types of decorative bricks are considered the most popular:
- Gypsum tiles. Such tiles are most common among consumers. Due to the plasticity of gypsum mortar, bricks of various textures are produced. The disadvantages include the fragility of the material, as well as the inability to use in rooms with high humidity.
- Cement tiles. This material will be more expensive than gypsum tiles, but this type has a number of advantages, such as high strength, the possibility of installation in wet rooms, and susceptibility to care and washing.
- Clinker tiles. The most similar imitation of brick will be on the wall when using the clinker variety. The price tag for this tile is significantly higher than other options, but the difference in cost is offset by the following advantages: the possibility of cladding facades, high strength, resistance to abrasion and ultraviolet radiation.
Gypsum brick tiles
Tile installation technology
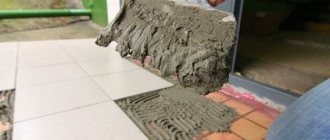
The rules and technology for facing a wall with hard tiles differ little from the technology for laying soft material. The difference will be hidden behind the thickness of the glue and the process of cutting the material. According to the first point, the thickness should not exceed 0.5 millimeters, and hard tiles can only be cut with diamond-coated circles. The exception is gypsum tiles - they are easy to cut with a knife.
Installation of rigid brick tiles
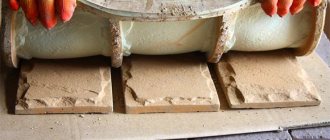
How to make a mold for casting plaster tiles
Brick finishes can be made from homemade tiles. To do this, you need to take an impression from several individual bricks, thereby preparing the mold for casting. A gypsum solution will be poured into the resulting form, after which the finished decorative stone can be mounted on the wall.
The side of the brick that is taken as a sample is covered with grease or heated wax mixed with kerosene. This is necessary in order to prevent the silicone from sticking to the surface. As soon as the layout dries, the treated side is covered with a layer of silicone sealant, 1-1.5 mm thick. The mold is set aside until the silicone has completely polymerized.
After the silicone has hardened, the mold is coated with polyurethane foam. After the foam has hardened, the sample is removed and the bottom of the mold is leveled.
A gypsum solution is poured into ready-made molds, which sets very quickly and takes on the appearance of a finished finishing material. If you have 10 molds, you can make several square meters of decorative stone in a couple of days.
Brick tile mold
Preparatory work
For quality work, it is important not only to choose the right paint, but also to first prepare the decorative brick for painting, because the service life of the decorative layer depends on this.
Preparatory work before applying a layer of paint includes several steps:
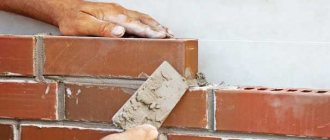
- Cleaning. First of all, you will need to remove all dust, traces of dirt, remnants of cement mortar and old finishing material (if any) from the brickwork. All seams must be carefully inspected. There should be no chips, cracks or falling out mortar on the wall. If any element has lost its strength, it must be removed and the resulting gap sealed using sand-cement mortar. Silicone sealant can be used. Using a similar principle, it is worth removing chips and small cracks. When the sealed areas are completely dry, they will need to be treated with sandpaper.
- Removing efflorescence. As practice shows, over time, efflorescence appears on the brickwork, which is removed with a hard-bristled brush and a solution based on bleach (the solution is prepared in the following proportions: 3 parts water and 1 part lime). There is an opinion that efflorescence can be easily masked with a paint composition, but it is worth noting that the effectiveness will not last long, and salt deposits will begin to appear on the finish after some time.
- Get rid of fungus and mold. If there are traces of fungus and mold on the wall, they must be immediately treated with special antiseptic agents. It is not necessary to purchase expensive professional products for this; it is enough to use “Belizna” and dilute it in clean water in a 1:1 ratio. When the wall is processed, you should wait about a quarter of an hour, and then carefully remove the mold and mildew with a scraper.
- Removing greasy stains. It is recommended to pay special attention to greasy marks. This is due to the fact that many paints and varnishes do not adhere well. To neutralize greasy traces, you will need to use degreasing solutions, which can be purchased in specialized stores.
- Washing the wall with a soapy solution. When the antiseptic composition has dried, the surface that is planned to be painted later will need to be washed with a soap-based solution. After cleaning, it is recommended to wait some time until the wall surface dries.
- Padding. After preparing the brick wall for painting, you should wait from 48 hours to 7 days - this time will be enough for the building material to dry completely. After this period of time, you can begin to prime the wall in 2 layers. When choosing a primer, many experts recommend taking into account the specifics of the surface, as well as the conditions in which the wall will be used. If necessary, the level of adhesion between the brick wall and the paint can be increased; for this purpose, special impregnations based on acrylic or latex additives are used.
If the wall is exposed to contact with water, it will be pre-primed. “Polyfluid” is perfect for this - a preparation made on the basis of synthetic resins, which, after application, penetrate deeply into the structure of the brick, after which the crystallization process begins. As a result, all capillaries become clogged, which leads to the appearance of a barrier that prevents the penetration of moisture and water. You can apply the primer with a roller, brush or spray gun - everyone chooses the most convenient option.
The use of special impregnations allows not only to improve the adhesion of paint to the wall, but also to reduce the consumption of paints and varnishes.
Old marble
If you like the effect of aging, you can treat the product so that the material becomes similar to old marble.
The work is carried out in a certain order:
The purchased stone will need to be kept for two days in a dark room. If you created the product yourself, dry it thoroughly (maximum at 55 degrees). Warm up the drying oil
This should be done very carefully and you will need to use gloves when working. The material is applied using a flute brush. It is recommended to apply it in 2 layers
Try not to leave unimpregnated areas: the product should be processed evenly. After some time, the surface will look like old marble.
Conclusion
For continuous production of tiles, I would choose the third painting method; it takes the least time and the stone turns out beautiful. You can use not 2, but 3 or 4 colors on one stone, the main thing is to choose the colors harmoniously.
Read also: How to make plaster several times stronger? Experiment
If I were making a stone for myself, I would most likely choose to paint it with a brush; it produces a very beautiful aging effect. But first, of course, I would paint it in bulk, and then apply pigments to the surface.
And I want to say a little more. In 99% of cases they buy white stone from me, I also talked to other stone makers, they also most often buy white stone, so if you are planning production, then first “hone” it properly, and then start painting.
Read more: DIY installation of decorative stone
5 / 5 ( 1 voice )
Author of the article
Sergey
Builder/plumber and just a good person
Articles written
16
about the author
5 / 5 ( 1 voice )
Similar articles:
Why paint a brick wall?
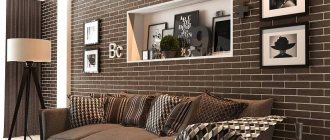
Artificial ceramic stone is a popular material for construction work. For the construction of walls, ordinary brick is used, the surface of which is rough and unattractive. When choosing masonry as a decorative element, it is necessary to improve the aesthetic perception of the surface. Painting brick white looks great in rooms decorated in loft, modern, and high-tech styles. The characteristic relief of the walls is preserved, but its presentability is enhanced.
Photo 1. Painting bricks white makes the room brighter
Brick facades of buildings are painted for various reasons:
- As a result of long-term use, the original appearance has been lost.
- The masonry has partially collapsed; repairs require plastering and color restoration.
- Construction of extensions where the creation of an overall harmonious composition is required.
- The desire to change the decorative appearance of the structure is also a powerful argument (photo 2).
Photo 2. Changing the decorative appearance of the facade by painting
Practical advice
New brick walls are painted 1.5 years after completion of construction work, otherwise you will have to face a number of troubles - the appearance of white spots and cracks.
When painting decorative bricks, it is recommended to apply a thin layer of paint and varnish; this approach will avoid the appearance of drips.
If you want to make the paint layer thicker, you need to add a mineral filler, which will make the facing material much more resistant to damage.
To achieve excellent results, you should take a responsible approach to surface preparation.
Tools and materials
After you have decided on the painting material, you need to prepare your working tools. Usually a brush or an airbrush is chosen. Painting can be done with any tool, for example, to create a coating, some use an ordinary sponge. But the advantage is on the side of the airbrush:
- creates a thin and neat layer of paint;
- does not smear surfaces during operation;
- when adjusting the spraying distance, one and the same paint looks different on gypsum stone;
- The surface color is even and uniform.
So, for painting you will need:
- dye;
- containers for water and mixing paint;
- gloves;
- rags;
- brushes and sponges (for decoration);
- airbrush (if the work will be done by him).
Tip: Construction stores offer a wide selection of airbrushes. They are suitable for painting almost any surface. You can also choose a cheap option - a spray gun, it will cope with painting artificial stone
The main thing when buying is to pay attention to the following: the strength and power of the compressor.
A brush is not the best option for painting for the following reasons:
- leaves streaks and drops;
- professionals don't use it;
- a thick layer of paint remains;
- individual gypsum elements may not be saturated with the next layer.
It is better to use a brush when it is necessary to treat torn areas.
We paint the product “to look like stone”
A short lesson in painting like a stone.
We are not interested in painting to look like brick or just rubble stone. The question is how to paint specifically for decorative stone, marble, jasper, malachite, and so on. This algorithm and sequence is the basis of the direction. By understanding and trying, you can learn to imitate different options and textures.
What we need for painting: 1) Brushes 001, 1,2 2) A sponge, or a piece of foam rubber, or a toothbrush 3) Acrylic or oil paints, whichever you prefer. Oil paints allow for deep, layered textures and require more experience working with paints. For a beginner, you can start with acrylic or practice on paper with simple watercolors. 4) Well, actually, what are we going to describe?
1) Step one
We apply matte white primer to the product we need. Then we apply the first primary color, which we will use for painting. In our case it is black.
2) Step two
Using a sponge, a piece of foam rubber or a toothbrush, apply the first texture. The color of the texture depends on what we want to get in the end. To imitate jasper, you can use white, gray and purple colors, applying them one after another. In our case, we will use two colors: light green (pale green) and light green (variations and color shades of green can be any, do not be afraid to experiment with color). Apply the first layer and let it dry. When using acrylic paints, this will take 10-15 minutes.
3) Step three
After the prepared base has dried, we begin to draw lines. It is advisable to draw lines with brushes of varying fineness from 001 to 2 (brush size). Direction, discontinuity, thickness of lines - it all depends on your imagination. To make it easier, imagine that you are drawing lightning breaks
The color of the lines also depends on what stone you are imitating. In our case, we mix a little green into the white color and draw lightning.
After complete drying, we apply a layer of glossy varnish.
An example of painting under “gray marble”.
A small, as they say now, life hack
If you have no desire to paint the surface like a stone, then you can create an imitation of the structure of an ornamental stone by simply mixing two different colors of polymer clay
I hope the lesson was interesting and instructive. I invite you to visit my page and see my work.
Required Tools
Before painting decorative bricks, it is recommended to first select a tool for applying paint. In this case, it will be necessary to take into account the degree of roughness of the masonry, as well as the effect that is ultimately necessary:
- A brush is perhaps the most convenient tool for applying paint. The brush allows you to feel the surface and distribute the paint evenly. It is recommended to move the brush along the brick pattern. If you plan to use acrylic paint while working, then it is best to choose brushes made of polyester. Alkyd and oil paints are best applied with a natural bristle tool. Many experts recommend using flat brushes, no more than 10 cm wide. Narrow brushes with an oblique cut are suitable for corners;
- A roller is a convenient tool used to apply the first layer. Do not forget that building bricks quickly absorb applied compounds. A roller made of foam rubber or wool is suitable for painting; the pile must be of medium length;
- spray gun - this option is suitable for the quick process of painting flat areas of a large area. To obtain the desired decorative effect, it is recommended to configure the spray gun before use;
- sponge - used mainly for brick walls located indoors. Using a sponge, you can create the visual effect of an old coating or one that has faded under direct sunlight. This technique allows you to highlight the wall and make the decorative coating transparent. A sponge is an excellent option, suitable for painting textured surfaces; if necessary, you can tint rough edges with it, while the paint penetrates to the full depth. This method of painting allows you to achieve silver or bronze highlights. If there is a need to make the wall contrast, you can add spots or use special stencils that are sold in specialized stores.
In addition to tools, you will also need other equipment, namely: protective clothing, rubber gloves, plastic film and construction tape, which allows you to protect adjacent surfaces from paint splashes.
If a roller is selected for applying paint and you need to process an area at height, then an extension rod can be installed on the handle.
List of tools
To create a decorative element that attracts attention with your own hands, you need to use tools that allow you to paint. The main devices include:
The main devices include:
- airbrush or spray gun;
- brushes and rollers;
- sandpaper or sanding machine.
Most often, an airbrush is used for painting.
With an airbrush, you can give the stone different shades - to do this, you simply adjust the flow of paint and the distance from the tool to the working surface. For painting the material, a conventional airbrush with a compressor equipped with oil cooling and an automatic pressure regulator is suitable.
It is very rare to paint the entire facing stone with a brush, because the device leaves streaks and unsightly stains. A brush is an excellent tool for highlighting certain areas.
Painting artificial stone proceeds efficiently, without any hiccups, if a set of tools is prepared in advance. It differs in the number of required items depending on the quality of the surface. For the old finish, more of them are prepared, for the new stone cladding - fewer of them. Basic list of tools:
- remove dust and dirt from the surface with a vacuum cleaner;
- the coating is sanded with sandpaper or a grinder;
- hard-to-reach places on the wall with decoration or its individual elements are painted with a sponge and brush;
- saves money and applies CM evenly with a sprayer.
Briefly about the main thing
Gypsum for decorative stone is used in almost every modern design. This material is a budget and modernized version of conventional brick. It is lighter, easier to install and suitable for all types of surfaces
That is why when choosing an artificial surface, attention is paid to gypsum stone
A large assortment allows you to choose the material for each room. But the types are very different from each other, so it is worth studying in detail the properties of each and comparing them with the technical characteristics of the room
You can do the installation yourself, but it is important to follow all the rules and strictly follow the instructions. Only then will gypsum tiles become an excellent addition to the interior of the house
Stone impregnation
Make sure the surface of the stone is clean and dry. You can start hydrophobic impregnation.
Impregnation of artificial stone prevents chipping, protects against excessive moisture, premature abrasion, closes pores and strengthens the structure of the stone. Without soaking, the paint will lie unevenly, with “camouflage” spots, and its consumption will also increase significantly.
Hydrophobic compounds come in different forms. It is better to select the most suitable composition for your stone model, for example, choose latex impregnation.
Impregnate the stone at least twice, in as uniform a layer as possible, using brushes, a roller, a sponge or a spray gun for this purpose. After processing, while any of the layers dry, do not allow water to come into contact with the stone.
Starting work on the surface of the stone
Before painting a decorative stone made of gypsum or cement, its surface is prepared:
- Contaminants are removed without the use of water;
- if necessary, surface grinding is carried out;
- surface treatment with impregnations allows you to reduce the consumption of CM and increase the service life of the finish. The impregnated surface is subject to wet cleaning;
- time is allowed to allow the artificial finish to dry.
Advice: you cannot start applying CM without inspecting the decorative tiles for defects.