The most popular type of finishing materials is wallpaper. This is explained by the fact that even a non-professional without experience or special knowledge can handle their installation. High-quality wall pasting implies a perfectly flat surface, which is often achieved by covering it with plasterboard sheets. For this reason, you should know how to properly glue wallpaper onto drywall, what tools and compounds may be required for this.
Padding
Applying a primer to the surface of plasterboard sheets is mandatory, as it ensures high-quality adhesion of the plasterboard to the putty. In addition, the primer composition prevents the development of mold fungi.
The most popular primer mixture is acrylic based. You can buy a similar composition in ready-made form or in powder form, which will need to be diluted in accordance with the manufacturer’s instructions.
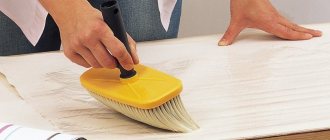
The surface should be primed with a brush, and the product should be distributed as evenly as possible on the wall. After processing, it will take some time for the primer to dry thoroughly. The manufacturer writes on the packaging how long it takes for the composition to dry completely.
Is it possible to apply liquid wallpaper to drywall without putty?
Liquid coating is a finishing material for a flat surface, suitable for drywall. It is plastic, durable, and provides additional protection for the HA surface. Since wallpaper is sold in the form of a dry mixture, it is diluted to a certain consistency. The mixture has the following qualities:
- The mixture applied to the surface does not have seams.
- Does not contain any harmful impurities.
- Increased sound and thermal insulation.
Among the disadvantages:
- Liquid formulations do not tolerate moisture.
- Absorbs odor and dust.
To apply the wallpaper mixture to a plasterboard surface, the following preparatory work is carried out:
| No. | Material used | Application on HA surfaces |
| 1. | Primer | Cover drywall, especially fastening points, as well as after puttying |
| 2. | Reinforcing tape | Close all gypsum board joints using KNAUF putty. |
| 3. | putty | Apply the finishing mixture to cover the plasterboard surface. |
After filling, the surface must dry. It is cleaned of remaining pieces of solution with sandpaper. Afterwards they prime.
The liquid coating is prepared according to the instructions on the package.
There is no need to pour water into the wallpaper mixture by eye. There is strict adherence to the technology for preparing wallpaper for application.
Working with a mixture of wallpaper on a GC surface:
- Before direct application, the mixture is thoroughly mixed to achieve uniformity.
- Place a piece of wallpaper on a plastic tool and distribute it evenly over the surface, starting from the corner.
- If unevenness appears during the distribution of wallpaper over the surface, it is possible to correct them within an hour.
- It will take 24 hours to dry.
Having studied the process of applying wallpaper to the prepared gypsum board surface, many home craftsmen avoid mistakes.
Sealing cracks between plasterboard sheets
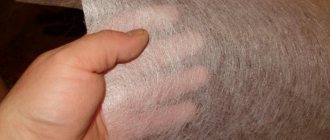
To remove cracks at the joints of sheets, a serpyanka is used. This material is a fiberglass or lavsan tape that looks very similar to a medical bandage. The serpyanka must be glued tightly to the joints of the drywall, and no cushions should appear from the air.
After the seam is sealed with sickle tape, putty is applied to the joint, which is subsequently thoroughly leveled. After such treatment, the joint becomes almost invisible, as it merges with the surface of the sheets.
Masking joints between drywall boards
To seal the joints, a special mixture is used, which can be purchased at any building materials store. The powder is diluted in water in compliance with the proportions specified by the manufacturer on the packaging. The mixture must be applied very carefully into the joints between sheets of drywall, distributing it evenly with a spatula along the entire length. You should not use too much of the mixture, otherwise, after it dries, bumps will be visible, which will spoil the appearance of the interior after wallpapering.
putty
Even if the plasterboard wall looks perfectly smooth, careful puttying will be required before you stick wallpaper on it. If you skip this step, big problems are inevitable during the next repair. The wallpaper sticks tightly to the drywall. If there was no putty layer, it will be impossible to tear them off. To soften the adhesive layer, heavy wetting will be required, and this will damage the drywall.
Without water, you will have to dismantle the old wallpaper using a spatula and brute force; as a result, the top, cardboard layer of drywall, as well as its core, will most likely be deformed and partially destroyed. In addition, without putty, after drying, the joints of the plasterboard sheets (seams) will appear on the wallpaper, which will greatly worsen the appearance of the walls. To avoid all these troubles, be sure to putty the drywall before wallpapering.
After smoothing and drying the putty layer, it must be sanded with fine-grained sandpaper. A rough base has better adhesion.
You can make your own composition for puttying work from gypsum or cement, but it is better to buy a ready-made dry mixture at a hardware store.
There are two types of similar building materials on sale:
- finishing putty, which is necessary for the final stage of finishing; after its application, the wall surface will become unusually smooth, and the smallest defects will be eliminated;
- The starting one makes it possible to quickly and efficiently make a wall with defects smooth.
The putty solution is prepared by adding water.
Advice! To make the resulting mass as homogeneous as possible, use a construction mixer.
To putty the surface you will need three spatulas:
- one small one for taking the solution from the container;
- two larger sizes, 40 and 60 cm long - for spreading and leveling the composition.
When applying to the surface, you need to make circular, even strokes, the tool should be at an angle of 45˚. The optimal thickness of the formed putty layer is 1-2 mm.
After the next portion of the mixture is applied to the wall and smoothed with a small spatula, you need to remove excess putty from the tool. Then you need to repeat the action from the beginning: “apply - level - remove residues from the spatula” until the entire wall has been processed.
If minor defects are visible on the surface, they can be easily removed by sanding with sandpaper. Initially, it is carried out with coarse-grained sandpaper, and later with fine-grained sandpaper.
Advice! Sand the wall carefully, as sudden movements can cause chips. To remove them, you will need to putty the wall again.
During the surface grinding process, a lot of caustic dust appears. For this reason, before starting work, protect your respiratory tract and eyes with personal protective equipment.
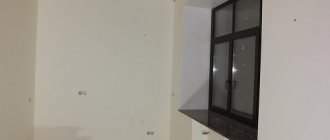
Preparing the walls
You should carefully inspect the surface, highlighting large cracks, defects, dimensional errors, protruding parts of fasteners, voids and damage. The joints are masked with joining tape so that the gypsum boards can expand. Many people make mistakes in this, especially at heights, by fastening the ceiling and walls tightly, without cracks or gaps , after which cracks appear.
For high-quality work, the gap between the sheets is initially puttied, reinforcing tape (sickle tape, reminiscent of a bandage) is glued, then joining tape. After all this, the wall is also puttied with mortar over the tape. It is important to keep in mind that all operations are performed without interruption , due to the rapid drying of the solution. After which the solution is allowed to dry for 1 day.
When choosing a putty, you should pay attention to expiration date , area of application and conditions under which it must be stored.
For defects less than 2.5 cm, starting putty is suitable, less than 0.5 cm - finishing putty, the remaining gap should not exceed 1.5 mm. It’s better not to try to save money - it will take more solution, and the quality will be worse than when using high-quality mixtures.
After the first one has dried, a second layer of putty is applied using a wider spatula, which also cuts off unevenness and smoothes out the lateral transitions of the layers. Putty helps not only to level the walls, but also to significantly strengthen the structure.
After the second layer has dried, the joint is sealed with a third, more liquid one. Each subsequent layer should overlap the previous one in width by 50 cm . When the seam dries, it must be carefully processed using coarse-grained, then fine-grained sandpaper , being careful not to damage the panels.
When sealing seams, you may encounter “steps” between the panels. In this case, it is better to cut the edge of the protruding sheet at an angle of 45 degrees to soften the transition.
The mixture is prepared in small portions, using the instructions indicated on the package, and thoroughly mixed with a trowel or mixer. The mixture must be applied carefully, stretching it as much as possible over the surface in a minimal layer. It is best to run along the wall with a large spatula, identify the largest defects, and pay special attention to them; small cracks will not be visible.
The corners are also initially sealed, after which two tapes are glued and the wall is leveled on both sides of the corner with a spatula. For the outside, you can fasten a special construction angle instead of tape, which allows you to increase the strength of the structure.
The screw caps are tightened more tightly so that they are 1 mm deeper from the sheet level. They also need to be covered with a spatula crosswise , cut off the excess and sanded. If the panel near the screw is damaged or there are cracks, then you need to secure reinforcing tape over the screw and putty.
In case of preparation without putty, you need to treat the screws with a special solution and stick two tapes, for reliability - reinforcing and joining .
After sanding, dust forms on the walls, which can be eliminated by treating the wall with a primer or a weak adhesive solution; after drying, you can glue the wallpaper. It is important to use a primer suitable for drywall; there are mixtures that are not suitable for such structures.
To prevent drywall from cracking when shrinking or from being flooded by neighbors above, it must be secured at the joints with reinforcing tape made from fiberglass and mounted with an adhesive base.
Large sheets of fiberglass called gossamer are used. It is glued to the entire surface of the drywall, after which it is puttied and finished with wallpaper. It is important to know that the web is secured with a specialized adhesive ; neither wallpaper glue nor its analogues are suitable for installation. This will also help protect the plasterboard from cracks.
Return to content
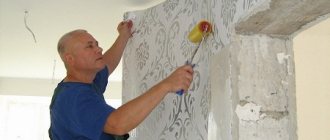
Wallpapering
Wallpaper should be glued to drywall only after the surface is prepared and completely dry.
You will need:
- wallpaper;
- adhesive composition corresponding to the type of cladding;
- container for preparing glue;
- plastic spatula;
- rubber roller;
- wide brush;
- short pile roller;
- a rope with a heavy object at the end or a plumb line (to position the canvas strictly vertically);
- stepladder (table, chair or stool).
If the wall surface is carefully and correctly prepared, then covering it with wallpaper will not be difficult.
Wallpaper installation instructions:
- Use a plumb line to measure a straight line near the window, to make it more convenient, draw it with a pencil.
- Cut the wallpaper, its length should be equal to the height of the wall, plus another 5 cm for allowances near the floor and ceiling (bottom and top).
- Prepare a glue solution (the composition should be selected in accordance with the type of wallpaper).
- When diluting the mixture, add 200-400 ml less water than recommended in the manufacturer's instructions. This is explained by the fact that wallpaper sticks much better to glue that has a thicker consistency.
- Start pasting from the window, gradually moving towards the door. This will make gluing errors less noticeable.
- Spread the area of the wall on which the canvas will be attached with adhesive. The width of the strip should be slightly larger than the width of the wallpaper.
- Mixtures containing coloring pigments are very convenient to use. Such a product will not appear through light-colored wallpaper, since after drying the color completely disappears.
- Lay the canvas on a clean, flat, horizontal surface and spread with glue. If necessary, leave for soaking (usually information about soaking time is contained in the instructions on each roll).
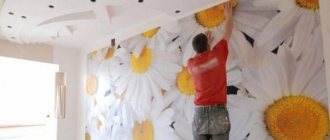
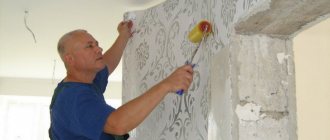
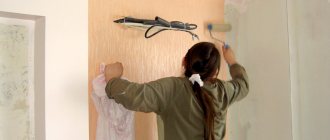
- Start gluing the canvas from the ceiling, gradually moving from top to bottom and from the center to the edges. Smooth out the glued fragment carefully, but without strong pressure, this will ensure secure fastening.
- After the canvas is glued to the wall, step back and take a closer look at it. If any air bubbles or wrinkles remain, they should be removed immediately. They do not disappear after drying.
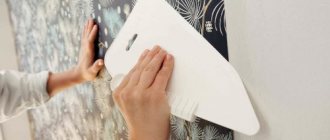
Advice! Wallpaper, the surface of which has bulges or a three-dimensional pattern, should be smoothed exclusively with a roller, as the spatula will damage the relief of the pattern.
Pasting corners
The most common mistake when gluing walls yourself is attaching wallpaper to the corners of the room. Two adjacent panels must be glued exactly end to end.
If the middle of the sheet hits a corner or adjacent sheets overlap each other, then after drying, not a corner, but a semicircle is formed. This is due to the fact that dried wallpaper stretches. However, it is difficult to achieve an even joint right away. Therefore, the sheet is attached to the adjacent wall (about 5 cm) - carefully press the sheet so that it completely fits against the corner.
Attach the next sheet of wallpaper as close to the corner as possible, and press carefully again. Now, using a sharp wallpaper knife, cut the wallpaper along the corner line, remove the strip that overlaps the adjacent wall - an even joint will be formed.
Another option involves all the same actions, only the joint is formed not in the corner, but somewhat to the side of it. The cutting line is drawn according to the building level, laser beam or plumb line.
Wallpaper on drywall
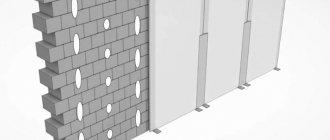
Drywall is a building material used for leveling walls and ceilings, creating partitions, and producing many elements of furniture, fireplaces, and podiums.
How can you make a wall finished with this material beautiful, durable, and multifunctional? Do I need to putty and prime drywall? Is it possible to glue wallpaper onto gypsum boards without putty?
Wallpaper has always been a popular finishing material. The most common and frequently arising questions are discussed in the article.
Useful tips
Recommendations from experts will help you reliably and efficiently glue wallpaper to drywall:
- Walls at different points in the room may have different heights. In order not to measure it for each canvas separately, a reserve of 5-10 cm is made (usually there is no more difference).
- If the wallpaper has a pattern, it will most likely have to be adjusted, so it makes sense to cut it along the front side. Cut off the first strip. Then unwind the next one and align the sheets so that the pattern on them continues. Cut along the top and bottom edges of the first piece.
- To avoid bevels and avoid mistakes in the length of the trellises, cut each one to the length of the first one.
- Craftsmen recommend arming yourself with a weight and a sharp wallpaper knife to cut several strips at a time - this will speed up the process. However, the method is not suitable for wallpaper, on which you need to adjust the pattern before cutting.
- To level the trellises and remove excess glue, you need to use a clean cloth. Old rags have the advantage that they have been washed many times and are guaranteed not to fade onto the wallpaper. its disadvantages are that it can leave threads, not be clean enough and stain the wallpaper.
- Very often you can see and hear the recommendation that it is desirable that the seams on the drywall and the joints of the wallpaper do not match. After sealing the seams with reinforcing tape and puttying, it is very difficult to detect the boundaries of the drywall sheets. Therefore, you can glue wallpaper as convenient as possible, without worrying about the seams between the sheets.
- Adhesive compositions conduct electric current because they are aqueous solutions. For this reason, before covering the walls, turn off the electricity in the room. This will make it possible to avoid electric shock.
Peculiarities
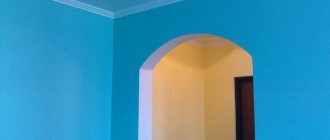
According to technical parameters, plasterboard materials are easy to install and are used for the manufacture of lightweight structures. The sheets are used to create partitions and false walls in living rooms and offices. Plasterboard insulates and insulates interior walls. To add aesthetics, wallpaper is glued to the gypsum board.
Wallpapering on drywall without putty or primer has the following features:
- Experts recommend treating the sheets to increase adhesion.
- Wallpaper can be hung on a base that is not primed and not covered with putty; for quick work, it is allowed to process seams and gaps between plasterboard boards.
- Finishing surfaces with decorative materials will improve the design of the room
- When gluing to an unputtyed surface, experts recommend choosing wallpaper in bright colors with a dense texture or textured surface.