And of course, the expected result can only be achieved with careful adherence to technology at each stage of repair work. Including the required intervals between the sequential application of all materials used in the work process to the surface.
Thus, when choosing and purchasing a primer, you need to familiarize yourself with the features of its use, as well as study information about how long it takes for the primer to dry for a car. This will allow you to avoid many serious mistakes, which can subsequently lead to significant defects in the paintwork or the need to completely repaint the car.
In our material we will look at the main types of modern automotive primers, introduce you to the features of their use and tell you how long to dry the primer before painting the car.
Tips for priming a car before painting. Technology, materials and advice on the implementation of work.
The primer application stage is included in the list of preparatory work immediately before painting the car. There is nothing complicated in the primer application technology itself, since this is a rough layer; many defects, including smudges and craters, can be solved by grinding and additional application of finishing putty. Having studied the theory and strictly followed the step-by-step instructions, you can easily prime your car before painting with your own hands, using only the tools at hand and purchasing consumables.
Before as…
Before you start priming, do not forget to cover the “non-working” parts of the body with masking tape and film (or paper). Unless, of course, you want to spend a long time and painfully scrubbing the glass, handles or moldings off the ground.
If you are priming partially, when masking, do not paste it too close to the repair area in order to avoid applying the primer “end-to-end” - otherwise a step will form, which may eventually be visible even on the paint. You can read more about camouflage here.
When you degrease the surface before priming, remember that the putty cannot be heavily wetted with a degreaser, as it absorbs and retains moisture for a long time. Therefore, it is enough to lightly walk over it with a dampened napkin.
What is a primer used for?
Before painting a body or a separate part, the primer performs a number of useful functions that provide a high-quality finish.
First, phosphate primer serves to prevent and remove rust from the metal surface.
Secondly, the main layer of primer levels the plane, filling small irregularities, and provides good protection of the surface from the effects of water and mechanical factors.
Thirdly, it increases the adhesion of paint to metal as an intermediate layer.
In addition, there are special primers for wheel arches that can withstand quite severe mechanical stress and prevent damage to the paint layer and subsequent corrosion of the metal.
Preparatory work
Before applying a primer to a car, the preparation steps preceding it are also important.
The main steps include grinding and cleaning the surface. This includes not only cleaning up rust and chips with scratches, but also removing swollen and chipped layers of old paintwork.
Next, the surface is degreased and putty is applied in places where it is required. Usually these are scratches, chips, dents that were previously straightened, but there are minor irregularities. Be sure to wait for the putty to dry completely, since some types of putty absorb moisture well and are able to retain it inside, forming pockets of corrosion. The dried putty is sanded and degreased with white spirit, and then wiped with a dry lint-free cloth.
Primer technology
Now let's take a closer look at this stage of work. First of all, you need to prepare the work area. If this is a garage, then it is desirable that it be clean, well lit, warm and have ventilation. This way, you can avoid installing additional heating sources in the form of IR heaters or the appearance of dust accumulations on the body.
The next step is to cover all untreated areas of the body where the material may get when applied with a spray gun, and also remove all plastic covers on the parts that will be repainted. Usually they cover everything with a film using masking tape, leaving only those areas of the metal surface to which the primer will be applied.
From materials and tools you will need:
This is a basic set of equipment and consumables.
The next step is preparing the finished primer composition before painting the car. It is important to strictly follow the proportions indicated by the manufacturer of the material on the packaging. It is advisable to use the hardener and solvent of the same brand so that there are no problems with differences in composition. You can also use 646 as a solvent. To maintain proportions, you can use measuring containers; do not do everything by eye, especially if you are not an experienced painter. Next, the composition is filtered with special filters offered by manufacturers, otherwise you take gauze, fold it into 3 - 4 layers and run the finished primer composition through it. This is done to filter out various lumps and debris, which may subsequently clog the spray gun.
In most cases, 2 - 3 layers of primer are applied to the surface of the car body, this is enough to ensure good conditions before applying the main paint.
Many people are interested in the question: “How long does the primer dry before painting?” The answer depends on the type of material used. So, say, if a hardener is used, then a drying period of 10 - 15 minutes is allowed between layers, and the finishing layer is dried for about 18 - 20 hours. Without using a hardener, one layer of material will dry in 24 hours, but this approach is very rarely used, due to a large loss of time for work.
When choosing a primer color, people often look at the shade of the finishing paint. So, if these are light colors, then take white or combine white and the desired tone of paint. If the surface is black, then take a black tint accordingly. But there is also a universal color - this is a gray primer, it is used for surfaces of both light and dark tones.
Layering process
The first layer of primer is usually applied in a thick enough layer to evenly cover the surface, and the material itself will fill all micro-irregularities and chips. Next, let it dry for about 10 – 15 minutes. If necessary, rub problem areas and apply a second layer. They wait for it to dry a little, if all is well, then leave it for about a day and move on to the final painting.
After drying, you need to clean the surface. It is not advisable to "wet sand" as some primers absorb moisture and this process can cause rust and blistering of the paint in the future. They are usually sanded with a machine. Preparation for acrylic is done using abrasives of grades R-400 and R-500, and for metallic grades R-600 and R-800.
What kind of primers are there? How to choose?
Globally, there are two types of soil: one-component and two-component. The first does not require special preparation and is sold in the form of jars or aerosols, which can be applied as the manufacturer did.
Two-component, as the name suggests, consists of two liquids: a polymer and a hardener, which are supplied in different containers. Before applying to the surface, the painter mixes the components in the required proportions and applies them to the parts. But the speed of application is important here, since the mixture hardens quickly and the minutes count.
If we divide the primer into components, then it comes in three types: acid, epoxy and acrylic.
- Acid primer.
Used for rough coating and protects the body from corrosion. - Acrylic.
The most common two-component primer, which is prepared no earlier than an hour before application. It is often applied to putty, and it dries from three to eight hours in a heat chamber. - Epoxy.
A primer that is applied before painting. It has the most durable anti-corrosion properties. It also fills microcavities well and creates good adhesion. But it takes a very long time to dry - at least 12 hours - and high temperatures cannot be used, because the epoxy will bubble.
Types of automotive primers
When purchasing material, you need to navigate the types of primers, since each type of material is responsible for its own stage of work.
There are three main types:
All these types of primers are often used, but combining them together is not always desirable, but it is possible if you follow the technology. For example, if you apply an acidic primer to metal and then apply an epoxy primer without waiting for it to dry completely, it will neutralize the effect of the acidic primer. If you wait the period correctly, then everything will be fine. There are no such problems with acrylic primer.
Source
Primer preparation
Before purchasing a primer, you should consider in advance several options that the market offers. The primer must be correctly selected in color and composition. This will make the work much easier and improve quality.
Before filling the spray gun, the primer is thoroughly mixed until smooth. If a primer with a hardener is used, it must be added as accurately as possible. In this case, you should not mix the entire volume of primer with the hardener, since its application will occur in several stages, and the pre-prepared primer may set during the drying period of the previous layers.
After mixing all the components, it is advisable to strain the primer through a special filter to cut off large particles. If this is not done, the spray gun may become clogged, which will lead to the ejection of large drops of soil and the formation of smudges. For straining, you can also use ordinary gauze, which is folded into several layers.
Particular attention should be paid to obtaining a primer of the required consistency. For this purpose, the spray gun kit includes a special device that allows you to measure this parameter. To dilute the soil, it is necessary to use an appropriate solvent. Ideally, the solvent should be from the same manufacturer as the primer.
Factors that determine paint consumption per car
Painting at a service will entail considerable expenses; it is cheaper to do it yourself. But when choosing the latter option, you need to have certain skills and calculate the paint consumption for the car. The quantity is influenced by several factors:
Next, we will analyze all these factors in more detail.
Machine size
It is quite difficult to accurately determine how much paint is needed to paint a car. Below is the approximate paint consumption for individual parts.
| Detail | Consumption in ml/l |
| Door | 200 |
| Wing | 150 |
| Trunk | From 300 to 400 |
| Roof | 400 |
| Bumper | 300 |
| Back panel | 250 |
| Radiator grille | 100 |
| Threshold | 150 |
Paint color and original body color
The consumption of paint and varnish material will depend on the original color of the car. If the color is contrasting with the original, more paint will be used than with standard coloring.
You need to know: dark colors do not overlap well with light shades.
It is necessary to apply paintwork in several layers. For example, red or yellow do not cover the substrate well. It may take about 9 or 10 coats of paint to completely cover. Black, green and their shades cover the base well.
Paint viscosity
Of all the parameters when painting a car, the most significant is the viscosity of the paintwork material. It depends on how correctly the coloring composition was diluted. Most cans indicate the proportions that must be followed when mixing the activator and paint. It could be 2:1 (or another value). In this case, dilute 2 parts of the dye and 1 part of the activator.
It is strictly forbidden to add all the ingredients by eye. Such an experiment can lead to the paint being either too thick or thin. In the first case, when painting, an “orange peel” effect occurs, and in the second, drips form.
A viscometer and a graduated container will help you calculate the required number of components. The operating principle of this device is to pour a certain amount of liquid into a special container through a hole of a certain diameter. The device's stopwatch records the time.
If you don’t have a professional measuring tool, you can use a regular ruler. It is placed in a container and a coloring agent is poured. The ruler scale determines the amount of activator that needs to be added.
Important: Viscosity may depend on the room temperature, as well as the surface of the parts. When the temperature in the garage is cold, “tears” form on the painted surface. It is better to perform coloring at a temperature not lower than +23C.
It is worth considering that the thicker the paint, the better its coverage, as a rule. This means that fewer layers will need to be applied than when using a less viscous material.
Type of spray gun, tools
Experience in car painting
Having skills will help reduce the consumption of paints and varnishes. There are a number of rules that should be followed when painting a car, otherwise the enamel layer will lie unevenly and you will have to additionally cover it. This may entail additional material costs. Therefore, if you have no experience in painting, then you should practice on some unnecessary surface.
The main nuances in coloring:
Temperature and weather conditions
This parameter, as already noted, affects the viscosity of the coating material. It is also important for drying paintwork materials. There are paints that dry already at a temperature of +20. And, there is a material that requires high temperature to dry. Such enamels are used in workshops where there are all appropriate conditions.
Important: to save paint, it is advisable to apply a new layer after the previous one has dried
Preparing the surface to be painted
It is worth noting that the consumption of paint and varnish material is influenced by the correct preparation of the machine or its individual parts. The surface of the part must be finely porous and carefully polished. The optimal abrasive for matting the surface is sandpaper with a grit of P 800-P1200. Smaller grains impair the adhesion of paint and parts, while larger grains increase paint consumption.
How to prepare a car for painting?
It is necessary to carry out a compatibility test if the machine has been covered with old paint. Dampen a small cloth with 646 solvent and place it on the surface. After 15–20 seconds, assess the condition of the surface.
You're lucky if the surface hasn't changed and remains smooth. If wrinkles appear, you have problems! Any material applied to it, no matter varnish or primer, will wrinkle in the same way.
Matte surface of the part
How to properly matte a surface? The success of further work depends 70% on how the surface is prepared for painting. Therefore, the most suitable abrasives must be used for grouting. In particular, you should not buy abrasives on a woven or regular basis. They crumble as they are intended only for woodworking.
Movements when grouting should be smooth, without pressure, in a circular manner. Grout over the entire surface of the problem area. If it clogs, it means you are pressing too hard, damaging the material, or it is simply not dry yet. You can rub over wet paint or primer.
Preparing a car for painting often includes the need to remove a layer of old paint. Sometimes there are blisters on old paint. This is most likely due to the presence of rust. The paint may peel off due to lack of rewinding or poor quality of rewinding. When moisture gets under the paint layer, peeling occurs in the form of small bubbles.
With all such manifestations, it becomes necessary to remove a layer of old paint. Of course, this is incredibly hard work. But otherwise, a month after the repair, the old paint will begin to fall off in pieces. Bare metal should be coated with a special anti-corrosion primer, after filling and cleaning the surface.
Preparing a car for painting includes properly cleaning the working surface. The old paint is removed using abrasive p80-180.
Work should be carried out evenly and carefully. If you started stripping with p80, then when bare metal appears, switch to p180.
You will spend more time using a finer 180 grit. But this will allow you to skip the work of necessarily removing marks left by coarse sandpaper. You can use a sander or drill with an attachment.
1. Priming the car body
Priming the car body
Proper preparation of a car for painting includes a mandatory primer. The primer will not sit on fresh or bare metal or stay there for long. Use sandpaper 180-240 to make the surface matte using uniform circular movements. There should be no shiny areas left.
Wash the surface to remove any remaining dust using a degreaser. Wipe the entire surface with a clean cloth. Be sure to use rubber gloves to avoid contaminating the cleaned areas. Putty and level the surface.
Prime the surface with epoxy or reactive primer or, in extreme cases, with a regular two-component primer. Dry the surface. Before painting, sand the surface with P320-500.
2. Putty
Puttying is also preparing a car for painting. It helps hide bumps and dents. But before carrying out work, it is necessary to realistically assess the depth of the unevenness. The need for a real assessment comes from what kind of putty will need to be used to level the surface.
- Fiberglass putty removes dents of virtually any depth.
- Soft putty according to GOST is used for dents up to 0.5 mm deep. In fact, it can withstand depths of up to 1 mm.
- Finishing putty is designed to remove minor scratches.
By assessing the depth of dents and irregularities, you can easily choose the putty that is suitable for your car. But there are exceptions to all rules. For example, a dent, shaped like a nail, with a radius of 8–10 mm. and depth 5 mm. Soft putty can also be removed.
What if the dent is deep? Then you will need fiberglass putty. Take the required amount on a spatula and add to it 2 - 4% of the hardener by weight of the taken putty. The hardener is included with the putty.
More hardener will ensure faster drying. But keep in mind that this may cause the putty to become brittle. An insufficient amount of hardener will result in the putty taking quite a long time to dry.
3. Re-priming
Preparing the car for painting does not end there. After filling, proceed to the primer. First, you should clean the prepared surface with sandpaper number 320 or 500 and make sure that all defects are eliminated. Otherwise, the soil will repeat every unevenness you leave.
It is necessary to hang the part in order to have full access to it. The room must be clean. Treat this stage of work with utmost care.
Prepare the soil. In a separate container, mix the primer, hardener and solvent, after mixing the primer in the jar. The proportions necessary for proper mixing must be indicated in the instructions. Mix the primer with a clean wooden ruler or stick.
Soil lifetime is one to two hours. Therefore, you should not prepare it in reserve. To prime the wing you will need approximately 100–150 grams of undiluted primer.
Preparing a car for painting requires cleanliness and removal of dust from the surface of the workpiece. Buy special dust-collecting wipes. Available wet and dry. Wet ones are impregnated with an adhesive composition and are very convenient for removing dust, since they do not leave fiber particles; when using dry ones, moisten them in a degreaser.
Pour the primer into the spray gun and test it to adjust the spray pattern. To apply the primer, a pressure of 3–4 atmospheres is required. When testing, you should get an elongated spot similar to an oval, with a height 3 to 4 times greater than the width.
The width to height ratio is adjusted using a knob on the side of the gun. Once you have adjusted the size of the spray, move the spray gun from side to side. Make sure that the layer is uniform and there are no interruptions in the supply of soil. Only then begin priming the part.
Primer should be started from the edge, slowly moving forward. The movement speed is uniform, the inclination angle is 90% to the surface of the part, towards the untreated surface. Cover each layer by half. If it is not too even, correct it when applying the second layer.
How to calculate the consumption of paint and varnish?
To calculate how much paint or varnish is needed to paint a car or its parts, you can use the average rate. According to approximate calculations per 1 sq.m. body, ¼ liter is spent. material. It follows from this that a vehicle will need 3.5 - 4 liters of paintwork.
As for the varnish, its consumption will be the same as the coloring composition (for a two-layer coating, the amount of substance must be multiplied by two). The amount of varnish also depends on the covering power of their base. Taking this parameter into account, in order to save on consumption, it is better to choose compounds made from synthetic resins. Nitro-combined and acrylic analogues “cover” the paint worse.
Preparing the car
If the entire car will be primed, then before doing this it is necessary to cover all the windows, headlights and other parts with special materials. If a separate part is primed, it is either dismantled or isolated from the rest. To properly cover individual parts, it is better to use high-quality tape from well-known or trusted manufacturers.
Before priming, the surface must be thoroughly cleaned of rust and old weakened paint. All defects on the body or parts are eliminated using putty and returned to the original geometry.
Next, you should clean the body from dust and degrease the entire surface. For these purposes, you can use either alcohol or a non-aggressive solvent. Additionally, care should be taken to dry the parts, as moisture will prevent the correct application of the primer layer.
Paint consumption in cans
An economical option when painting a car is a can of automotive enamel. In addition, using a can is very convenient when painting individual parts.
In this situation, as in the case of ordinary paint, there are only approximate cost estimates. The table shows approximately how much varnish and spray cans are needed for painting different car parts.
| Detail | Aerosol quantity | varnish |
| Front, rear bumper | 3 pcs. | 350 ml. |
| Front, back door | 3 pcs. | 250 ml. |
| Roof | 4 things. | 400 ml. |
| trunk lid | 3 pcs. | 300 - 400 ml. |
| Hood | 3-4 pcs. | 400 ml. |
| Wing (front, rear) | 2 pcs. | 250 ml. |
| Threshold | 1 PC. | 100 ml. |
| Trunk lid hatchback, jeep | 3 pcs. | 300-400 ml. |
| Side racks | 1 PC. | 100 ml. |
| Side mirror | 1 PC. | 100 ml. |
Taking into account all the above nuances when painting a car, you can reduce the likelihood of overuse of paint and calculate the approximate amount of material required. Of course, the main criterion for paint consumption is the size of the machine and the viscosity of the material itself.
Preparing the car for primer application
Before applying primer and subsequent painting of the car, it must be carefully prepared. To protect glass, front and rear headlights, plastic bumpers and other non-metallic elements, they are covered with special tape. When priming a separate part (for minor repairs), it is removed and processed separately.
Preparing a car for applying primer involves:
- Stripping the old paintwork (provides access to the metal).
- Mechanical straightening (leveling deformed areas).
- Application of anti-corrosion compounds to the metal surface.
- Local correction of defects and damage (applying putty to damaged areas, cleaning, finishing putty).
- Degreasing the body surface (using alcohol or delicate solvents).
- Thorough drying of elements and parts of the car body.
What affects paint consumption?
Specialized stores offer a wide selection of different paints for painting cars. However, it is worth noting that the cost of this type of product is very high. Nobody wants to overpay for one-time painting and buy extra. Before buying a coloring composition, it is necessary to make a preliminary calculation. After all, if there is not enough paint, you will have to urgently buy more, and it is not always possible to choose an identical shade.
When calculating the amount of material, consider the following:
These are just the main parameters that affect the amount of substance consumed. Also, paint consumption is affected by the thickness of the coating, the number of layers applied and the method of painting. Thus, it is very difficult to calculate the exact amount of material; you can only rely on standard figures.
Applying the final coat of primer
This stage is the most important before painting the car, so it must be carried out extremely carefully, taking into account the experience of applying the first layer. When priming in elite workshops, a special primer is used to apply the finishing layer. But in simpler conditions, a fairly high-quality result can be obtained by using the same material for the soil.
When applying the finishing layer, do not allow smudges. If such a defect occurs, it must be immediately removed and the area reworked. The second layer is not applied as thickly as the first, so the risk of smudges is quite low.
When applying the last layer of primer, the same movement technique is used as in the previous examples. To become more familiar with it, experts recommend first watching a visual video. This will help you quickly master the basics of working with a spray gun. Immediately before painting, final sanding of the applied primer is carried out. The result of the work should be a matte car with an even layer of primer over the entire surface. If there are minor defects, then it is better to spend time and apply another layer of primer at least locally in the place where such defects exist.
Average consumption rates
So how much paint does it take to paint an average sized car? Experts note that painting damaged areas of a car fender or door is a widely applicable service. This process requires about 150 ml of dye, but to paint a bumper (medium size) you need at least 300 ml.
To paint a larger bumper, the hood or the trim of the entire vehicle, you need from 600 to 1000 ml, respectively. It turns out that approximately 250 ml of paint is needed per square meter of coating.
Below is a table with car enamels consumption indicators:
| Part or area/vehicle type | Consumption in ml/l |
| Hood | 400-600 |
| Wing | 150 |
| Bumper | Up to 300 |
| Door | Up to 200 |
| Upper part (roof) | Maximum 400 |
| Trunk (lid) | 300-400 |
| For painting a medium sized car | 2-3 l |
| For painting Gazelle | Up to 5 l |
Preparing the room for priming the car
Since primer is classified as a toxic hazardous material, it is important to take precautions when working with it. Particular attention should be paid to the workplace. Work should only be carried out indoors, since ultraviolet rays, dust and other external factors can adversely affect the results obtained.
Preparing and painting the car must be carried out in a specially equipped room with a properly functioning ventilation system, since the vapors of primer compounds are harmful to the human respiratory system. To prevent defects and the appearance of other staining defects, all work should be carried out in good lighting.
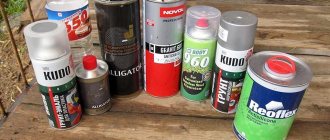
To prime a car before painting, you will need the following tools and consumables:
- A spray gun is a device for uniformly spraying a primer onto the surface of a body.
- Grinding machine with abrasive wheels of different grain sizes.
- One-component or two-component primer.
- Alcohol – for degreasing metal parts and elements.
- Sandpaper with grit from P400 to P800-P1200.
Car body painting
You can achieve high savings by choosing colors that are similar to the color of the car before it was repainted. A full car repaint will require more coats of paint than a simple tint change. If you want to restore the color of only the damaged part, it will be much cheaper than completely repainting the car.
It is also worth remembering: how much paint is needed to paint a car depends on the method of work and the brand of spray gun used. It is worth noting that some of the paint remains on the walls of the spray gun tank. Alkyd enamel typically costs 35-55% more than acrylic car paint to cover the same surface. The amount of paint consumed depends on the size of the car. It takes from 2.5 to 3 liters of liquid to completely paint the body.
The main parameter of car paint consumption is viscosity. An incorrectly diluted composition will not only increase paint consumption, but may even ruin it. Paint that is too thin will not set well and will spread in drops over the body, while paint that is thick will cause an orange peel effect on metal parts. In both cases, you will have to sand and repaint. There is a tool specifically to avoid such mistakes - a viscometer. If this device is not available, you can use a marked container and a ruler.
Tips and tricks
Experienced builders and craftsmen advise being extremely careful when choosing a primer composition. The choice of a specific product and a specific manufacturer will depend on the parameters of the surfaces to which the primer composition will subsequently be applied. A smooth concrete wall surface needs a mixture that contains abrasive particles. They will make the surface rough, which makes it easier to apply further finishing materials. Metal surfaces must be coated with a special mixture with anti-corrosion properties. This protects the metal from rust formation.
For wood surfaces there are special base primers. They will preserve the wood for as long as possible and protect it from increased moisture absorption and rotting. The priming mixture must contain substances that prevent the formation of bark beetles and other pests. If a new tree is treated with shellac, it will not release resins. In the future, this helps to avoid differences in shades. For rooms where there is a high degree of humidity, a primer with an antibacterial effect should be used. Such information is usually written on the packaging of the material, next to information about how long the primer takes to dry.
To work with gypsum boards, deep penetration agents should be used. This helps reduce the amount of material absorbed into the wall covering. Applying putty before the primer mixture is required for perfect adhesion of all materials. But a primer on top of the putty will contribute to a long service life. You should pay attention and buy the composition from the same manufacturer. This makes it possible for all components and substances to reveal their qualities to a greater extent and perform their functions efficiently. After applying the mixture, do not allow temperature changes in the first 72 hours after application. Otherwise, the coating may crack. Sometimes specialists apply the mixture using a spray bottle, and this helps novice craftsmen achieve uniform application to the surface.
To save budget, experienced craftsmen advise making the primer mixture yourself in some rooms. Here you will need to calculate the required number of building materials. Sometimes you don’t have to remove the old plaster layer, but before gluing the wallpaper you need to go over it with a mixture with deep penetration. Certain surfaces absorb a lot of moisture and also have a porous structure. To determine the required amount of product for them, you should do a little checking. A piece of foam rubber is moistened in water and applied to the desired surface. Areas where liquid has been absorbed quickly will require more primer mixture. The primer should be applied only to those surfaces from which only fungus and mold have been removed. It is important to treat the walls before applying the finishing coating, and all masters agree on this. This results in a highly durable coating that lasts for years.
Choosing the best paint for a car
The paint consumption on a car directly depends on its type. To understand the basic properties of paintwork materials for tuning work and choose the best option, you need to study their composition. However, any high-quality paint consists of the following components:
So what kind of paint is suitable for painting a car? The following types of paints are most suitable for garage work:
On the video: the main types of car enamels.
The best option is acrylic enamels. They have a number of undeniable advantages compared to other paint and varnish coatings:
The advantages of acrylic enamels also include economical consumption. How much paint is needed per square meter? You only need 200 ml; bumpers and other large areas require up to two liters. And when painting the inside of a car, you will need no more than one and a half liters of paint.
Acrylic enamel is highly resistant to mechanical stress, so the coating does not need to be renewed every two to three years. This also saves you money.
Painting the outside of a vehicle using acrylic enamels is quite easy and quick, and does not require special skills or professional knowledge. This process takes about several hours.
Despite the fact that acrylic paint has high durability and pigmentation, the resulting coating cannot be polished. For the initial finishing of a car, you can use this type of paintwork, but for repainting, “soft” paints that are easy to polish (alkyd, nitro enamels) are more suitable.
On video: review of acrylic paint.
Procedure for priming a car
How to prime a car before painting? Many car enthusiasts face this question. The body priming procedure can be divided into several stages:
- Preparing the premises.
- Preparation of tools and equipment.
- Preparing the car for primer application.
- Mixing the primer composition (when purchasing two-component primers).
- Applying primer (several layers).
- Drying and finishing (grinding).
The resulting painting result depends on the quality of the work performed - the reliability and durability of the paint coating, the ease of applying subsequent layers of car paint, the absence of visible defects, etc. Priming the body affects the external neat and presentable appearance of the car.
In addition to aesthetics, the primer has important protective properties.
We determine the paint consumption for painting a car. Table for calculating the required volume of material.
When you paint a car yourself, you save a lot of money, which is why many people are interested in the question of the technology for carrying out all the work. But one of the main questions that worries novice car painters is: “What is the paint consumption for a car?” Paint is not a cheap material at all, and you don’t really want to buy too much; you’ll end up throwing money away. You will not be able to get an exact answer to this question, since many factors influence the volume of material.
What affects consumption?
At first glance, the main parameters include the surface area that needs to be processed and the number of layers of material that are planned to be applied.
But in fact there are other factors.
Related article: How to paint the underbody of a car yourself? Selection of materials and step-by-step instructions for carrying out work.
In particular, many craftsmen recommend the use of primers, paints and varnishes from the same manufacturer. This way, you can avoid defects and save on car paint consumption for all sorts of alterations.
Which paint should you choose for your car?
In fact, there are several different types of auto enamels that are used to apply to the car body at home.
Car paint consumption rates
On average, to paint, for example, a door or fender, you will need about 150 ml of paint, about 250 - 300 ml of material for a bumper, and about 600 ml for a hood.
On average, the consumption rate is 200-250 ml per 1 sq.m. treated surface. The varnish consumption is approximately the same, this does not take into account the solvent and hardener.
An average sedan, if the technology is followed, requires about 2 - 2.5 liters of acrylic paint, excluding solvent and hardener. If you use alkyd paint, its consumption will be slightly higher than 3 - 3.5 liters. If your task is to paint all surfaces inside the body, then the material consumption will increase by 1.5 - 2 times.
Related article: Metallic car painting technology. Base for beginners.
If, when repainting a part, the old paint was, for example, black, and you decided to apply a white layer, then the consumption will increase by 50%. This occurs due to the application of additional overlapping layers.
We will provide a table that will help you roughly navigate the paint consumption for individual parts of the car body.
Here is a useful video on the topic of calculating material consumption when painting a car.
What if you use aerosol cans?
They are mainly used for local repairs, and one can has a volume of 150 grams of paint. The average paint consumption for painting a car using an aerosol can will be from 0.25 sq.m. up to 0.5 sq.m.
For 1 sq.m. For the surface to be treated, we will need about 2 - 4 cans of paint and the same amount of varnish.
Do I need a primer before painting the ceiling?
This type of paint and varnish replaced whitewashing with chalk or lime. They are a suspension in which tiny polymer particles are suspended. After applying the paint, the moisture evaporates, leaving a thin film on the surface to be painted.
Coating ceilings and walls with water-based emulsion is environmentally friendly, does not cause allergic reactions and has no negative impact on humans. And the addition of pigment gives the surface the desired color.
But with all the advantages, water-based paint has one disadvantage - it is more expensive than chalk or lime whitewash.
It makes sense to reduce its consumption. Priming the ceiling before painting is the best solution. Costs will be reduced, and the quality of coverage will increase.
Application of primer provides:
- Increasing the strength of the surface, because impregnation and gluing of its layers, as well as the dust remaining after preliminary preparation of the walls and ceiling, occurs. This happens due to the fact that the soil particles are 10 times smaller than the components of the water emulsion, so they penetrate deeply into the surface being treated, where they polymerize and bind to the prepared surface.
- Proper adhesion (adhesion) of the ceiling to the paint due to the similarity of the particles of the primer and water-based emulsion.
- Leveling the absorbency of the surface, preventing the appearance of stains.
- Increasing the moisture resistance of walls and ceilings, but still maintaining the ability to “breathe”.
- Prevents the appearance of fungi and mold (if special additives are present).
Based on the above, the question of the need for a primer disappears. Painting the surface without prior preparation is the main mistake of beginners.
How much spray paint will you need?
The most inexpensive option is car paint in a can. On average, it costs between 150-350 rubles. However, few people think about how long such a can of paint lasts, because it is almost impossible to control the consumption of the substance in such a package. Note that one cylinder containing 150 g of paint is often enough to paint 0.25-0.5 m² of surface. To cover 1 m² of body area you will need at least 2-3 cans.
Only experienced mechanics can accurately answer how much of this paint is needed to paint a bumper, but at least 250 ml of the composition will be required.
However, little depends on the material itself; it is impossible to definitely calculate the amount of such paint. Depending on the manufacturer, the can may contain different volumes, and the quality of the enamel (for example, ductility and density) may be different.
Source
Primer application methods
Vehicle primers can be applied in several ways, depending on why the primer is being used. There are five main methods of applying primer: dipping, brushing, spraying, electrodeposition, electrospray.
The dipping method is used in mass production. Other methods are used for repairs. A brush is needed to prime small areas before painting.
When applying a primer to a car with your own hands, you need to take into account how long each layer dries (this is indicated in the instructions for use). For leveling, sanding paper with different grain sizes is used. Grinding defects are eliminated by applying a thicker leveling primer. You cannot replace putty with primer - no matter how much it is applied, it will only be able to correct minor unevenness.
Before priming the car with your own hands, you need to cover the areas that cannot be repaired with masking paper and masking tape. You need to cover all places where soil can get in during work: door handles, seals, moldings, emblems, wheels, glass, openings, etc. The masking should remain on as long as the soil dries.
How to prime a car body with your own hands?
Priming a car with your own hands is much easier than painting, because it is quite difficult to make smudges on the ground. The priming technique is so simple that anyone can master it. To properly prime your car yourself, it is enough to familiarize yourself with the theory once. It is best to prime the car in a relatively clean, well-ventilated area with a minimum of dust. If we are talking about local priming, then you should cover the parts that will not be primed with special paper (in extreme cases, newspapers) and masking tape. Before applying primer, you should prepare a tool such as a primer sprayer in advance.
Layers and drying time
So, how long does it take to dry the primer mixture, which is applied to plastic parts and requires the use of a spray gun? Unlike putty, the drying time of the primer mixture is on average 30 minutes. The putty sometimes takes a long time to dry - from 24 to 48 hours. Any qualified car service worker will confirm that it is better to use several types of primer before painting a vehicle. At the beginning of painting, it is recommended to apply a phosphating primer for cars or an acid primer, after which the best “adhesion” of the surface is ensured. It should be remembered that before applying the primary primer, you will need to clean the body and underbody of the car from dirt and degrease these parts using Anti-Silicone.
Application Tips
- Whether it is treating thresholds or areas near the windshield, start each process with degreasing. Be sure to wipe off bitumen stains and wash off fat deposits.
- Use the air pressure recommended by the material instructions (adjustments may apply to different spray systems). Of course, an aerosol will not give you such worries.
- Observe the proportions when diluting the soil (indicated on the label).
After the final treatment of the thresholds, it is recommended to cover the surface with gravitex.
