Primer for self-leveling floor
Forming a perfectly flat floor is the main task performed during the renovation process. Self-leveling flooring is ideal for this purpose. In addition to the smooth surface, the self-leveling floor has a number of additional advantages (strength, resistance to moisture and temperature changes). In order for all these qualities to be preserved for a long time, the rough surface must be primed with a special compound.
Using a deep penetration primer
This type of soil must be selected if the room has a special microclimate. For example, a deep penetration agent will be required if there are frequent changes in temperature in the sauna, or with high humidity in the bathroom, shower, or swimming pool. Since the floor is constantly in contact with water, it is important that the soil penetrates into the deeper layers of the subfloor and creates a waterproofing layer.
Why you need to prime
The better the base is prepared, the longer it will last.
When thinking about whether it is necessary to prime a self-leveling floor, it is worth remembering that only a carefully and correctly prepared surface can withstand fairly heavy loads over a long period of operation. The primer for self-leveling floors has many positive qualities corresponding to each type of composition.
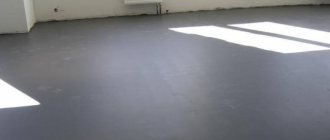
In most rooms, the base for the flooring is a concrete surface, the distinctive feature and feature of which can be considered the ability to actively absorb moisture.
It is moisture that has a negative effect on concrete and causes its destruction. A properly selected primer can protect such a base from the harmful effects of water.
Working with primer
Preparing the coating for priming
The final result depends on the preparation of the coating.
Before applying the primer, the surface must go through several priming steps:
- The surface is cleaned of looseness, etc., right down to the base.
- We remove any remaining construction debris, dust and dirt.
- Next, we screed the floor.
- When the surface is completely dry, clean it of smears and smooth out the seams.
ADVICE. To check whether the mixture has dried, you need to put a small piece of plastic film on it; if after a day no moisture has formed, then the screed has completely hardened.
- The entire surface is sanded with a special construction vacuum cleaner; the quality of the self-leveling floor depends on the quality of the rough sanding.
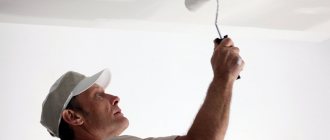
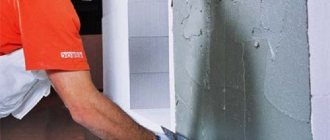
Instructions for applying primer
- The first step consists of the preparation described above and wet cleaning. Next, dilute the composition according to the manufacturer's instructions.
- The primer can be applied with a roller or spatula, depending on the coating and its purpose. We start from the farthest corner of the room.
- Apply consistently and evenly.
- After application, allow time for the primer to dry for a certain period of time. After complete drying, you can begin pouring the floor.
Advice. In order not to spoil the coating on the walls (if any), you should cover them with masking film.
What do we paint with?
Alkyd and epoxy coatings are most often used for painting self-leveling floors.
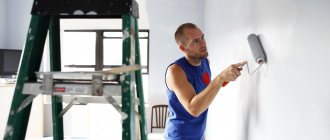
How to paint the self-leveling floor? Once you have your self-leveling floor ready, the question arises of what to paint it with and whether it’s worth doing it at all. Of course, it is worth painting the self-leveling floor, as this is not only a way to improve the room, but also an excellent prevention of cracks and chips, as well as excellent protection from external factors that affect the service life.
Alkyd and epoxy coatings are most often used for painting self-leveling floors. They have an anti-slip effect and also have antistatic properties.
Types of paint
Self-leveling floors are ideal for painting
Is it possible to paint self-leveling floors? As mentioned above, self-leveling floors are ideal for painting. To paint floors, you can choose epoxy paint, paint with an acrylic composition, and you can also use polyurethane enamel. Let's consider all the positive and negative aspects of each paint for use with a self-leveling floor:
- Epoxy paint is suitable for painting both open and closed floor surfaces. In operation it retains almost all its external qualities. But it has two components, and to use it you need to spend some time mixing it;
- Acrylic paints create a durable protective film on self-leveling concrete floors; it is highly resistant to moisture and also reduces the risk of scratches, cracks and chips. Dries within a period of ten to fourteen hours after application. The paint is applied with a wide roller;
- Polyurethane two-component enamels. They are excellently applied to self-leveling concrete floors, they withstand the influence of the atmosphere well, and they are also environmentally friendly. After drying, the paint becomes glossy and even.
Painting self-leveling floors
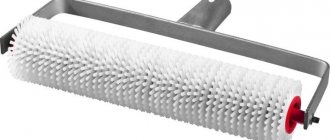
Paint can be applied using a sprayer or roller
Painting a self-leveling floor is usually not difficult. But this should be done extremely carefully, since improper preparation of the floor for painting can lead to a not very pleasant result. So, first, make sure that the floor surface is free of dust, construction debris, various debris, and also traces of old paint, if the floor is not new. For a better effect, you can first cover the self-leveling floor with a layer of primer, this will enhance the paint absorption property. If you have an epoxy coating, then using a primer is not necessary.
Important! Also, before painting, make sure that the humidity on the floor surface is acceptable. To do this, you need to place a small piece of plastic tape on the floor surface for a day. If condensation has occurred on the outside of the plastic tape, then before painting it is necessary to carry out work to reduce the humidity of the room using special dehumidifiers.
- If the condensation process occurs on the inside of the plastic tape, then moisture is present in the self-leveling coating itself. To get rid of it, just warm up the room with heaters.
- The ideal temperature is between five and thirty degrees Celsius.
- The room must be empty before painting. If you have traces of previous painting on the floor surface, remove them with a sanding machine or sandpaper.
- You should also cover up all cracks and chips using a spatula and special putty, which is sold in any construction supermarket.
- After the surface is prepared, you can paint the self-leveling floor. Experts recommend doing it in two steps, namely, in the first layer you need to apply a thin layer, carefully monitoring all smudges and spills; if this does not happen, the surface will turn out crooked and uneven.
- One day after applying the first layer, you can begin the final painting. It should take a maximum of two weeks for the paint to dry completely.
The paint can be applied using a spray gun; the corners are painted over with a regular paint brush. Work should begin from the wall opposite to the exit from the room.
The primer for self-leveling floors enjoys well-deserved popularity among professionals and amateur craftsmen who carry out work related to installing floors on their own without the involvement of specialists.
The primer composition, evenly distributed over the surface, will not only improve adhesion, but also achieve significant strengthening of the structure, increase the strength, reliability, and durability of the outer layer, giving it additional rigidity.
This primer creates a thin but fairly durable film on the floor surface, which has a high ability to seal all the pores existing on the surface.
Types of primers
The following types of primers are distinguished:
- universal;
- strengthening;
- adhesive, etc.
Each type has its own characteristics.
Universal primers
Universal mixtures have the following properties:
- strengthening;
- compaction;
- adhesion - efficiency is significantly lower than when using specialized ones.
The application and filling technology allow us to talk about indoor use.
Distinctive features are:
- weak supply of chemicals;
- ease of mixing;
- ease of use.
The positive aspects are considered to be use in warm and cold rooms (without heating).
The drying period does not exceed 4 hours.
- concentrate;
- ready solution.
The first option is practical and can be used to solve any problem, for example, for processing wooden surfaces.
Strengthening soils
A simple example is a deep penetration primer. With its help, you can not only increase the density of the floor, but also significantly reduce the level of absorption of the base.
Penetration depth up to 5 cm.
Primer for heated floors is the optimal area of application. It is used extremely rarely for external work.
Adhesive primers
The most famous products include Betokontakt soil. All domestic enterprises, without exception, are engaged in its production.
Composition includes:
- polymer dispersion based on acrylic or urethane resin;
- pigments;
- modifying additives;
- mineral fillers.
The last component is considered the most significant and at the same time distinctive feature.
Multi-grounds
The most interesting type from the point of view of manufacturing technology.
Optional primer properties
Depending on the conditions and purposes of the work, it is sometimes necessary to select primers with specific properties. Among these options are:
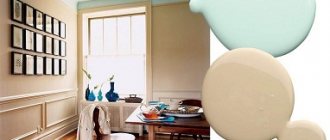
- Color of the primer (to prevent the dark base surface from showing through through single-layer polymer coatings of light colors).
- Possibility of using the composition at high humidity of the base.
- The ability to putty large cracks by first mixing the base with quartz sand.
- Increased electrical insulating properties. For use over conductive circuits.
Features of soil selection for self-leveling floor mass
The task of the primer is to form a transition layer between two dissimilar materials, the concrete base and the cement-polymer self-leveling layer. Therefore, the composition of the primer must correspond to the specific type of leveling mixture, otherwise it will be of very little use.
And, of course, you should not confuse the material for applying self-leveling mixtures with primers for painting the surface, primers, stabilizers and waterproofing. All of these are completely different products in composition, the formulation of which was developed to solve specific problems not related to pouring self-leveling floors.
Primers for epoxy self-leveling compounds
They are manufactured mainly in a two-component form; together with the modified resin there is a liquid hardener. One example of such a primer mixture is the composition EP0301.
Epoxy materials
The containers show the designation A and B for the resin and hardener
The primer mixture is used for epoxy and polyurethane self-leveling floors. Unlike self-leveling fillers, it has a low viscosity, which allows it to penetrate even into air-filled pores. Used for concrete, cement-sand, and any other floors on a mineral or wood base. Can only be used with bulk mixtures of the same brand as the primer.
Polyurethane primers
They are made in the form of quick-drying liquid mixtures with a very unpleasant odor. Can be used both under epoxy self-leveling floors and acrylic ones. Of the entire range of primers, they have the highest strength and ductility. Recommended for use on fresh concrete floors and surfaces with a lot of cracks.
Can be used as a second coat on a surface pre-treated with epoxy. Double priming is often used for complex floors with a highly porous structure.
Acrylic primer materials
Used for bulk mixtures prepared on the basis of aqueous emulsions. Typically these are materials based on acrylic or latex resins. Of the highest quality and at the same time affordable, we can name “Betonkontakt” and “Tikkurila Euro Primer”.
One of the best soil options for self-leveling flooring
Acrylic primer does not require preliminary preparation
Quartz dust in the form of microplates and needles is used as a filler. Thanks to this, after applying an acrylic primer to concrete, a needle-like forest remains on the surface, so any water-based self-leveling floor adheres to the primer very firmly.
Primer for water-based self-leveling mixtures
Methacrylate and methyl methacrylate primers
This is a product of deep processing of vinyl polymers, very expensive, but inferior in strength and depth of setting to epoxy primer.
Among the positive qualities, the following points can be noted:
- High drying speed of the applied primer, this allows you to fill the floor in a matter of hours;
- Good workability of the primer. It is used to prepare the surface before pouring the second layer.
The material is used for local repair of self-leveling base; heating, grinding and tinting in a specific color are allowed. Methyl methacrylate primer is just a solution of the polymer in an alcohol-acetone mixture with the addition of delamination stabilizers. One of the few types of soil that can be adjusted by dilution. Can be used in conjunction with epoxy and polyurethane materials. Strongly absorbs water, resulting in loss of performance.
How to choose the right material
Soil for self-leveling floors can be different; in order to choose the right product, you should understand what types of composition exist and what floor coverings they are best suited for. The operating conditions of the floors must also be taken into account.
Soil for self-leveling floors can be different; in order to choose the right product, you need to understand what types of composition exist.
Epoxy mixtures
A good option if the work will be carried out on a concrete base; the epoxy type helps to obtain a reliably reinforced coating that increases the shelf life of the floor. It is possible to choose products for working with wood, for example, parquet.
The composition includes two components, the main part and the hardener. There are options for deep penetration primers; they differ from others in being more liquid. Thick types are used to eliminate surface defects. It is advisable to use a similar product for the finishing coat.
The epoxy look helps provide a well-reinforced coating that increases the shelf life of the floor.
Polyurethane solutions
Floor primer for self-leveling polyurethane flooring can be used for different materials; it can be used for a protective function for concrete, wooden floors, or ceramic tiles. Just like with an epoxy mixture, it is better to lay a self-leveling floor of the same type on top, so it is recommended to choose a polyurethane self-leveling floor in addition to a polyurethane primer.
If work is carried out with an old, fragile coating, then it is better to pre-treat it with an epoxy primer.
Floor primer for self-leveling polyurethane type flooring can be used for different materials.
Acrylic and latex compositions
These products can be used to pre-treat plaster or wood floors. These compositions create an even and smooth floor, strengthening their strength characteristics. However, it is undesirable to choose them for concrete material, as well as for the purpose of repairing surface defects.
Acrylic and latex compounds create an even and smooth floor, strengthening their strength characteristics.
Silicone primers
This type is highly resistant to moisture, so it can be used on screed that has not completely dried. The product penetrates deeply into the concrete and displaces remaining moisture. Creates a reliable barrier against the formation of mold and fungi.
This type is highly resistant to moisture, so it can be used for application to screed that has not completely dried.
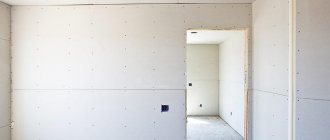
Preparing the base
If the surface is uneven, then before laying the finishing coating, you will need to make floor screeds. They are:
- concrete;
- dry;
- self-leveling.
Concrete screeds are traditional. They are necessary if the unevenness is large. Dry screeds are also suitable for strong changes. They are made from special sheets on gypsum fiber or along logs. But self-leveling screeds are simply poured onto the floor up to three centimeters, thus ultimately forming an ideal surface.
First, carefully examine the surface for curvature, and estimate how much mixture is required to screed the floor. Then the beacons are fixed, preferably with an asbestos solution and do not forget to apply primer. After this, the surface is prepared and coated using compounds that include concrete. The premises where work is carried out should not be exposed to sunlight. You should be prepared for the fact that complete drying will occur only after 25-28 days.
If self-leveling compounds are used for the screed, you will need:
- remove dirt completely;
- apply primer to concrete;
- prepare the solution and pour it onto the surface, helping to level it with a level.
Typical drying time is 10-12 hours. However, in rooms where the percentage of moisture is high, this will take longer.
The use of dry screed is a new method. In this case, the first layer is made of expanded clay sand. The second layer consists of plasterboard sheets, which are screwed using self-tapping screws.
Once the job is complete, the next step is to prime the floor before applying the topcoat. When using, you must strictly follow the instructions. Then the primer forms a reliable layer, which will guarantee that the self-leveling floor will form perfectly evenly.
Characteristics of gunmetals
The primer is a substance of astringent quality, easily applied to a surface that is difficult to impregnate. After the floor dries, the primer turns into a layer of film, due to which the surface is better sealed; you will need less decorative material. The adhesion of the base will also increase with the solution.
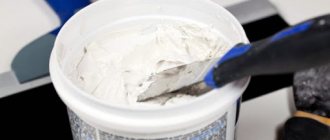
If a high quality primer is used, this will ensure a strong bond to the finish. Along with all the variety of floor coverings, the number of mixtures for treating the base is also growing. They look like:
- dry powder, which is mixed with water before application;
- liquid substance, ready for use.
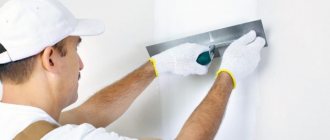
Priming technology
In order to effectively prime the surface and obtain the declared properties from the layer, the solution should be applied correctly. So the following procedure is performed:
- If the preparatory stage has been completely completed and the base has dried, then you can proceed to preparing the solution; it is prepared according to the manufacturer’s recommendations, the rules are always written on the label;
- Afterwards, you can begin to apply the mixture to the surface; you can choose a roller or spatula as your tool. The choice is made taking into account the thickness and type of solution. Start by selecting the far corner from the entrance door to the room;
- Moving one by one, cover the entire base with a primer solution, making sure that it is distributed in an even layer;
- When the process is completed, they wait a certain time until the next stage of applying the self-leveling floor so that the primer coating is completely dry. The timing is indicated by the manufacturer; on average, the process takes four hours.
If finishing work was previously carried out on the walls in the room, then in order not to spoil their surface, masking tape is glued in the transition zone.
The floor covering should be poured only when the base is completely dry. In this case, a damper tape is first glued along the walls; it serves to preserve space if, after drying, expansion of the layer occurs due to temperature effects.
The article answered the question: is it necessary to prime a self-leveling floor? If owners want to get a high-quality coating that will last a long time, then applying a primer to the floor is indispensable. It is important to choose a remedy that suits the conditions. Also, do not neglect the stage of preparing the base; the evenness of the floor in the end depends on it.
Popular primer manufacturers (briefly)
The surface should be primed before pouring with a quality product, then you can be sure that the coating will last longer. There are a large number of primer compositions on the construction market, but not all of them are of good quality or high stability.
If the process is to be done with your own hands, then it is better when choosing to focus on popular brands that have proven themselves to be high-quality mixtures among consumers. You can highlight the products of the brands Ceresit, Knauf, Bergauf, you can also highlight the domestic manufacturer Volma, which produces a series of Nivelir primers, kg. the mixtures are not expensive, and their quality is high.
When choosing, you should study the instructions from the manufacturer, which indicate for which materials it is better to use a specific type of primer solution.
The surface should be primed before pouring with a quality product, then you can be sure that the coating will last longer.