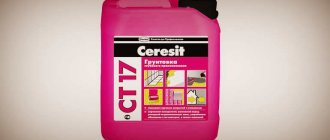
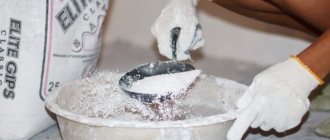
It is well known that priming the base greatly simplifies the pouring of the leveling mixture. The primer for a self-leveling floor is just as important as in the case of painting walls or plastering a concrete surface. You just need to make sure you make the right choice, otherwise a significant part of your efforts and resources will be wasted.
After alkyd primer the floor looks different
Types and use of primer for self-leveling floors
Today, homeowners increasingly choose self-leveling floors, because this polymer coating has excellent performance characteristics and durability.
But the last parameter is achieved only if the rules for preparing and processing the base surface are followed.
Therefore, we will discuss how to prepare a cement-sand or concrete surface for pouring, as well as what primer for a self-leveling floor will be required in a particular case.
Why do you need to prime concrete?
Concrete coating has an increased ability to absorb moisture
Note: Due to its properties, concrete coating has an increased ability to absorb moisture, but, unfortunately, this is a significant drawback.
After all, when any mixture is applied to the base, its moisture is instantly absorbed into the floor, and, consequently, the bonding of the materials to each other deteriorates.
Also, the remaining moisture after drying can raise the self-leveling floor, thereby requiring replacement of part of the coating or the entire surface.
Article on the topic: Warm floor under linoleum. What are the pitfalls?
Therefore, the main requirement for a primer is to close the micropores in the concrete surface, as well as to prevent moisture from entering. Any deep penetration primer designed for concrete surfaces will cope with this task.
Why do you need deep penetration soil?
When repair work is carried out in rooms with a special microclimate, for example, swimming pools, saunas or bathrooms, then a primer for self-leveling floors is used only for deep penetration. You can also use liquid glass. The use of such soil allows you to create a waterproofing layer on the concrete surface.
We recommend reading: Polyurethane self-leveling floor: types, composition and filling technology
Advice: For ordinary premises, concrete-contact impregnation is sufficient.
Primer for cement screed: making the right choice
Depending on the type of room, its functionality and the microclimate present in it. Therefore, you need to figure out how to prime the self-leveling floor.
When renovations are carried out in an apartment or private house, the main source of aggressive influence is moisture, therefore, the floor primer must have water-repellent properties.
Biocidal primer for cement screed
Biocidal and polyurethane primer
When there is a basement in the house, and above them there is a room that will be renovated, then there is a high percentage of mold and mildew formation on the floor surface. Therefore, to treat the surface, you should use a biocidal primer, which has dual properties, namely:
- Deep penetration and protection against moisture penetration;
- Antiseptic properties (protection against fungus and mold).
Polyurethane primer and epoxy paint
If the poured concrete coating is created in a garage, then its base will be exposed to various aggressive agents (oils, solvents, gasoline, etc.). In this case, a primer for polyurethane-based self-leveling floors will be simply irreplaceable. And when the floor covering, in addition to protection, needs to be given a decorative look, then epoxy paint can be used.
Important! These materials protect the surface very well, but their cost is quite high. Although the material consumption is economical and a 2.5-liter jar is enough for 25-30 square meters. Moreover, even applying one layer will perfectly protect the surface.
Soils with increased adhesive and hydrophobic properties
Hydrophobic primers have excellent adhesive properties, but do not withstand the effects of alkalis contained in concrete. Therefore, the area that has not been treated after priming will have to be re-primed over a certain period of time.
It is quite difficult to answer the question of whether it is necessary to prime a self-leveling floor with hydrophobic mixtures, because there are a huge number of them and, moreover, with different characteristics. But, still, when choosing which is the best primer, you should pay attention to the following type.
Article on the topic: Cork floor tiles. Types, advantages and disadvantages
Recommended reading: Floor mosaics: types, materials and applications
Silicone primers
Silicone primer and concrete contact
This type of waterproofing primer perfectly resists moisture due to its properties. The applied composition penetrates deep into the concrete coating, displaces the moisture present there and protects against reappearance, and also prevents the development of mold and fungi.
Interesting to know: Thanks to their unique properties, silicone primers can be applied even to a still wet cement screed.
Primer "Betonokontakt"
This type of primer is crystallizing and has excellent adhesive properties.
But, unfortunately, its use is limited only to rooms with a normal microclimate, because it does not have protective properties against the penetration of moisture and the formation of mold and mildew.
The purpose of this type of primer is to create a special bonding film on the concrete surface.
The use of primers with different characteristics is mandatory not only when using self-leveling floors, but also when laying other finishing materials.
With the correct selection and application of a primer, the self-leveling floor will last “faithfully” for decades, so its use is mandatory, especially in rooms with a special microclimate.
You can’t skimp on primers because the final result of the repair depends on it, and if something happens, it will be much more expensive to redo the entire coating. Therefore, you need to remember the saying “The miser pays twice” and start renovating the premises.
Construction mixtures for priming wooden floors
The primer for wood floors is selected according to different criteria than concrete or cement screeds.
In most cases, alkyd, phenolic and polystyrene primers are used to impregnate wood. It is also possible to use oily mixtures and natural tree resins, which penetrate perfectly into the wood and create an excellent protective layer. If you want to make a wood floor that will last for quite a long time, then the primers should contain special fire-fighting additives and antiseptics that prevent the formation of mold and mildew, as well as protect the wood from ants, termites and other insects.
It is worth noting that for wooden floors there is no point in using deep penetration mixtures, since, unlike industrial premises, large loads will not be created on the floor. Therefore, priming with any finishing mixtures that are intended for impregnation of wood will be sufficient.
Basic properties of primers for self-leveling floors
Today, self-leveling floors are gaining increasing popularity. This material is used in various types of premises - from residential to industrial. The pouring technology is quite complex, so without precise knowledge of the process it is very easy to make a mistake.
We recommend: Zinc-containing primer for metal
An important component for this material is the primer, because only a well-primed surface will last for many years.
What is self-leveling floor
Self-leveling flooring is a thin coating that has high decorative and strength characteristics. It is created by applying a special polymer substance after preliminary preparation.
The basis of this mortar consists of cement powder. Components: polymer additives, fixatives, plasticizers. Thanks to polymer additives, it becomes elastic, smooth, and durable. The self-leveling coating helps create a smooth surface that can be decorated with a pattern.
Purpose of the primer
- Reduced moisture absorption.
- Reliable adhesion of the material. Reduces the appearance of cracks, bubbles, voids.
- Uniform distribution over the entire surface.
- Improves the performance properties of the material.
- Protects against mold and mildew.
Is it necessary to use a primer?
Every master will tell you that the use of primers is not a matter of choice, but an obligatory stage of work. A primer for self-leveling floors is a guarantee of long, comfortable operation of the coating. What happens if you don't use soil? Without it, the floor will begin to deteriorate within a few years: unevenness and cracks will appear on its surface. It is especially important to use soil in rooms with high humidity, otherwise the mineral base will become saturated with moisture, which will destroy the self-leveling floor.
Application of deep penetration soils
A primer for deep penetration self-leveling flooring is necessary if the room has a special microclimate. What kind of premises are we talking about? Where there is a frequent change in temperature and humidity: swimming pools, saunas, showers. In such rooms there is constant contact with water, and the soil, in turn, will create a waterproofing layer.
Types of primers
They are divided into liquid and dry. The latter must be diluted with water; liquid ones are ready for use.
Based on its composition, soil is divided into:
Cement (mineral). It is used as the first layer for pronounced unevenness. Suitable for concrete, expanded clay and aerated concrete. Alkyd. Suitable for use on tile, wood, metal and plastic substrates. Cannot be used on plastered or gypsum surfaces. Acrylic. Created for wood, gypsum as a finishing layer. According to properties they are divided into:
Universal
Their base is water, solvents, solvents. Designed for high-quality preparation and subsequent finishing. Reduces absorption, compacts, strengthens. If the composition contains organic solvents, then before they dry completely they have an unpleasant odor, are toxic, and quickly ignite. It is not advisable to use them in residential premises.
Strengthening
Used to eliminate pores and increase strength. It contains polyurethane, polymers, acrylates, and additives. On their packaging you will find the note “For loose bases.” Often, coloring pigments are added to such soil, which helps to see untreated areas. Dries quickly - only 0.5-2 hours.
Adhesive
All manufacturers make such compositions. They consist of quartz sand, polyurethane resin, pigments (concrete contact). Due to the presence of a mineral filler (sand) in the composition, the solution has a roughness, and the composition adheres well to the rough finish. It can be used on most surfaces, except highly absorbent ones.
Multi-grounds
Only a few manufacturers make them, so they are not so easy to buy. The primer can be applied to bitumen, stone, iron, wood, gypsum, ceramic, mineral substrates, also with glue, paint residues, putty. They contain various polymers and resins. They are difficult to use, so only professionals work with them.
Composition of polymer soils
It is necessary to select the appropriate one depending on the material and need. Read more about this.
Epoxy primer
Suitable for mixture of asphalt, concrete, wood, concrete. It is ideal for strengthening concrete screed and increasing its service life. All epoxy primers are produced in a two-component form - base material, hardener. Primers for deep impregnation have low viscosity. The thick solution, in turn, is used to eliminate cavities and defects, first leveling it. Experts note that epoxy self-leveling floors and soil go well together.
Polyurethane primer
Perfectly suitable for polyurethane self-leveling floors. The primer is compatible with various types of substrates - wood, concrete, ceramic tiles and cement-sand shavings. If the concrete is old and weak, it is better to replace the polyurethane primer with epoxy. To reduce the cost of construction work, you can apply the first layer with epoxy and the second with polyurethane.
Latex and acrylic primer
Suitable for plaster screeds and wooden surfaces. Compared to epoxy and polyurethane primers, it strengthens latex, acrylic, and concrete an order of magnitude worse. Not suitable for sealing seams, cracks, and defects in concrete.
Methyl methacrylate primer
Dries quickly and hardens. The primer has high adhesion rates, but is inferior to polyurethane and epoxy compounds. Due to the high price, the material is used mainly for repairing certain areas or emergency repairs of premises.
How to choose a primer
The choice should be made carefully. It is important to consider that the material is suitable for the type of base and the room in which the floor will be made.
By type of base
Read more about the type of base. The label usually indicates which substrate it is suitable for: wood, concrete or iron. There are also universal primers that are suitable for all types of surfaces. For example, on the most common surface - concrete, it is recommended to apply any primer, but latex and acrylic mixtures will adhere less well. If the cement screed contains alkali and fire-fighting inclusions, you need to use anti-alkaline soils.
If the surface does not need leveling and the floor can be poured immediately, it should be used with the mark “finish”. For painted ones, only a deep penetration composition is suitable. The same composition is also recommended for repairing old screeds, because it will strengthen the surface and protect it from dust. The tiled surface is primed with epoxy or polyurethane primers.
By room type
Now let's talk more about the type of room. It is important to note that in rooms with high humidity, especially where there is constant water, it is necessary to use special products. Deep penetration soil guarantees the creation of a stable waterproofing layer. In rooms with very high humidity, it is recommended to use only “liquid glass”.
In ordinary domestic premises it is worth using soil with anti-mold additives (biocide soil) or concrete contact.
By cost
Too low a price may be characterized by poor quality, so we do not recommend taking the cheapest one. The total cost of the work depends on the primer consumption. Material consumption depends on the porosity and area of the room, as well as its chemical composition. Typically, 250-500 g/sq.m. is used for the first layer. polyurethane, epoxy, 250-300 - latex and acrylic. 100-200 g/sq.m. is consumed for a second layer. material. Taking these costs into account, the total costs can be calculated.
By difficulty of use
The master knows how to work with any type of primer. The easiest way to work is with acrylic and latex. The most difficult thing is with the epoxy composition.
Primer application technology
The surface must be primed in compliance with certain requirements and standards, otherwise you will get poor-quality adhesion.
Application Tools
For a small room, rollers and brushes are usually purchased. In large rooms it is recommended to use spray guns.
Surface preparation
Before starting work, the floor surface must be prepared. It is recommended to get rid of the old coating, especially the peeled parts. Remove dust and debris from the screed, because even small particles of dirt can cause bubbles to appear on the self-leveling floor. After cleaning, the floor must be washed. If there are deep defects, a self-leveling screed is recommended. The seams are sanded and smoothed.
We recommend: Where and how is heat-resistant primer used?
Make sure the surface is dry before applying. To do this, put a piece of polyethylene and leave it for a day. If during this time moisture forms under it and the surface is all wet, further drying is necessary. The room is left for several days. Joints and corners can be treated with sealant, which will protect against unevenness during the floor pouring process.
If there is already finished trim on the wall, the bottom needs to be covered with masking tape. In case of thermal expansion of the coating, a special damper tape is glued along the wall.
Priming process
The mixture for application is carefully prepared. Dry materials should be diluted according to instructions, ready to mix well. Application of primer. First, it is applied from the far corner (relative to the door), after which it needs to be distributed over the entire surface. The finished layer must be dried exactly as indicated on the packaging.
A second coat is applied depending on needs. In cases with a porous surface, the composition dries quickly, so a large amount is required. Drying time depends on the material. It is not recommended to start pouring the floor earlier than after two days.
The following brands of primer are popular among home renovation specialists: Bergauf; Ceresit; Knauf.
Types of primer compositions used for floors
Specialized types of primers with different bases are used for flooring:
- Alkyd primer is most often used when working on wood floors before painting them. The drying time for the soil is approximately 10 hours.
Important! If the floor will be painted with alkyd paint, you need to choose a zinc phosphate-based primer. When using other coloring compositions, you should buy a composition with zinc chromate.
- Acrylic primer is considered the most universal, it is a deep penetration composition and is used for treating brick, wood, cement, plastered surfaces, fiberboard and chipboard, and concrete floors. Its advantages include the possibility of dilution with water, lack of odor, and ease of application. Drying will take from 2 to 5 hours.
USEFUL INFORMATION: 3D floors in the bathroom and toilet: 9 photos, price, technology
- Polyvinyl acetate. Suitable for a wide variety of surfaces that will subsequently be painted with polyvinyl acetate paint. It has good hiding power and significantly reduces paint consumption.
- Glyphthalic. Used for metal and wooden surfaces, used to improve adhesion to enamels. Contains pigments that make the color of subsequently applied paint more saturated.
Primers such as polystyrene, phenolic, perchlorovinyl, contain toxic substances, and therefore are not used in apartment conditions.
Using a deep penetration primer
This type of soil must be selected if the room has a special microclimate. For example, a deep penetration agent will be required if there are frequent changes in temperature in the sauna, or with high humidity in the bathroom, shower, or swimming pool. Since the floor is constantly in contact with water, it is important that the soil penetrates into the deeper layers of the subfloor and creates a waterproofing layer.
Required tools and materials
The primer composition is applied to the surface of the base with a paint brush or roller. The first option is necessary in places where a narrow and thin instrument is required. A long-nap roller allows you to achieve a thick layer of protection in a short time. It is used if ceramic tiles are chosen as finishing.
A short-nap roller creates a thinner, neater layer. The coating is uniform and suitable for subsequent paint application. You will also need a container for the solution.
How is the floor primed before laying linoleum?
Step 1. The primer is used according to the instructions. If it was purchased in the form of a dry mixture, then it is diluted in accordance with the instructions given on the packaging. Also, the soil can be liquid, that is, ready-made, and some builders create it themselves from PVA construction glue. It is easy to prepare - 1 part glue is mixed with 2 parts water in a container.
Preparation of the primer mixture
Step 2. Mix the homemade composition using a construction mixer. The finished soil is also thoroughly mixed.
Mixing the composition
Step 3. The roller is dipped into the prepared primer. Then the composition is applied to the rough base. The composition is applied starting from the wall farthest relative to the exit from the room, so that you do not have to move along the fresh layer of soil.
Applying primer to the base
Step 4. The corners and joints between the floor and the wall are well processed. The primer must be applied evenly - there should be no untreated areas or puddles left on the floor surface.
Using a Roller to Apply Primer
Step 5. The entire surface of the subfloor is processed in the same way. The primer can be applied in 2-3 layers, each of which is dried before applying the next. Then the primer layer dries well, after which you can continue working.
The process of priming a floor under linoleum
After priming, you can proceed directly to laying linoleum.
Preparing the floor surface before applying primer
Before applying the primer mixture, the subfloor base must be carefully prepared. The result and quality of the final work will depend on this. The surface must, if necessary, be cleaned from old peeling coating to a solid base. This is done if the base was previously covered with some kind of loose material. All construction debris, down to the smallest dust, is also removed from the surface. To do this, the base is subjected to wet cleaning. If necessary, the subfloor is filled with cement screed or self-leveling mortar. All seams and irregularities are smoothed out as much as possible, the surface is sanded and additionally cleaned of dust.
Preparing the base
The base must be well dried before applying the primer. A piece of polyethylene attached to it will help determine the humidity of the surface. If after 24 hours no condensation has collected under it, then the surface is dry. Otherwise, it is left for several days to dry further.
On a note! All joints and corners can be sealed with sealant.
What does using a primer provide?
In the construction industry, several types of self-leveling floors are used on an epoxy, acrylic, polyurethane, and water-based base. The composition necessarily includes cement and finely ground quartz, but the main substance is still a polymer binder. And since the self-leveling floor is mostly poured on a cement-sand base, it is almost impossible to “force” the poured mixture to adhere to the concrete without using a primer. Or the polymer-cement filling will fail in a couple of months.
Experts say that using a primer:
- Provides displacement of air bubbles from the surface of concrete;
- Improves the wettability of the concrete floor surface with a self-leveling mixture;
- Blocks the absorption of water or solvent included in the mixture by the base.
In practice, craftsmen say it more simply - if you do not use a primer, the hardened mirror made of self-leveling material will peel off from the old floor, no matter how durable and high-quality the composition being poured is.
Important! The first and main reason for using a primer was and remains to ensure the maximum level of adhesion. The filling composition always has a certain viscosity so that a mirror can form on the floor surface. Therefore, the mixture has to be “glued” to the concrete.
Primer for self-leveling floors - varieties, application technique, consumption rates
Technologies for installing cement and polymer self-leveling floors differ from each other in the use of different base materials, the number of coating layers, the presence or absence of protective varnish, but priming the substrate remains a mandatory stage of work for any scheme.
A primer for a self-leveling floor (primer) must perform three main functions:
- hardening of the surface layer;
- sealing pores (reducing absorption) and filling small cracks and cavities;
- increasing the adhesion of the polymer to the base.
Compositions of polymer primers
The main criterion for choosing a primer is the complex of properties of the base surface. However, the best results are achieved with a screed primer that matches the material used to fill the layers.
Let's consider the main types of compositions used.
Epoxy primers
Suitable for preparing surfaces made of ordinary concrete, its porous modifications, mixtures of concrete with asphalt, as well as wood and other materials (depending on the brand of the specific composition). It is believed that epoxy primers provide the best strengthening of concrete screeds.
Epoxy primer
Primers of this type usually have a two-component base (resin and hardener). Depending on the chemical composition, they are characterized by different viscosities. Brands intended for deep impregnation have a lower viscosity. The advantage of thicker compounds is that they are better used for repairing putty cracks. In addition, viscous primers provide good preliminary leveling of the surface.
Epoxy resin primers are used for both epoxy and polyurethane self-leveling floors. However, combining different types of chemical bases is permissible only within materials of the same brand, if this is directly stated in the technical characteristics of the material. The use of epoxy primers as a surface preparation for cement-sand self-leveling floors is economically justified only in one case: to strengthen a low-quality concrete screed with a fragile surface layer.
Polyurethane primers
Used as a base preparation for applying layers of polyurethane self-leveling floors. Like epoxy primers, they are suitable for all main types of substrates - concrete, asphalt, cement-sand screeds and metal surfaces.
Application of polyurethane primer
A special feature of polyurethane primers is their effective use on ceramic tile floors. Inferior to special deep penetration epoxy impregnations in cases of insufficient strength of the base concrete. If the compressive strength of the substrate is below 20 MPa, as a rule, a profile epoxy composition is used as the first primer layer, and only then a polyurethane primer is applied.
Acrylic and latex primers
Acrylic compounds are considered the best types of primers for preparing wooden surfaces and screeds containing a gypsum binder. When working on concrete, acrylic primers are inferior to epoxy and polyurethane compounds in terms of strengthening and impregnation properties and are almost never used for sealing cracks in concrete. However, with good quality screeds, acrylic-based compositions work well as a base preparation for any type of self-leveling floors, providing a high degree of adhesion.
Acrylic primer Tikkurila Euro Primer
We recommend: Features and rules for applying primer GF-0119
Acrylic primers are predominantly used in combination with acrylic and cement-sand self-leveling floors. Popular primers of the “concrete-contact” type, depending on the brand and manufacturer, contain an acrylic or latex binder. Fine quartz sand is used as filler.
Methyl methacrylate primers
A floor primer for self-leveling floors based on methyl methacrylates is usually included in installation kits based on this chemical base. Like all materials of this type, it has a very high drying and final hardening speed. It has high covering and adhesive properties, but is inferior to epoxy and polyurethane compounds in terms of penetration depth into concrete. It does not make economic sense to use methyl methacrylate primers in combination with epoxy and polyurethane floors due to the high price of the material. However, if emergency repair work is necessary, methyl methacrylate repair compounds can be used to perform local repairs of self-leveling floors of a different chemical composition.
Priming technology
Regardless of the type of primer, the following stages of work are performed immediately before its application:
- Base diagnostics. Depending on the properties of concrete or another type of substrate, as well as the intended type of self-leveling floor, the brand of primer is selected. Sometimes it is necessary to use two types of primers on the same substrate.
- Preparing the base. It consists of removing cement laitance, dirt, repairing cracks and sinkholes, grinding and removing dust.
- Application of primers. All types of primers can be applied by spray, roller or brush. The brush is suitable for local repairs in small areas.
- Applying the second layer. The decision to apply a second layer is made depending on how evenly the drying occurs. Accelerated drying in certain areas indicates increased porosity and requires repeated treatment with primer over the entire surface of the floor. If this is specified in the primer instructions, the second layer must be applied.
The main differences in the technology of applying primers are in the preparation of mixtures for work and in their drying time.
Epoxy and polyurethane primers take the longest to dry and polymerize - from several hours to two days. The time for applying the second layer is determined depending on the degree of polymerization of the resin: the surface should no longer be sticky, but not yet completely hardened. The first main layer of self-leveling floor is poured, as a rule, after complete polymerization of the primer.
The drying speed depends on the temperature and humidity in the room.
Acrylic and latex primers, in particular concrete-contact primers, dry in 6 to 24 hours. The time intervals between applying repeated layers and the start of pouring the floors are the same and take into account the complete drying of the primer.
Methyl methacrylate compounds are champions in polymerization speed: it takes place within a few minutes. At the same time, high humidity and low temperature have a slight effect on the process.
It is important to note that exceeding the time interval between priming and pouring floors is undesirable to the same extent as insufficient polymerization. When the primer dries out, it can lose a significant part of its properties. Dust removal of overexposed primer does not restore its functions.
Primer consumption
The consumption of primer under a self-leveling floor depends on its chemical composition and the porosity of the base surface. For the first layers of epoxy and polyurethane primers it is 250-500g per m2. Re-coating takes less - on average, about 100-200g per m2. The consumption of acrylic and latex primers is commensurate with the indicated indicators.
Optional primer properties
Depending on the conditions and purposes of the work, it is sometimes necessary to select primers with specific properties. Among these options are:
- Color of the primer (to prevent the dark base surface from showing through through single-layer polymer coatings of light colors).
- Possibility of using the composition at high humidity of the base.
- The ability to putty large cracks by first mixing the base with quartz sand.
- Increased electrical insulating properties. For use over conductive circuits.
Summary
Do I need to prime the floor before self-leveling the floor? Yes, this is a necessary stage of work, regardless of the condition of the base surface and the type of intended finishing coating.
When choosing a primer, it is necessary to take into account the quality of the substrate, the type of self-leveling floor and the microclimate in the room.
If you are well versed in construction chemicals, you can use primer and finishing filler of different brands and chemical compositions. However, you should keep in mind: when installing polymer self-leveling floors, it is better to limit yourself to materials recommended by one manufacturer. In addition to the quality guarantee, this will ensure that you can file a justified claim in the event of a defect due to a manufacturing defect or violation of the storage conditions of the goods by the seller. These materials are quite expensive, so it is better to insure yourself this way.
Video on the topic
Technology for applying a primer to a concrete base from IVSIL
Purpose
Primer is one of the most common and popular finishing materials. It is used for various purposes. Let's take a closer look at them.
- Using a high-quality primer, you can level the surface of the subfloor. Many finishing materials (for example, porcelain stoneware, laminate, parquet, tiles or linoleum) must be laid on a prepared base. To achieve the desired effect, you simply cannot do without primer.
- The primer is often laid on a cement screed. Due to this tandem, cement bases become more pliable in work. It becomes much easier to lay other coatings on them.
- Finishing floor materials that were laid on a base covered with soil have a longer service life. This effect is achieved by increasing the degree of adhesion of coatings. Due to this feature, the finish is not susceptible to cracking, chipping or peeling.
- The concrete floor surface becomes more durable after treatment with soil. Therefore, during repairs, many consumers rush to strengthen their floor foundations with a high-quality primer. Without it, concrete can deteriorate over time.
- The primer is designed to protect the base of the floor from aggressive chemicals. Few people know that dampness and substances dissolved in it can penetrate putty on various substrates. This often leads to chemical reactions that have a detrimental effect on finishing materials. With the help of a high-quality primer mixture, you can forget about such problems.
- The primer allows you to significantly save on subsequent finishing materials, since it closes the pores located in the structure of the base.
- It is necessary to maintain the natural level of moisture in the base. A surface that has not been finished with primer is usually overdried or too damp, and this has a very detrimental effect on the durability and strength of the floor base.
- Special primer compositions with a high degree of moisture resistance are often used if the room has a “warm floor” system. Such mixtures are often used before laying tiles in rooms with high levels of humidity (kitchen, bathroom, toilet).
A primer is necessary to prevent dust from accumulating on the finishing surface of the base. It is a very useful addition to the subfloor. Thanks to it, the base and decorative material will serve for a long time without causing any trouble.
Selection options
To select a primer for floor screed, you need to determine the conditions under which the base will be used. The following parameters are taken into account:
- the selected solution must contain an antiseptic: the concrete surface is prone to the accumulation of dampness;
- waterproof compounds are necessary for floors that are intensively used and susceptible to the influence of water and dirt;
- compatibility of the liquid with the finishing material.
When choosing a primer, you cannot rely only on its cost. It is better to give preference to solutions with positive reviews. You need to purchase material from certified points of sale to avoid buying counterfeit products.
