In recent times, wall decoration consisted of whitewashing and wallpapering old canvases. Only sometimes were serious defects masked with putty. Today, materials require a certain algorithm for carrying out preparatory work, an important stage of which is the application of finishing putty. This process allows you to obtain a neat, smooth surface. Finishing putty brings the surface to an ideal state, increases sound insulation, improves adhesion and strength of the coating.
Reasons for applying finishing putty
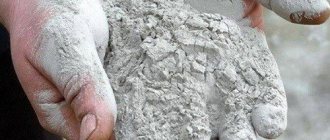
Starter plaster cannot be perfectly leveled. Even after grinding, a microrelief will be visible on it. The paint will apply unevenly on it, since more of it will be absorbed in some areas and less in others. The microrelief can be filled with finely dispersed Bergauf or Sheetrock finishing putty.
A layer of such material is also needed under the wallpaper. It will even out the color, thereby preventing stains from appearing. A surface coated with this composition absorbs less moisture, which has a positive effect on the quality of gluing and allows you to save glue.
How to properly putty walls for painting
There are rules that will allow you to get the perfect result:
- The putty is applied in layers until the surface is smooth.
- You need to work with a wide spatula. A narrow tool is necessary to reach hard-to-reach places.
- You need to dry the walls naturally after each layer. Do not use air guns or a hair dryer.
- For perfect painting, painter's fiberglass or gossamer is applied to the final layer of putty. It will prevent the paint from cracking in the future.
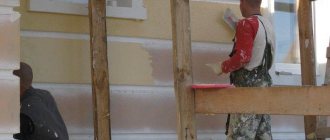
Anyone can cope with puttying walls, but if you don’t have confidence in your abilities, it’s better to entrust the job to professionals.
Types of finishing mixtures
Finishing putty Ceresit st 95
Which mixture is better to choose for wallpaper so as not to be disappointed in its quality later? It is recommended to give preference to well-known manufacturers who have proven themselves on the positive side.
Finishing putty Knauf Multi-finish
Depending on the composition, the following types of finishing putty are distinguished:
- cement;
- plaster;
- polymer.
Cement-based mixtures are highly moisture resistant, so they can be used in the bathroom, toilet, kitchen, as well as for finishing facades. The disadvantage of such compositions is that they shrink slightly, which leads to the appearance of cracks.
Finishing putty from major manufacturers
Gypsum finishing putty, such as Knauf Rotband, is intended for rooms with low humidity (living rooms, corridors). It can be applied to walls with a thickness of more than 2 mm; it sets in about 2 hours. The result is a smooth surface without shrinkage.
Polymer compositions, for example, Vetonit, are moisture resistant and do not shrink at all. The minimum layer thickness is 1 mm. They fit well and set quickly. The result is a perfectly smooth surface ready for applying paint or wallpaper. The disadvantages of this material include its high cost.
Dry putty compositions are produced, which must be diluted with water in accordance with the manufacturer’s recommendations, and ready-to-use mixtures.
Tools and accessories
To apply the finishing putty yourself, you will need to prepare the following list of tools:
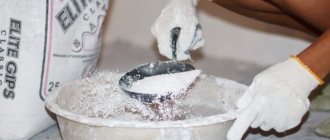
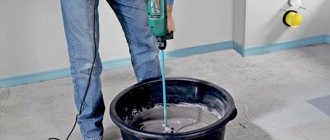
- Drill equipped with a mixer attachment. Typically, consumers prefer putty sold in the form of a dry powder. This mixture is much cheaper. Mix the composition immediately before starting work. To achieve the required consistency, use water in the required amount and an electrical device that allows you to achieve uniformity of the composition.
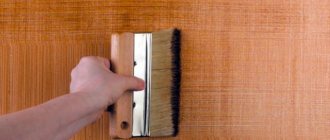
- Construction spatulas. Several tools are required to apply the finishing putty. One is small, the other is large - the size of which is 50 centimeters. The first one will be used for applying the composition in hard-to-reach places, the second one will be needed for the main work.
- Brushes and roller for applying primer. Some homeowners refuse to apply primer to the work surface. It is highly undesirable to follow their example, since this mixture improves adhesion.
- Laser level. A modern tool that allows you to control the leveling process. In preparation for applying the coating, special beacons are placed using a level, along which the master carries out further activities.
- Sandpaper. Sheets of sandpaper help achieve a smooth, even surface. Use it on a thoroughly dried surface; the one that has an index of 240 is better than others. You can make the work easier by purchasing a manual skinner at a hardware store; it provides good results.
- Construction bucket or other container. The container for mixing the composition should have a capacity of 10-20 liters.
Preparing the surface for puttying
To obtain a perfectly smooth surface, it must first be prepared. The old finish is removed. Sludges of cement mortar are removed with a perforator. The cracks are opened and thoroughly cleaned. The peeling plaster is cleaned off. Then the walls are swept with a soft broom to remove dust from them. If there are frozen areas, it is necessary to wait until they are completely thawed, otherwise it will not be possible to obtain a flat surface.
The next stage of preparation is primer treatment. It will remove dust from the wall and improve its adhesion to the putty. A roller is used for uniform application. After the primer has dried, you can begin to putty.
How to properly apply the solution to the surface?
Finishing putty requires a minimum of tools and skills.
- Initially, it is necessary to prepare the surface, since only a flat, clean, dry base can be puttied.
- Then a primer is applied, fragmentary finishing is carried out, and a starting layer is applied.
- After mixing the solution, the “finish” is applied to the wall, and after drying it is thoroughly sanded.
Required Tools
Before applying the finishing putty, stock up on starting compound and rubber or latex gloves. Basic tools and materials for puttying:
- wide metal or rubber spatula (50–60 cm);
- painting spatula (70–100 mm);
- grinder or grater;
- internal and external corner spatulas;
- nylon roller.
For adhesion, use a deep penetration primer. Spray guns are convenient for puttingtying large areas. If the mixture requires mixing, prepare a plastic container and a construction mixer.
Surface preparation
- First remove the old finish. Wet the wallpaper or plaster, then remove it with a scraper, spatula or chisel. If necessary, heat the surface with a hair dryer or use an acid remover.
- Before leveling the wall, prime the base, then apply a layer of plaster over the metal beacons, leveling with a trowel and an H-shaped or trapezoidal rule. A gypsum rotband or cement is better suited for this.
Other features:
- the cleaned surface is primed with a nylon roller with a deep penetration compound in 1–2 layers with a break for drying;
- primary fragmentary finishing is performed with starting putty;
- fill cracks, screw heads, small defects with starting putty, making cross-shaped movements of the spatula;
- deep differences, fill the drywall seams with “start”, drown the serpyanka, cover with a second layer;
- plasterboard sheets require laying fiberglass, which is fixed with glue;
- Fill the outer and inner corners with corner spatulas, having previously swept the mortar onto the corner;
- After the fragmentary finishing of the corners has dried, use a spatula or roller to apply the starting putty over the entire area of the wall;
- After drying, apply 1 layer of penetrating primer and leave for 6–8 hours.
Attention
Before applying the finishing coat, the surface must be clean and dry. Do not level the walls with putty, as this is uneconomical and energy-consuming. At the same time, the plaster has additional noise and heat insulation.
Starting plaster dries within 12 hours, cement - 5 hours, polymer composition - from 3 to 12 depending on the type.
How to make a solution?
The finishing putty must be mixed according to the instructions on the package. Mixing proportions depend on the type and purpose of the building material. For example, gypsum is diluted in a ratio of 1 kg per 0.8 liters of water, and cement - 1 kg per 0.4 liters.
Features of mixing technology:
- Having unpacked the package, mix the mixture by hand to evenly distribute the fraction;
- pour water into a plastic container;
- Scoop some of the mixture into a measuring cup;
- pour the semi-finished product into the water, stirring at medium speed of the mixer;
- mix the putty until lumps are eliminated and a paste-like consistency is obtained;
- let the solution sit for 5-7 minutes, then stir again.
Dilute gypsum and cement mixtures approximately 1 kg per 20-30 minutes of work, as they set quickly. Polymer putty lasts up to 12 hours, so it can be diluted in proportions of 25 kg per 10 liters of water.
Experts do not recommend mixing the solution by hand , because the fraction risks not being distributed throughout the putty, and it will be difficult to achieve a paste-like consistency.
Do not add water to the powder, otherwise lumps will form in the solution.
How to plaster?
The finish can be applied to a dry primed surface covered with a layer of starting putty. If the base is being prepared for painting, tinting the composition (only polymer) or using a tinted covering primer is allowed.
Stages of work:
- Using a paint spatula, apply the solution to the inner and outer corners of the walls, lightly brushing;
- Using corner spatulas, level the putty, forming even 90-degree angles;
- transfer the composition to a wide spatula, transfer it to the surface using cross-shaped movements;
- keep the layer thickness within 1.5 mm in accordance with the diameter of the fraction;
- Apply layers overlapping, avoiding straight vertical seams;
- Having treated the entire surface, wait until the composition dries completely.
The finishing putty can be applied in a maximum of 3 layers up to 1.5 mm thick. Smooth out significant defects with a spatula; smaller ones will disappear with subsequent sanding. The drying time for polymer and gypsum finishes is about 12 hours. Cement mortar takes longer to dry (16–20 hours).
Advice
When applying several layers, prime the wall and wait until the putty solution has completely dried.
Grinding
Sanding is carried out at least 24 hours after finishing. To do this, use a grinding machine or grater with a fine-grained nozzle (100). For cementitious coatings, sanding with medium-grit sandpaper (240) is allowed. You can sand up to 30% of the surface until defects and minor irregularities are completely eliminated.
A grater with an angle attachment is suitable for sanding corners. Sand the main area in a circular motion, starting from the upper left corner of the wall, just wear a respirator and safety glasses. Then the surface is wiped with a damp cloth and primed for painting, plastering or wallpaper.
Preparation of putty solution
If a ready-made mixture is used for work, then it is mixed until a homogeneous consistency is formed.
Preparation of a putty solution from a dry mixture is carried out as follows:
- Cold water is poured into a round plastic container.
- Then the powder is poured in.
- The solution is mixed using a special mixer until a homogeneous paste-like mass is formed. After a few minutes, stirring is repeated.
The required proportions are indicated on the packaging. There are also brief instructions on how to apply the solution.
Let's look at two ways to level walls with finishing putty:
- using a spatula;
- using a roller.
Tips from repair experts
Tips from experts on working with finishing putty:
- do not neglect the primer, apply it after each layer - it will improve adhesion to the surface;
- to fix defects and irregularities, use a laser level, checking in vertical and horizontal planes;
- instead of a grater or machine, you can use sandpaper No. 240, but no more;
- when processing large areas, choose dry mixtures, since ready-made ones are very expensive;
- For painting and wallpaper, it is recommended to use adhesive finishing putty with drying oil and polymers;
- if the type of building material allows it, then paint it in the color of the finishing - the tone will be more saturated.
Only a perfectly flat reinforced surface will ensure the durability and aesthetics of the decorative finish. To level the walls, you need a gypsum rotband and putty - starting and finishing. Do not choose universal formulations: their characteristics are low. When choosing a primer or putty, take into account the type of room, purpose, and temperature conditions of work.
Final leveling of walls with a spatula
The work is carried out using two types of spatulas:
- wide (40 cm);
- narrow (8-10 cm).
Alignment is carried out as follows:
- Using a narrow spatula, apply the finished mixture onto a wide spatula in a strip of 2-3 cm.
- Then a wide spatula is applied to the wall at an angle of 30° and a strip about 30-40 cm long is drawn. The thickness of the layer should not exceed 1-2 mm.
- Using a wide spatula, the remaining mixture is removed into a bucket and mixed with the main volume.
- Then all the previous steps are repeated until everything is processed.
- After complete drying (the manufacturer indicates how long the finishing putty dries in the instructions), the surface is sanded using a paint block with a diamond mesh.
- Dust is swept off the wall. Now you can start decorating.
Putty should be applied in good lighting. This will allow you to see all the shortcomings.
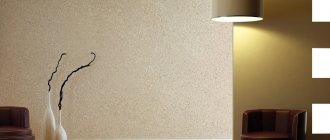
Kinds
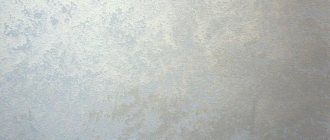
Plaster
Finishing white putty based on gypsum allows you to hide dark spots on the walls well. Such compositions are good for preparing walls and ceilings that will be decorated with thin, light or textured wallpaper.
Attention! The composition hardens quickly! The drying time of the product takes about two hours. However, it must be used within 30 minutes after dilution. Otherwise, the mixture will become unusable.
When using gypsum putty, it is important not to apply a coating layer of more than 2 mm. It is better to use the material in warm heated rooms. Due to the low waterproofing and water-repellent characteristics, the service area of the putty is significantly reduced. At the same time, the undeniable advantage of white gypsum-based finishing putty is its affordable price, which ensures high consumer demand.
Cement mixture
Cement mixture is an affordable and simple coating option. It is used in various types of premises, including rooms with high humidity. The product is suitable for both indoor and outdoor use. A layer of cement putty forms a durable coating that is resistant to external influences. The disadvantages of the material include an increased risk of cracks forming in the wall after drying.
Important! The coating must be sanded until completely dry. After drying, manipulation will be impossible.
Polymer
Polymer putty is the most convenient mixture option. The product is easy to use and is more suitable than others for a person who does not have professional experience in working with finishing putty. When applied to a work surface, the composition perfectly corrects surface imperfections, but its high cost makes the solution inaccessible to most buyers.
The undoubted advantages of the finished finishing polymer putty are its ease of application and high degree of adhesion. The superfinish mixture has the finest structure and is purchased in the case of artistic decoration of walls and ceilings, which require delicate decorative work.
Attention! The product is not prone to shrinkage, which eliminates the possibility of cracks forming in the wall. It has high plasticity and moisture resistance.
As for the texture of the putty, it is determined by the size of the particles. The smaller the fraction, the smoother the treated surface. The superfinish putty elements reach about 0.15 mm in diameter.
Water-dispersed
This product can withstand various temperature changes and moisture with dignity. The solution can be used for both exterior and interior decoration. The special properties of the putty form a waterproof barrier, which allows the use of a breathable acrylic surface in wet rooms such as the bathroom and kitchen. An equally important feature is good adhesion performance.
Roller putty technology
The following tools will be required:
- velor paint roller;
- paint tray;
- set of plaster spatulas.
The work is carried out with the spotlight turned on, which will allow relief defects to be identified in time.
Puttying with a roller is performed in the following sequence:
- The mixture is being prepared. It should have a semi-liquid fluid state.
- Then it is poured into the tray.
- The roller is completely dipped in the solution and does not rub against the edge of the tray.
- The leveling compound is applied in a strip to the wall surface. The length of the strip is about 50-60 cm. In this way, an area up to 3 m in length is covered.
- Using a wide spatula, the applied putty is pulled onto the free area.
- The steps described in paragraphs 2-4 are repeated.
- The mortar is pulled from the new area, capturing the already treated part of the wall so that the transition is not visible.
- After complete drying, sanding is performed with a paint block with a diamond mesh.
- The dust is swept away.
Selection of finishing putty
For wet areas
PETROMIX FP-04 and FP-05 putty on a cement binder has increased strength and is suitable for rooms with high humidity.
On a polymer binder
Polymer modifiers in the composition of the PETROMIX FP-07 polymer putty provide increased plasticity and rapid drying of the solution, reducing the period of work.
Polymer putty FP-07 Polymer putty ShF Gray putty 5 kg FP-05 Polymer putty FP-07
1
/4
For decorative coating
To avoid spoiling the color of light paint or thin wallpaper, it is recommended to use a white mixture.
Can finishing putty be used under tiles? No. Do not use putties under the tiles. The glue is applied directly to the plaster or drywall. This provides better adhesion to the tile adhesive.
White putty FP-04 White putty ШТ White putty 5 kg FP-04
1
/3
For minor repairs
Usually putty is sold in bags of 20-25 kg, but PETROMIX also has a small package of 5 kg in case there is just a little bit missing or you need to smooth out several seams.
White putty 5 kg FP-04 Gray putty 5 kg FP-05
1
/2
Features of applying putty for wallpaper and painting
If you plan to glue thick wallpaper, it is recommended to apply the putty in two layers. Thin wallpaper requires three leveling layers.
The surface must be prepared more thoroughly before painting. After applying the paint, even the slightest unevenness will be visible. In this case, more leveling layers will be required.
The quality of application of the finishing putty directly affects the appearance of painted or wallpapered walls. Therefore, this stage of repair should be treated with great responsibility.
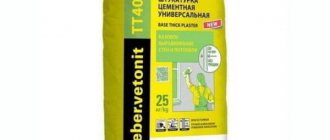
Below is a video on the topic from the Vetonit manufacturer, but in principle all major manufacturers have putties of different fractions from initial to finishing paste.
A Weber-Vetonit specialist demonstrates the technology of using weber.vetonit LR+ finishing putty and weber.vetonit LR Pasta super-finishing putty.
putty
Purpose and application
The purpose of using finishing putty is the following:
- Completing surface leveling;
- Elimination of defects on the plane;
- Improved surface characteristics:
- Resistance to temperature and mechanical stress, water resistance;
- Improving the quality of the working surface after rough finishing;
- Work on the aesthetic appearance of the object and uniform coloring;
- Providing the surface with plasticity to avoid cracks.
How to choose putty
What layer should I apply the finishing putty? It depends on its type, which needs to be selected correctly. There are two main ones - for standard work and for leveling. The standard material is applied in a layer of 0.2-1 cm. But the thicker one is designed to create a layer of up to 3 cm. The latter is suitable for leveling walls that are too curved or damaged.
In general, the material classification is as follows:
- Cement. How to apply finishing putty to this type of wall? In a standard way - it is easy to use. It resists moisture well, but may shrink after use.
- Polymer. Resists moisture, does not shrink, has excellent performance, and is easy to use. The only drawback is the relatively high cost.
- Plaster. It is inexpensive, quite easy to apply, but during use in damp rooms there are negative consequences in the form of stains on the walls. Therefore suitable for use in dry rooms.
Another classification provides for division by methods of coating application:
- Leveling. It is not difficult to understand how to apply the finishing layer of putty for leveling - it is quite dense, dense, and can be quickly spread with a large spatula. A distinctive feature is a high strength index.
- Starting. Suitable for preliminary work on minor leveling.
- Decorative. It is applied with sandpaper and spreads quite easily. The layer is usually up to 5 mm. Used in cases where there is no need to level the walls.
- Universal. Allows you to level and give walls a beautiful appearance. True, the general indicators are combined, but not very pronounced. Thus, the strength when applying a large layer is still less than that of professional leveling putty.
How the finishing putty is applied depends on its type. Dry food needs to be diluted, but the finished product does not last long - even in a hermetically sealed form, it is stored for a maximum of a couple of months.
It must be said that the composition ready for application is usually thicker and more grainy, but it also shrinks more strongly. This must be taken into account in your work.
Preparatory work
The question often arises: can finishing putty be applied to semi-dry walls? No, it is not applied to a damp wall, just as it is not applied to a frozen wall. Shrink properties can change, and this is not good for anyone. Even after applying the primer, it is better to wait for it to dry completely.
If there is paint, pieces of wallpaper, dirt on the walls, all this must be carefully removed. Work through the cracks with a brush, which will help remove dust from their cavities. The space must be completely filled with putty.
After cleaning the wall, it is coated with a primer, and then putty and a final decorative coating are applied.
Can finishing putty be applied to paint? No, this is prohibited. The paint will begin to peel off, creating unevenness and the risk of damage to the coating.