Painting cars, furniture, appliances and many other elements involves creating a high-quality, uniform layer, without smudges or unevenness. A special pneumatic sprayer connected to a compressor of sufficient capacity can cope with such a task. However, to get a decent result, a regular connection will not be enough. In order for the spray gun to reveal its maximum potential, it must be properly configured, setting the optimal pressure and other indicators. Next, we will tell you in detail how to adjust the spray gun and carry out a test painting, fully preparing it for effective work.
Regulators and their purpose
To successfully calibrate any device, you should know which elements of its design are responsible for changing performance indicators. The effectiveness of setting up the tool configuration directly depends on a clear understanding of the purpose and operating principle of these elements. Fortunately, adjusting the spray gun is not very difficult and boils down to rotating 2-3 valves (depending on the model), which we will discuss later.
Torch size regulator
A screw element that changes the position of a rod with a cone-shaped tip, reminiscent of a thick awl. Regulates the air pressure going to the head of the instrument by moving the rod closer or further from the through hole. The further the tip is located from the nozzle, the stronger the air pressure enters the head, creating a larger torch. The approach of the rod, on the contrary, limits the flow, reducing its influence on the formation of the torch. The maximum size of the torch is an elongated oval, and the minimum size turns it into a point.
Material supply
The flow of paint from the tank to the nozzle is blocked by a special needle, whose cone-shaped tip fits tightly to the inner walls of the nozzle. When the trigger is fully pressed, the needle moves back slightly, allowing the material to fall on the head of the spray gun and break into millions of tiny droplets under the pressure of the air flow. The feed screw adjusts the distance the needle will retract. Minimum paint supply means that the gap between the cone and the walls of the nozzle is very small and is not capable of passing a large amount of mixture. The maximum adjustment value, on the contrary, indicates that the needle moves a long distance, completely opening the exit to the air head.
Air supply
Fundamental setting of the optimal value of the input pressure required for the correct operation of the tool. Despite its importance, not all models are equipped with a built-in screw, forcing owners to resort to using third-party gearboxes (pressure gauges with regulators). Fortunately, more and more modern spray guns have the ability to change the air supply, without the need to connect third-party devices. Unlike the settings of the torch or material supply, which can be adjusted based on your needs, the volume of supplied air must have a single value specified by the manufacturer in the technical documentation. Reducing or exceeding the optimal threshold will distort the shape of the torch, making it unsuitable for professional work.
How to choose a successful model suitable for solving a given problem
Choosing a spray gun that will immediately perfectly meet your needs and bring pleasure when working with it is almost impossible. The problem is that a beginner often does not fully know all the intricacies of the painting process and cannot clearly formulate a list of requirements for the tool. However, there are several basic criteria by which one or another automobile spray gun is assessed for the overall level of reliability and convenience.
Read also: How to roll stamped video discs
Reliable materials are the key to durability
When choosing a spray gun for painting a car or for other purposes, you should not neglect a thorough analysis of the materials from which it is made. It is worth considering all the details before purchasing.
- The body of a good atomizer is necessarily made of aluminum. For models with increased reliability, structural elements are plated with nickel to protect against corrosion. You should not consider models whose body is made of silumin or other alloys that do not have high mechanical strength and resistance to acidic and alkaline environments.
- The design part that experiences the maximum wear is the paint ejection nozzle. The minimum requirement that a model acceptable for long service must meet is the manufacture of this element from aluminum. If you need a truly reliable tool, you should opt for a spray gun with a brass or stainless steel nozzle.
In general, the entire structure should be as light as possible, made of aluminum and steel, with a good trigger trigger, which should also be made of metal. Saving every gram is a smart move.
Important! It is worth remembering that the total weight of the tool will increase significantly when the working mixture is poured into the colorful glass.
Another area of careful evaluation is the degree of sealing. A car spray gun, regardless of its class, works with high pressure. Liquids must not leak. Therefore, special attention is paid to the quality of gaskets and seals. A good spray gun will offer reliable elements made of fluoroplastic and technopolymers. High quality models are equipped with Teflon gaskets.
Location and capacity of the paint tank
Today, the choice of spray gun for painting a car is offered among models with an upper or lower location of the paint tank. Both types of devices have their own usage characteristics.
- A spray gun with an overhead tank is capable of working with high-viscosity paints; it requires maintaining a constant orientation of the tool for a stable supply of the mixture. The main feature of working with such models is that it is advisable to produce the entire volume of the glass. Changing it is a fairly long process, so you won’t be able to quickly switch from one paint to another.
- Spray guns with a bottom tank will offer a quick change of paint. These models use a siphon paint supply method. This imposes some restrictions on the level of its viscosity, however, experienced painters appreciate the convenience of changing the glass almost without stopping the painting process.
Models with an upper and lower tank differ in weight distribution, ease of operation, and visibility of the surface to be painted. Beginners value simplicity first. They prefer to buy a spray gun with a lower cup for painting a car. This model will allow you to quickly change paints; it offers maximum visibility of the painting area and accessibility of all adjustment controls.
Available adjustments
The configuration of the torch spot and the consumption of the color mixture are responsible for the overall performance. Therefore, a good spray gun must have at least two adjustments:
- adjusting the torch, in the normal position the paint spot has a round shape, by adjusting it achieves a vertically elongated ellipse;
- changing the needle position.
A professional tool often differs from the average spray gun for beginners. In particular, it has a longer needle stroke, the ability to limit its movement and fix its position. It is also often possible to fine-tune and conveniently adjust the size of the torch spot.
Setting the inlet pressure
The level of air flow pressure has a direct impact on the shape of the torch, where its excess deforms the spot into a dumbbell-shaped figure eight, and its deficiency guarantees paint accumulation in the center, but with a coverage area reduced by 60%. The quality and uniformity of material spraying by the tool depends on the value of this parameter. Many beginners, not understanding how to set up the spray gun, begin painting immediately after connecting to the compressor, which often causes serious inconvenience to themselves. There are several ways to set the optimal air supply, applicable to different life situations.
The exact pressure required by your tool to operate properly can be found in the technical documentation. The number with the prefix “bar” or “atm” is often indicated on tool packaging, and sometimes even on the pistol body. Adjustment with a pressure gauge
The most accurate and recommended way to adjust the inlet pressure of the spray gun. Requires a digital or dial gauge connected between the hose and the gun handle. Some modern models are equipped with a built-in electronic pressure gauge and do not require connecting additional equipment. For most instruments, especially the budget class, it is worth acquiring this measuring device. Setting the air supply can be done quite simply by following the simple steps of the instructions below.
- Turn counterclockwise all the way, the air and torch size adjustment screws, setting them to the maximum value. The flow of paint does not matter and should not be touched.
- While observing the gauge gauge, press the trigger lever to open the valves and record the pressure reading on the gauge. If the obtained data is below the required values, unscrew the adjusting screw on the gearbox or gun (if it is built-in). At higher values, on the contrary, we tighten it.
- When the air flow is adjusted, open the paint supply to maximum. All that remains is to carry out a test staining and you can begin full-fledged work.
Setting without a pressure gauge on the spray gun
A less accurate, but calculated way to set the optimal input pressure for the operation of the device. If among spray guns, only 15% of models are equipped with a built-in or removable pressure gauge, then the presence of this important element in the compressor is mandatory in 100% of cases. It is based on the output pressure of the compressor receiver that you can determine how many atmospheres will be at the outlet of the air hose (or inlet to the spray gun).
Calculation of pressure reduction is based on the simplest formula “the pressure on the compressor pressure gauge, minus that lost in the hose and filter, is equal to the inlet pressure for the spray gun.”
For example: the air pressure at the outlet of the compressor is 3 atmospheres and passes through a 15-meter air hose with a diameter of 9 mm and a water separator. As you can see in the table below, a hose of this size will reduce the pressure by 0.6 atmospheres, and the water separator by 0.3. We subtract this data from the initial pressure (3 atm) and determine the volume of air received by the spray gun (1.9 a class=”aligncenter” width=”519″ height=”480″|fcw3qayjh5a| src=”https://instrumentoria.ru/uploads /posts/2018-12/1546090456_12_1.jpg" class="aligncenter" width="800″ height="226″[/img] Clean air filters reduce an average of 0.3 - 0.5 atm. In clogged ones, the pressure drops much more. Stages setup process:
- Set the torch size to maximum and open to full air supply (if provided on the device).
- We calculate the approximate pressure reduction based on the available elements. 15 m of air hose (9 mm) and clean filter. The pressure will drop by about 1 atm and (for example) to connect the SATA JET 4000 B RP (2.0-2.2) spray gun, you will need to tighten the compressor valve to 3.0 - 3.2 atmospheres.
- If the resulting estimated pressure distorts the shape of the torch, it can be slightly reduced or increased by carrying out several test sprays.
If the required pressure is unknown
Not everyone purchases a tool exclusively from an official supplier. Sometimes such a purchase is made in markets and unknown sites, where there is a high probability of running into frankly ugly fakes that lack the usual technical documentation. But even on such a spray gun, dedicated to its creator, you can set the optimal inlet pressure. You will have to tinker with it longer than with a pressure gauge, but you can really achieve an acceptable result (if the tool itself is working properly).
- First, set the air supply, material supply and torch size to maximum.
- Fill the tank with paint material of suitable viscosity.
- We carry out second sprays on the test surface, periodically reducing the air supply until we obtain a print of the most even shape.
This setup method requires experience and a trained eye. It’s not for nothing that prof. circles, the process of forced adjustment of a Chinese spray gun is considered an entire art.
Difficulties in adjusting the device
Many people who pick up a spray gun for the first time believe that it is equipped with an adjustment mechanism that is too cunning. But the tactics of action depend only on the location of the pressure gauge:
- On the instrument itself. In this case, you need to set the data specified in the factory settings.
- A removable pressure gauge, which is an additional accessory for the spray gun. It is attached to the handle of the device. You can also configure it using the prepared table in the attached instructions.
- Regulator on an autonomous air mixture supply source. You can use any air compressor for this. The adjustment is carried out at the point where the air supply pipe is connected to the spray gun, when choosing the optimal ratio between the air flow from the compressor and the paint mixture in the spray gun.
Knowing what parameters are necessary for high-quality painting, you can easily, based on the pressure gauge readings and the nature of the test spot, select the necessary settings using the regulator. When the paint sprayer is prepared for work using this method, obtaining a beautiful and high-quality painted surface will not take much time.
Torch size and material supply
Once the spray gun inlet pressure is set to the optimal value, you can move on to less significant, but still important, settings. The amount of material supplied and the size of the torch have a direct impact on the efficiency of painting: from the number of passes to the thickness of the applied layer. In most cases, these parameters are set to maximum, but in some situations they take on other values. To more clearly understand how to adjust the spray gun for specific tasks, it is recommended that you familiarize yourself with the features of these settings.
Adjusting the material feed
changes the amount of paint that will flow to the air head when the trigger is pulled. Increasing or decreasing the parameter will only affect the saturation of the torch and the thickness of the applied layer. Allows you to save LMC in situations where a fine spray is sufficient. The optimal ratio of paint supply to torch size is achieved by setting both of these settings to maximum. In 95% of cases, spray gun owners set the material flow to maximum. This is due to increased operating efficiency and reduced wear of the nozzle and needle.
Torch size
affects not only the spray area, but also the quality of the layer, as well as the overall operating efficiency. Basically, this parameter is set to maximum, which allows you to quickly cover large areas while making fewer passes. Due to the reduction in passes, the number of paint overlaps decreases and the overall uniformity of the layer increases. Reducing the size of the torch is recommended for local painting, when the surface to be treated is small and does not allow spraying paintwork over a large area.
By adjusting the size of the torch, adjust the paint supply to it. Otherwise, during application, serious smudges may form due to excess material.
Equipment involved in painting
Modern industry produces special devices for the painting procedure of equipment. The use of a spray gun and an airbrush provides an opportunity for car enthusiasts to transform a vehicle with their own hands so that the result of their efforts is no worse than that of professionals.
The appropriate equipment is selected in accordance with the planned scope of work, i.e. it all depends on what needs to be painted: the entire surface of the body or just a separate element of it. A device with a universal spectrum of action is a paint sprayer, the shape of which is very similar to a pistol.
Table of paint consumption when painting a car with a spray gun.
When painting, a very important skill is the ability to adjust the pressure. The outcome of all work will depend on how correctly the pressure regulator is configured. In order not to waste money and save personal time, you should understand this issue thoroughly and take into account the recommendations of those who specialize in this issue.
Painting a car with incorrectly chosen pressure threatens to result in defective paint application. It is noted that:
- High pressure causes excessive paint consumption, drips, and damaged work in general, which will have to be done all over again.
- Too low a pressure also affects the quality of the coating; in addition, it requires the use of a highly powerful compressor.
Nozzle selection
Setting up the optimal operation of the spray gun is not based on regulators alone. An important part of this process is choosing the right nozzle capable of passing materials of a certain viscosity through it. The larger the diameter of the central hole of the nozzle, the thicker the mixture can be fed through it. If you want to figure out how to set up a spray gun for high-quality painting, it’s definitely worth paying attention to this detail.
You can determine what size nozzle is needed for spraying paint and varnish material from the information indicated on its container. Almost every more or less large manufacturer of paints and varnishes indicates the required nozzle diameter in millimeters with tenths (1.4, 1.5, 2.0, 3.0, etc.). Among the most common types of coating sprayed by a spray gun are:
- “Metallic” and other base enamels – 1.4 mm
- Primers -1.4 mm
- Clear varnishes – 1.5 mm
- Epoxy primers – 1.8 mm
- Liquid putties – 2.5 mm
The size of the nozzle opening affects the spray volume and the thickness of the resulting layer. If the hole diameter is smaller than required, the coating material will flow with difficulty and the painting speed will drop significantly. When the nozzle, on the contrary, exceeds the required dimensions, the paint is supplied in copious quantities, forming smudges or forcing the pace of work to be accelerated (in such situations, you can get out of the situation by tightening up the supply of material). The choice of nozzle may depend on the “style” of the master’s work. Some prefer to make a thin layer, while others like to specifically fill the part with the mixture. If you are just a beginner, it is best to use the medium nozzle sizes recommended by the paint manufacturer.
Electric spray guns for painting cars
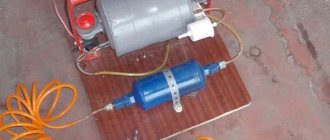
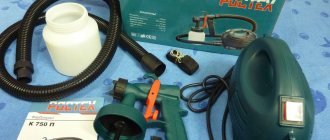
An electric spray gun is a fairly new device on the market. This is a fully balanced, often automatic complex. For it to work, you only need access to the power supply. All the necessary equipment (compressor, spray handle, paint cup) is arranged in fairly compact units.
Until recently, the main disadvantage of an electric spray gun was its large weight and poor ease of use. But today models are being produced that cause virtually no inconvenience. The ideal option for a beginner is an electric spray gun, the compressor unit of which is hung on backpack unloading straps behind the operator’s back (or on the shoulder).
Some models require installation of the supercharger on the floor.
Even more inconvenient ones suggest holding the compressor unit in your hands.
A modern electric spray gun offers a number of convenient features:
- long continuous operation thanks to the use of a membrane compressor;
- high performance of models with a piston compressor;
- high overall reliability and durability;
- variety of assortment of paints, varnishes, primers used;
- high productivity.
In addition, an electric spray gun allows you to not fully use the working mixture and quickly change containers. You need to choose such a device based on the diameter of the nozzle, available adjustments and the nature of paint consumption. In general, a tool of this class does not offer high flexibility and versatility, but it allows you to perform the necessary operations efficiently using one device without complex settings.
Test Spray
Having adjusted your spray gun and selected the optimal nozzle, do not rush to start painting the required object.
To make sure the settings are correct, do a few test sprays on paper, cardboard, or other vertical surface that you don't mind getting dirty. It is necessary to carry out this procedure to assess the shape of the torch, the uniformity of application and distribution of the material over its area. The most important test is considered to be the form check, and we will look at it first. Imprint shape
The spray gun torch, ideally, is an elongated oval with slightly blurred edges. The width can vary between 200-400 mm. The paint transfer must be uniform over the entire spray area and form an even print, without depressions or bevels.
When spraying, the spray gun must be held at a certain distance: 10-15 cm for HVLP, a little further (15-20 cm) for LVLP, and as far as possible (20-25 cm) for conventional sprayers (HP).
It takes no more than a second to open the paint supply. If the torch of your spray gun has the above distortions, you should know that they are caused by unregulated air pressure, clogged or defective nozzle. The dumbbell-shaped figure eight indicates increased air supply, which is corrected by lowering the inlet pressure. Too much paint accumulation in the center can be reduced by tightening the appropriate adjustment screw. If one of the air cap holes is clogged or defective, the torch spot takes the shape of a banana, which can be eliminated by cleaning or replacing the element.
Paint distribution
the area of the sprayed spot affects the uniformity of the layer and is checked quite simply. To do this, turn the air cap 90° (for horizontal spraying), and press the trigger for 2-3 seconds until smudges begin to appear. If the drops are evenly spaced and have the same length, then the dispersion of paint molecules is correct and does not require additional calibration. If smudges predominate in the center or on the sides, the air or material supply should be adjusted.
Spray quality
is a subjective indicator of the effectiveness of a pneumatic spray gun and is determined based on the size of the droplets transferred to the object. The size of the mixture particles can vary, increasing from bottom to top. Increasing the inlet pressure increases paint dispersion and reduces the layer size, making it rough and “dry”. To ensure that the spray gun layer does not cause any complaints, use the optimal operating pressure.
article from the Rating section
- 40
Pneumatic tools Painting tools
Save this page on your social media. network and return to it at any time.
ADD A COMMENT
